音频组件
一、组件定义
<audio poster="{{poster}}" name="{{name}}" author="{{author}}" src="{{src}}" controls></audio>
controls的意思是是否显示默认控件,默认值是不显示的,当我们写出controls才会显示播放的控件。
二、切换歌曲功能
.wxml
<audio poster="{{poster}}" name="{{name}}" author="{{author}}" src="{{src}}" controls></audio>
<button bindtap='next'>下一曲</button>
.js
  data: {
      poster: 'http://i1.hdslb.com/bfs/archive/89252dadd2525f8190485a069f73cdf3d783cabc.jpg',
      name: '普通disco',
      author: '洛天依/言和',
      src: 'https://qcloudbbs-10019892.cos.ap-shanghai.myqcloud.com/%E6%99%AE%E9%80%9ADisco%20-%20%E6%B4%9B%E5%A4%A9%E4%BE%9D%20_%20%E8%A8%80%E5%92%8C.mp3',
  },
next(){
  var i = 0;
  var array = [{
    poster: 'http://i1.hdslb.com/bfs/archive/89252dadd2525f8190485a069f73cdf3d783cabc.jpg',
    name: '普通disco',
    author: '洛天依/言和',
    src: 'https://qcloudbbs-10019892.cos.ap-shanghai.myqcloud.com/%E6%99%AE%E9%80%9ADisco%20-%20%E6%B4%9B%E5%A4%A9%E4%BE%9D%20_%20%E8%A8%80%E5%92%8C.mp3',
  },
  {
    poster: 'http://y.gtimg.cn/music/photo_new/T002R300x300M000003rsKF44GyaSk.jpg?max_age=2592000',
    name: '此时此刻',
    author: '许巍',
    src: 'http://ws.stream.qqmusic.qq.com/M500001VfvsJ21xFqb.mp3?guid=ffffffff82def4af4b12b3cd9337d5e7&uin=346897220&vkey=6292F51E1E384E06DCBDC9AB7C49FD713D632D313AC4858BACB8DDD29067D3C601481D36E62053BF8DFEAF74C0A5CCFADD6471160CAF3E6A&fromtag=46',
  }]
  i++
  this.setData({
    poster: array[i].poster,
    name: array[i].name,
    author: array[i].author,
    src: array[i].src
  })
},
点击下一曲按钮时,会执行next()函数,自动更换poster、name、author、src等数据。
三、音频API – AudioContext的使用(可与audio组件联合使用)
音频播放暂停、播放等功能需要AudioContext接口,在使用该接口之前,需要使用wx.createAudioContext()创建对象。创建完对象后,我们使用播放音频方法AudioContext.play(),暂停音频方法AudioContext.pause(),跳转到指定位置方法AudioContext.seek(number position)来控制当前音频。

wx.createAudioContext()
需要指定当前组件的ID才能使用
,所以我们修改index.wxml内容如下。
<audio id="Audio" poster="{{poster}}" name="{{name}}" author="{{author}}" src="{{src}}" controls ></audio>
<button type="primary" bindtap="audioPlay">播放</button>
<button type="primary" bindtap="audioPause">暂停</button>
<button type="primary" bindtap="audio14">设置当前播放时间为14秒</button>
<button type="primary" bindtap="audioStart">回到开头</button>
这里id内的内容可随意指定,但需要记录其内容。接下来,我们在index.js文件的page()中,写出下面的代码。
data: {
      poster: 'http://i1.hdslb.com/bfs/archive/89252dadd2525f8190485a069f73cdf3d783cabc.jpg',
      name: '普通disco',
      author: '洛天依/言和',
      src: 'https://qcloudbbs-10019892.cos.ap-shanghai.myqcloud.com/%E6%99%AE%E9%80%9ADisco%20-%20%E6%B4%9B%E5%A4%A9%E4%BE%9D%20_%20%E8%A8%80%E5%92%8C.mp3',
  },
  audioPlay() {
    this.audioCtx.play()
  },
  audioPause() {
    this.audioCtx.pause()
  },
  audio14() {
    this.audioCtx.seek(14)
  },
  audioStart() {
    this.audioCtx.seek(0)
  },
  onReady: function () {
    this.audioCtx = wx.createAudioContext('Audio')					//命名的id在这里使用
  },
这段代码中,我们指定了默认的音乐数据,存放在data()中,然后创建audioPlay、audioPause()、audio14()、audioStart()四个函数,来控制当前音乐,在onReady函数中,我们指定了当前音频的ID。
音频API- InnerAudioContext

注意
:官方文档中说的是获取实例,即这个API不能跟audio组件组合使用,需要自己去写代码去实现前端展示功能。
InnerAudioContext接口使用和AudioContext比较接近,在调用前,我们不需要指定相关ID(没有audio ID参数)。我们可以使用下面的代码来实现基本的播放功能。
1.实现方式一(示例代码)
.js
 const innerAudioContext = wx.createInnerAudioContext()
innerAudioContext.autoplay = true
innerAudioContext.src = 'http://ws.stream.qqmusic.qq.com/M500001VfvsJ21xFqb.mp3?guid=ffffffff82def4af4b12b3cd9337d5e7&uin=346897220&vkey=6292F51E1E384E061FF02C31F716658E5C81F5594D561F2E88B854E81CAAB7806D5E4F103E55D33C16F3FAC506D1AB172DE8600B37E43FAD&fromtag=46'
innerAudioContext.onPlay(() => {
  console.log('开始播放')
})
innerAudioContext.onError((res) => {
  console.log(res.errMsg)
  console.log(res.errCode)
})
InnerAudioContext的属性表格
| 属性名 | 类型 | 默认值 | 说明 |
|---|---|---|---|
| src | string | 音频资源的地址,用于直接播放。2.2.3 开始支持云文件ID | |
| startTime | number | 0 | 开始播放的位置(单位:s),默认为 0 |
| autoplay | boolean | false | 是否自动开始播放,默认为 false |
| loop | boolean | false | 是否循环播放,默认为 false |
| obeyMuteSwitch | boolean | true | 是否遵循系统静音开关,默认为 true。当此参数为 false 时,即使用户打开了静音开关,也能继续发出声音 |
| volume | number | 1 | 音量。范围 0~1。默认为 1 |
| duration | number | 当前音频的长度(单位 s)。只有在当前有合法的 src 时返回(只读) | |
| currentTime | number | 当前音频的播放位置(单位 s)。只有在当前有合法的 src 时返回,时间保留小数点后 6 位(只读) | |
| paused | boolean | 当前是是否暂停或停止状态(只读) | |
| buffered | number | 音频缓冲的时间点,仅保证当前播放时间点到此时间点内容已缓冲(只读) |
几个常用的接口
| 接口 | 说明 |
|---|---|
| InnerAudioContext.play() | 播放 |
| InnerAudioContext.pause() | 暂停。暂停后的音频再播放会从暂停处开始播放 |
| InnerAudioContext.stop() | 停止。停止后的音频再播放会从头开始播放。 |
| InnerAudioContext.seek(number position) | 跳转到指定位置 |
2.实现方式二
const innerAudioContext = wx.createInnerAudioContext();
Page({

  data: {

  },
  onShow: function () {
    innerAudioContext.src = "http://ws.stream.qqmusic.qq.com/M500001VfvsJ21xFqb.mp3?guid=ffffffff82def4af4b12b3cd9337d5e7&uin=346897220&vkey=6292F51E1E384E061FF02C31F716658E5C81F5594D561F2E88B854E81CAAB7806D5E4F103E55D33C16F3FAC506D1AB172DE8600B37E43FAD&fromtag=46"
    //音频的数据链接,用于直接播放。支持云文件ID(2.2.3起)。

  },
  //点击播放,(如果要一进来就播放放到onload即可)
  play: function () {
    innerAudioContext .play();
  },
  //点击 停止
  stop: function () {
    innerAudioContext .pause();
  }
})
这种方式可添加按钮控制播放、暂停。
3.实现方式三
<button type="primary" bindtap="audioPlay">播放</button>
<button type="primary" bindtap="audioPause">暂停</button>
<text>当前状态:{{status}}</text>
Page({
  data: {
    status:"等待播放"
  },
  audioStatus(){
  },
  audioPlay() {
    this.innerAudioContext.play()
    this.innerAudioContext.onPlay(() => {
      this.setData({
        status: "正在播放"
      })
    })
  },
  audioPause(){
    this.innerAudioContext.pause()
    this.innerAudioContext.onPause(() => {
      this.setData({
        status: "暂停"
      })
    })
  },
  onReady: function () {
    this.innerAudioContext = wx.createInnerAudioContext()
    this.innerAudioContext.src = 'https://qcloudbbs-10019892.cos.ap-shanghai.myqcloud.com/%E6%99%AE%E9%80%9ADisco%20-%20%E6%B4%9B%E5%A4%A9%E4%BE%9D%20_%20%E8%A8%80%E5%92%8C.mp3'
  },
})
4.回调函数的使用
.js
const innerAudioContext = wx.createInnerAudioContext()
Page({
  data: {
  },

  onLoad: function (options) {
    innerAudioContext.onPlay(() => {
      console.log('开始播放')
    })																			//将回调函数放在加载完成函数中
  },

  onShow: function () {
    innerAudioContext.src = 'http://ws.stream.qqmusic.qq.com/M500001VfvsJ21xFqb.mp3?guid=ffffffff82def4af4b12b3cd9337d5e7&uin=346897220&vkey=6292F51E1E384E061FF02C31F716658E5C81F5594D561F2E88B854E81CAAB7806D5E4F103E55D33C16F3FAC506D1AB172DE8600B37E43FAD&fromtag=46'
  },

  play:function(){
    innerAudioContext.play()
    console.log('已开始')
  },
  stop:function(){
    innerAudioContext.stop()
    innerAudioContext.onStop(() => {
      console.log('停止播放')								//在这个位置的回调函数,每点一次按钮就会被调用一次,并且不销毁
    })
  },
  pause:function(){
    innerAudioContext.pause()
    innerAudioContext.onPause(() => {
      console.log('暂停播放')
    })
  },
})
.wxml
<button bindtap='play'>播放</button>
<button bindtap='stop'>停止</button>
<button bindtap='pause'>暂停</button>
输出结果:
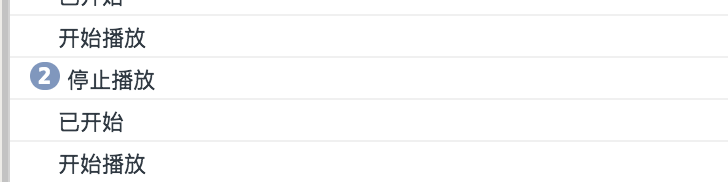
两次点击播放和两次点击停止后,可以看到放到onload中的回调函数只被调用了一次,而放到按钮函数中的回调函数累加输出。
参考:https://cloud.tencent.com/developer/article/1362479
遗留问题:
当我将实现方式二与实现方式三中的
innerAudioContext
改为
innerA
时程序运行结果并没有变化,所以为什么可以用实现方式三
this.innerAudioContext = wx.createInnerAudioContext()
这样的形式呢???
音乐播放器
1.音乐列表功能
.wxml
<view>
  <block wx:for="{{music}}" wx:for-index="index">
    <button data-index='{{index}}' bindtap='play'>{{item.musicName}}</button>
  </block>
</view>
用列表渲染创建了音乐列表,列表渲染知识可查看
微信小程序之列表渲染

const innerA = wx.createInnerAudioContext();
Page({
  data: {

    music:[
      {musicSrc:'http://ws.stream.qqmusic.qq.com/M500001VfvsJ21xFqb.mp3?guid=ffffffff82def4af4b12b3cd9337d5e7&uin=346897220&vkey=6292F51E1E384E061FF02C31F716658E5C81F5594D561F2E88B854E81CAAB7806D5E4F103E55D33C16F3FAC506D1AB172DE8600B37E43FAD&fromtag=46',
      musicName:'雨蝶'
      },
      {
        musicSrc: 'http://ws.stream.qqmusic.qq.com/M500001VfvsJ21xFqb.mp3?guid=ffffffff82def4af4b12b3cd9337d5e7&uin=346897220&vkey=6292F51E1E384E061FF02C31F716658E5C81F5594D561F2E88B854E81CAAB7806D5E4F103E55D33C16F3FAC506D1AB172DE8600B37E43FAD&fromtag=46',
        musicName: '超喜欢你'
      },

      {
        musicSrc: 'http://ws.stream.qqmusic.qq.com/M500001VfvsJ21xFqb.mp3?guid=ffffffff82def4af4b12b3cd9337d5e7&uin=346897220&vkey=6292F51E1E384E061FF02C31F716658E5C81F5594D561F2E88B854E81CAAB7806D5E4F103E55D33C16F3FAC506D1AB172DE8600B37E43FAD&fromtag=46',
        musicName: '面目全非'
      }
    ]
  },

  play:function(event){
    const id=event.currentTarget.dataset.index;
    if(id==0){
      console.log(event);
      innerA.src = this.data.music[id].musicName;
      innerA.play();

    }
    else if (id == 1) {
      console.log(event.currentTarget);
    }
    else {
      wx.showToast({
        title: '成功',
        icon: 'success',
        duration: 2000
      })
    }

  },

  onLoad: function (options) {
    innerA.onPlay(() => {
      console.log('开始播放')
    })
  },
 })
注意一
:函数中调用
data
中数据要使用
this
,
this.data.music[id].musicName
;
注意二
:不能直接使用
wxml
程序中的列表属性
index
,要从点击事件的数据参数中获取
const id=event.currentTarget.dataset.index
;若直接使用
this.data.music[index].musicName
会报错:index没有定义
2.自动播放下一首
注意三
:
const id=event.currentTarget.dataset.index;
由于id是由const定义的,所以id不能进行数学运算,其是常量,不能被改变。若要改变id的值,需要将其定义为var
注意四
:当使用
InnerAudioContext.onEnded(function callback)
监听音频自然播放至结束的事件时(回调函数),只要监听到音乐播放结束就会调用这个函数,部分函数代码如下:
{
		//	音乐播放函数中的部分代码
	 if(id==0){
		console.log('第一首');
		innerA.src = this.data.music[id].musicSrc;
		innerA.play();

		innerA.onEnded(() => { console.log('播放结束');
   	   id = id + 1;								//id为var变量
      	playMusic();
    }
 }

onLoad: function (options) {
    innerA.onPlay(() => {
      console.log('开始播放')
    })
    }
本来以为监听音频播放结束事件放在音乐播放函数中只会在一首音乐播放结束后调用一次,没想到可以一直监听,运行结果如下:


报错是因为id的值已经加到最大2了,没有对应的音乐了。
所以,不需要使用递归函数,就可以实现音乐的下一首自动播放。
回调函数的使用
也就是这个事件触发过一次。这个回调就已经一直存在了。所以不需要一直去创建回调事件。
只需要把所有的回调写在onLoad中即可。页面加载即注册监听事件,小程序中即使定义了全局变量,事件绑定也不会覆盖,只会加注册多一个线程监听
控制播放在其他事件进行即可。回调只需要在onLoad中注册就可以了
回调函数就是一个通过函数指针调用的函数。如果你把函数的指针(地址)作为参数传递给另一个函数,当这个指针被用来调用其所指向的函数时,我们就说这是回调函数。回调函数不是由该函数的实现方直接调用,而是在特定的事件或条件发生时由另外的一方调用的,用于对该事件或条件进行响应。
0
字面上的理解,回调函数就是一个参数,将这个函数作为参数传到另一个函数里面,当那个函数执行完之后,再执行传进去的这个函数。这个过程就叫做回调。
回调,就是回头调用的意思。主函数的事先干完,回头再调用传进来的那个函数。
//定义主函数,回调函数作为参数
function A(callback) {
    callback();
    console.log('我是主函数');
}

//定义回调函数
function B(){
    setTimeout("console.log('我是回调函数')", 3000);//模仿耗时操作
}

//调用主函数,将函数B传进去
A(B);

//输出结果
我是主函数
我是回调函数
上面的代码中,我们先定义了主函数和回调函数,然后再去调用主函数,将回调函数传进去。
定义主函数的时候,我们让代码先去执行callback()回调函数,但输出结果却是后输出回调函数的内容。这就说明了主函数不用等待回调函数执行完,可以接着执行自己的代码。所以一般回调函数都用在耗时操作上面。比如ajax请求,比如处理文件等。