一、springmvc 整合jsp技术(过时 了解该技术)
1、核心配置
import org.springframework.context.annotation.Bean;
import org.springframework.context.annotation.ComponentScan;
import org.springframework.context.annotation.Configuration;
import org.springframework.web.servlet.config.annotation.DefaultServletHandlerConfigurer;
import org.springframework.web.servlet.config.annotation.EnableWebMvc;
import org.springframework.web.servlet.config.annotation.ViewResolverRegistry;
import org.springframework.web.servlet.view.InternalResourceViewResolver;

/**
 * @author chenqun
 * @date 2023/3/18 13:07
 */
@Configuration
@ComponentScan("com.qizekj.controller")
@EnableWebMvc
public class SpringMVCConfig {
    /**
     * 1.@Configuration  定义SpringMVCConfig.xml配置文件
     * 2.需要将我们的控制类注入到ioc容器 @ComponentScan("com.qizekj.springmvc")
     * @ComponentScan("com.qizekj.springmvc")将该包下所有的类 注入到IOC容器种
     * 3.在springmvc原理 所有请求过来先达到DispatcherServlet 分发具体控制类 方法执行
     *
     * @Configuration
     * SpringMVCConfig.java   @Configuration
     * springmvc.xml=== SpringMVCConfig.java
     *
     */

    //WebMvcConfigurer
    @Bean
    public InternalResourceViewResolver resourceViewResolver() {
        InternalResourceViewResolver internalResourceViewResolver = new InternalResourceViewResolver();
        //请求视图文件的前缀地址
        internalResourceViewResolver.setPrefix("/WEB-INF/jsp/");
        //请求视图文件的后缀
        internalResourceViewResolver.setSuffix(".jsp");

        internalResourceViewResolver.setExposeContextBeansAsAttributes(true);
        return internalResourceViewResolver;
    }

    /**
     * 视图配置
     * @param registry
     */
    public void configureViewResolvers(ViewResolverRegistry registry) {
        registry.viewResolver(resourceViewResolver());
    }
    public void configureDefaultServletHandling(DefaultServletHandlerConfigurer configurer) {
        configurer.enable();
    }

}
2、定义控制器
package com.qizekj.controller;

import org.springframework.stereotype.Controller;
import org.springframework.web.bind.annotation.RequestMapping;

/**
 * @author chenqun
 * @date 2023/3/19 10:24
 */
@Controller
public class QizekjJspController {

    /**
     * 访问qizekjJsp,就转发到jsp
     * @return
     */
    @RequestMapping("/qizekjJsp")
    public String qizekjJsp() {
        ///WEB-INF/jsp/ 目录中查找qizekj.jsp
        return "qizekj";
    }
}
3、定义jsp页面
在webapp 目录下创建 WEB-INF/jsp 目录,存放qizekj.jsp
<%@ page contentType="text/html;charset=UTF-8" language="java" %>
<html>
<head>
<title>Qizekj</title>
</head>
<body>
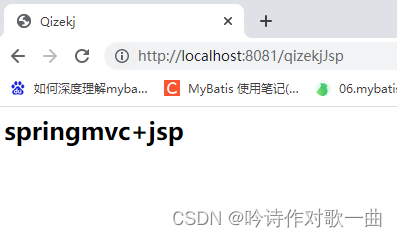
<h2>springmvc+jsp</h2>
</body>
</html>
浏览器访问http://localhost:8081/qizekjJsp:
二、spring+springmvc+mybatis整合
1、SSM环境的整合之提供增删改查
1.1、创建数据库表结构
创建数据库qizekj,并创建表:
CREATE TABLE `qizekj_users` (
  `id` int NOT NULL AUTO_INCREMENT,
  `name` varchar(255) CHARACTER SET utf8 COLLATE utf8_general_ci DEFAULT NULL,
  `age` int DEFAULT NULL,
  `addres` varchar(255) DEFAULT NULL,
  PRIMARY KEY (`id`)
) ENGINE=InnoDB AUTO_INCREMENT=48 DEFAULT CHARSET=utf8mb3;
1.2、整合maven依赖
spring/springmvc/mybatis
<?xml version="1.0" encoding="UTF-8"?>

<project xmlns="http://maven.apache.org/POM/4.0.0" xmlns:xsi="http://www.w3.org/2001/XMLSchema-instance"
  xsi:schemaLocation="http://maven.apache.org/POM/4.0.0 http://maven.apache.org/xsd/maven-4.0.0.xsd">
  <modelVersion>4.0.0</modelVersion>

  <groupId>com.qizekj</groupId>
  <artifactId>qizekj-ssm</artifactId>
  <version>1.0-SNAPSHOT</version>
  <packaging>war</packaging>

  <name>qizekj-ssm Maven Webapp</name>
  <!-- FIXME change it to the project's website -->
  <url>http://www.example.com</url>

  <properties>
    <project.build.sourceEncoding>UTF-8</project.build.sourceEncoding>
    <maven.compiler.source>1.7</maven.compiler.source>
    <maven.compiler.target>1.7</maven.compiler.target>
  </properties>

  <dependencies>
    <!--整合springmvc -->
    <dependency>
      <groupId>org.springframework</groupId>
      <artifactId>spring-webmvc</artifactId>
      <version>5.2.10.RELEASE</version>
    </dependency>
    <!--整合mybatis -->
    <dependency>
      <groupId>org.mybatis</groupId>
      <artifactId>mybatis</artifactId>
      <version>3.5.6</version>
    </dependency>
    <dependency>
      <groupId>org.springframework</groupId>
      <artifactId>spring-jdbc</artifactId>
      <version>5.2.10.RELEASE</version>
    </dependency>
    <dependency>
      <groupId>org.mybatis</groupId>
      <artifactId>mybatis-spring</artifactId>
      <version>1.3.0</version>
    </dependency>

    <dependency>
      <groupId>mysql</groupId>
      <artifactId>mysql-connector-java</artifactId>
      <version>8.0.13</version>
    </dependency>
    <!--使用alibaba数据源 -->
    <dependency>
      <groupId>com.alibaba</groupId>
      <artifactId>druid</artifactId>
      <version>1.1.16</version>
    </dependency>


    <dependency>
      <groupId>javax.servlet</groupId>
      <artifactId>javax.servlet-api</artifactId>
      <version>3.1.0</version>
      <scope>provided</scope>
    </dependency>
    <!--使用@ResponseBody 能够响应数据 -->
    <dependency>
      <groupId>com.fasterxml.jackson.core</groupId>
      <artifactId>jackson-databind</artifactId>
      <version>2.9.0</version>
    </dependency>
  </dependencies>

  <build>
    <plugins>
      <plugin>
        <groupId>org.apache.tomcat.maven</groupId>
        <artifactId>tomcat7-maven-plugin</artifactId>
        <version>2.1</version>
        <configuration>
          <port>8081</port>
          <path>/</path>
        </configuration>
      </plugin>
    </plugins>
  </build>
</project>
1.3、实体类层
创建 com.mayikt.entity文件夹,创建实体类UserEntity
package com.qizekj.entity;

/**
 * @author chenqun
 * @date 2023/3/19 11:04
 */
public class UserEntity {
    private Integer id;
    private String name;
    private Integer age;
    private String addres;

    public Integer getId() {
        return id;
    }

    public void setId(Integer id) {
        this.id = id;
    }

    public String getName() {
        return name;
    }

    public void setName(String name) {
        this.name = name;
    }

    public Integer getAge() {
        return age;
    }

    public void setAge(Integer age) {
        this.age = age;
    }

    public String getAddres() {
        return addres;
    }

    public void setAddres(String addres) {
        this.addres = addres;
    }
}
1.4、数据库访问层
创建 com.mayikt.mapper文件夹,创建UserMapper
package com.qizekj.mapper;

import com.qizekj.entity.UserEntity;
import org.apache.ibatis.annotations.Delete;
import org.apache.ibatis.annotations.Insert;
import org.apache.ibatis.annotations.Select;
import org.apache.ibatis.annotations.Update;

/**
 * @author chenqun
 * @date 2023/3/19 11:07
 */
public interface UserMapper {
    /**
     * mybatis 有xml和注解两种方式(sql语句)
     */
    @Insert("INSERT INTO `qizekj`.`qizekj_users` (`id`, `name`, `age`, `addres`) VALUES (#{id}, #{name}, #{age}, #{addres});")
    int insertUser(UserEntity userEntity);

    @Delete("delete from qizekj_users where id=#{id}")
    int deleteById(Integer id);

    @Update("UPDATE `qizekj`.`qizekj_users` SET `name`=#{name}, `age`=#{age}, `addres`=#{addres} WHERE id=#{id}")
    int updateUser(UserEntity userEntity);

    @Select("select * from qizekj_users where id=#{id}")
    UserEntity getById(Integer id);
}
1.5、业务逻辑层
创建 com.mayikt.service文件夹,创建UserService
package com.qizekj.service;

import com.qizekj.entity.UserEntity;
import com.qizekj.mapper.UserMapper;
import org.springframework.beans.factory.annotation.Autowired;
import org.springframework.stereotype.Service;

/**
 * @author chenqun
 * @date 2023/3/19 12:22
 */
@Service
public class UserService {

    @Autowired
    private UserMapper userMapper;

    public int insertUser(UserEntity userEntity){
        return userMapper.insertUser(userEntity);
    };

    public int deleteById(Integer id){
        return userMapper.deleteById(id);
    };

    public int updateUser(UserEntity userEntity){
        return userMapper.updateUser(userEntity);
    };

    public UserEntity getById(Integer id){
        return userMapper.getById(id);
    };
}
1.6、控制层
创建 com.mayikt.controller文件夹,创建UserController
package com.qizekj.controller;

import com.qizekj.entity.UserEntity;
import com.qizekj.service.UserService;
import org.springframework.beans.factory.annotation.Autowired;
import org.springframework.web.bind.annotation.*;

/**
 * @author chenqun
 * @date 2023/3/19 12:27
 */
@RestController
public class UserController {

    @Autowired
    private UserService userService;

    /**
     * 根据id查询数据
     * @param id
     * @return
     */
    @GetMapping("/getById/{id}")
    public UserEntity getById(@PathVariable("id") Integer id){
        return userService.getById(id);
    };

    /**
     * 插入数据
     * @param userEntity
     * @return
     */
    @PostMapping("/insertUser")
    public int insertUser(@RequestBody UserEntity userEntity){
        return userService.insertUser(userEntity);
    };

    /**
     * 根据id删除数据
     * @param id
     * @return
     */
    @DeleteMapping("/deleteById/{id}")
    public int deleteById(@PathVariable("id") Integer id){
        return userService.deleteById(id);
    };

    /**
     * 修改数据
     * @param userEntity
     * @return
     */
    @PutMapping("/updateUser")
    public int updateUser(@RequestBody UserEntity userEntity){
        return userService.updateUser(userEntity);
    };
}
2、SSM环境的整合之配置整合
2.1、JdbcConfig
import com.alibaba.druid.pool.DruidDataSource;
import org.springframework.beans.factory.annotation.Autowired;
import org.springframework.context.annotation.Bean;
import org.springframework.jdbc.datasource.DataSourceTransactionManager;
import org.springframework.transaction.PlatformTransactionManager;

import javax.sql.DataSource;

/**
 * @author chenqun
 * @date 2023/3/19 13:05
 */
public class JdbcConfig {
    /**
     * 定义数据源配置
     * @return
     */
    @Bean
    public DataSource dataSource() {
        DruidDataSource druidDataSource = new DruidDataSource();
        druidDataSource.setDriverClassName("com.mysql.jdbc.Driver");
        druidDataSource.setUrl("jdbc:mysql://localhost:3306/qizekj?useSSL=false&useUnicode=true&characterEncoding=UTF-8&serverTimezone=GMT");
        druidDataSource.setUsername("root");
        druidDataSource.setPassword("123456");
        return druidDataSource;
    }

    /**
     * 整合事务
     * @param dataSource
     * @return
     */
    @Bean
    public PlatformTransactionManager platformTransactionManager(@Autowired DataSource dataSource) {
        DataSourceTransactionManager dataSourceTransactionManager = new DataSourceTransactionManager();
        dataSourceTransactionManager.setDataSource(dataSource);
        return dataSourceTransactionManager;
    }
}
2.2、MybatisConfig
import org.mybatis.spring.SqlSessionFactoryBean;
import org.springframework.beans.factory.annotation.Autowired;
import org.springframework.context.annotation.Bean;

import javax.sql.DataSource;

/**
 * @author chenqun
 * @date 2023/3/19 13:06
 */
public class MybatisConfig {
    /**
     * mybatis相关配置
     * @param dataSource
     * @return
     */
    @Bean
    public SqlSessionFactoryBean sqlSessionFactory(@Autowired DataSource dataSource) {
        SqlSessionFactoryBean sqlSessionFactoryBean = new SqlSessionFactoryBean();
        sqlSessionFactoryBean.setDataSource(dataSource);
        // 实体层包
        sqlSessionFactoryBean.setTypeAliasesPackage("com.qizekj.entity");
        return sqlSessionFactoryBean;
    }
}
2.3、SpringConfig
import org.mybatis.spring.annotation.MapperScan;
import org.springframework.context.annotation.ComponentScan;
import org.springframework.context.annotation.Configuration;
import org.springframework.context.annotation.Import;
import org.springframework.transaction.annotation.EnableTransactionManagement;

/**
 * @author chenqun
 * @date 2023/3/19 13:06
 */
@Configuration
@ComponentScan({"com.qizekj.service"})
@MapperScan("com.qizekj.mapper")
//开启事务
@EnableTransactionManagement
@Import({MybatisConfig.class, JdbcConfig.class})
public class SpringConfig {
    //SpringConfig.xml 扫包范围
    //@MapperScan() mybatis 扫包范围
    //@Import({MybatisConfig.class, JdbcConfig.class}) 引入MybatisConfig和JdbcConfig配置类
}
2.4、SpringMVCConfig
import org.springframework.context.annotation.ComponentScan;
import org.springframework.context.annotation.Configuration;
import org.springframework.web.servlet.config.annotation.EnableWebMvc;

/**
 * @author chenqun
 * @date 2023/3/19 13:06
 */
@EnableWebMvc  //开启springmvc
@Configuration
@ComponentScan("com.qizekj.controller")  //配置springmvc扫包范围
public class SpringMVCConfig {
}
2.5、ServletConfig
import org.springframework.web.servlet.support.AbstractAnnotationConfigDispatcherServletInitializer;

/**
 * @author chenqun
 * @date 2023/3/19 13:06
 */
public class ServletConfig extends AbstractAnnotationConfigDispatcherServletInitializer {

    /**
     * 加载Spring相关配置
     * @return
     */
    protected Class<?>[] getRootConfigClasses() {
        return new Class[]{SpringConfig.class};
    }

    /**
     * 加载SpringMVC相关配置
     * @return
     */
    protected Class<?>[] getServletConfigClasses() {
        return new Class[]{SpringMVCConfig.class};
    }

    /**
     * 拦截所以请求
     * @return
     */
    protected String[] getServletMappings() {
        return new String[]{"/"};
    }
}
2.6、测试增删改查方法
- 使用postman测试插入方法,插入成功:

- 使用postman测试查询方法,查询成功:
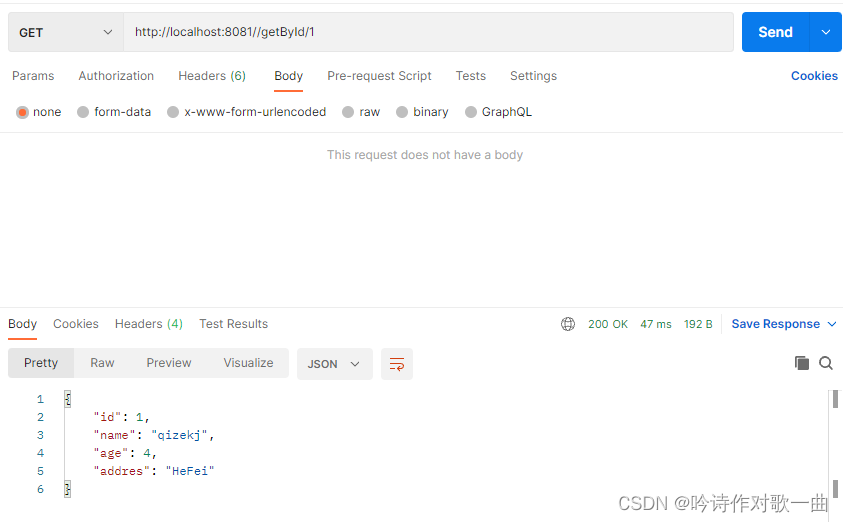
-
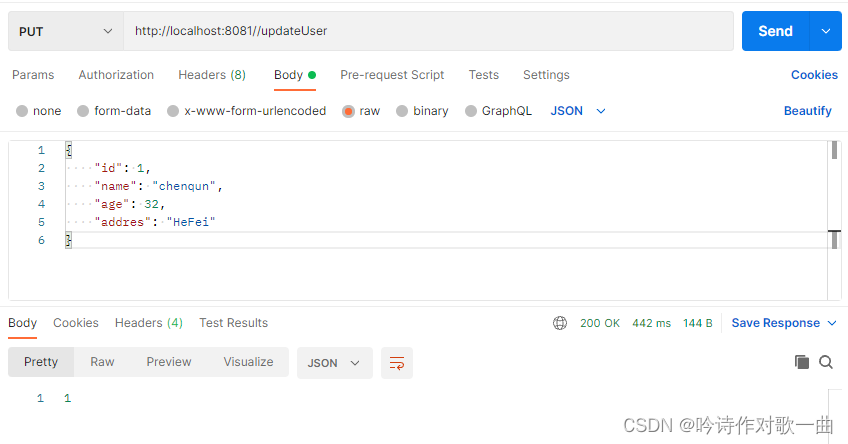
使用postman测试修改方法,修改成功:
- 使用postman测试删除方法,删除成功:

3、接口响应状态码
统一规范返回数据的格式,此处以json格式为例。返回数据应包含:返回状态码、返回状态信息、具体数据。
格式规范如下:
- 例如成功查询到数据,则显示:
{
    "code":"200",
    "msg":"ok",
    "data": {
        "name":"qizekj",
        "age":32
    }
}
前端 ajax 技术:
if(code==200){
	"data": {
	        "name":"qizekj",
	        "age":32
	    }
}
- 例如没有查询到数据,则显示:
{
    "code":"500",
    "msg":"fail",
    "data": {

    }
}
- 例如新增数据成功,则显示:
{
    "code":"200",
    "msg":"插入成功",
    "data": {

    }
}
- 例如新增数据失败,则显示:
{
    "code":"500",
    "msg":"插入失败",
    "data": {

    }
}
前端 ajax 技术:
if(code==200){
  alert(" "msg":"插入成功"")
}
- Api Code状态码:
| 状态码 | 描述 |
|---|---|
| 1** | 服务器收到请求,需要请求者继续执行操作 |
| 2** | 操作被成功接收并处理 |
| 3** | 重定向,需要进一步的操作以完成请求 |
| 4** | 客户端错误,请求包含语法错误或无法完成请求 |
| 5** | 服务器错误,服务器在处理请求的过程中发生了错误 |
- 封装接口响应状态码:
import java.util.HashMap;

/**
 * @author chenqun
 * @date 2023/3/19 19:41
 */
public class BaseController {
    /**
     * 提供处理请求响应成功的情况下
     * @param data
     * @return
     */
    public HashMap<String, Object> setResultOk(Object data) {
        return setResult(200, "ok", data);
    }

    public HashMap<String, Object> setResultSuccess(String msg) {
        return setResult(200, msg, null);
    }


    /**
     * 提供处理请求失败情况下
     *
     * @param msg
     * @return
     */
    public HashMap<String, Object> setResultError(String msg) {
        return setResult(500, msg, null);
    }

    /**
     * @param code code 200 处理成功 500 处理失败
     * @param msg  响应错误内容
     * @param data 响应的数据
     * @return
     */
    public HashMap<String, Object> setResult(Integer code, String msg, Object data) {
        HashMap<String, Object> result = new HashMap<>();
        result.put("code", code);
        result.put("msg", msg);
        result.put("data", data);
        return result;
    }
}
}
-
改造前面的controller里的查询和新增方法:
继承BaseController类,并改造查询和新增方法。
import com.qizekj.entity.UserEntity;
import com.qizekj.service.UserService;
import org.springframework.beans.factory.annotation.Autowired;
import org.springframework.web.bind.annotation.*;

import java.util.Map;

/**
 * @author chenqun
 * @date 2023/3/19 12:27
 */
@RestController
public class UserController2 extends BaseController{

    @Autowired
    private UserService userService;

    /**
     * 根据id查询数据
     * @param id
     * @return
     */
    @GetMapping("/getById/{id}")
    public Map<String, Object> getById(@PathVariable("id") Integer id){
        // 定义返回数据的结果,验证参数是否合法
        if(id == null){
            return setResultError("id is null");
        }
        // 根据id查询数据
        UserEntity userEntity = userService.getById(id);
        if(userEntity == null){
            return setResultError("根据该id没有查询到数据");
        }
        return setResultOk(userEntity);
    };

    /**
     * 插入数据
     * @param userEntity
     * @return
     */
    @PostMapping("/insertUser")
    public Map<String, Object> insertUser(@RequestBody UserEntity userEntity){
        return userService.insertUser(userEntity)>0 ? setResultSuccess("插入成功") : setResultError("插入失败");
    };
}
4、整合全局捕获异常
-
创建全局捕获异常配置类
当系统发生错误时,统一将系统错误日志 返回输出。
import org.springframework.web.bind.annotation.ControllerAdvice;
import org.springframework.web.bind.annotation.ExceptionHandler;
import org.springframework.web.bind.annotation.ResponseBody;

import javax.servlet.http.HttpServletRequest;
import java.util.Map;

@ControllerAdvice
public class GlobalExceptionHandler extends BaseController {
    @ResponseBody
    @ExceptionHandler(value = Exception.class)
    public Map<String, Object> handleException(HttpServletRequest h, Exception e) {
        System.out.println("自定义异常:" + e);
        return setResultError("系统发生了错误!");
    }
}
-
测试:
编写测试controller:
import org.springframework.web.bind.annotation.RequestMapping;
import org.springframework.web.bind.annotation.RestController;
/**
* @author chenqun
* @date 2023/3/19 20:01
*/
@RestController
public class ExceptionController {
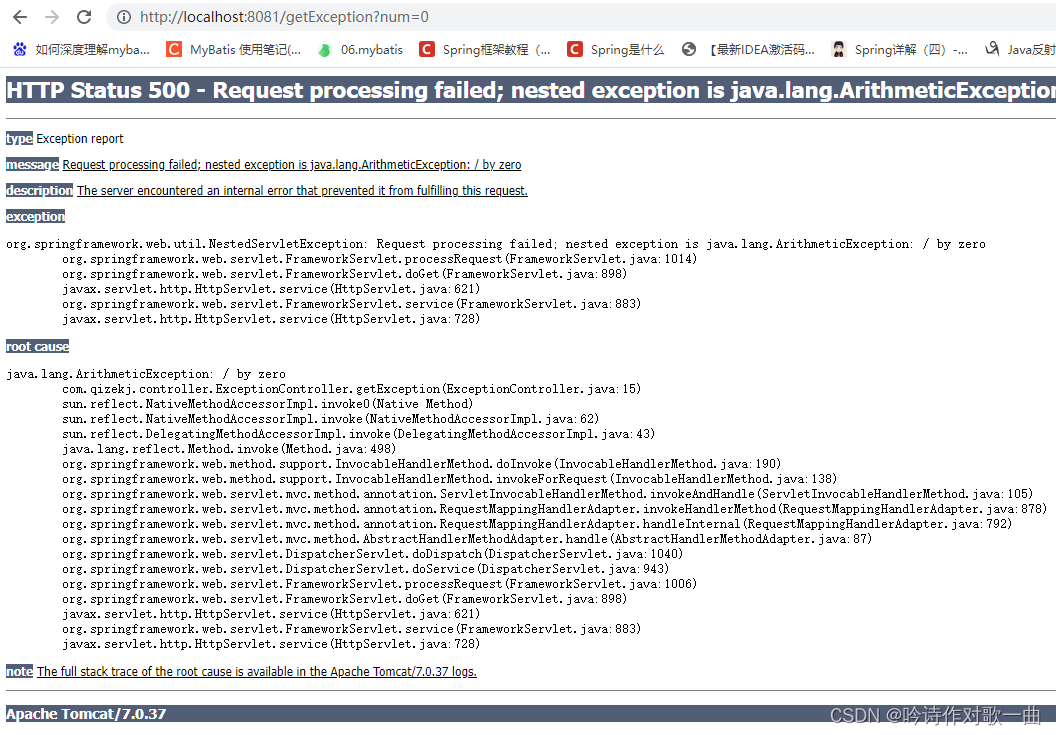
@RequestMapping("/getException")
public String getException(Integer num){
int i = 1/num;
return "qizekj:" + num;
}
}
未配置全局捕获异常配置类之前:
配置全局捕获异常配置类后的效果:

版权声明:本文为qq_36216193原创文章,遵循 CC 4.0 BY-SA 版权协议,转载请附上原文出处链接和本声明。