原代码
import tensorflow as tf
import numpy as np
import matplotlib.pyplot as plt

tf.compat.v1.disable_eager_execution()

def add_layer(inputs,in_size,out_size,activation_function=None):
    #add one more layer and return the output of this layer#
    with tf.name_scope('layer'):#大框架#
        with tf.name_scope('weights'):#小部件#
            Weights = tf.Variable(tf.random.normal([in_size,out_size]),name='W')
        with tf.name_scope('biases'):
            biases = tf.Variable(tf.zeros([1,out_size])+0.1,name='b')
        with tf.name_scope('Wx_plus_b'):
            Wx_plus_b = tf.add(tf.matmul(inputs,Weights),biases)
        #activation_function 先忽略,因为如果选定了的话他自己默认就有名字,比如选relu就叫relu,所以可以暂时不用处理他的名字
        if activation_function is None:
            outputs = Wx_plus_b
        else:
            outputs = activation_function(Wx_plus_b)
        return outputs

#make up some real data#
x_data = np.linspace(-1,1,300)[:,np.newaxis]
noise = np.random.normal(0,0.05,x_data.shape)
y_data = np.square(x_data) - 0.5 + noise

#define placeholder for inputs to network#
with tf.name_scope('inputs'):#名字象征#
    xs = tf.compat.v1.placeholder(tf.float32,[None,1],name='x_input')
    ys = tf.compat.v1.placeholder(tf.float32,[None,1],name='y_input')

#add hidden layer#
l1 = add_layer(xs,1,10,activation_function=tf.nn.relu)
#add output layer#
prediction = add_layer(l1,10,1,activation_function=None)

#the error between prediction and real data#
with tf.name_scope('loss'):
    loss =tf.reduce_mean(tf.reduce_sum(tf.square(ys-prediction),
                axis=[1]))#这里可以给很多函数:reduce_mean,sum,square后面加名字#

with tf.name_scope('train'):#框架#
    train_step = tf.compat.v1.train.GradientDescentOptimizer(0.1).minimize(loss)

sess = tf.compat.v1.Session()
writer = tf.train.SummaryWriter("logs/",sess.graph)
#将整个框架加载到一个文件里面去,loading出来再在浏览器里面观看#

#important step#
sess.run(tf.compat.v1.global_variables_initializer())
报错及问题解决
1
AttributeError: module ‘tensorflow._api.v2.compat.v1.train’ has no attribute ‘SummaryWriter’
![]()
查看代码是这一句说train中没有Summary
writer = tf.train.SummaryWriter("logs/",sess.graph)
改为:
writer = tf.summary.FileWriter("logs/",sess.graph)
又出现了以下报错:
2
AttributeError: module ‘tensorboard.summary._tf.summary’ has no attribute ‘FileWriter’

再将代码改为
writer = tf.summary.create_file_writer("logs/",sess.graph)
又遇到这样的报错
3
TypeError: Expected int32 passed to parameter ‘max_queue’ of op ‘CreateSummaryFileWriter’, got <tensorflow.python.framework.ops.Graph object at 0x000001D2837156A0> of type ‘Graph’ instead. Error: Expected int32, got <tensorflow.python.framework.ops.Graph object at 0x000001D2837156A0> of type ‘Graph’ instead.

这里的问题主要是“create_file_writer”没有graph这种类型的参数
此时网上能够找到的写法我尝试过都会报错,于是我打开了pycharm,查看tf允许的函数
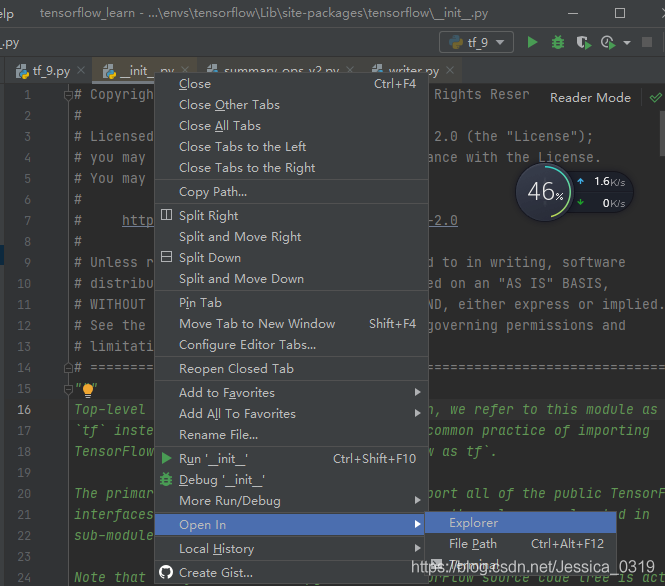
具体步骤:
(1)按住ctrl键,点tf.出现
(2)右键 init.py,选择下方的Open In ——>Exlorer
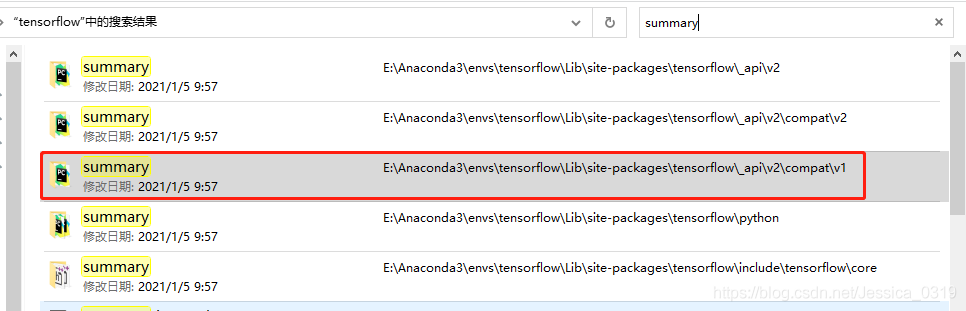
(3)这时会打开文件夹,在搜索框直接搜索想要的内容,例如“summary”,目的是为了找到v2 compat v1的summary
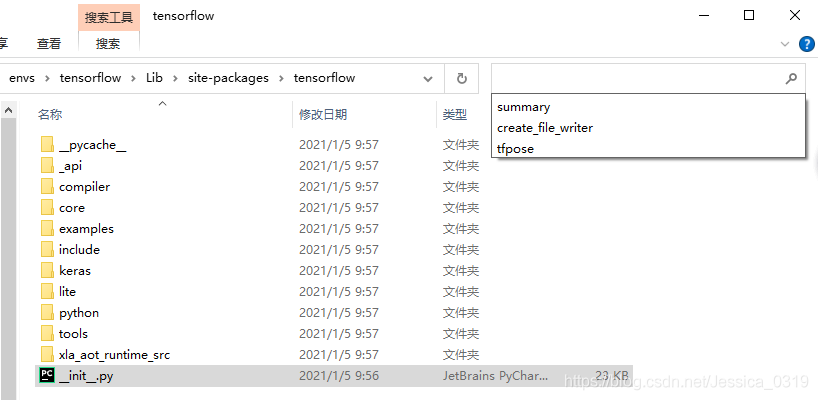
这里要看文件地址,我们选择的是带有“compat v1”的
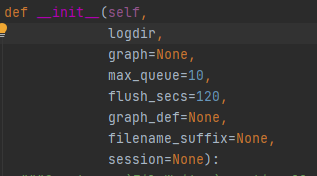
点进去,以任意方式查看_init_.py,我这里用VScode查看,你也可以用pycharm,记事本查看:

结果
事实上,“create_file_writer”与“FileWriter”都是有的,
在这里可以发现summary中是有FileWriter的,只不过要写成“tf.compat.v1.summary.FileWriter”的形式
“create_file_writer”与“FileWriter”的区别在于:
create_file_writer的参数中是没有graph类型的

而FileWriter是可以使用graph类型的参数
如果强行采用以下这句会导致蓝屏死机
writer = tf.summary.create_file_writer("logs/",sess.graph)
最终的解决办法是将代码改为
writer = tf.compat.v1.summary.FileWriter("logs/", sess.graph)
结果
结果成功运行,在logs中出现了以“.电脑名字”为后缀的的文件

这里我们直接在Pycharm的Terminal中输入:
tensorboard –logdir=“logs/”
就可以显示,而不用像原教程一样先cd ~\Desktop,因为他是用mac的环境搞得,我用的是windows

直接点击链接就可以进入Tensorboard

点开每一个模块都可以看到里面的结构,包括包含的参数等等
在这里插入图片描述
全部改好的代码
import tensorflow as tf
import numpy as np
import matplotlib.pyplot as plt

tf.compat.v1.disable_eager_execution()


def add_layer(inputs, in_size, out_size, activation_function=None):
    # add one more layer and return the output of this layer#
    with tf.name_scope('layer'):  # 大框架#
        with tf.name_scope('weights'):  # 小部件#
            Weights = tf.Variable(tf.random.normal([in_size, out_size]), name='W')
        with tf.name_scope('biases'):
            biases = tf.Variable(tf.zeros([1, out_size]) + 0.1, name='b')
        with tf.name_scope('Wx_plus_b'):
            Wx_plus_b = tf.add(tf.matmul(inputs, Weights), biases)
            # activation_function 先忽略,因为如果选定了的话他自己默认就有名字,比如选relu就叫relu,所以可以暂时不用处理他的名字
        if activation_function is None:
            outputs = Wx_plus_b
        else:
            outputs = activation_function(Wx_plus_b)
        return outputs


# make up some real data#
x_data = np.linspace(-1, 1, 300)[:, np.newaxis]
noise = np.random.normal(0, 0.05, x_data.shape)
y_data = np.square(x_data) - 0.5 + noise

# define placeholder for inputs to network#
with tf.name_scope('inputs'):  # 名字象征#
    xs = tf.compat.v1.placeholder(tf.float32, [None, 1], name='x_input')
    ys = tf.compat.v1.placeholder(tf.float32, [None, 1], name='y_input')

# add hidden layer#
l1 = add_layer(xs, 1, 10, activation_function=tf.nn.relu)
# add output layer#
prediction = add_layer(l1, 10, 1, activation_function=None)

# the error between prediction and real data#
with tf.name_scope('loss'):
    loss = tf.reduce_mean(tf.reduce_sum(tf.square(ys - prediction),
                                        axis=[1]))  # 这里可以给很多函数:reduce_mean,sum,square后面加名字#

with tf.name_scope('train'):  # 框架#
    train_step = tf.compat.v1.train.GradientDescentOptimizer(0.1).minimize(loss)

sess = tf.compat.v1.Session()
writer = tf.compat.v1.summary.FileWriter("logs/", sess.graph)
# 将整个框架加载到一个文件里面去,loading出来再在浏览器里面观看#

# important step#
sess.run(tf.compat.v1.global_variables_initializer())
由于之前是用VScode写的代码,所以格式可能不是特别规范,之后如果有时间就将在pycharm调整好格式的代码全发上来,这次的代码是规范好格式的。