背景
上篇博文讲述了fanout广播模式,只要绑定该类型的交换机的所有队列,都会接收到该交换机的消息。而direct模式是针对广播模式的一种升级,对绑定的队列进行
分类
,投递消息时指定一个RountingKey,只有RountingKey 与 BindingKey 匹配的队列,消息才会被投递进去。
假设我们有一个订单系统,用户进行下单支付,下单成功后,根据业务处理一般都会消息通知用户相关信息。例如通过邮件+手机+qq 等方式进行消息推送支付成功信息。
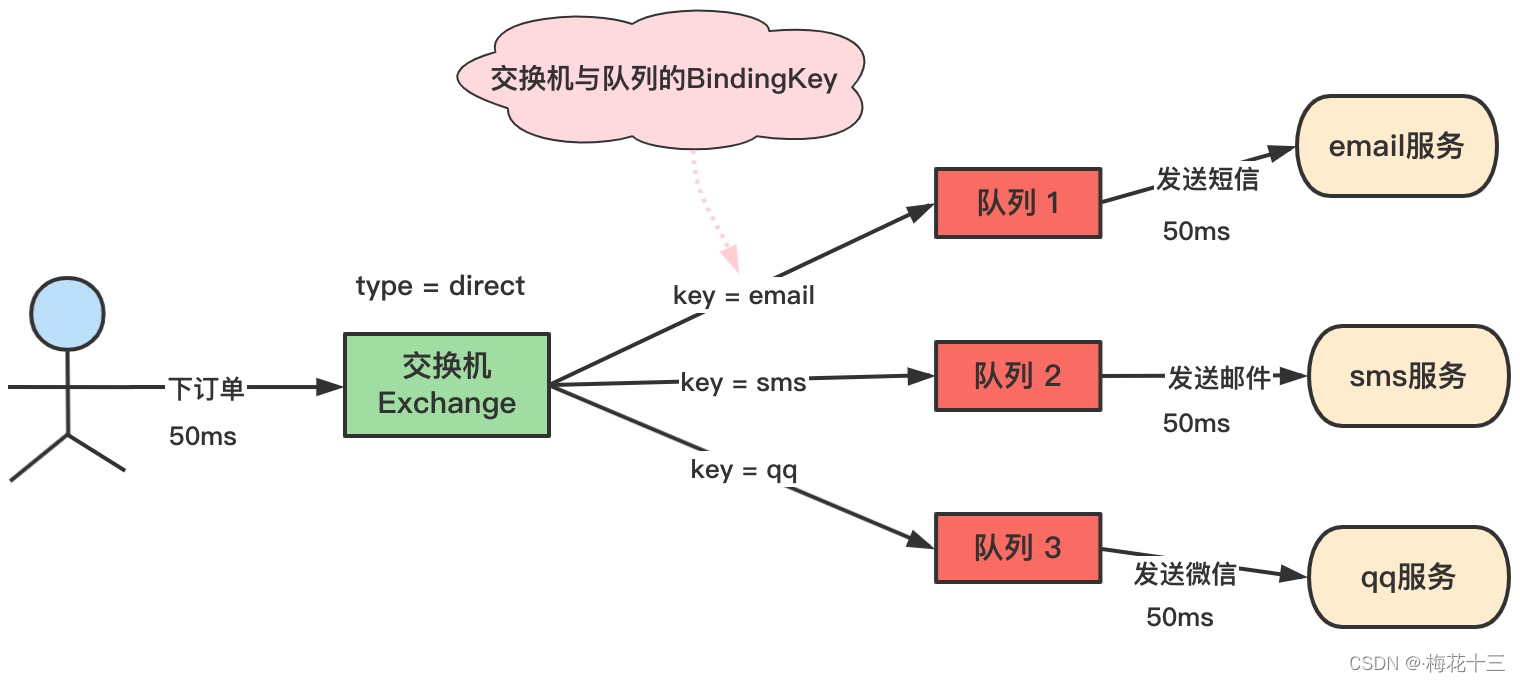
由上图可知,每个队列与交换机都绑定了一个key,为BindingKey,此时我们模拟用户下单,订单创建成功后,只对用户发送
和
邮件提醒
▎
消费者 Consumer
项目创建详细流程和相关配置代码与fanout模式中一致,这里不再二次贴文,想要知道完整的demo样例,请翻阅《SpringBoot整合RabbitMQ ——Fanout模式》
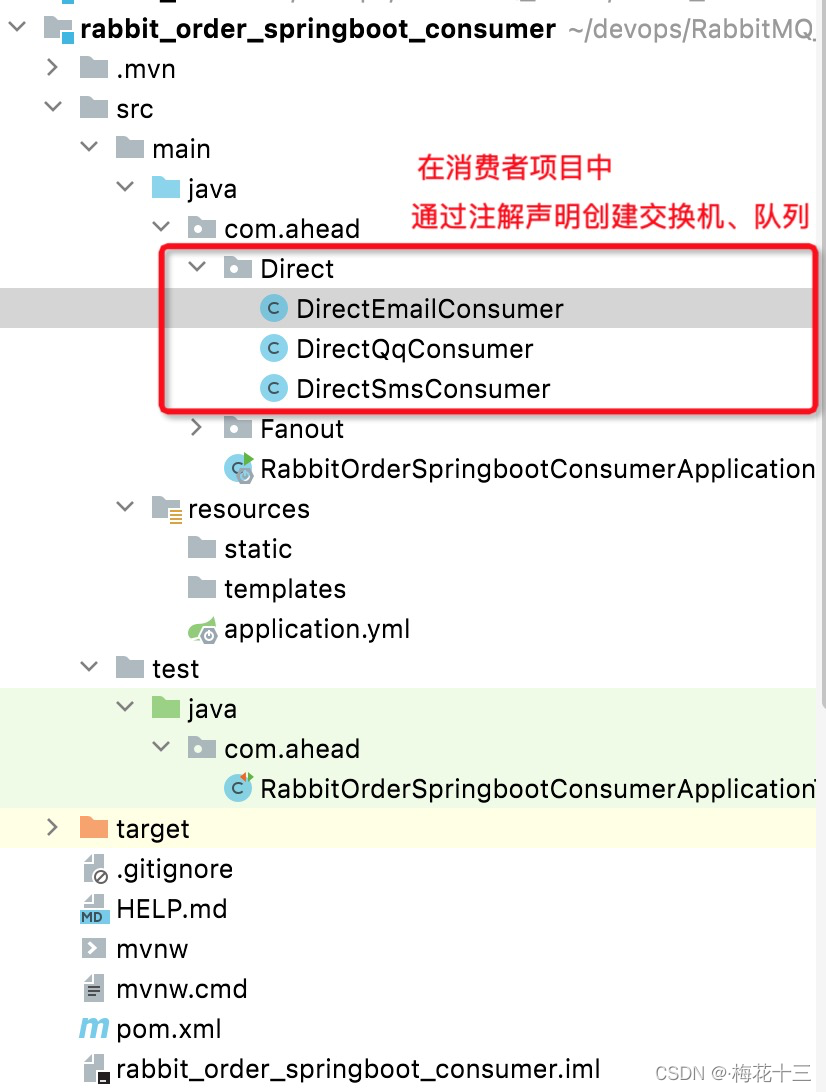
在《SpringBoot整合RabbitMQ ——Fanout模式》文章中,我们是通过编写 @Configuration 类来声明创建交换机、队列,并完成绑定关系,SpringBoot 队列的声明和绑定方式除了通过编写配置类的方式,还可以通过注解方式进行配置和绑定
注解方式配置格式
// 声明队列并绑定到指定交换机
bindings = @QueueBinding(
value = @Queue(“声明队列的属性信息”),
exchange = @Exchange(“声明交换机和属性信息”),
key = “绑定的BindingKey”
))
1. 消费者
DirectEmailConsumer
类代码如下
/**
 *  @QueueBinding (队列,交换机,交换机与队列的BindingKey)
 *     声明创建队列 email_direct_Queue
 *     声明创建交换机direct_order_exchange
 *     绑定交换机与队列的关系,BindingKey = “email”
 */
@Component
@RabbitListener(bindings = @QueueBinding(
        value = @Queue(value = "email_direct_Queue",durable = "true",exclusive = "false",autoDelete = "false")
        ,exchange = @Exchange(value = "direct_order_exchange",type = ExchangeTypes.DIRECT,durable = "true",autoDelete = "false")
        ,key = "email"
))
public class DirectEmailConsumer {

    // 接收消息
    @RabbitHandler
    public void receiveMess(String message){
        System.out.println("EmailConsumer direct 接收到订单消息————>"+message);
    }
}
2. 消费者
DirectQqConsumer
类代码如下,代码与上述一致,只是创建的队列和交换机绑定的key不一样
/**
 *  @QueueBinding (队列,交换机,交换机与队列的BindingKey)
 *     声明创建队列 qq_direct_Queue
 *     声明创建交换机direct_order_exchange(不存在则创建,不会多次创建)
 *     绑定交换机与队列的关系,BindingKey = “qq”
 */
@Component
@RabbitListener(bindings = @QueueBinding(
        value = @Queue(value = "qq_direct_Queue",durable = "true",exclusive = "false",autoDelete = "false")
        ,exchange = @Exchange(value = "direct_order_exchange",type = ExchangeTypes.DIRECT,durable = "true",autoDelete = "false")
        ,key = "qq"
))
public class DirectQqConsumer {
    // 接收消息
    @RabbitHandler
    public void receiveMess(String message){
        System.out.println("QqConsumer direct 接收到订单消息————>"+message);
    }
}
3. 消费者
DirectSmsConsumer
类代码如下,代码与上述一致,只是创建的队列和交换机绑定的key不一样
/**
 *  @QueueBinding (队列,交换机,交换机与队列的BindingKey)
 *     声明创建队列 sms_direct_Queue
 *     声明创建交换机direct_order_exchange(不存在则创建,不会多次创建)
 *     绑定交换机与队列的关系,BindingKey = “sms”
 )
 */
@Component
@RabbitListener(bindings = @QueueBinding(
        value = @Queue(value = "sms_direct_Queue",durable = "true",exclusive = "false",autoDelete = "false")
        ,exchange = @Exchange(value = "direct_order_exchange",type = ExchangeTypes.DIRECT,durable = "true",autoDelete = "false")
        ,key = "sms"
))
public class DirectSmsConsumer {
    // 接收消息
    @RabbitHandler
    public void receiveMess(String message){
        System.out.println("SmsConsumer direct 接收到订单消息————>"+message);
    }
}
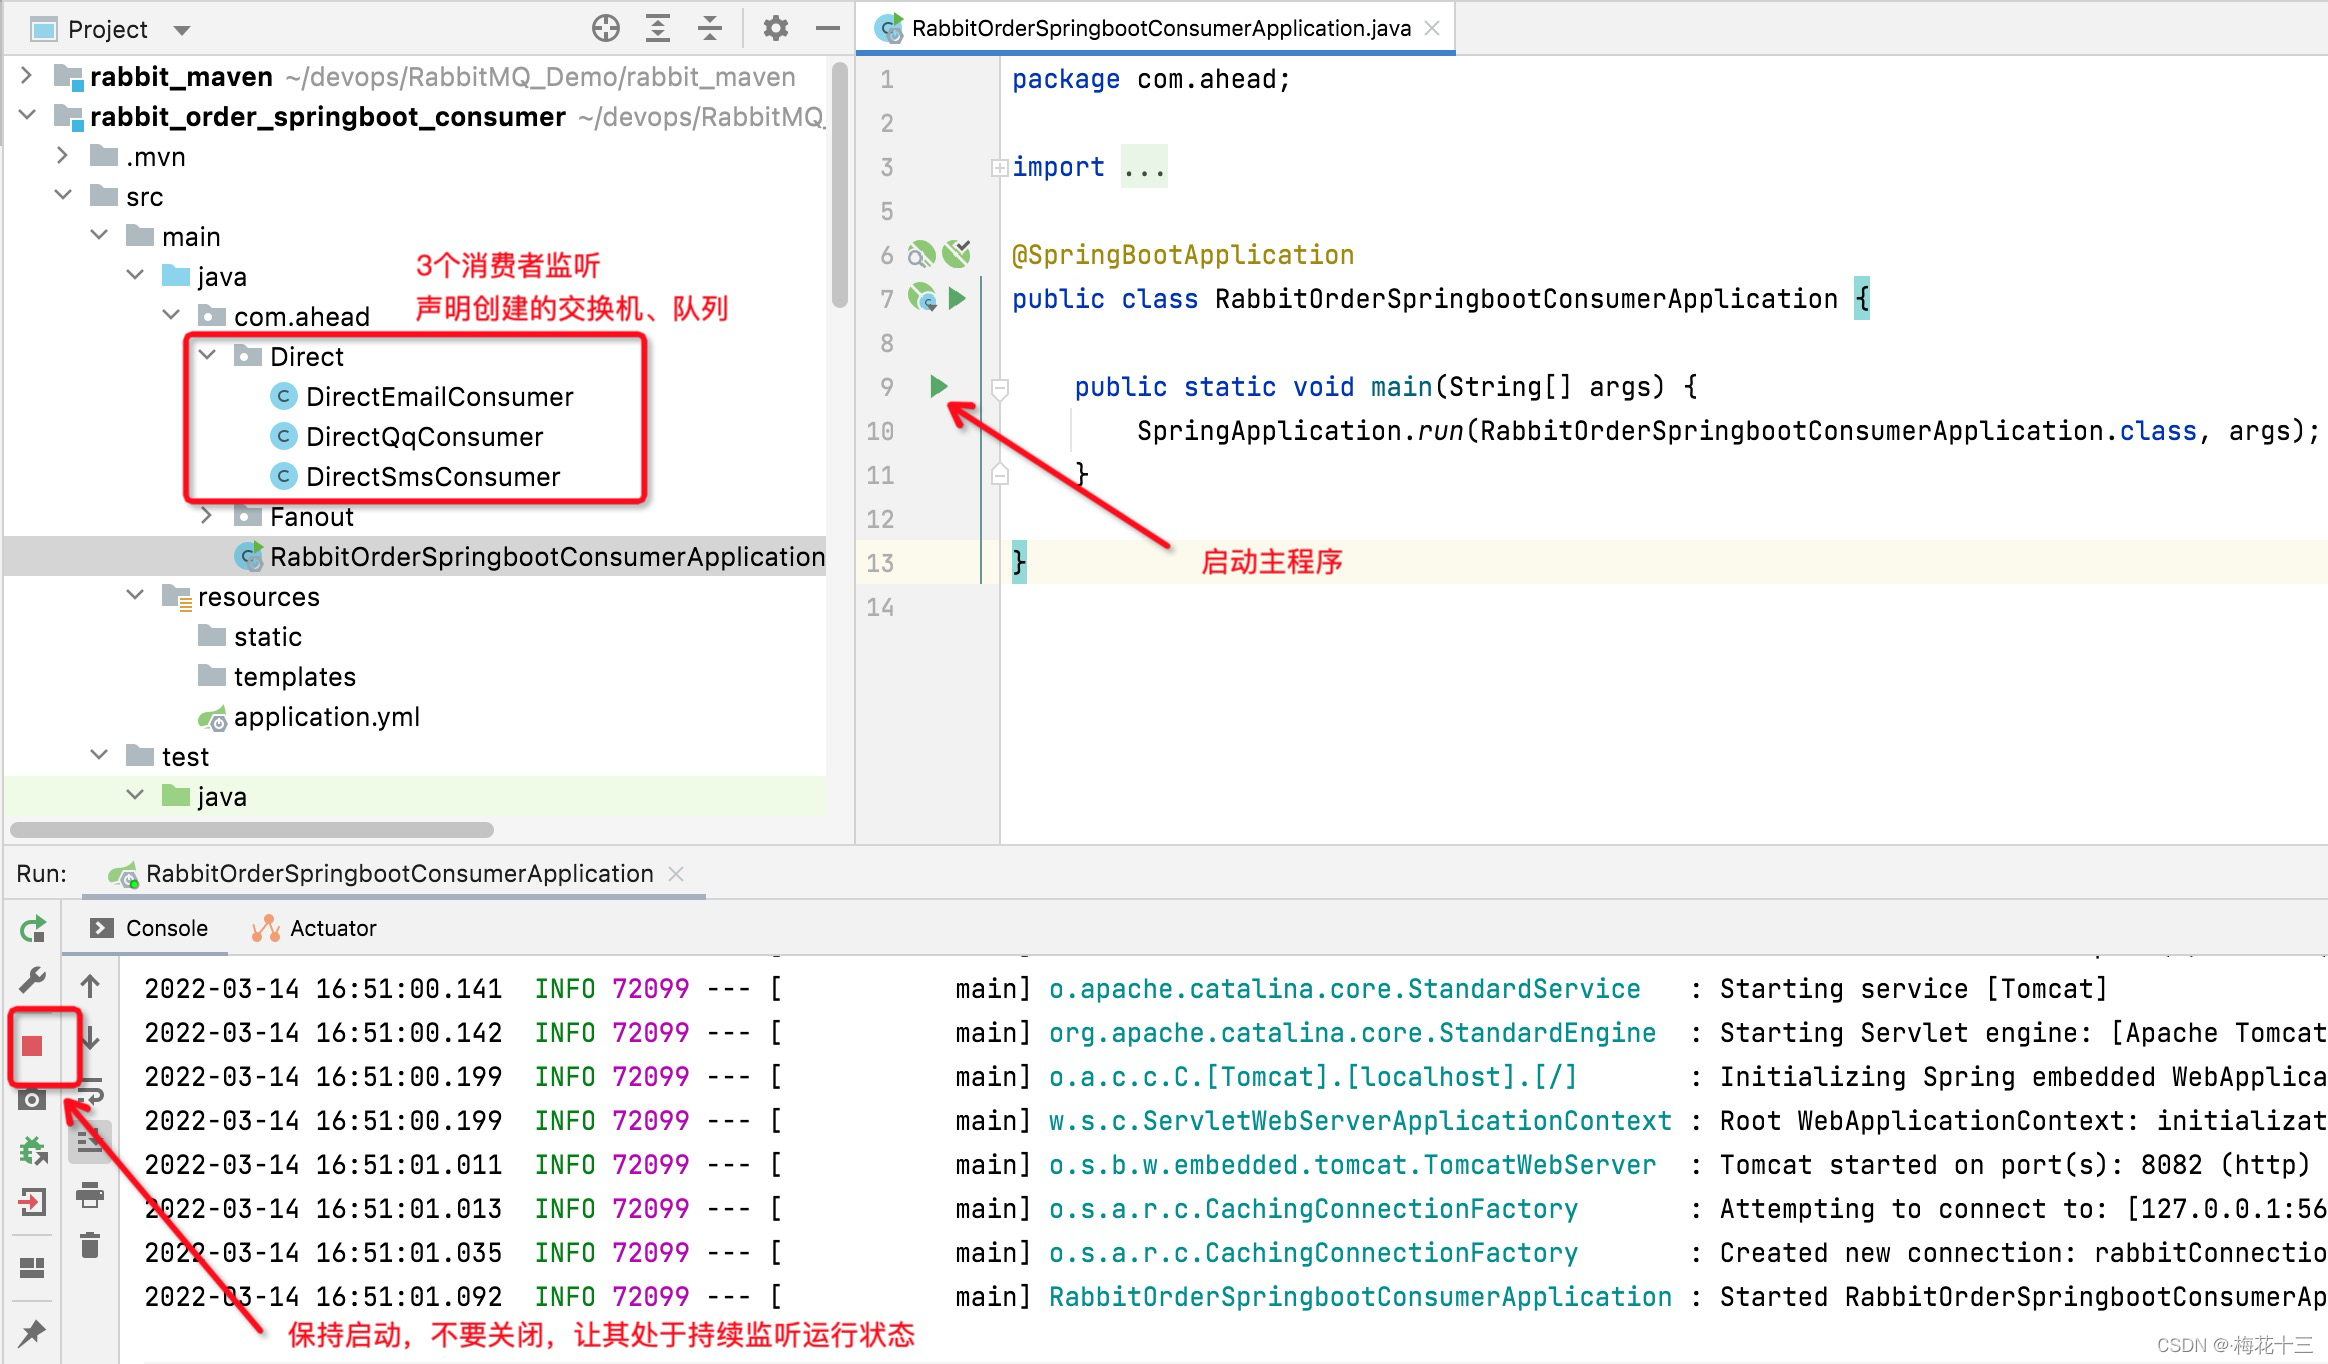
4. 运行主程序,开启消费者监听
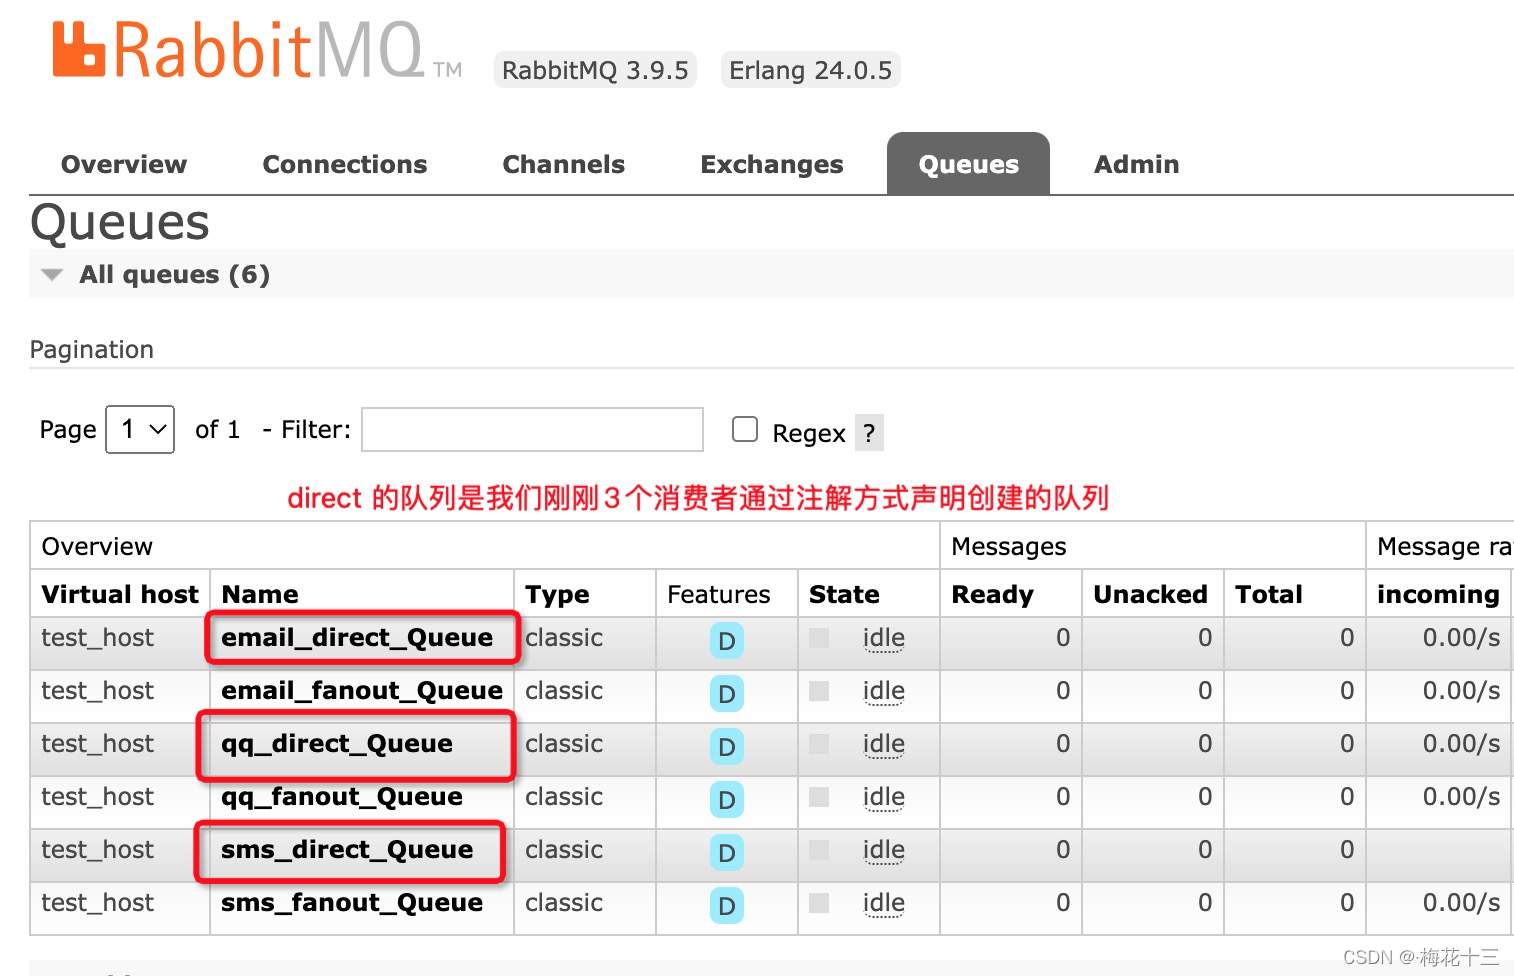
5. 图形化界面查看队列创建信息
▎
生产者 Producer
项目结构与《SpringBoot整合RabbitMQ ——Fanout模式》博文中代码一致,不二次贴出。
项目结构如下
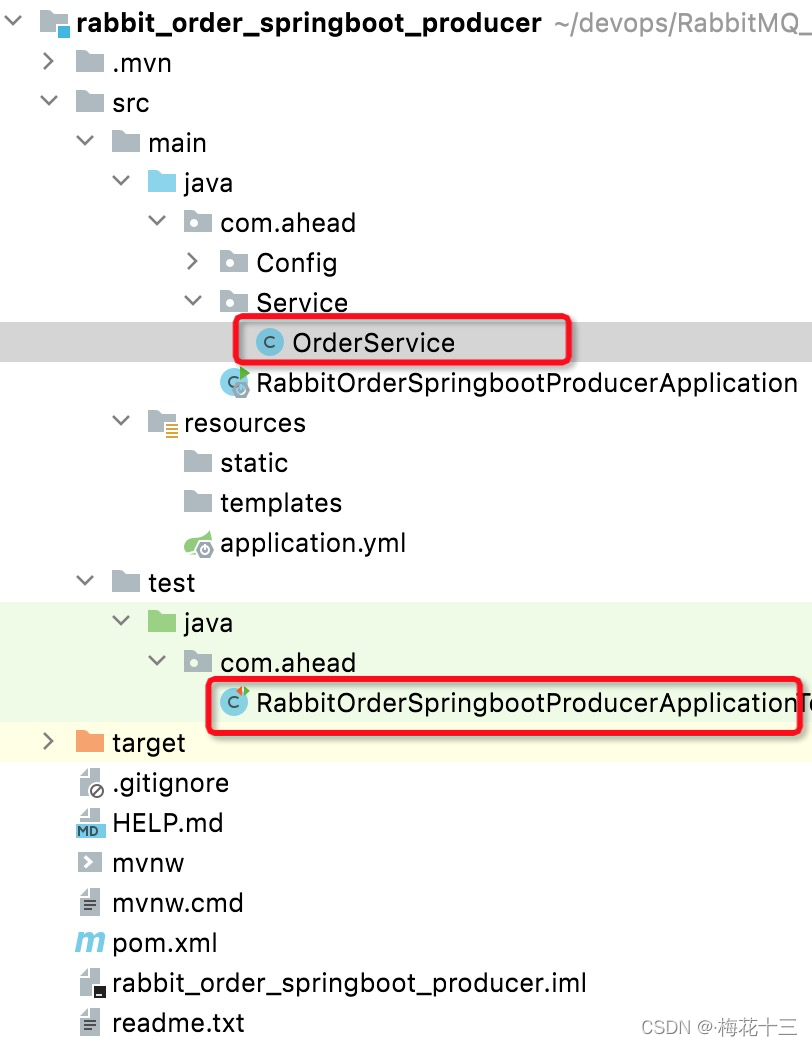
1. 创建订单服务,模拟下单
@Service
public class OrderService {
    @Autowired
    private RabbitTemplate template;

    /**
     * 模拟用户创建订单
     * @param userId  客户ID
     * @param productId 产品ID
     * @param num 数量
     */
    public void createOrder(String userId, String productId, int num){
        // 1.根据商品ID查询库存是否充足

        // 2.生成订单
        String orderId = UUID.randomUUID().toString();
        System.out.println("订单生成成功....");

        // 3.将订单id封装成MQ消息,投递到交换机
        /**@params1 :交换机名称
         * @params2 :路由key/队列名称
         * @params3 :消息内容
         * 注:指定RoutingKey=qq和email
         * 交换机direct_order_exchange与绑定的队列的BindingKey匹配的队列才会接收到
         */
        template.convertAndSend("direct_order_exchange","qq",orderId);
        template.convertAndSend("direct_order_exchange","email",orderId);

    }
}
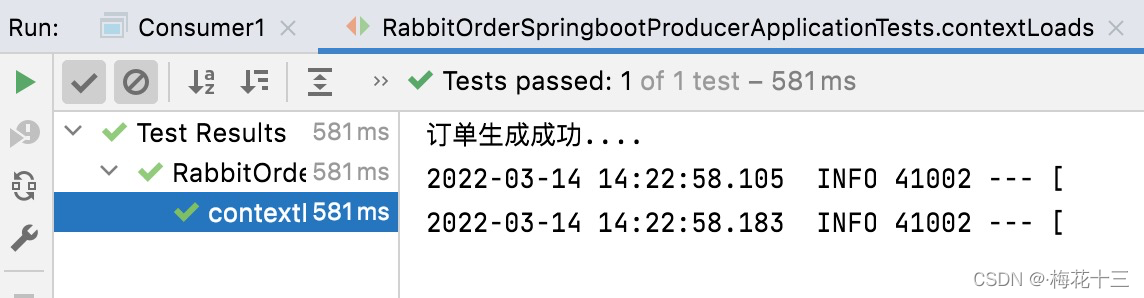
6. 测试类进行测试
@SpringBootTest
class RabbitOrderSpringbootProducerApplicationTests {

    @Autowired
    private OrderService orderService;

    @Test
    void contextLoads() {
        orderService.createOrder("1001","96",1);
    }
}
运行结果
7. 切换至消费者控制面板,查看3个消费者监听队列的结果
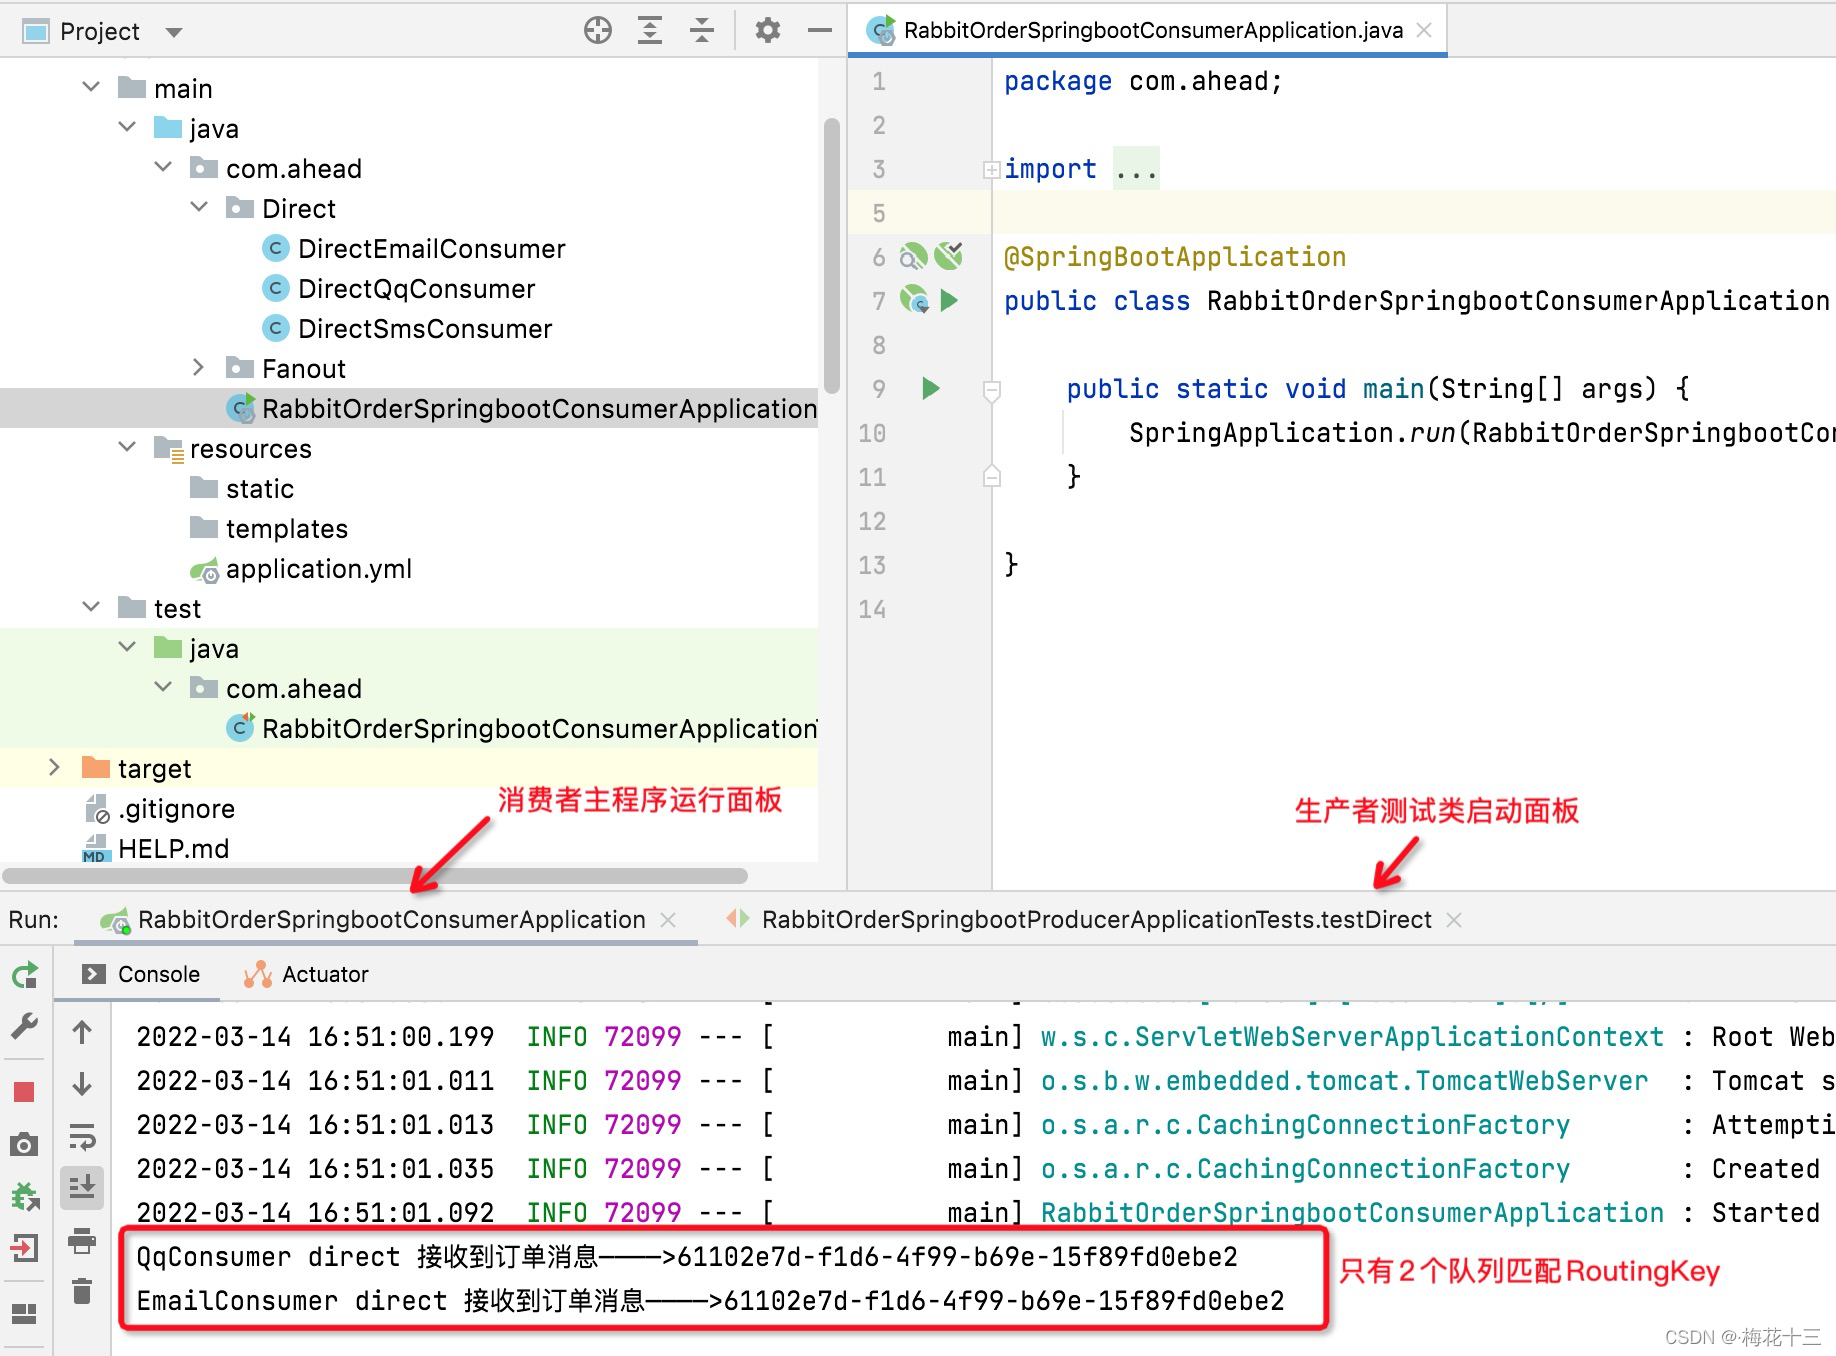
☛
扩展:队列、交换机的声明方式
本文讲述的例子是通过注解方式声明队列和交换机,也可以同fanout模式中讲解的例子一样,在生产者项目中,通过编写@Configuration 类进行声明和创建
@Configuration
public class Direct_RabbitMQConfiguration {

    // 1.声明direct路由模式的交换机
    @Bean
    public DirectExchange getExchange(){
        return new DirectExchange("direct_order_exchange",true,false);
    }

    // 2.声明三个队列队列:emailQueue、smsQueue、qqQueue
    @Bean
    public Queue getEmailQueue(){
        return new Queue("email_direct_Queue",true,false,false);
    }
    @Bean
    public Queue getSMSQueue(){
        return new Queue("sms_direct_Queue",true,false,false);
    }
    @Bean
    public Queue getQqQueue(){
        return new Queue("qq_direct_Queue",true,false,false);
    }

    // 3.绑定交换机与队列的关系
    @Bean
    public Binding getEmailBinding(){
        // 注:与fanout模式不同的是,需要声明交换机与队列之间的BindingKey,如下with设置
        return BindingBuilder.bind(getEmailQueue()).to(getExchange()).with("email");
    }
    @Bean
    public Binding getSMSBinding(){
        return BindingBuilder.bind(getSMSQueue()).to(getExchange()).with("sms");
    }
    @Bean
    public Binding getQQBinding(){
        return BindingBuilder.bind(getQqQueue()).to(getExchange()).with("qq");
    }
}
思考:队列的声明是定义在消费者中好,还是生产者?
如果能两边都配置则两边都配置,如果不能则最好的方式是定义在消费者中,因为在启动过程中,如果队列未声明则会报异常,其次消费者是直接跟队列打交道的
结尾:
topic主题模式与direct一致,只是指定的RoutingKey 与 BindingKey 是模糊匹配模式!