i2c-and-cross-gcc-and-qemu-mount-nfs
qemu-mount-nfs
1. 服务端(ubuntu)配置
1.1 命令及说明
(1) 创建根目录和共享挂载点
sudo mkdir -p /nfs/zxxr
(2) 将挂载目录绑定到共享挂载点
sudo mount --bind /home/ujnstu/zxxr/ /nfs/zxxr
其作用为ubuntu下的/nfs/zxxr和/home/ujnstu/zxxr与开发板下的文件/mnt(本文中),这三个文件夹实现共享。
(3) 修改/etc/profile文件
- 命令:
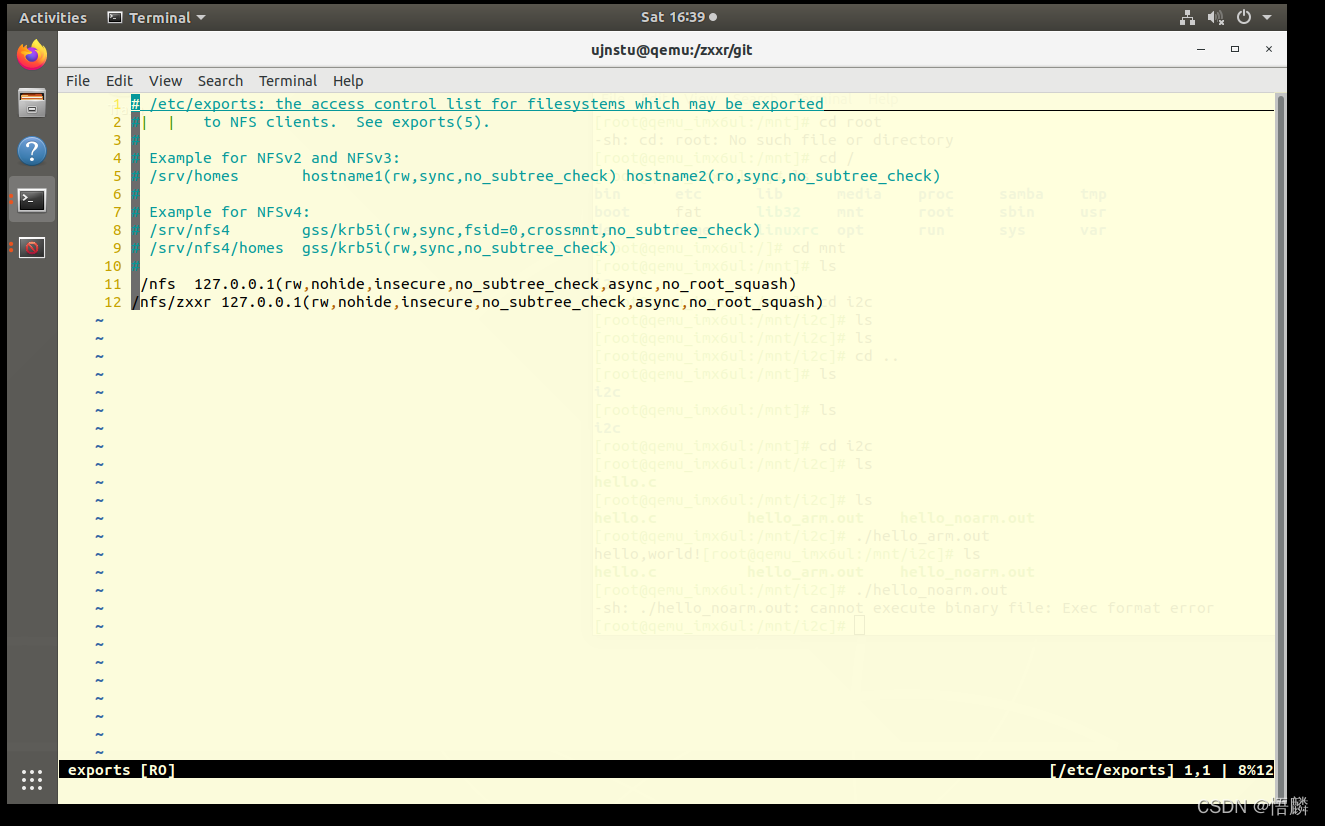
sudo vim /etc/exports
- 在文件中添加以下行:
/nfs 127.0.0.1(rw,nohide,insecure,no_subtree_check,async,no_root_squash)
/nfs/zxxr 127.0.0.1(rw,nohide,insecure,no_subtree_check,async,no_root_squash)
- 保存文件并导出共享
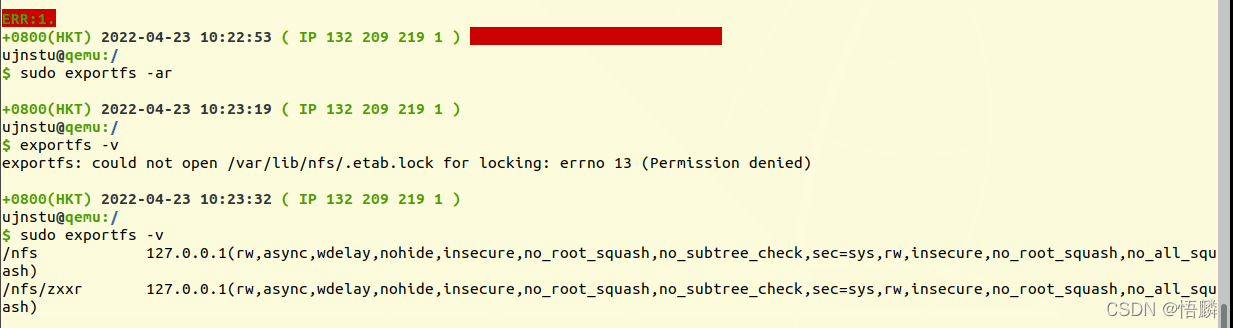
sudo exportfs -ar
- 查看当前活动的导出及其状态
sudo exportfs -v
将显示:
/nfs       127.0.0.1(rw,async,wdelay,nohide,insecure,no_root_squash,no_subtree_check,sec=sys,rw,insecure,no_root_squash,no_all_squash)
/nfs/zxxr   127.0.0.1(rw,async,wdelay,nohide,insecure,no_root_squash,no_subtree_check,sec=sys,rw,insecure,no_root_squash,no_all_squash)
- 在服务器端执行下面命令,强制重新读取/etc/exports文件
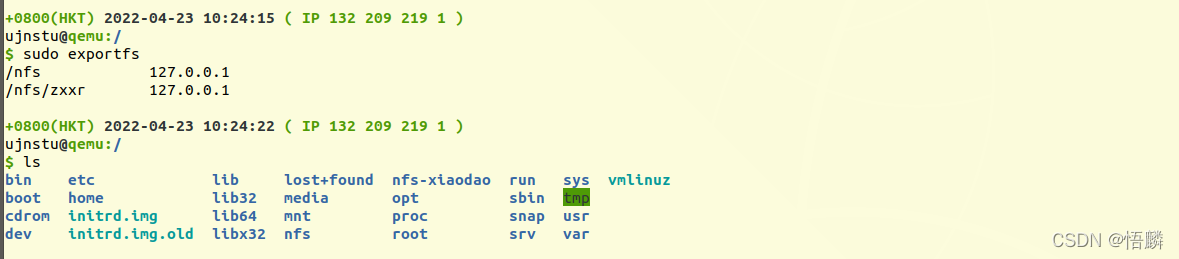
sudo exportfs
将显示:
/nfs      127.0.0.1
/nfs/zxxr  127.0.0.1
注意:不执行以上命令并显示出以上内容信息可能会挂载失败。
1.2 执行图片
- mkdir and mount-bind and vim /etc/exports

-
vim /etc/exports
-
sudo exportfs -ar and -v
-
sudo exportfs
2. 客户端(开发板)
2.1 命令及说明
(1) 运行开发板
cd /home/ujnstu/qemu/ubuntu-18.04_imx6ul_qemu_system
./gui-qemu-imx6ull-gui.sh
(2) 登陆root
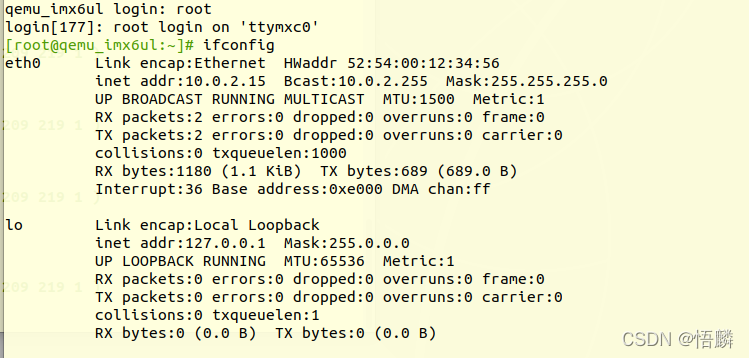
当出现 qemu_imx6ul login:
只需输入:root
qemu_imx6ul login: root
(3) 开发板默认给主机分配的ip是:10.0.2.2
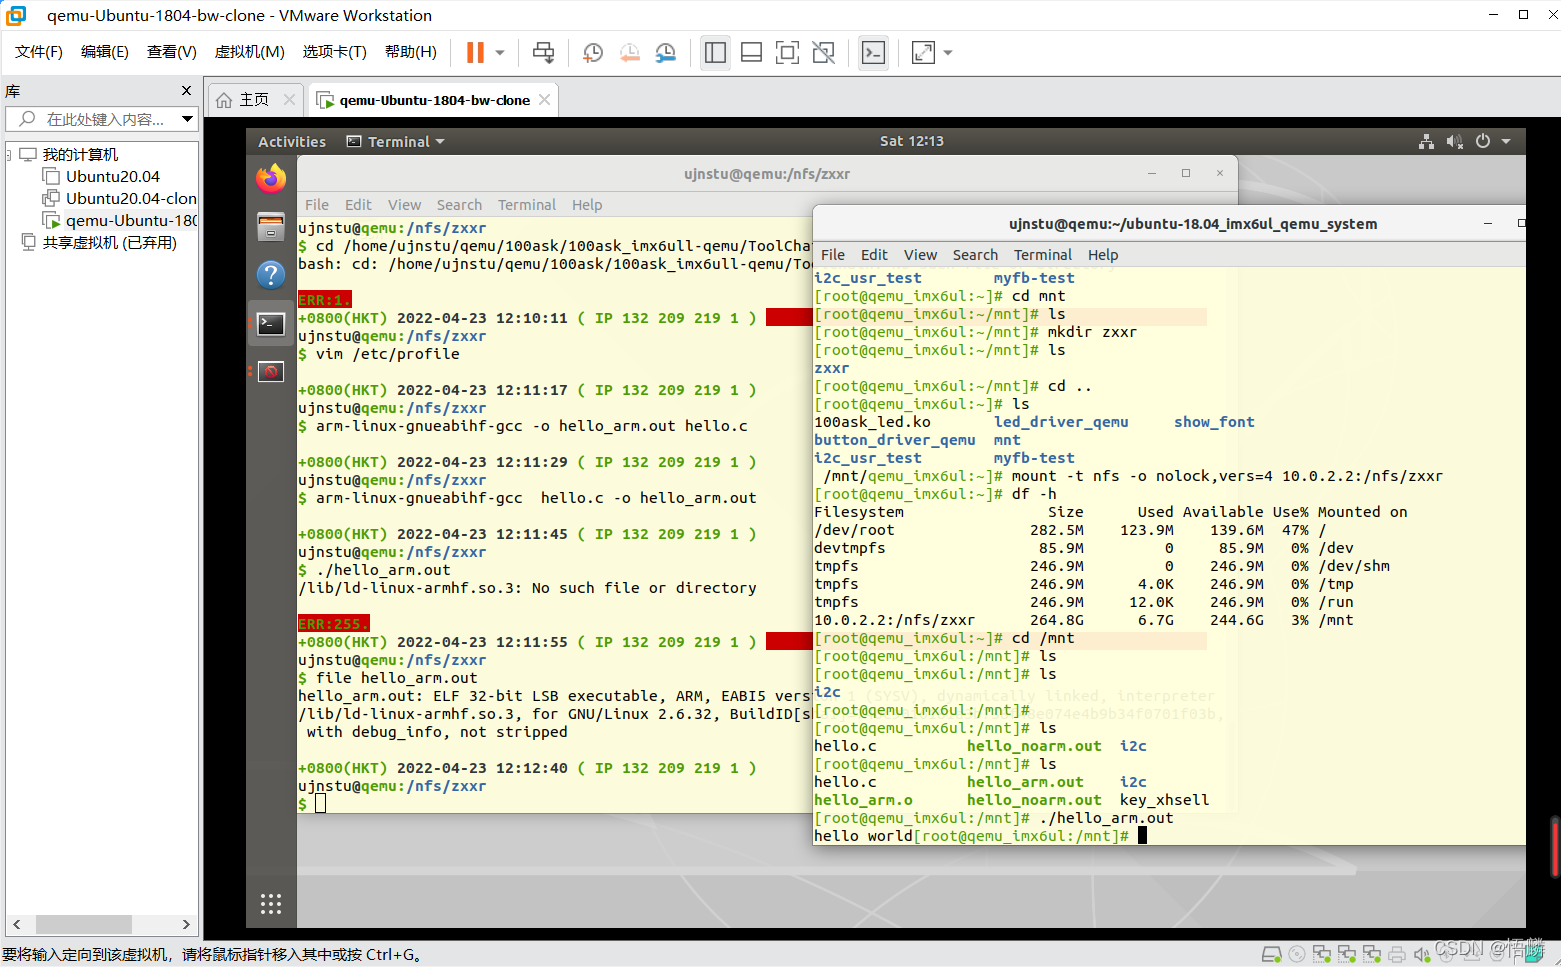
(4) 挂载(mount)
将主机上的/nfs/zxxr挂载到开发板的/mnt/下。(开发板默认给主机分配的ip是:10.0.2.2)
mount -t nfs -o nolock,vers=4 10.0.2.2:/nfs/zxxr /mnt/ # /mnt/ 为根目录下的文件夹,而不是登陆后直接ls出现的文件夹。
(5)查看挂载情况
df -h
出现的内容中有:
10.0.2.2:/nfs/zxxr 216.1G 7.3G 197.8G 4%/mnt #表示挂载成功
2.2 执行图片
- 运行开发板

- 登陆root
- 挂载命令和df -h

- 挂载成功

- 注意本文中开发板mnt文件夹所处位置:
- 注意本文中开发板mnt文件夹所处位置:
- 注意本文中开发板mnt文件夹所处位置:
- 不是直接ls出现的mnt文件夹

- 真正的mnt文件夹位置:

cross-gcc(主机ubuntu配置)
1. 主机(ubuntu)配置步骤:
(1) 网上下载压缩包arm-linux-gcc-4.4.3-20100728.tar.gz
下载地址:
下载压缩包地址
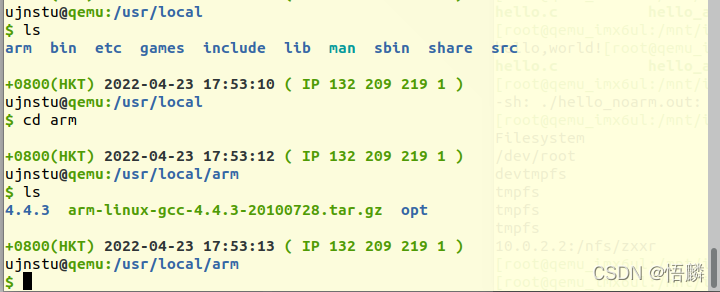
(2) 在/usr/local/目录下创建arm文件夹
sudo mkdir /usr/local/arm
(3) 把软件包arm-linux-gcc-4.4.3.tgz解压在usr/local/arm/文件夹
tar- xzvf arm-linux-gcc4.4.3.tgz #当arm-linux-gcc4.4.3.tgz压缩包位于usr/local/arm/文件夹中时的命令。
(4) 把文件夹4.4.3移动到新建文件夹usr/local/arm下
sudo cp -r /usr/local/arm/opt/FirendlyARM/toolschain/4.4.3 /usr/local/arm
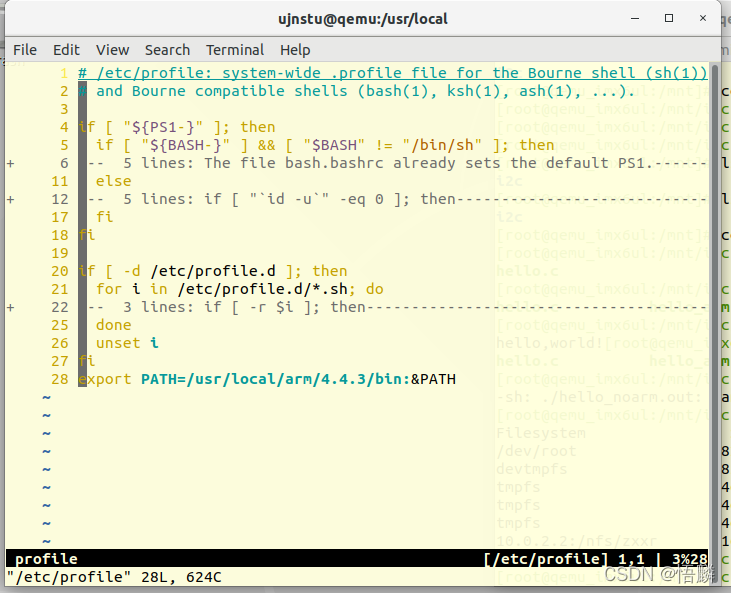
(5) 修改环境变量PATH
- 命令:
chmod 777 /etc/profile
vim /etc/profile
- 在最后一行的下面加入环境变量:
export PATH=/usr/local/arm/4.4.3/bin:$PATH
(6) 使已修改的配置文件/etc/profile生效
sudo source /etc/profile
(7) 配置临时环境(可以先忽略此步骤,直接进行编译;若编译失败,则执行这一步)
export ARCH=arm
export CROSS_COMPILE=arm-linux-gnueabihf-
export PATH=$PATH:/home/ujnstu/qemu/100ask/100ask_imx6ull-qemu/ToolChain/gcc-linaro-6.2.1-2016.11-x86_64_arm-linux-gnueabihf/bin
2. 在主机(ubuntu)中编译文件
(1) 在共享的文件夹中存在hello.c文件。(主机ubuntu下的/nfs/zxxr 和 /home/ujnstu/zxxr 与 开发板下的/mnt/ 的共享文件夹)
(2) 输入命令:
gcc hello.c -o hello_noarm.out
(3) 输入命令:
arm-linux-gcc hello.c -o hello_arm.out
(4) hello_noarm.out在主机(ubuntu)中可以运行,但在开发板中不可以运行。
在主机输入命令:
./hello_noarm.out
即可运行。
(5) hello_arm.out在开发板中可以运行,在主机(ubuntu)中不可以运行。
在开发板输入命令:
./hello_arm.out
即可运行。
3. 执行图片
- /usr/local/arm文件夹
-
vim /etc/profile
-
编译与执行
echo service
意义:在源程序的基础上加上一个应答,发送什么返回什么。
nr_bytes_read = read(thread_session_socket, receive_and_send_buffer, 1024);  //服务端接受客户端发送的信息
write(thread_session_socket, receive_and_send_buffer, strlen(receive_and_send_buffer));  //服务端发送信息给客户端,实现echo service
echo 大写
       nr_bytes_read = read(thread_session_socket, receive_and_send_buffer, 1024);  //服务端接受客户端发送的信息
       if ( nr_bytes_read == -1)
           break;
      receive_and_send_buffer[nr_bytes_read] = '\0';

      for( i=0; i <= nr_bytes_read ;i++)  //实现 echo 大写
      {
         if(receive_and_send_buffer[i] >= 'a' && receive_and_send_buffer[i] <= 'z' )
		 receive_and_send_buffer[i] = receive_and_send_buffer[i] - 'a'+ 'A';
      }

       printf("Message from client(%d): %s\n", nr_bytes_read, receive_and_send_buffer);
       write(thread_session_socket, receive_and_send_buffer, strlen(receive_and_send_buffer));  //服务端发送信息给客户端,实现echo service
i2c驱动app
1. eeprog.c程序代码
/***************************************************************************
    copyright            : (C) by 2009 Guangzhou FriendlyaRM, in China
    email                : capbily@163.com
    website		         : arm9.net
 ***************************************************************************/

#include <stdio.h>
#include <fcntl.h>
#include <getopt.h>
#include <unistd.h>
#include <stdlib.h>
#include <errno.h>
#include <string.h>
#include <sys/types.h>
#include <sys/stat.h>
#include "24cXX.h"

#define DEVICE_FILE_STRING "/dev/i2c-0"
#define DEVICE_ADDRESS 0x50

#define usage_if(a) do { do_usage_if( a , __LINE__); } while(0);
void do_usage_if(int b, int line) {
	const static char *eeprog_usage =
		"I2C-24C08(256 bytes) Read/Write Program, ONLY FOR TEST!\n"
		"FriendlyARM Computer Tech. 2009\n";
	if(!b)
		return;
	fprintf(stderr, "%s\n[line %d]\n", eeprog_usage, line);
	exit(1);
}


#define die_if(a, msg) do { do_die_if( a , msg, __LINE__); } while(0);
void do_die_if(int b, char* msg, int line) {
	if(!b)
		return;
	fprintf(stderr, "Error at line %d: %s\n", line, msg);
	fprintf(stderr, "	sysmsg: %s\n", strerror(errno));
	exit(1);
}

/*从eeprom存储器的地址为int_address_for_service_eeprom的存储单元中读取字节数据*/
static int read_from_eeprom(struct eeprom *p_eeprom_device_struct, int int_address_for_service_eeprom, int size) {
	int char_read_byte_from_eeprom, index_for_loops;
	for(index_for_loops = 0; index_for_loops < size; ++index_for_loops, ++int_address_for_service_eeprom) {
		die_if((char_read_byte_from_eeprom = eeprom_read_byte(p_eeprom_device_struct, int_address_for_service_eeprom)) < 0, "read error");
		if( (index_for_loops % 16) == 0 )
			printf("\n %.4x|  ", int_address_for_service_eeprom);
		else if( (index_for_loops % 8) == 0 )
			printf("  ");
		printf("%.2x ", char_read_byte_from_eeprom);
		fflush(stdout);
	}
	fprintf(stderr, "\n\n");
	return 0;
}
/*把字节数据写入eeprom地址为int_address_for_service_eeprom的存储单元*/
static int write_to_eeprom(struct eeprom *p_eeprom_device_struct, int int_address_for_service_eeprom) {
	int index_for_loops;
	for(index_for_loops=0, int_address_for_service_eeprom=0; index_for_loops<256; index_for_loops++, int_address_for_service_eeprom++) {
		if( (index_for_loops % 16) == 0 )
			printf("\n %.4x|  ", int_address_for_service_eeprom);
		else if( (index_for_loops % 8) == 0 )
			printf("  ");
		printf("%.2x ", index_for_loops);
		fflush(stdout);
		die_if(eeprom_write_byte(p_eeprom_device_struct, int_address_for_service_eeprom, index_for_loops), "write error"); //写入
	}
	fprintf(stderr, "\n\n");
	return 0;
}

int main(int argc, char** argv) {
	struct eeprom eeprom_device_struct;
	int option_read_or_write;

	option_read_or_write = 0;

	usage_if(argc != 2 || argv[1][0] != '-' || argv[1][2] != '\0');
	option_read_or_write = argv[1][1];

	//TODO: 将数字改为自己的学号。
	write(STDOUT_FILENO, "APP for 201930310120 ...\n", strlen("APP for 201930310120 ...\n"));
	fprintf(stderr, "Open %s with 8bit mode\n", DEVICE_FILE_STRING);
	die_if(eeprom_open(DEVICE_FILE_STRING, DEVICE_ADDRESS, EEPROM_TYPE_8BIT_ADDR, &eeprom_device_struct) < 0,
			"unable to open eeprom device file "
			"(check that the file exists and that it's readable)");
	switch(option_read_or_write) {
	case 'r':
		fprintf(stderr, "  Reading 256 bytes from 0x0\n");
		read_from_eeprom(&eeprom_device_struct, 0, 256);
		break;
	case 'w':
		fprintf(stderr, "  Writing 0x00-0xff into 24C08 \n");
		write_to_eeprom(&eeprom_device_struct, 0);
		break;
	default:
		usage_if(1);
		exit(1);
	}
	eeprom_close(&eeprom_device_struct);

	return 0;
}
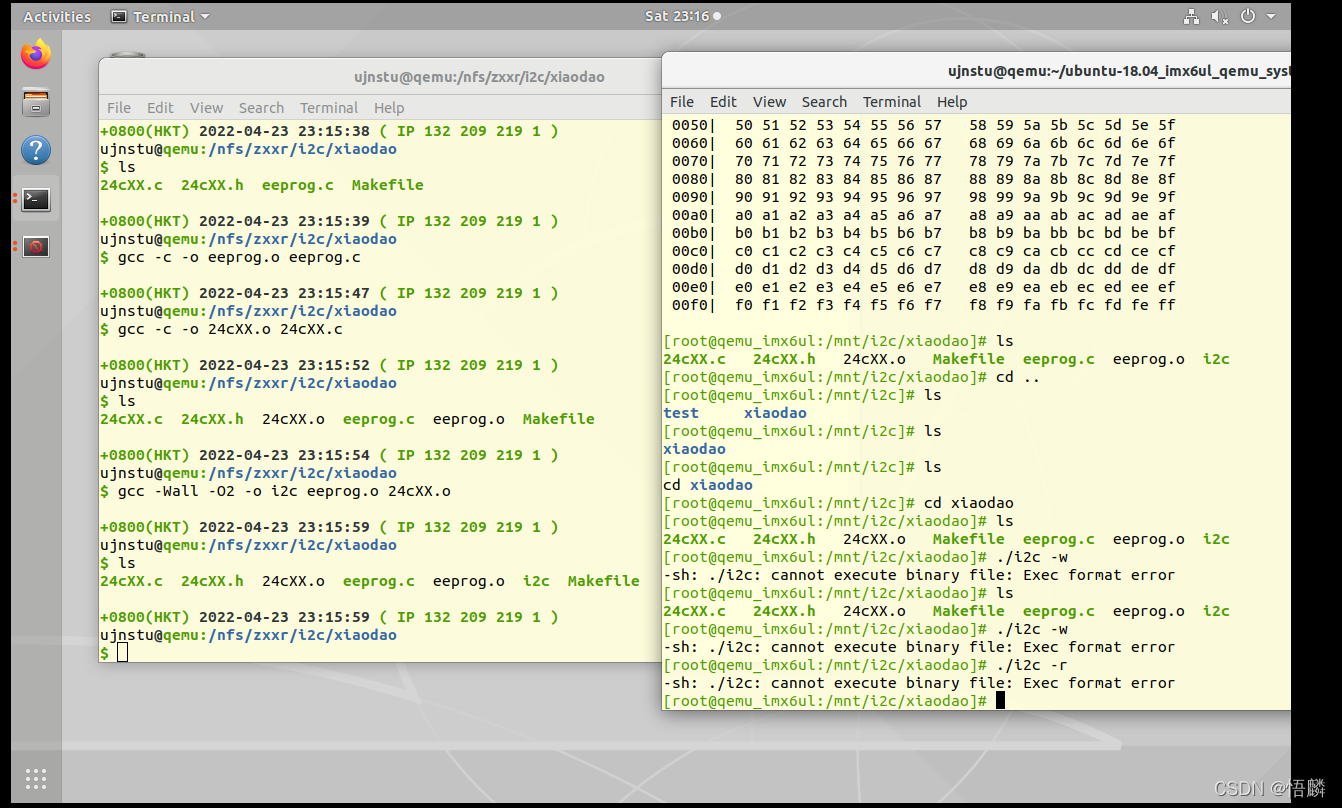
2. gcc(在ubuntu下编译)
- 命令:
gcc -c -o eeprog.o eeprog.c
gcc -c -o 24cXX.o 24cXX.c
gcc -wall -02 -o i2c eeprog.o 24cXX.o  #此i2c不可以在开发板内执行
- 执行命令图片
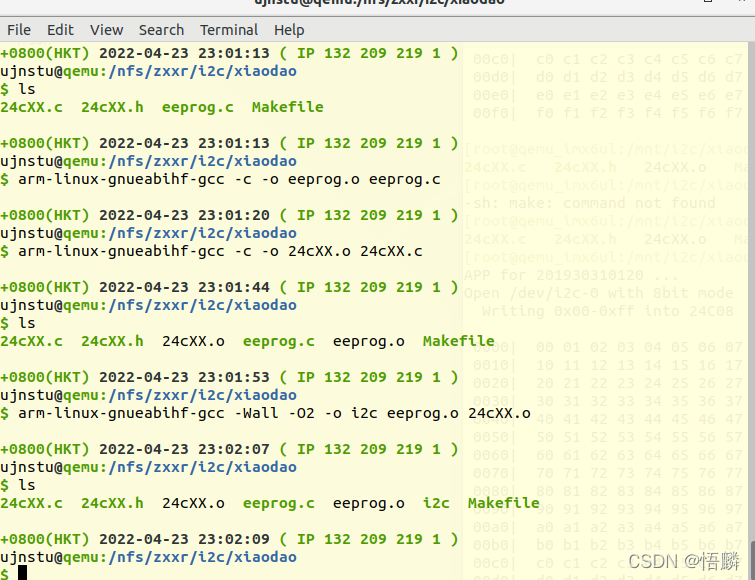
3. 交叉编译(在ubuntu下编译)
- 命令:
arm-linux-gnueabihf-gcc -c -o eeprog.o eeprog.c
arm-linux-gnueabihf-gcc -c -o 24cXX.o 24cXX.c
arm-linux-gnueabihf-gcc -wall -02 -o i2c eeprog.o 24cXX.o  #此i2c可以在开发板内执行
-
执行命令图片
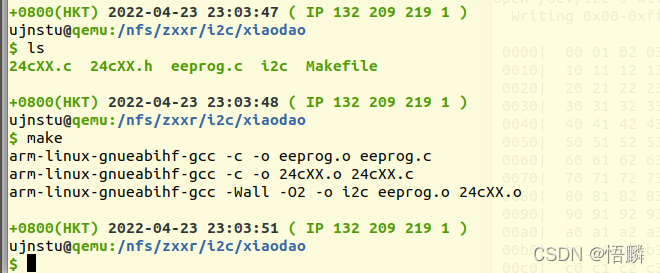
4. make方式编译(在ubuntu下编译)
- 命令
make
- 执行命令图片
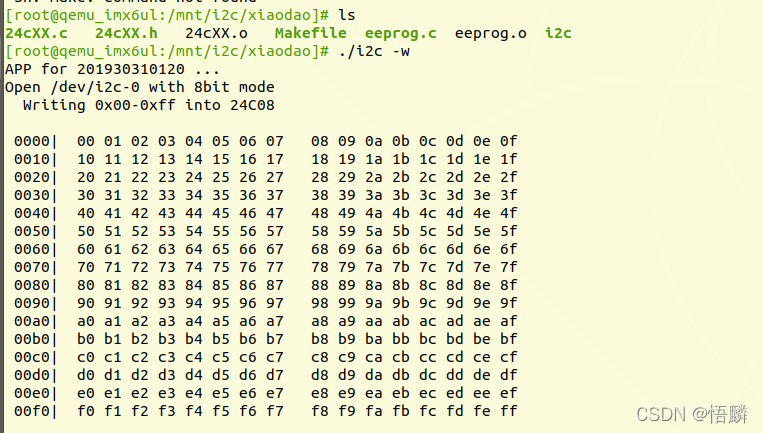
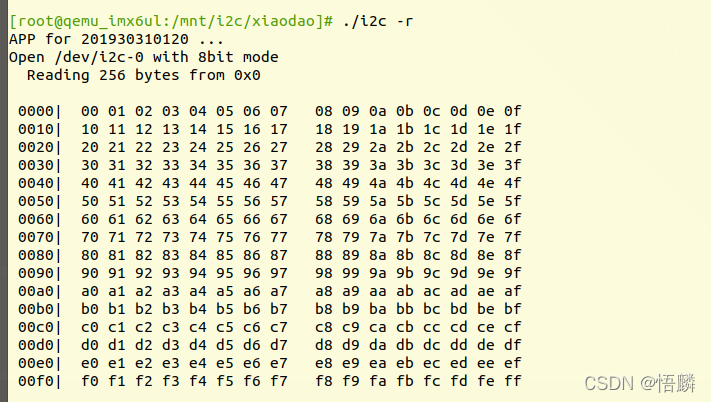
5. 执行i2c文件(在ubuntu下编译)
-
i2c -w
-
i2c -r
git
- 命令:
git clone https://gitee.com/xiaodao_zxxr/i2c-and-cross-gcc-and-qemu-mount-nfs.git
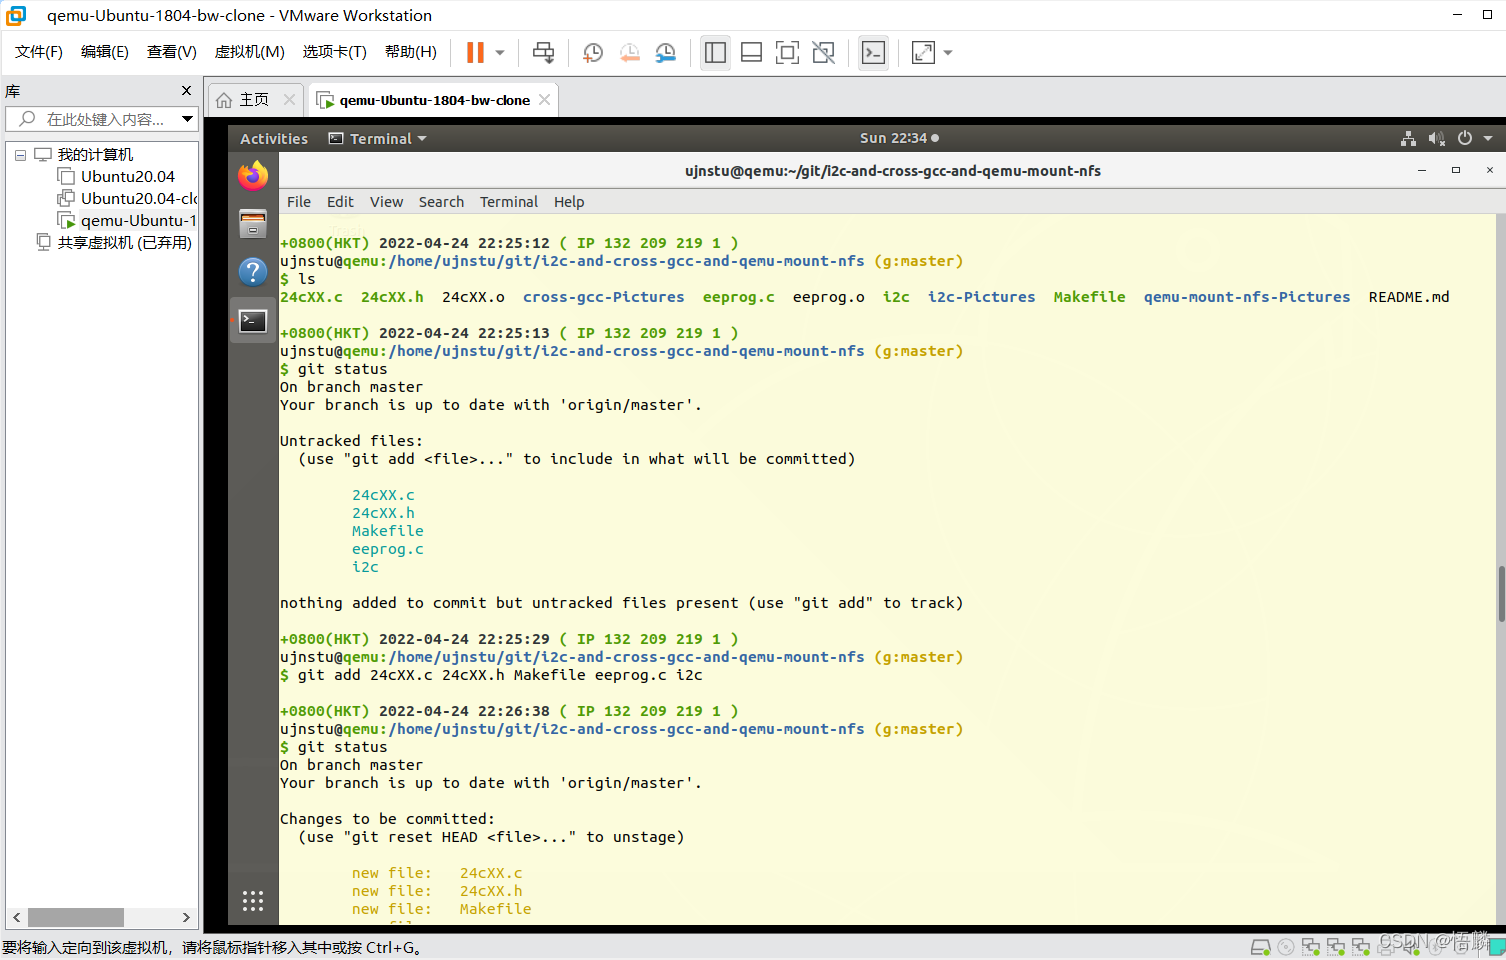
git status
git add Makefile eeprog.c 24cXX.c 24cXX.o
git status
git commit -am'added files'
git status
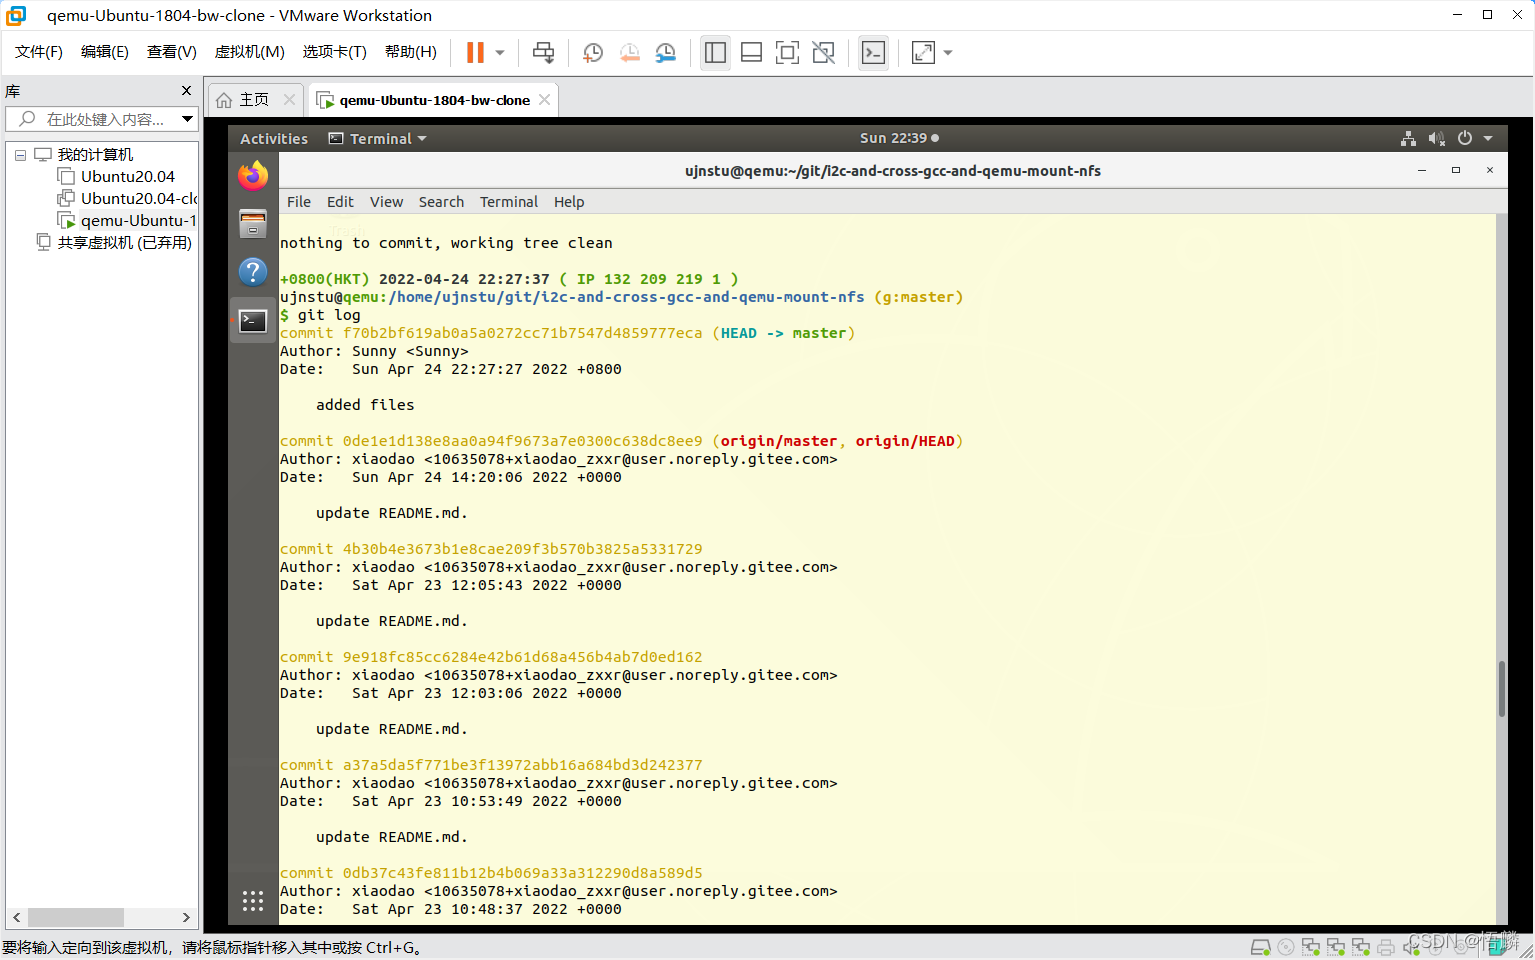
git log
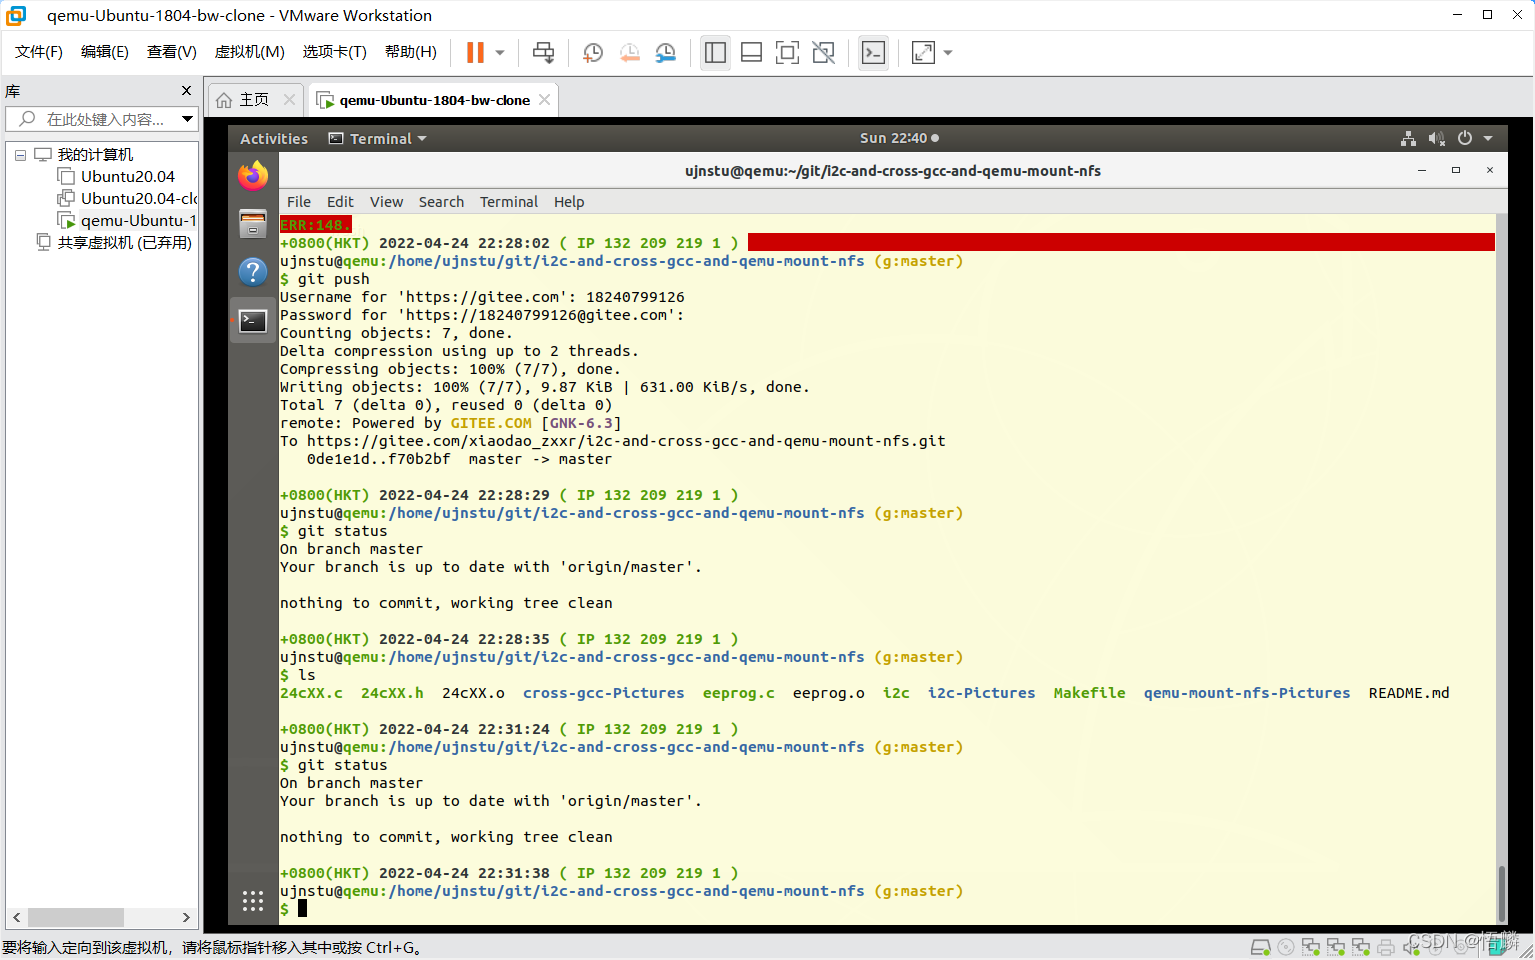
git push
git status
- 执行命令图片

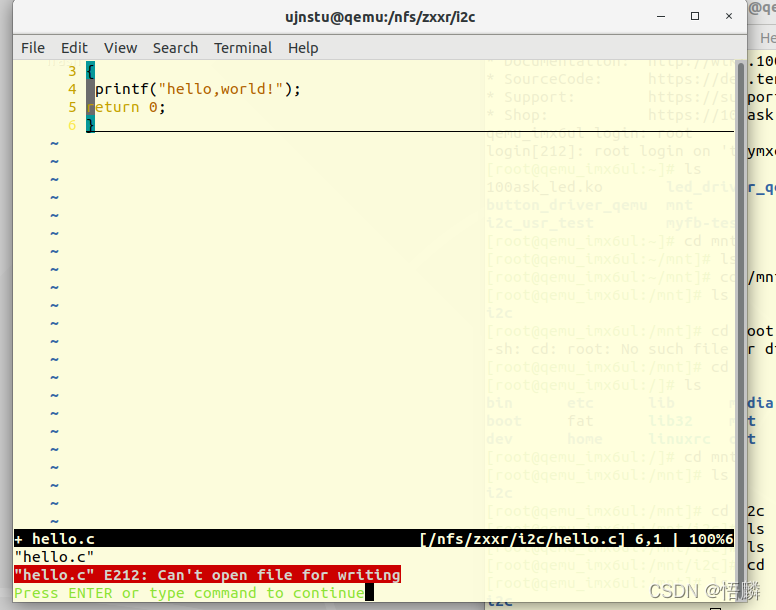
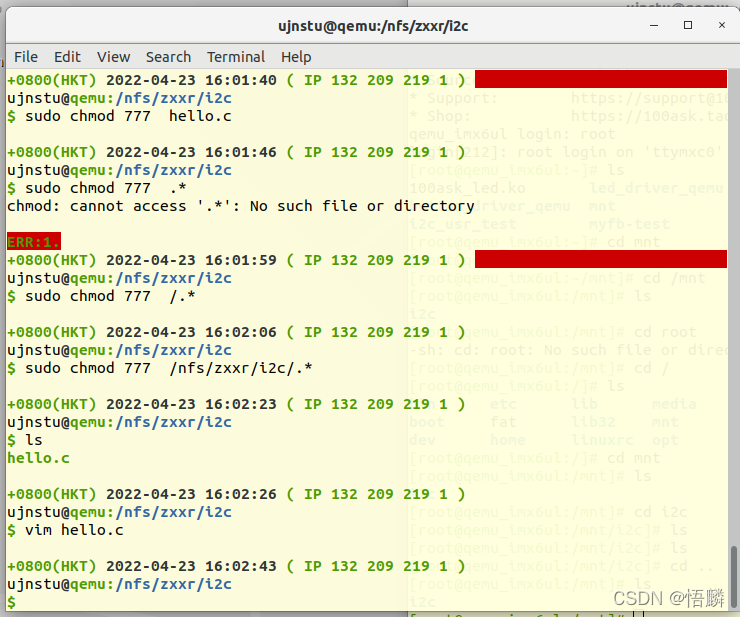
遇到的问题1 (对于.c文件:can’t open file for writing)
-
问题的图片:
-
解决方式:
(1) 末端命令模式下,输入命令 :w ! sudo tee % 保存输入
(2) 继续在末端命令模式下,输入命令 :q! 强制退出
(3) 若想之后的操作不出现同样问题,可以更改文件夹的权限,输入命令 sudo chmod 777 /nfs/zxxr/i2c/.* -
图片:
-
参考:
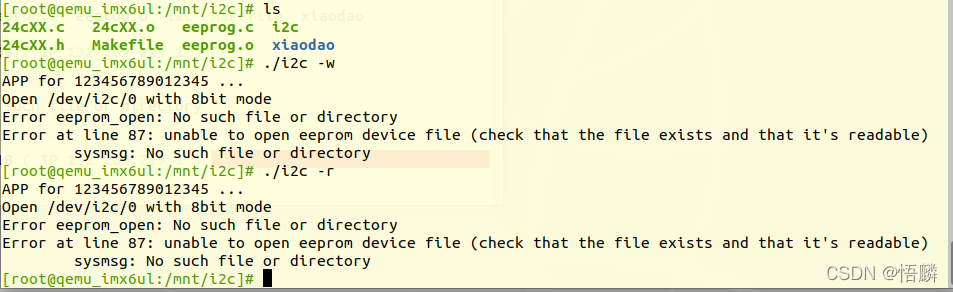
遇到的问题2 (open dev/i2c/0 错误)
- 问题图片:
-
解决问题方式:
把eeprog.c源代码中
#define DEVICE_FILE_STRING "/dev/i2c/0"
改为
#define DEVICE_FILE_STRING "/dev/i2c-0"
-
修改后即可正常执行i2c文件
