场景
Windows上Mqtt服务器搭建与使用客户端工具MqttBox进行测试:
https://blog.csdn.net/BADAO_LIUMANG_QIZHI/article/details/112305328
SpringBoot整合MQTT服务器实现消息的发送与订阅(推送消息与接收推送):
https://blog.csdn.net/BADAO_LIUMANG_QIZHI/article/details/112394731
在上面实现了将MQTT服务器搭建成功并且在SpringBoot中实现消息的发送与订阅。
Android中连接MQTT服务器实现发布一个消息推送给订阅者(附代码下载):
https://blog.csdn.net/BADAO_LIUMANG_QIZHI/article/details/112461516
以及在Android中怎样实现消息的推送,即作为发布者的角色去连接MQTT服务器,那么Android怎样作为订阅者即
接收推送的消息并显示在通知栏中。
效果
注:
博客:
https://blog.csdn.net/badao_liumang_qizhi
关注公众号
霸道的程序猿
获取编程相关电子书、教程推送与免费下载。
实现
首先你需要将MQTT服务器搭建好,参照上面的博客。
然后新建一个Android项目,在build.gradle中引入mqtt依赖
    //mqtt
    implementation 'org.eclipse.paho:org.eclipse.paho.client.mqttv3:1.1.0'
    implementation 'org.eclipse.paho:org.eclipse.paho.android.service:1.1.1'
然后在AndroidManifest.xml中添加网络权限
    <uses-permission android:name="android.permission.INTERNET" />
    <uses-permission android:name="android.permission.ACCESS_NETWORK_STATE" />
在项目包下新建一个mqtt包,然后新建一个service叫MQTTService用来实现项目启动后连接到mqtt服务器的一些初始化操作并且实现订阅主题的操作。
package com.badao.androidmqttsubscribeclient.mqtt;

import android.app.Service;
import android.content.Intent;
import android.os.IBinder;
import android.util.Log;

import androidx.annotation.Nullable;

import org.eclipse.paho.client.mqttv3.MqttClient;
import org.eclipse.paho.client.mqttv3.MqttConnectOptions;
import org.eclipse.paho.client.mqttv3.MqttException;
import org.eclipse.paho.client.mqttv3.persist.MemoryPersistence;
public class MQTTService extends Service {
    private static final String TAG = "MQTTService";
    public static final String BROKER_URL = "tcp://你自己的MQTT服务器ip:1883";
    public static final String CLIENT_ID = "gongzhonghaobadaodecehngxvyuan";
    //订阅的主题
    public static final String TOPIC = "badaodechengxvyuan";
    public static MqttClient mqttClient;
    //mqtt连接配置
    private MqttConnectOptions mqttOptions;
    private String username = "admin";
    private String password = "admin";

    public MQTTService() {

    }

    @Nullable
    @Override
    public IBinder onBind(Intent intent) {
        return null;
    }

    @Override
    public int onStartCommand(Intent intent, int flags, int startId) {
        Log.i(TAG, "onStartCommand: begin");

        try {
            //第三个参数代表持久化客户端,如果为null,则不持久化
            mqttClient = new MqttClient(BROKER_URL, CLIENT_ID, new MemoryPersistence());
            //mqtt连接设置
            mqttOptions = new MqttConnectOptions();
            mqttOptions.setUserName(username);
            mqttOptions.setPassword(password.toCharArray());
            //超时连接,单位为秒
            mqttOptions.setConnectionTimeout(10);
            mqttOptions.setKeepAliveInterval(20);
            //false代表可以接受离线消息
            mqttOptions.setCleanSession(false);
            mqttOptions.setAutomaticReconnect(true);
            // 设置回调
            mqttClient.setCallback(new PushCallback(mqttClient));
            Log.i(TAG, "onStartCommand: before connect");
            //客户端下线,其它客户端或者自己再次上线可以接收"遗嘱"消息
//            MqttTopic topic1 = mqttClient.getTopic(TOPIC);
//            mqttOptions.setWill(topic1, "close".getBytes(), 2, true);
            mqttClient.connect(mqttOptions);
            Log.i(TAG, "onStartCommand: after connect");
            Log.i(TAG, "连接mqtt服务器成功");

            //mqtt客户端订阅主题
            //在mqtt中用QoS来标识服务质量
            //QoS=0时,报文最多发送一次,有可能丢失
            //QoS=1时,报文至少发送一次,有可能重复
            //QoS=2时,报文只发送一次,并且确保消息只到达一次。
            int[] qos = {1};
            String[] topic = {TOPIC};
            mqttClient.subscribe(topic, qos);

        } catch (MqttException e) {
            e.printStackTrace();
            Log.i(TAG, e.getMessage());
        }
        return super.onStartCommand(intent, flags, startId);
    }

    @Override
    public void onDestroy() {
        try {
            mqttClient.disconnect();
        } catch (MqttException e) {
            e.printStackTrace();
        }
    }
}
把上面的mqtt服务器的地址改为你自己的地址。
在这里还设置了回调处理类PushCallback用来实现在接收到消息后进行通知栏通知的操作。
为了实现在回调方法中通知到主线程去进行通知栏通知,这里用到了Eventbus来实现传递消息的操作。
所以还需要在项目中引入Eventbus
    //Event bus用来传递消息
    implementation 'org.greenrobot:eventbus:3.0.0'
然后新建上面设置的回调处理类PushCallback
package com.badao.androidmqttsubscribeclient.mqtt;

import android.util.Log;

import com.badao.androidmqttsubscribeclient.bean.MessageEvent;

import org.eclipse.paho.client.mqttv3.IMqttDeliveryToken;
import org.eclipse.paho.client.mqttv3.MqttCallbackExtended;
import org.eclipse.paho.client.mqttv3.MqttClient;
import org.eclipse.paho.client.mqttv3.MqttMessage;
import org.greenrobot.eventbus.EventBus;


public class PushCallback implements MqttCallbackExtended {
    private static final String TAG = "PusherCallback";
    private MqttClient mqttClient = null;

    public PushCallback(MqttClient client) {
        mqttClient = client;
    }

    @Override
    public void connectionLost(Throwable cause) {
        Log.i(TAG, "连接失败");
    }

    @Override
    public void messageArrived(String topic, MqttMessage message) throws Exception {
        String msg = new String(message.getPayload());
        Log.i(TAG, "消息到达,message: " + msg);
        EventBus.getDefault().postSticky(new MessageEvent(msg));
    }

    @Override
    public void deliveryComplete(IMqttDeliveryToken token) {
        Log.i(TAG, "消息成功发送");

    }

    @Override
    public void connectComplete(boolean reconnect, String serverURI) {
        Log.i(TAG, "连接完成");

    }
}
在回调处理类的收到消息的回调方法中通过
EventBus.getDefault().postSticky(new MessageEvent(msg));来实现EventBus的消息的发布,这里的参数是根据官方文档指示的新建的一个消息事件实体对象
package com.badao.androidmqttsubscribeclient.bean;

public class MessageEvent {
    private String message;

    public MessageEvent(String message) {
        this.message = message;
    }

    public String getMessage() {
        return message;
    }

    public void setMessage(String message) {
        this.message = message;
    }
}
然后为了实现消息的传递,还需要在MainActivity中进行注册事件,即在需要订阅的地方注册事件
还需要在MainActivity中设置事件的处理
    //处理事件
    @Subscribe(threadMode = ThreadMode.MAIN, sticky = true)
    public void showTheEventMessage(MessageEvent messageEvent) {
        Log.i(TAG, "showTheEventMessage: show notification");
        showNotification(this, messageEvent.getMessage());
    }
在事件的处理中调用了showNotification方法,这个方法是实现在通知栏显示通知消息的
然后方法的具体实现
    public void showNotification(Context context, String content) {
        //1.创建通知管理器
        NotificationManager notificationManager = (NotificationManager) getSystemService(NOTIFICATION_SERVICE);
        NotificationCompat.Builder builder;
        Log.i(TAG, "showNotification:version: " + Build.VERSION.SDK_INT);
        if (Build.VERSION.SDK_INT >= Build.VERSION_CODES.O) {//Android 8.0版本适配
            NotificationChannel channel = new NotificationChannel("default", "default", NotificationManager.IMPORTANCE_HIGH);
            notificationManager.createNotificationChannel(channel);
            builder = new NotificationCompat.Builder(context, "default");
        } else {
            builder = new NotificationCompat.Builder(context);
        }

        Intent intent = new Intent(this, MsgDetailsActivity.class);
        intent.putExtra("msgContent",content);
        //2.创建通知实例
        Notification notification = builder
                .setContentTitle("通知标题")
                .setContentText(content)
                .setWhen(System.currentTimeMillis())
                //smallIcon 通知栏显示小图标
                //android5.0 之后通知栏图标都修改了,小图标不能含有RGB图层,也就是说图片不能带颜色,否则显示的就成白色方格了
                //解决方法一:为图片带颜色,targetSdkVersion改为21以下
                //解决方法二:只能用白色透明底的图片
                .setSmallIcon(R.mipmap.ic_launcher)
                //LargeIcon 下拉后显示的图标
                .setLargeIcon(BitmapFactory.decodeResource(getResources(), R.mipmap.ic_launcher))
                //收到通知时的效果,这里是默认声音
                .setDefaults(Notification.DEFAULT_SOUND)
                .setAutoCancel(true)
                .setContentIntent(PendingIntent.getActivity(context, 0, intent, PendingIntent.FLAG_CANCEL_CURRENT))
                .build();
        //3.notify
        //notifyId每次要不一致,不然下一次的通知会覆盖上一次
        int notifyId = new Random().nextInt();
        notificationManager.notify(notifyId, notification);
    }
为了实现点击通知栏的消息跳转到消息详情并携带消息内容过去
新建一个MsgDetailsActivity,并添加一个TextView
    <TextView
        android:id="@+id/msg_TextView"
        android:layout_width="match_parent"
        android:layout_height="wrap_content"/>
然后通过
        Intent intent = new Intent(this, MsgDetailsActivity.class);
        intent.putExtra("msgContent",content);
传递参数,在MsgDetailsActivity中接收传递过来的参数并显示
@Override
protected void onCreate(Bundle savedInstanceState) {
super.onCreate(savedInstanceState);
setContentView(R.layout.activity_msg_details);
String msgContent = getIntent().getStringExtra("msgContent");
TextView textView = findViewById(R.id.msg_TextView);
textView.setText(msgContent);
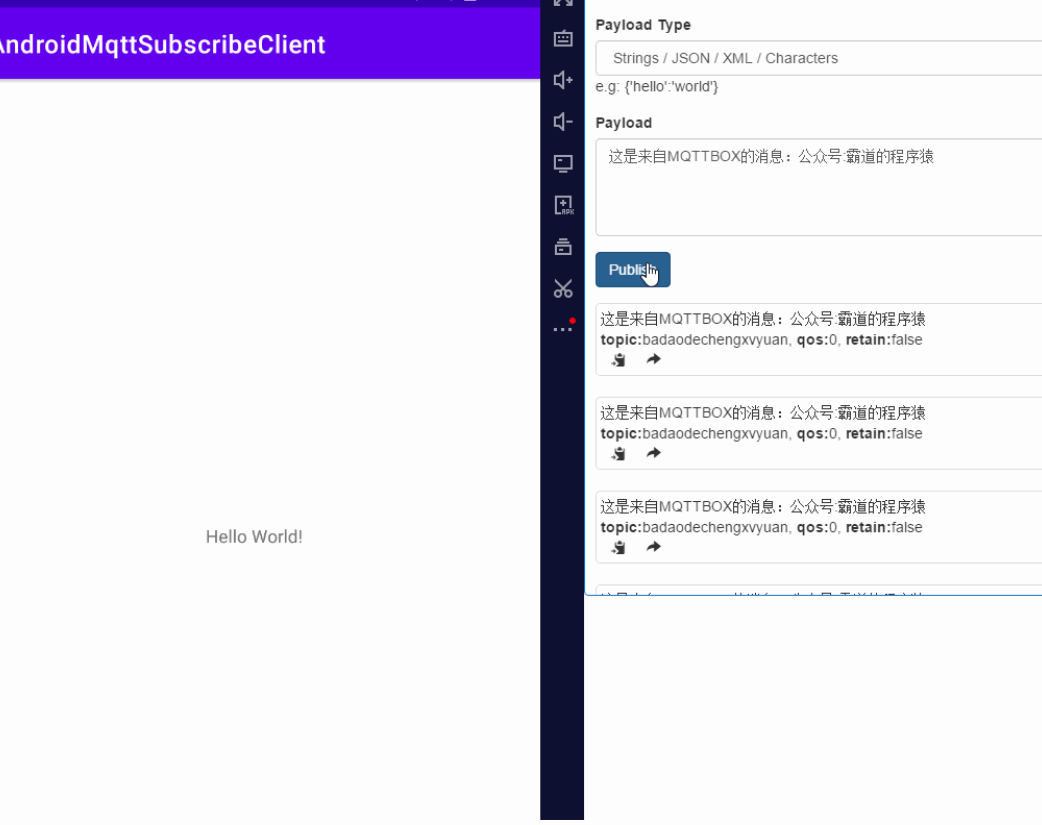
}然后运行app并且使用MqttBox发布一个相同主题的消息

可以看到在收到消息的回调方法已经执行。
示例代码下载
https://download.csdn.net/download/BADAO_LIUMANG_QIZHI/14109723