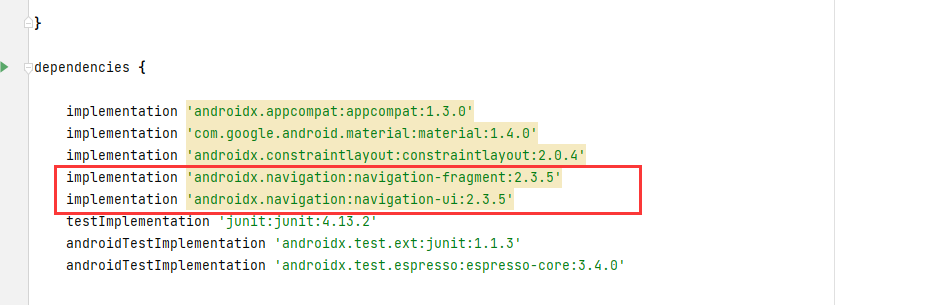
1.在build.gradle中添加依赖
implementation'androidx.navigation:navigation-fragment:2.3.5'
implementation'androidx.navigation:navigation-ui:2.3.5'
点击sync now
2.在res新建两个package:menu和navigation
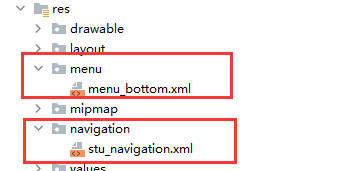
添加两个xml文件:menu_bottom.xml和stu_navigation.xml
3.menu_bottom.xml(android:icon随意放就可以)
<?xmlversion="1.0"encoding="utf-8"?>
<menuxmlns:android="http://schemas.android.com/apk/res/android">
<item
android:id="@+id/navigation_plan"
android:icon="@mipmap/plan"
android:title="计划"/>
<item
android:id="@+id/navigation_callback"
android:icon="@mipmap/request"
android:title="反馈"/>
<item
android:id="@+id/navigation_mine"
android:icon="@mipmap/mine"
android:title="我的"/>
</menu>
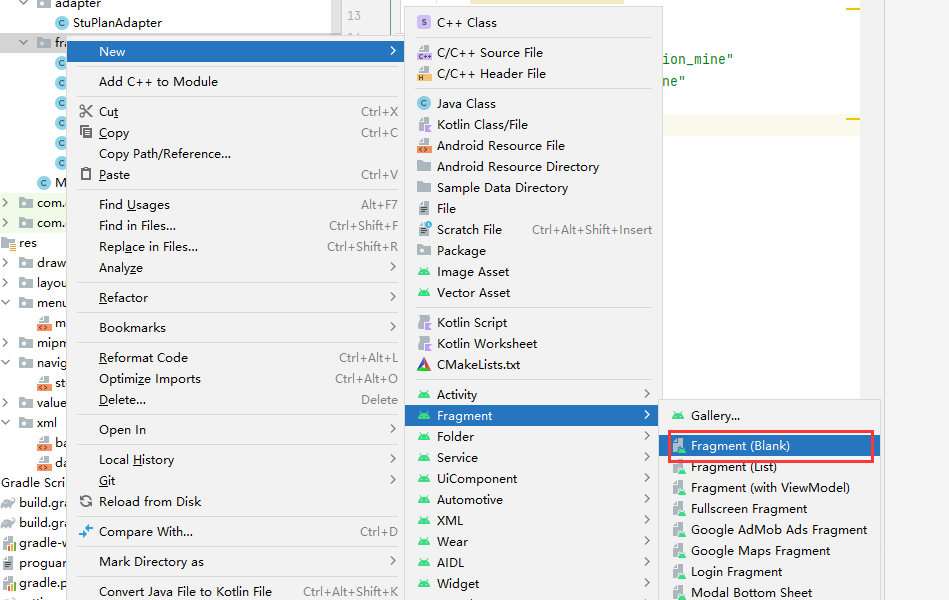
4.新建需要添加的item的fragment,并在stu_navigation.xml中进行绑定新建好的三个fragment
5.stu_navigation.xml
<?xmlversion="1.0"encoding="utf-8"?>
<navigationxmlns:android="http://schemas.android.com/apk/res/android"
xmlns:app="http://schemas.android.com/apk/res-auto"
xmlns:tools="http://schemas.android.com/tools"
android:id="@+id/mobile_navigation"
app:startDestination="@+id/navigation_plan">
<fragment
android:id="@+id/navigation_plan"
android:name="com.gty.studyefficiencymanager.fragment.StuPlanFragment"
tools:layout="@layout/fragment_stu_plan"/>
<fragment
android:id="@+id/navigation_callback"
android:name="com.gty.studyefficiencymanager.fragment.StuCallbackFragment"
tools:layout="@layout/fragment_stu_callback"/>
<fragment
android:id="@+id/navigation_mine"
android:name="com.gty.studyefficiencymanager.fragment.StuMineFragment"
tools:layout="@layout/fragment_stu_mine"/>
</navigation>
6.activity_main.xml
<?xml version="1.0" encoding="utf-8"?>
<androidx.constraintlayout.widget.ConstraintLayout xmlns:android="http://schemas.android.com/apk/res/android"
    xmlns:app="http://schemas.android.com/apk/res-auto"
    xmlns:tools="http://schemas.android.com/tools"
    android:layout_width="match_parent"
    android:layout_height="match_parent"
    tools:context=".MainActivity">
    <!-- 底部导航栏 -->
    <com.google.android.material.bottomnavigation.BottomNavigationView
        android:id="@+id/nav_stu_view"
        android:layout_width="0dp"
        android:layout_height="wrap_content"
        android:layout_marginStart="0dp"
        android:background="?android:windowBackground"
        android:layout_marginEnd="0dp"
        app:layout_constraintBottom_toBottomOf="parent"
        app:layout_constraintLeft_toLeftOf="parent"
        app:layout_constraintRight_toRightOf="parent"
        app:menu="@menu/menu_bottom" />

    <!-- 页面中显式fragment的容器-->
    <fragment
        android:id="@+id/nav_stu_fragment"
        android:name="androidx.navigation.fragment.NavHostFragment"
        android:layout_width="match_parent"
        android:layout_height="match_parent"
        app:defaultNavHost="true"
        app:layout_constraintBottom_toTopOf="@id/nav_stu_view"
        app:layout_constraintLeft_toLeftOf="parent"
        app:layout_constraintRight_toRightOf="parent"
        app:layout_constraintTop_toTopOf="parent"
        app:navGraph="@navigation/stu_navigation" />

</androidx.constraintlayout.widget.ConstraintLayout>
7.MainActivity.java
public class MainActivity extends AppCompatActivity {

    @Override
    protected void onCreate(Bundle savedInstanceState) {
        super.onCreate(savedInstanceState);
        setContentView(R.layout.activity_main);

        BottomNavigationView navigationView = findViewById(R.id.nav_stu_view);

        // 配置navigation与底部菜单之间的联系
        // 底部菜单的样式里面的item里面的ID与navigation布局里面指定的ID必须相同,否则会出现绑定失败的情况
        AppBarConfiguration appBarConfiguration = new AppBarConfiguration.Builder(
                R.id.navigation_plan,R.id.navigation_callback,R.id.navigation_mine)
                .build();
        // 建立fragment容器的控制器,这个容器就是页面的上的fragment容器
        NavController navController = Navigation.findNavController(this, R.id.nav_stu_fragment);

        // 启动
        NavigationUI.setupActionBarWithNavController(MainActivity.this, navController, appBarConfiguration);
        NavigationUI.setupWithNavController(navigationView, navController);
    }
}
7.运行即可实现功能

版权声明:本文为m0_59533802原创文章,遵循 CC 4.0 BY-SA 版权协议,转载请附上原文出处链接和本声明。