目录
引言
Python Requests库是Python语言中最为流行的HTTP客户端库之一。它提供了简单易用的API,让发送HTTP/1.1请求变得异常容易,支持常见的HTTP操作(例如GET、POST、PUT、DELETE等),同时还能够自动处理Cookie、Headers等信息。
如果你想在Python开发中使用HTTP协议进行数据交换,Requests库绝对是不可或缺的选择。不论你是初学者还是有经验的开发人员,本文都将从浅入深地解析Python Requests库,并带领读者逐步掌握其全部技能。
让我们一起来探索这个强大而又方便的Python HTTP客户端库吧!

安装
requests库是一个开源的库,我们可以在GitHub中随时获取源代码。——
github地址
同时requests也提供了不错的官方文档https://requests.readthedocs.io/zh_CN/latest/
通过官方的仓库我们可以了解到。目前最新的版本支持的是python版本是
2.7 3.5 3.6 3.7 3.8
。
所以在安装之前一定要确认一下自己的python版本是否能够支持。
python安装库非常的简单,我们直接通过pip来安装requests库。
pip install requests
安装好之后我们先来测试一下。
首先我们进入ipython的交互环境。打开一下百度的网页的。
In [1]: import requests
In [2]: r = requests.get('https://www.baidu.com')
In [3]: r.text
Out[3]: '<!DOCTYPE html>\r\n<!--STATUS OK--><html> <head><meta http-equiv=content-type content=text/html;charset=utf-8><meta http-equiv=X-UA-Compatible content=IE=Edge><meta content=always name=referrer><link rel=stylesheet type=text/css href=https://ss1.bdstatic.com/5eN1bjq8AAUYm2zgoY3K/r/www/cache/bdorz/baidu.min.css><title>ç\x99¾åº¦ä¸\x80ä¸\x8bï¼\x8cä½\xa0å°±ç\x9f¥é\x81\x93</title></head> <body link=#0000cc> <div id=wrapper> <div id=head> <div class=head_wrapper> <div cl
ass=s_form> <div class=s_form_wrapper> <div id=lg> <img hidefocus=true src=//www.baidu.com/img/bd_logo1.png width=270 height=129> </div> <form id=form name=f action=//www.baidu.com/s class=fm> <input type=hidden name=bdorz_come value=1> <input type=hidden name=ie value=utf-8> <input type=hidden name=f value=8> <input type=hidden name=rsv_bp value=1> <input type=hidden name=rsv_idx value=1> <input type=hidden name=tn value=baidu><span class="bg s_ipt_wr"><input id=kw name=wd class=s_ipt value maxlength=255 autocomplete=off autofocus=autofocus></span><span class="bg s_btn_wr"><input type=submit id=su value=ç\x99¾åº¦ä¸\x80ä¸\x8b class="bg s_btn" autofocus></span> </form> </div> </div> <div id=u1> <a href=http://news.baidu.com name=tj_trnews class=mnav>æ\x96°é\x97»</a> <a href=https://www.hao123.com name=tj_trhao123 class=mnav>hao1 23</a> <a href=http://map.baidu.com name=tj_trmap class=mnav>å\x9c°å\x9b¾</a> <a href=http://v.baidu.com name=tj_trvide o class=mnav>è§\x86é¢\x91</a> <a href=http://tieba.baidu.com name=tj_trtieba class=mnav>è´´å\x90§</a> <noscript> <a hr
ef=http://www.baidu.com/bdorz/login.gif?login&tpl=mn&u=http%3A%2F%2Fwww.baidu.com%2f%3fbdorz_come%3d1 name=tj_login class=lb>ç\x99»å½\x95</a> </noscript> <script>document.write(\'<a href="http://www.baidu.com/bdorz/login.gif?login&tpl=mn&u=\'+ encodeURIComponent(window.location.href+ (window.location.search === "" ? "?" : "&")+ "bdorz_come=1")+ \'" name="tj_login" class="lb">ç\x99»å½\x95</a>\');\r\n </script> <a href=//www.baidu.com/more/ name=tj_briicon class=bri style="display: block;">æ\x9b´å¤\x9a产å\x93\x81</a> </div> </div> </div> <div id=ftCon> <div id=ftConw> <
p id=lh> <a href=http://home.baidu.com>å\x85³äº\x8eç\x99¾åº¦</a> <a href=http://ir.baidu.com>About Baidu</a> </p> <p id=cp>©2017 Baidu <a href=http://www.baidu.com/duty/>使ç\x94¨ç\x99¾åº¦å\x89\x8då¿\x85读</a> <a href =http://jianyi.baidu.com/ class=cp-feedback>æ\x84\x8fè§\x81å\x8f\x8dé¦\x88</a> 京ICPè¯\x81030173å\x8f· <im
g src=//www.baidu.com/img/gs.gif> </p> </div> </div> </div> </body> </html>\r\n'
可以看到我们的通过导入的requests库,仅仅三行代码,就通过get方法成功的返回了百度首页的数据。使用起来十分方便。
启动用户管理项目
在开始之前我们先把我们之前编写的用户管理API启动一下。

好了成功启动了我们开始把。
GET请求
用户管理接口一共有三种表现形式。我们分别使用requests来请求试试。还是进入ipython的交互环境。
-
/user/
In [85]: r = requests.get('http://127.0.0.1:8000/user/')

In [86]: r.text
Out[86]: '{"code": 200, "message": "success", "data": [{"id": 3, "name": "\\u968f\\u98ce\\u6325\\u624b", "sex": 1, "idcard": "123", "email": "1084502012@qq.com", "address": "123", "company": "123", "created_time": "2020-11-11T14:33:12.869Z"}]}'
可以看到我们的这个是什么成功返回了,但是格式好像不太正确,被单引号圈起来了,因为text返回的是一个文本字符串的格式。
但是我们的接口返回的是一个json格式的。
所以我们需要获取json数据。
In [87]: r.json()
Out[87]:
{'code': 200,
 'message': 'success',
 'data': [{'id': 3,
   'name': '锦都不二',
   'sex': 1,
   'idcard': '123',
   'email': '1084502012@qq.com',
   'address': '123',
   'company': '123',
   'created_time': '2020-11-11T14:33:12.869Z'}]}
可以看到这样就成功的返回了json格式的数据。
-
/user/1/
In [10]: r = requests.get('http://127.0.0.1:8000/user/3/') In [11]: r.json() Out[11]: {'code': 200, 'message': 'success', 'data': {'id': 3, 'name': '锦都不二', 'sex': 1, 'idcard': '123', 'email': '1084502012@qq.com', 'address': '123', 'company': '123'}} -
/user/?name=随风
那么这个参数是怎么去访问呢。get方法是可以在后面通过
?key=value&key2=value2
的一个方式来进行请求的,那么我们先来看看这样的一个方式怎么样来进行的呢。In [12]: r = requests.get('http://127.0.0.1:8000/user/?name=随风') In [13]: r.json() Out[13]: {'code': 200, 'message': 'success', 'data': [{'id': 3, 'name': '锦都不二', 'sex': 1, 'idcard': '123', 'email': '1084502012@qq.com', 'address': '123', 'company': '123', 'created_time': '2020-11-11T14:33:12.869Z'}]}可以看到直接把参数附加在请求地址的后面也可以进行访问。
那有没有更加简便的方法呢。在requests库中提供了一个更加简单的方法。
首先我们阅读一下requests库的源码。下图。可以看到有一个
params
参数,通过这个参数呢。def get(url, params=None, **kwargs): r"""Sends a GET request. :param url: URL for the new :class:`Request` object. :param params: (optional) Dictionary, list of tuples or bytes to send in the query string for the :class:`Request`. :param \*\*kwargs: Optional arguments that ``request`` takes. :return: :class:`Response <Response>` object :rtype: requests.Response """ kwargs.setdefault('allow_redirects', True) return request('get', url, params=params, **kwargs)那我们来试试这种方式把。
In [17]: payload = {'name':'不二'}

In [18]: r = requests.get('http://127.0.0.1:8000/user/',params=payload)

In [19]: r.json()
Out[19]:
{'code': 200,
 'message': 'success',
 'data': [{'id': 3,
   'name': '锦都不二',
   'sex': 1,
   'idcard': '123',
   'email': '1084502012@qq.com',
   'address': '123',
   'company': '123',
   'created_time': '2020-11-11T14:33:12.869Z'}]}
可以看到这种方式更简洁清晰明了。推荐使用这种方式。
当然同时也支持一个键多个值的同时查找,需要在键值对中指定值为列表的方式。
In [20]: payload = {'name':['不','二']}

In [21]: r = requests.get('http://127.0.0.1:8000/user/',params=payload)

In [22]: r.json()
Out[22]:
{'code': 200,
 'message': 'success',
 'data': [{'id': 3,
   'name': '锦都不二',
   'sex': 1,
   'idcard': '123',
   'email': '1084502012@qq.com',
   'address': '123',
   'company': '123',
   'created_time': '2020-11-11T14:33:12.869Z'}]}
POST请求
post请求一般都是提交一个表单,在requests的post请求中提供了两个参数。看下源码吧。
def post(url, data=None, json=None, **kwargs):
    r"""Sends a POST request.

    :param url: URL for the new :class:`Request` object.
    :param data: (optional) Dictionary, list of tuples, bytes, or file-like
        object to send in the body of the :class:`Request`.
    :param json: (optional) json data to send in the body of the :class:`Request`.
    :param \*\*kwargs: Optional arguments that ``request`` takes.
    :return: :class:`Response <Response>` object
    :rtype: requests.Response
    """

    return request('post', url, data=data, json=json, **kwargs)
分别是
data
和
json
,这两个都是传递参数的。其中data传的是表单参数,而json传递的是content_type=application/json的数据类型的。所以我们先来试试吧。先试一下json参数的post请求。
In [32]: data = {'name':'锦都不二11','sex':1,'idcard':'1234567','email':'1084502012@qq.com','address':'123','company'
    ...: :'123'}

In [33]: r = requests.post('http://127.0.0.1:8000/user/',json=data)

In [34]: r.json()
Out[34]:
{'code': 201,
 'message': 'created',
 'data': {'id': 4,
  'name': '锦都不二11',
  'sex': 1,
  'idcard': '1234567',
  'email': '1084502012@qq.com',
  'address': '123',
  'company': '123'}}
可以看到使用json参数成功的创建了一个新的用户。然后我们使用data参数来试试。
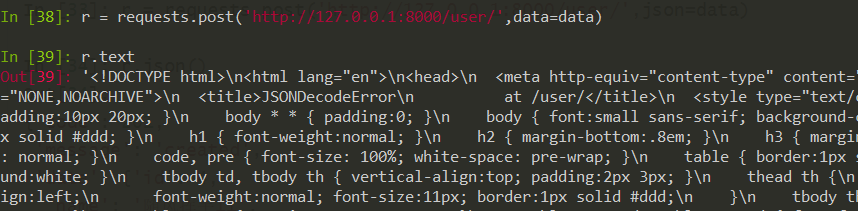
可以看到报错了,因为我编写的接口不支持非json格式数据的提交。这个报错太长了,所以我这里直接截图了。
那么我们怎么使用这个data参数呢。我手里面也没有合适的示例,直接用
官方
的演示吧。
In [40]: payload = {'key1': 'value1', 'key2': 'value2'}

In [41]: r = requests.post("http://httpbin.org/post", data=payload)

In [42]: r.text
Out[42]: '{\n  "args": {}, \n  "data": "", \n  "files": {}, \n  "form": {\n    "key1": "value1", \n    "key2": "value2"\n  }, \n  "headers": {\n    "Accept": "*/*", \n    "Accept-Encoding": "gzip, deflate", \n    "Content-Length": "23", \n    "Content-Type": "application/x-www-form-urlencoded", \n    "Host": "httpbin.org", \n    "User-Agent": "python-requests/2.24.0", \n    "X-Amzn-Trace-Id": "Root=1-5fabff48-70ea1f742434542615593b4b"\n  }, \n  "json": null, \n  "origin": "39.144.1.194", \n  "url": "http://httpbin.org/post"\n}\n'
这样通过data参数就成功提交了一个表单参数。
PUT请求
def put(url, data=None, **kwargs):
    r"""Sends a PUT request.

    :param url: URL for the new :class:`Request` object.
    :param data: (optional) Dictionary, list of tuples, bytes, or file-like
        object to send in the body of the :class:`Request`.
    :param json: (optional) json data to send in the body of the :class:`Request`.
    :param \*\*kwargs: Optional arguments that ``request`` takes.
    :return: :class:`Response <Response>` object
    :rtype: requests.Response
    """

    return request('put', url, data=data, **kwargs)
然后我们试一下put请求得一个方式。
In [51]: r = requests.put('http://127.0.0.1:8000/user/4/',json=data)

In [52]: r.json()
Out[52]:
{'code': 200,
 'message': 'updated',
 'data': {'id': 4,
  'name': '锦都不二11111',
  'sex': 1,
  'idcard': '1234567',
  'email': '1084502012@qq.com',
  'address': '123',
  'company': '123'}}
可以看到数据成功更新了。
DELETE方法
delete方法源码
def delete(url, **kwargs):
    r"""Sends a DELETE request.

    :param url: URL for the new :class:`Request` object.
    :param \*\*kwargs: Optional arguments that ``request`` takes.
    :return: :class:`Response <Response>` object
    :rtype: requests.Response
    """

    return request('delete', url, **kwargs)
删除刚才创建的数据试试。
In [63]: r = requests.delete('http://127.0.0.1:8000/user/5/')

In [64]: r.status_code
Out[64]: 204
因为delete是删除方法,所以我们只需要查看一下它的状态码是204即可。至此我们的四种请求方式就说完了。
requests响应
在代码里面我们使用的
r.text
和
r.json()
都是requests提供的响应方法。
我们结合官方文档在这里总结一下常用的响应结果吧。
| 方法 | 描述 |
|---|---|
| r.text | Requests 会自动解码来自服务器的内容。大多数 unicode 字符集都能被无缝地解码。 |
| r.json() | 返回json数据,如果数据不符合json格式规范,则会抛出异常 |
| r.encoding | 查看返回的数据使用了什么编码 |
| r.content | 使用字节的方式返回数据,通常用于图片等 |
| r.status_code | 返回服务器响应的状态码,如200,400,500 |
| r.raw | 返回响应的原始内容 |
| r.headers | 返回服务器的响应头 |
| r.url | 返回请求的地址数据 |
| r.history | 返回请求的历史记录 |
这些都是requests库响应内容提供的一些方法。
Session请求
session意思就是会话,在很多的场景中都是存在依赖关系的,比如我之前些的接口测试框架中智学网的接口就是我需要先登录才可以访问其他的接口,那么我必须保持这登录结果传到下一个请求中,在这里举这个例子可能不是很恰当,因为这个示例的token是通过请求体传递的。
所以我们来看看官方的一个示例把。
import requests
s = requests.Session()

r1 = s.get('http://httpbin.org/cookies/set/sessioncookie/123456789')
print(r1.text)
#out: '{"cookies": {"sessioncookie": "123456789"}}'

r2 = s.get("http://httpbin.org/cookies")
print(r2.text)
#out '{"cookies": {"sessioncookie": "123456789"}}'
没有使用session会话保持的方式:
import requests
r1 = requests.get('http://httpbin.org/cookies/set/sessioncookie/123456789')
print(r1.text)
#out: '{"cookies": {"sessioncookie": "123456789"}}'

r2 = requests.get("http://httpbin.org/cookies")
print(r2.text)
#out '{"cookies": {}}'
由于手头没有示例,所以只能继续先拿
官方
的示例来敷衍一下了。。。如果谁有好的网站可以分享一下。
为什么Session类可以保持会话
那么为什么session方法能够保持会话呢,而requests普通的
get
和
post
等方法不能保持会话呢。那我们就得来探究下requests的内部是怎么实现的。回顾上文的get方法源码,我们发现get方法内部调用的是request方法,看看这个方法里面实现了什么呢。
def request(method, url, **kwargs):
    """Constructs and sends a :class:`Request <Request>`.

    :param method: method for the new :class:`Request` object: ``GET``, ``OPTIONS``, ``HEAD``, ``POST``, ``PUT``, ``PATCH``, or ``DELETE``.
    :param url: URL for the new :class:`Request` object.
    :param params: (optional) Dictionary, list of tuples or bytes to send
        in the query string for the :class:`Request`.
    :param data: (optional) Dictionary, list of tuples, bytes, or file-like
        object to send in the body of the :class:`Request`.
    :param json: (optional) A JSON serializable Python object to send in the body of the :class:`Request`.
    :param headers: (optional) Dictionary of HTTP Headers to send with the :class:`Request`.
    :param cookies: (optional) Dict or CookieJar object to send with the :class:`Request`.
    :param files: (optional) Dictionary of ``'name': file-like-objects`` (or ``{'name': file-tuple}``) for multipart encoding upload.
        ``file-tuple`` can be a 2-tuple ``('filename', fileobj)``, 3-tuple ``('filename', fileobj, 'content_type')``
        or a 4-tuple ``('filename', fileobj, 'content_type', custom_headers)``, where ``'content-type'`` is a string
        defining the content type of the given file and ``custom_headers`` a dict-like object containing additional headers
        to add for the file.
    :param auth: (optional) Auth tuple to enable Basic/Digest/Custom HTTP Auth.
    :param timeout: (optional) How many seconds to wait for the server to send data
        before giving up, as a float, or a :ref:`(connect timeout, read
        timeout) <timeouts>` tuple.
    :type timeout: float or tuple
    :param allow_redirects: (optional) Boolean. Enable/disable GET/OPTIONS/POST/PUT/PATCH/DELETE/HEAD redirection. Defaults to ``True``.
    :type allow_redirects: bool
    :param proxies: (optional) Dictionary mapping protocol to the URL of the proxy.
    :param verify: (optional) Either a boolean, in which case it controls whether we verify
            the server's TLS certificate, or a string, in which case it must be a path
            to a CA bundle to use. Defaults to ``True``.
    :param stream: (optional) if ``False``, the response content will be immediately downloaded.
    :param cert: (optional) if String, path to ssl client cert file (.pem). If Tuple, ('cert', 'key') pair.
    :return: :class:`Response <Response>` object
    :rtype: requests.Response

    Usage::

      >>> import requests
      >>> req = requests.request('GET', 'https://httpbin.org/get')
      >>> req
      <Response [200]>
    """

    # By using the 'with' statement we are sure the session is closed, thus we
    # avoid leaving sockets open which can trigger a ResourceWarning in some
    # cases, and look like a memory leak in others.
    with sessions.Session() as session:
        return session.request(method=method, url=url, **kwargs)
我们发现request方法的内部也是使用了Session类的对象来进行请求的,说明他也是可以支持会话保持的,但是他使用了
with
关键字,在python基础中with关键字的作用就是,处理事务后自动关闭,比如我们的读写文件。
with open('test.txt') as f:
    print(f.read())
我们都知道在使用with关键字后,文件with下面的内容被执行完毕后,文件会被自动关闭的,那么同样的在这个request方法也是一样的效果,在这次请求结束后,会话被自动关闭,说明其使用了with处理之后丧失了会话保持的能力。
那么我们在来看看Session类的内部是怎么实现with上下文的。
要想把一个类通过with关键字调用,那么类的内部,一定有
__init__
,
__enter__
,
__exit__
,这三个方法。
打开Session的源码,我们一起看看。
class Session(SessionRedirectMixin):
    """A Requests session.

    Provides cookie persistence, connection-pooling, and configuration.

    Basic Usage::

      >>> import requests
      >>> s = requests.Session()
      >>> s.get('https://httpbin.org/get')
      <Response [200]>

    Or as a context manager::

      >>> with requests.Session() as s:
      ...     s.get('https://httpbin.org/get')
      <Response [200]>
    """

    __attrs__ = [
        'headers', 'cookies', 'auth', 'proxies', 'hooks', 'params', 'verify',
        'cert', 'adapters', 'stream', 'trust_env',
        'max_redirects',
    ]

    def __init__(self):

        #: A case-insensitive dictionary of headers to be sent on each
        #: :class:`Request <Request>` sent from this
        #: :class:`Session <Session>`.
        self.headers = default_headers()

        #: Default Authentication tuple or object to attach to
        #: :class:`Request <Request>`.
        self.auth = None

        #: Dictionary mapping protocol or protocol and host to the URL of the proxy
        #: (e.g. {'http': 'foo.bar:3128', 'http://host.name': 'foo.bar:4012'}) to
        #: be used on each :class:`Request <Request>`.
        self.proxies = {}

        #: Event-handling hooks.
        self.hooks = default_hooks()

        #: Dictionary of querystring data to attach to each
        #: :class:`Request <Request>`. The dictionary values may be lists for
        #: representing multivalued query parameters.
        self.params = {}

        #: Stream response content default.
        self.stream = False

        #: SSL Verification default.
        self.verify = True

        #: SSL client certificate default, if String, path to ssl client
        #: cert file (.pem). If Tuple, ('cert', 'key') pair.
        self.cert = None

        #: Maximum number of redirects allowed. If the request exceeds this
        #: limit, a :class:`TooManyRedirects` exception is raised.
        #: This defaults to requests.models.DEFAULT_REDIRECT_LIMIT, which is
        #: 30.
        self.max_redirects = DEFAULT_REDIRECT_LIMIT

        #: Trust environment settings for proxy configuration, default
        #: authentication and similar.
        self.trust_env = True

        #: A CookieJar containing all currently outstanding cookies set on this
        #: session. By default it is a
        #: :class:`RequestsCookieJar <requests.cookies.RequestsCookieJar>`, but
        #: may be any other ``cookielib.CookieJar`` compatible object.
        self.cookies = cookiejar_from_dict({})

        # Default connection adapters.
        self.adapters = OrderedDict()
        self.mount('https://', HTTPAdapter())
        self.mount('http://', HTTPAdapter())

    def __enter__(self):
        return self

    def __exit__(self, *args):
        self.close()
这个里面就实现了一套with关键字操作,可以看到的
__exit__
就实现了清理的操作。这样每次请求之后的会话记录就被清除了。
所以我们要想保持会话记录,可以直接使用Session进行请求,这样在不关闭python解释器的情况下每次请求的会话会一直被保持。
至于close里面的实现,目前我也只能看一个大概,里面的整体逻辑还是挺复杂的,为了不误人子弟,这里我就不再讲解了。大佬们可以自己去看看。
封装requests
requests库已经很好用了,但是我们在这个基础上还是要进行一层封装,为什么要封装呢。
首先,封装可以更好的去集成到测试框架中,减少我们的代码数量,并且我们只要要通过封装的类实例化一次session会话,不用担心会话重复的问题。在者我们可以和测试框架的其他模块进行耦合,所以在这种前提下,封装requests必不可少,即使他已经足够好用了。
以下是我的一个封装示例。
#!/usr/bin/env python3
# -*- coding: utf-8 -*-
import urllib3
import requests

urllib3.disable_warnings()

http_method_names = ['get', 'post', 'put', 'delete', 'patch', 'head', 'options']


class HttpRequest(object):
    """requests方法二次封装"""

    def __init__(self):
        self.timer = None
        self.timeout = 30.0
        self.session = requests.session()

    def request(self, method: str, url: str, **kwargs):
        """发送请求"""
        method = method.lower()

        def dispatch(method, *args, **kwargs):
            if method in http_method_names:
                handler = getattr(self.session, method)
                return handler(*args, **kwargs)
            else:
                raise AttributeError("请求方法不正确!")

        response = dispatch(method, url, **kwargs)
        self.timer = response.elapsed.total_seconds()
        return response

    def __call__(self, *args, **kwargs):
        """发送request请求"""
        return self.request(*args, **kwargs)


req = HttpRequest()

if __name__ == '__main__':
    r = req("get", url="https://www.baidu.com")
    print(r.text)
    print(req.timer)
运行一下:

requests的封装方式仁者见仁智者见智,每个人都有不一样的思想,不能因为看到了别人的封装形式就限制住了自己的思维,一定要有自己的想法,可以集百家之长处,但不可浑然无己见。所以在使用这个库的时候希望我们都能在工作或学习中发挥出他的妙用。

好了 学习也就到此结束了 ,
三连支持一下
吧。
想了解更多相关知识请关注我吧!衷心感谢每一个认真阅读我文章的人!
。