Chrony由两个程序组成,分别是chronyd和chronyc
chronyd是一个后台运行的守护进程,用于调整内核中运行的系统时钟和时钟服务器同步。它确定计算机增减时间的比率,并对此进行补偿。
chronyc提供了一个用户界面,用于监控性能并进行多样化的配置。它可以在chronyd实例控制的计算机上工作,也可以在一台不同的远程计算机上工作。
建立前的安装
首先通过以下命令查看本机是否具有chrony软件
[root@zhangyihao ~]# rpm -qa | grep chrony

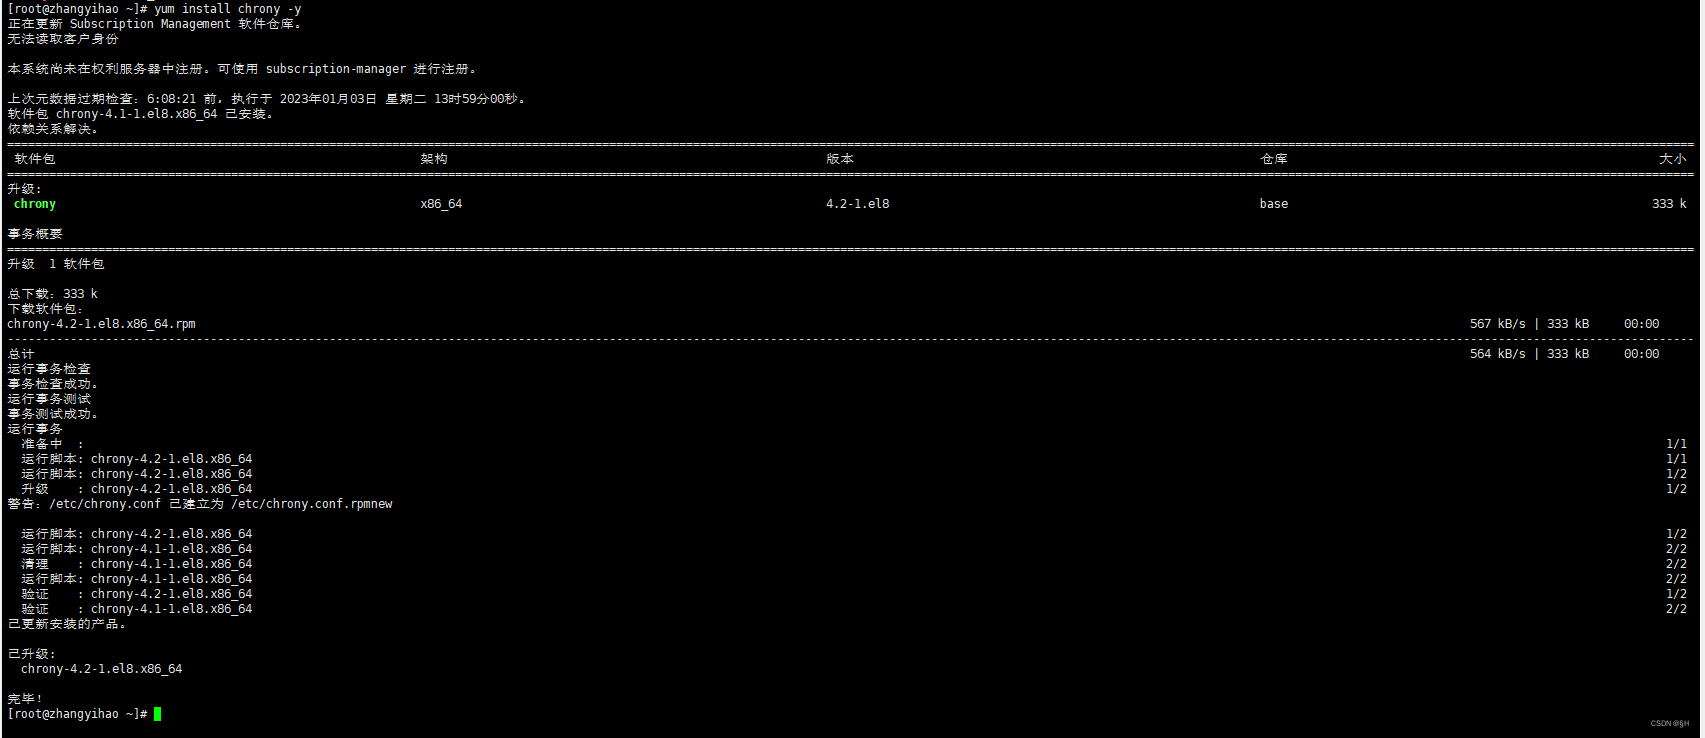
本机已经提前安装过了,如果自己的虚拟机未安装chrony,则需要输入以下命令进行安装
[root@zhangyihao ~]# yum install chrony -y
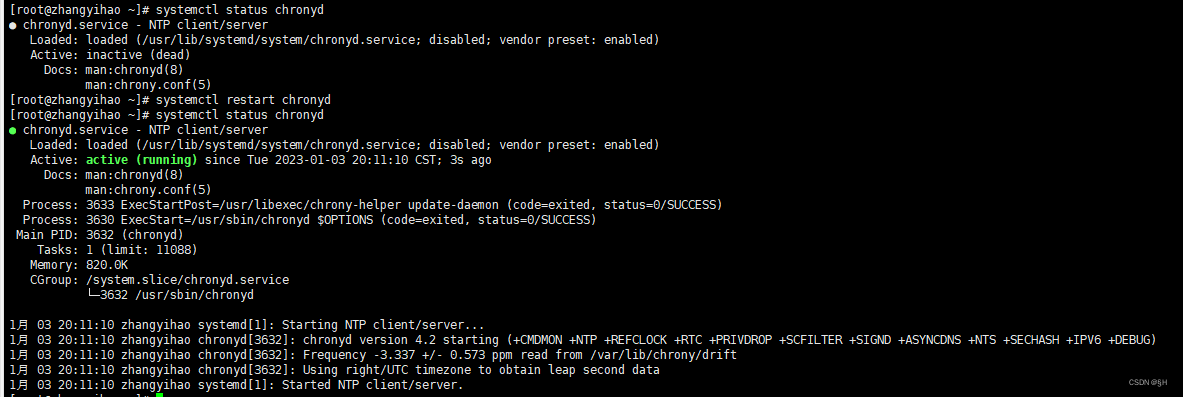
安装完成后输入以下命令查看一下chronyd的状态,如若未开启,则需将chronyd开启
[root@zhangyihao ~]# systemctl status chronyd //查看chronyd状态
● chronyd.service – NTP client/server
Loaded: loaded (/usr/lib/systemd/system/chronyd.service; disabled; vendor preset: enabled)
Active: inactive (dead)
Docs: man:chronyd(8)
man:chrony.conf(5)
[root@zhangyihao ~]# systemctl restart chronyd //开启chronyd
[root@zhangyihao ~]# systemctl status chronyd //重新查看状态
● chronyd.service – NTP client/server
Loaded: loaded (/usr/lib/systemd/system/chronyd.service; disabled; vendor preset: enabled)
Active: active (running) since Tue 2023-01-03 20:11:10 CST; 3s ago
Docs: man:chronyd(8)
man:chrony.conf(5)
Process: 3633 ExecStartPost=/usr/libexec/chrony-helper update-daemon (code=exited, status=0/SUCCESS)
Process: 3630 ExecStart=/usr/sbin/chronyd $OPTIONS (code=exited, status=0/SUCCESS)
Main PID: 3632 (chronyd)
Tasks: 1 (limit: 11088)
Memory: 820.0K
CGroup: /system.slice/chronyd.service
└─3632 /usr/sbin/chronyd1月 03 20:11:10 zhangyihao systemd[1]: Starting NTP client/server…
1月 03 20:11:10 zhangyihao chronyd[3632]: chronyd version 4.2 starting (+CMDMON +NTP +REFCLOCK +RTC +PRIVDROP +SCFILTER +SIGND +ASYNCDNS +NTS +SECHASH +IPV6 +DEBUG)
1月 03 20:11:10 zhangyihao chronyd[3632]: Frequency -3.337 +/- 0.573 ppm read from /var/lib/chrony/drift
1月 03 20:11:10 zhangyihao chronyd[3632]: Using right/UTC timezone to obtain leap second data
1月 03 20:11:10 zhangyihao systemd[1]: Started NTP client/server.
安装完成后对此虚拟机进行克隆,使得两台虚拟机构成一个小的局域网,切记克隆后的虚拟机需要重新配置IP地址并设置一个新的主机名进行区分。
安装完成后的配置
例一:以阿里云为源
第一台:
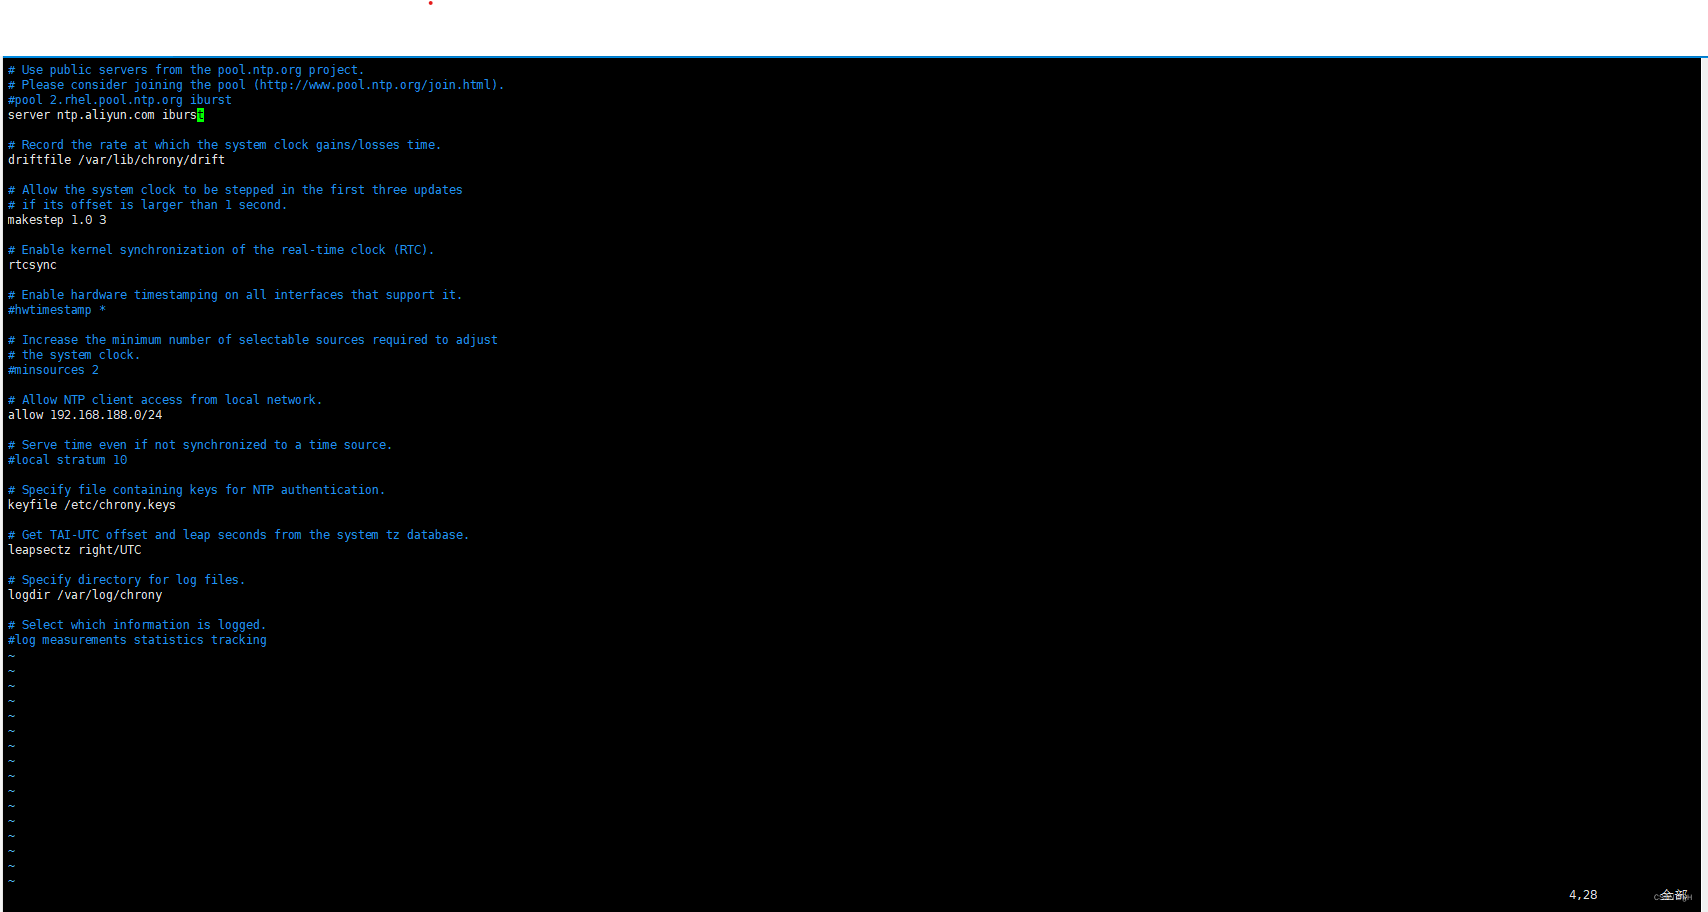
chrony的配置文件为/etc/chrony.conf通过输入以下命令进入配置文件,并进行如下配置
[root@zhangyihao ~]# vim /etc/chrony.conf
# Use public servers from the pool.ntp.org project.
# Please consider joining the pool (http://www.pool.ntp.org/join.html).
#pool 2.rhel.pool.ntp.org iburst
server ntp.aliyun.com iburst //设置从阿里云同步时间
# Record the rate at which the system clock gains/losses time.
driftfile /var/lib/chrony/drift# Allow the system clock to be stepped in the first three updates
# if its offset is larger than 1 second.
makestep 1.0 3# Enable kernel synchronization of the real-time clock (RTC).
rtcsync# Enable hardware timestamping on all interfaces that support it.
#hwtimestamp *# Increase the minimum number of selectable sources required to adjust
# the system clock.
#minsources 2# Allow NTP client access from local network.
allow 192.168.188.0/24 //允许该网段访问,若不设置默认拒绝所有
# Serve time even if not synchronized to a time source.
#local stratum 10# Specify file containing keys for NTP authentication.
keyfile /etc/chrony.keys# Get TAI-UTC offset and leap seconds from the system tz database.
leapsectz right/UTC# Specify directory for log files.
logdir /var/log/chrony# Select which information is logged.
#log measurements statistics tracking
配置完成后,通过以下命令重新启动chronyd
[root@zhangyihao ~]# systemctl restart chronyd
通过输入以下命令查看服务器
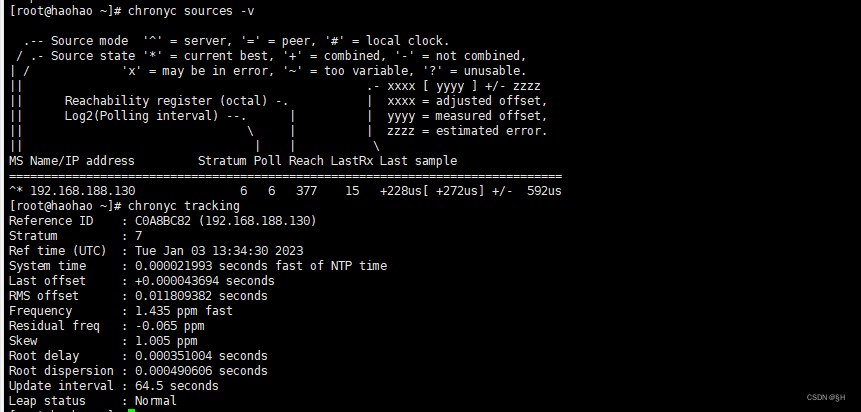
[root@zhangyihao ~]# chronyc sources -v
.– Source mode ‘^’ = server, ‘=’ = peer, ‘#’ = local clock.
/ .- Source state ‘*’ = current best, ‘+’ = combined, ‘-‘ = not combined,
| / ‘x’ = may be in error, ‘~’ = too variable, ‘?’ = unusable.
|| .- xxxx [ yyyy ] +/- zzzz
|| Reachability register (octal) -. | xxxx = adjusted offset,
|| Log2(Polling interval) –. | | yyyy = measured offset,
|| \ | | zzzz = estimated error.
|| | | \
MS Name/IP address Stratum Poll Reach LastRx Last sample
===============================================================================
^* 203.107.6.88 2 6 37 34 +26us[-4306us] +/- 37ms
通过输入以下命令查看 客户端详细信息
[root@zhangyihao ~]# chronyc tracking
Reference ID : CB6B0658 (203.107.6.88)
Stratum : 3
Ref time (UTC) : Tue Jan 03 12:53:00 2023
System time : 0.000177981 seconds fast of NTP time
Last offset : +0.000191720 seconds
RMS offset : 0.003855445 seconds
Frequency : 3.462 ppm slow
Residual freq : -10.436 ppm
Skew : 3.249 ppm
Root delay : 0.064554051 seconds
Root dispersion : 0.002926003 seconds
Update interval : 65.2 seconds
Leap status : Normal
第二台
重复上述步骤,只需在设置配置文件时设置为从第一台虚拟机获取同步时间,以此达到局域网内时间统一

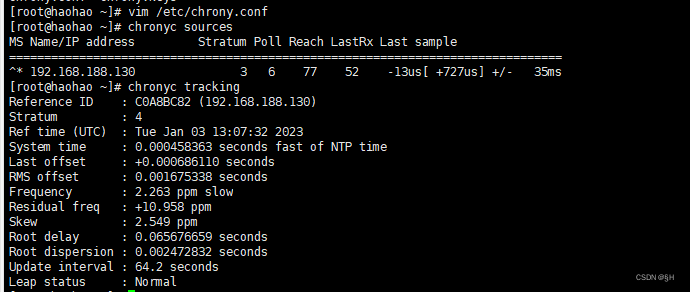
例二:以第一台为源
第一台
重复例一所做的操作,只需在设置配置文件时进行一定的修改,具体如下
[root@zhangyihao ~]# vim /etc/chrony.conf
# Use public servers from the pool.ntp.org project.
# Please consider joining the pool (http://www.pool.ntp.org/join.html).
#pool 2.rhel.pool.ntp.org iburst
#server ntp.aliyun.com iburst
server 192.168.188.87 iburst //设置从一个无法访问的IP地址同步时间
# Record the rate at which the system clock gains/losses time.
driftfile /var/lib/chrony/drift# Allow the system clock to be stepped in the first three updates
# if its offset is larger than 1 second.
makestep 1.0 3# Enable kernel synchronization of the real-time clock (RTC).
rtcsync# Enable hardware timestamping on all interfaces that support it.
#hwtimestamp *# Increase the minimum number of selectable sources required to adjust
# the system clock.
#minsources 2# Allow NTP client access from local network.
allow 192.168.188.0/24 //允许该网段访问,若不设置默认拒绝所有
# Serve time even if not synchronized to a time source.
local stratum 6 //从本机同步时间,设置服务器层级为6
# Specify file containing keys for NTP authentication.
keyfile /etc/chrony.keys# Get TAI-UTC offset and leap seconds from the system tz database.
leapsectz right/UTC# Specify directory for log files.
logdir /var/log/chrony# Select which information is logged.
#log measurements statistics tracking
后续重复例一操作
查看信息
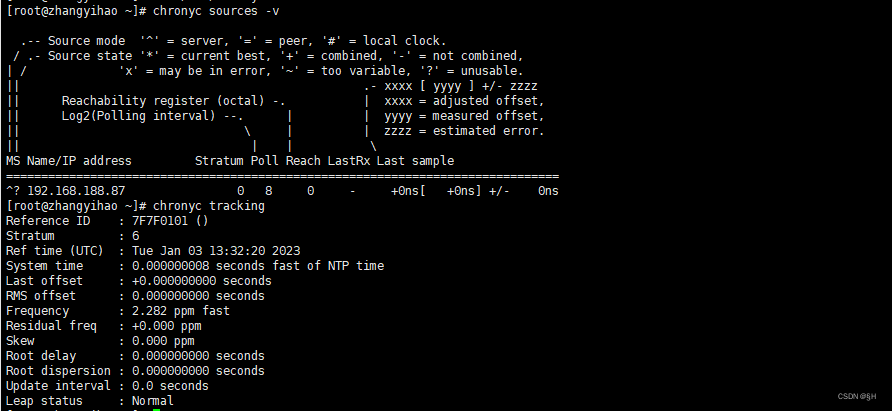
第二台
重复上述配置,不需要进行更改
最终查看