
android 抽屉
In this tutorial you will learn about android navigation drawer.
在本教程中,您将了解android导航抽屉。
There are so little possibilities when it comes to choosing the main menu of an android application. If we start enlisting, we have TabLayout (used by the very famous WhatsApp), Bottom navigation drawer (used again by a facebook product Instagram) and then we have the most common form of menu ui and i.e. Navigation Drawer. Using a navigation drawer really adds a professional cover sort of thing to an android application and as an android developer, once you learn to implement it, trust me when I tell you this, it makes you feel as if you can now implement anything in an android application. I have been through that feeling and I wish you to experience the same. So, without any further delay, let’s get started on how to implement an Android Navigation Drawer.
选择android应用程序的主菜单时,可能性很小。 如果我们开始征募,我们将拥有TabLayout(由非常著名的WhatsApp使用),Bottom导航抽屉(由Facebook产品Instagram再次使用),然后我们将拥有最常见的ui菜单形式,即Navigation Drawer。 使用导航抽屉确实为android应用程序增加了专业的掩盖之物,作为android开发人员,一旦您学会实现它,请告诉我,请相信我,这让您感觉好像您现在可以在android应用程序。 我经历过这种感觉,希望您也能体验到。 因此,在没有任何延迟的情况下,让我们开始如何实现Android导航抽屉。
Android导航抽屉教程
(
Android Navigation Drawer Tutorial
)
创建一个新活动
(
Creating a New Activity
)
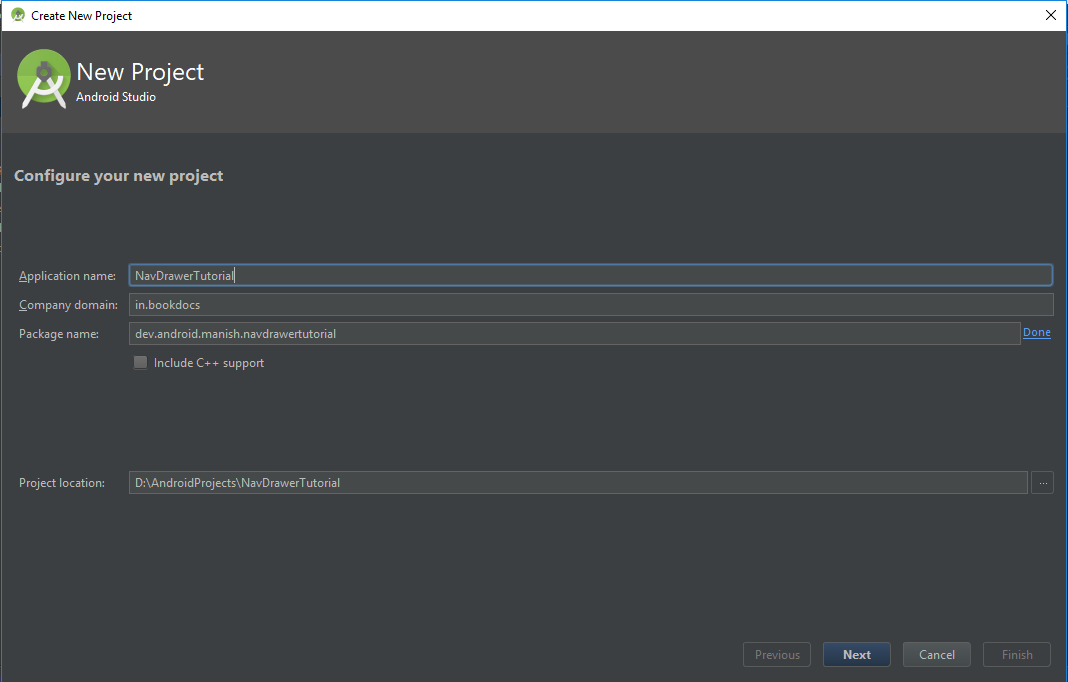
To begin with, hit the create a new project button in Android Studio and follow the steps below:-
首先,请在Android Studio中点击“创建新项目”按钮,然后执行以下步骤:-
Step 1:
Assign a good name to your project.
步骤1:
为您的项目分配一个好名字。
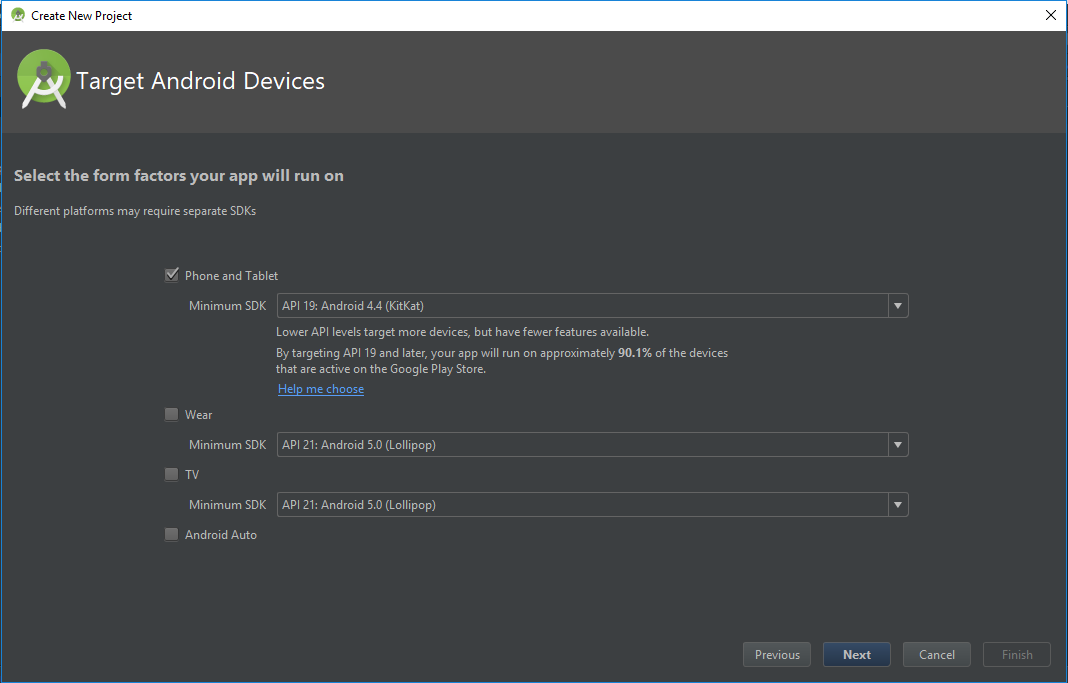
Step 2:
Select the minimum android version that you want your app to support to.
第2步:
选择您希望应用支持的最低Android版本。
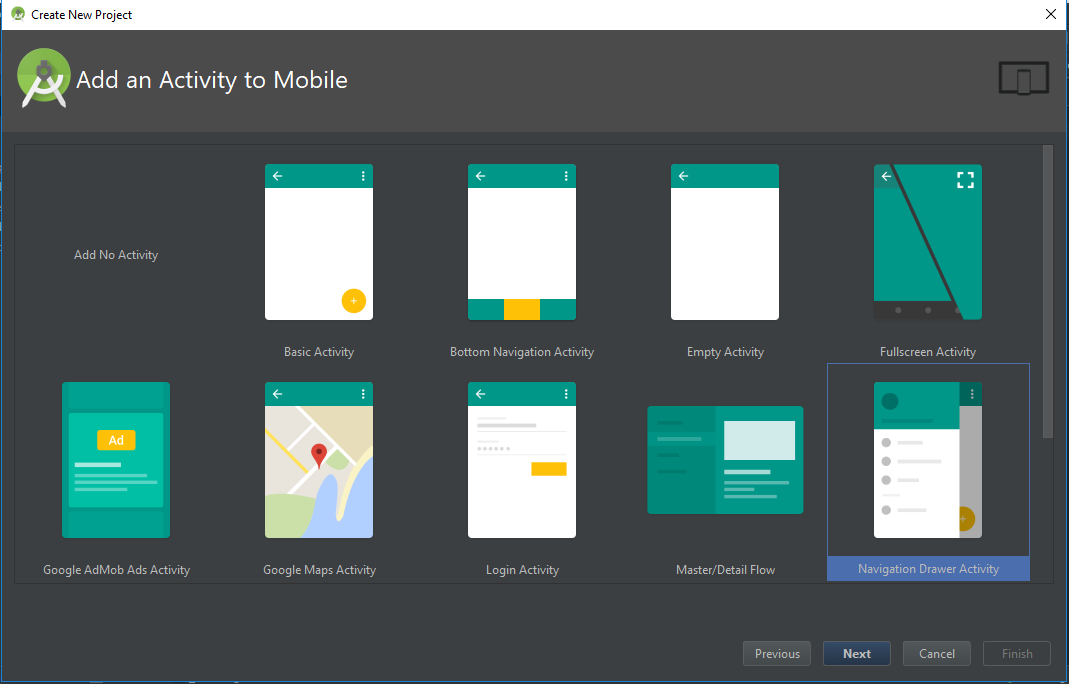
Step 3:
This is most important step in which you need to select the navigation drawer activity in order to implement the navigation drawer. So, go ahead and select the navigation drawer activity from list and hit next and then hit finish.
步骤3:
这是最重要的步骤,您需要在其中选择导航抽屉活动以实现导航抽屉。 因此,继续并从列表中选择导航抽屉活动,然后单击下一步,然后单击完成。
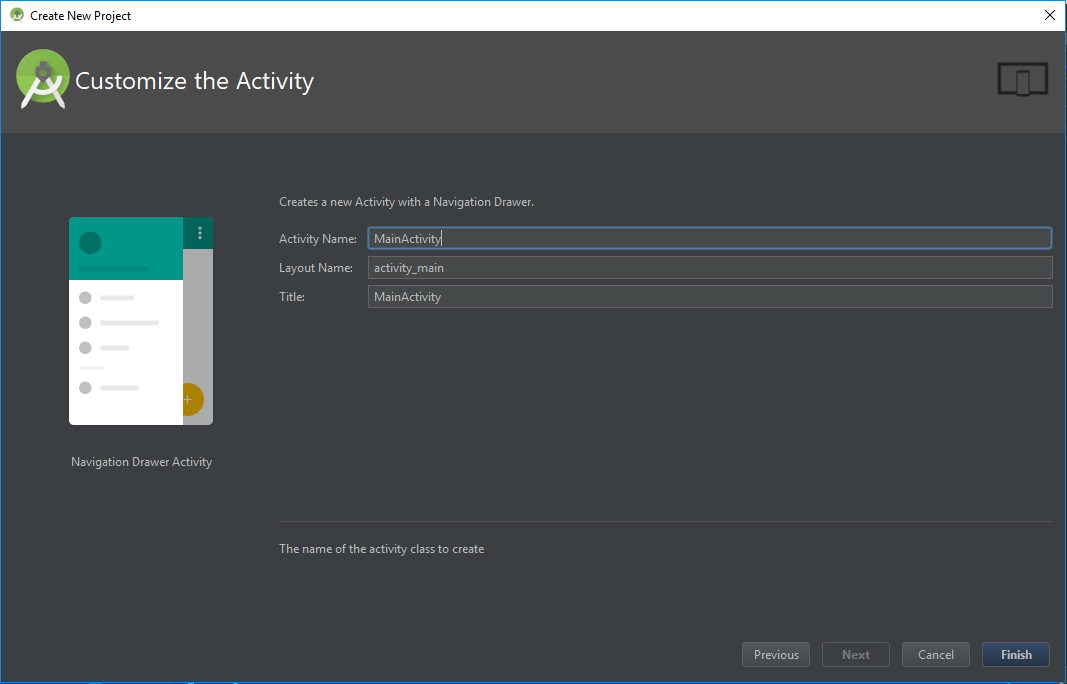
Now let the project load and gradle be built and then we shall start configuring Navigation Drawer Activity.
现在,让项目装入和构建gradle,然后我们将开始配置Navigation Drawer Activity。
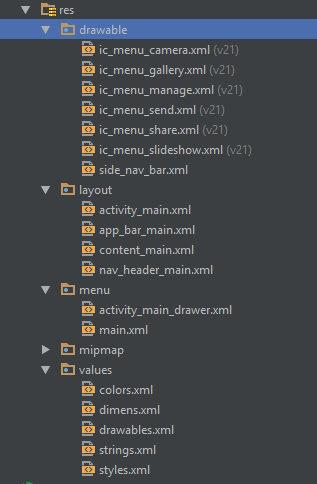
The project is all set by now to get started with code. Before doing so, let me give you a quick walk through of the file structure of this activity.
现在已设置好项目,以开始使用代码。 在开始之前,让我快速介绍一下此活动的文件结构。
在XML中
(
In the XML
)
-
In the first folder of
res
, we have directory by the name
drawable
and it simply contains all the xml icons for the drawer menu items.在
res
的第一个文件夹中,我们有一个名为
drawable的
目录,它仅包含抽屉菜单项的所有xml图标。 -
In the next directory called
layout
, we have the all the layout files required for this activity. On the top of the list, we have the
activity_main.xml
which looks as shown below:-在下一个名为
layout的
目录中,我们具有此活动所需的所有布局文件。 在列表的顶部,我们有
activity_main.xml
,如下所示:-
activity_main.xml
activity_main.xml
<?xml version="1.0" encoding="utf-8"?>
<android.support.v4.widget.DrawerLayout xmlns:android="http://schemas.android.com/apk/res/android"
    xmlns:app="http://schemas.android.com/apk/res-auto"
    xmlns:tools="http://schemas.android.com/tools"
    android:id="@+id/drawer_layout"
    android:layout_width="match_parent"
    android:layout_height="match_parent"
    android:fitsSystemWindows="true"
    tools:openDrawer="start">

    <include
        layout="@layout/app_bar_main"
        android:layout_width="match_parent"
        android:layout_height="match_parent" />

    <android.support.design.widget.NavigationView
        android:id="@+id/nav_view"
        android:layout_width="wrap_content"
        android:layout_height="match_parent"
        android:layout_gravity="start"
        android:fitsSystemWindows="true"
        app:headerLayout="@layout/nav_header_main"
        app:menu="@menu/activity_main_drawer" />

</android.support.v4.widget.DrawerLayout>-
In the above xml code, we have an
include
envelope and then we have the
NavigationView
. This include envelope is being used here to render the code in the
app_bar_main.xml
layout file. The purpose of using include here is to maintain the cleanliness and readability of the code. The Parent layout for
activity_main.xml
is
DrawerLayout
.在上面的xml代码中,我们有一个
include
信封,然后有
NavigationView
。 这里使用了这个包含信封来在
app_bar_main.xml
布局文件中呈现代码。 在此使用include的目的是为了保持代码的整洁性和可读性。
activity_main.xml
的父布局是
DrawerLayout
。 -
The next layout file in the list is
app_bar_main.xml
and it looks something like below:-列表中的下一个布局文件是
app_bar_main.xml
,它看起来类似于以下内容:
app_bar_main.xml
app_bar_main.xml
<?xml version="1.0" encoding="utf-8"?>
<android.support.design.widget.CoordinatorLayout xmlns:android="http://schemas.android.com/apk/res/android"
    xmlns:app="http://schemas.android.com/apk/res-auto"
    xmlns:tools="http://schemas.android.com/tools"
    android:layout_width="match_parent"
    android:layout_height="match_parent"
    tools:context="dev.android.manish.navdrawertutorial.MainActivity">

    <android.support.design.widget.AppBarLayout
        android:layout_width="match_parent"
        android:layout_height="wrap_content"
        android:theme="@style/AppTheme.AppBarOverlay">

        <android.support.v7.widget.Toolbar
            android:id="@+id/toolbar"
            android:layout_width="match_parent"
            android:layout_height="?attr/actionBarSize"
            android:background="?attr/colorPrimary"
            app:popupTheme="@style/AppTheme.PopupOverlay" />

    </android.support.design.widget.AppBarLayout>

    <include layout="@layout/content_main" />

    <android.support.design.widget.FloatingActionButton
        android:id="@+id/fab"
        android:layout_width="wrap_content"
        android:layout_height="wrap_content"
        android:layout_gravity="bottom|end"
        android:layout_margin="@dimen/fab_margin"
        app:srcCompat="@android:drawable/ic_dialog_email" />

</android.support.design.widget.CoordinatorLayout>-
It simply has the
Toolbar
layout enclosed by the
AppBarLayout
which adds a shadow underneath the toolbar. Again here also we have a include envelope which refers to
content_main.xml
. So, content_main would be the place to display the different drawer screens. It also has a
FloatinActionButton
just as we have the YouTube App as the upload button. Well, it’s got nothing to do with navigation drawer activity so, we’ll just remove it once we start working on t