Eigen::Matrix4f transform_1 = Eigen::Matrix4f::Identity();
// Define a rotation matrix (see https://en.wikipedia.org/wiki/Rotation_matrix)
float theta = M_PI / 4; // The angle of rotation in radians
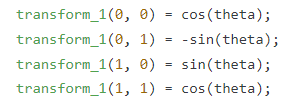
transform_1(0, 0) = cos(theta);
transform_1(0, 1) = -sin(theta);
transform_1(1, 0) = sin(theta);
transform_1(1, 1) = cos(theta);
// (row, column)
// Define a translation of 2.5 meters on the x axis.
transform_1(0, 3) = 2.5;
这段代码使用 Eigen 库创建了一个 4×4 的变换矩阵
transform_1
,并对其进行了旋转和平移操作。
在此示例中,我们首先初始化
transform_1
为单位矩阵(Identity),然后定义了一个旋转角度
theta
,这里取 π/4 弧度(即 45°)。接下来,我们根据旋转角度填充了旋转矩阵的相关元素:
这些元素用于描述绕 Z 轴旋转
theta
弧度的旋转变换。
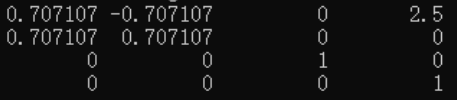
最后,我们在 X 轴上进行了一个平移操作,将点云沿 X 轴方向平移 2.5 米:
![]()
这里索引
(0, 3)
对应于平移向量的 X 分量。
生成的矩阵:
Eigen::Affine3f transform_2 = Eigen::Affine3f::Identity();

// Define a translation of 0.8 meters on the x axis.
transform_2.translation() << 0.8, 0.0, 0.0;

// The same rotation matrix as before; theta radians arround Z axis
transform_2.rotate(Eigen::AngleAxisf(theta, Eigen::Vector3f::UnitZ()));
这段代码使用 Eigen 库创建了一个 Affine3f 变换矩阵 transform_2,并对其进行平移和旋转操作。
在此示例中,我们首先初始化 transform_2 为单位矩阵 (Identity)。接下来,我们使用 translation() 方法在 X 轴上进行了一个平移操作,将点云沿 X 轴方向平移 0.8 米:
![]()
在这里,translation() 方法返回一个 3D 向量,我们使用 << 运算符将平移向量设置为 (0.8, 0.0, 0.0),表示在 X 轴上的平移量。
然后,我们应用与之前相同的旋转变换到 transform_2 中,绕着 Z 轴旋转 theta 弧度:
![]()
rotate() 方法接受一个 AngleAxisf 对象作为参数,该对象定义了旋转轴和角度。在这里,使用 UnitZ() 定义了绕着 Z 轴的旋转轴,然后传入 theta 角度,以获得绕 Z 轴旋转 theta 弧度的旋转变换。
Affine3f 类是 Eigen 提供的一种特殊的 4×4 变换矩阵类型,它可以表示平移、旋转和缩放等变换。
viewer.addCoordinateSystem(0.5, "cloud", 0);
viewer.addCoordinateSystem(scale, id, viewport)
方法用于在点云可视化窗口中添加一个坐标系。它接受三个参数:
-
scale
是一个标量值,表示坐标系的大小。在这个例子中,传入的值为 0.5,表示坐标系的大小为原来的一半。 -
id
是一个字符串,表示坐标系的名称或标识符。在这个例子中,传入的值为 “cloud”,表示给添加的坐标系一个名称为 “cloud”。 -
viewport
是一个整数值,表示要将坐标系添加到哪个视口上。在这个例子中,传入的值为 0,表示将坐标系添加到默认的第一个视口上。
通过调用
viewer.addCoordinateSystem
方法,我们可以在点云可视化窗口中添加一个固定大小的坐标系,并使其与点云对齐,以便更好地理解点云的空间位置和方向。
viewer.setPointCloudRenderingProperties(pcl::visualization::PCL_VISUALIZER_POINT_SIZE, 2, "transformed_cloud");
viewer.setPointCloudRenderingProperties(property, value, id)
方法用于设置点云可视化中的渲染属性。它接受三个参数:
-
property
是一个枚举类型,表示要设置的渲染属性。在这个例子中,使用了
pcl::visualization::PCL_VISUALIZER_POINT_SIZE
,表示设置点的大小。 -
value
是一个数值,表示所设置渲染属性的值。在这个例子中,传入的值为 2,表示将点的大小设置为 2 个单位大小。 -
id
是一个字符串,表示要设置渲染属性的点云对象的标识符。在这个例子中,传入的值为 “transformed_cloud”,表示要对名称为 “transformed_cloud” 的点云对象进行设置。
通过调用
viewer.setPointCloudRenderingProperties
方法,我们可以设置已变换点云的渲染属性,例如点的大小、颜色等。在这个例子中,将已变换点云的点大小设置为 2 单位大小。
完整代码:
#include <iostream>
#include <pcl/io/pcd_io.h>
#include <pcl/io/ply_io.h>
#include <pcl/point_cloud.h>
#include <pcl/console/parse.h>
#include <pcl/common/transforms.h>
#include <pcl/visualization/pcl_visualizer.h>
int main(int argc, char** argv) {
// Load file | Works with PCD and PLY files
pcl::PointCloud<pcl::PointXYZ>::Ptr source_cloud(new pcl::PointCloud<pcl::PointXYZ>());
if (pcl::io::loadPCDFile("../data/bunny.pcd", *source_cloud) < 0) {
std::cout << "Error loading point cloud " << "bunny.pcd" << std::endl << std::endl;
return -1;
}
/* Reminder: how transformation matrices work :
|-------> This column is the translation
| 1 0 0 x | \
| 0 1 0 y | }-> The identity 3x3 matrix (no rotation) on the left
| 0 0 1 z | /
| 0 0 0 1 | -> We do not use this line (and it has to stay 0,0,0,1)
METHOD #1: Using a Matrix4f
This is the "manual" method, perfect to understand but error prone !
*/
Eigen::Matrix4f transform_1 = Eigen::Matrix4f::Identity();
// Define a rotation matrix (see https://en.wikipedia.org/wiki/Rotation_matrix)
float theta = M_PI / 4; // The angle of rotation in radians
transform_1(0, 0) = cos(theta);
transform_1(0, 1) = -sin(theta);
transform_1(1, 0) = sin(theta);
transform_1(1, 1) = cos(theta);
// (row, column)
// Define a translation of 2.5 meters on the x axis.
transform_1(0, 3) = 2.5;
// Print the transformation
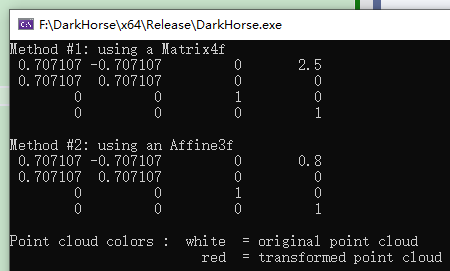
printf("Method #1: using a Matrix4f\n");
std::cout << transform_1 << std::endl;
/* METHOD #2: Using a Affine3f
This method is easier and less error prone
*/
Eigen::Affine3f transform_2 = Eigen::Affine3f::Identity();
// Define a translation of 0.8 meters on the x axis.
transform_2.translation() << 0.8, 0.0, 0.0;
// The same rotation matrix as before; theta radians arround Z axis
transform_2.rotate(Eigen::AngleAxisf(theta, Eigen::Vector3f::UnitZ()));
// Print the transformation
printf("\nMethod #2: using an Affine3f\n");
std::cout << transform_2.matrix() << std::endl;
// Executing the transformation
pcl::PointCloud<pcl::PointXYZ>::Ptr transformed_cloud(new pcl::PointCloud<pcl::PointXYZ>());
// You can either apply transform_1 or transform_2; they are the same
pcl::transformPointCloud(*source_cloud, *transformed_cloud, transform_2);
// Visualization
printf("\nPoint cloud colors : white = original point cloud\n"
" red = transformed point cloud\n");
pcl::visualization::PCLVisualizer viewer("Matrix transformation example");
// Define R,G,B colors for the point cloud
pcl::visualization::PointCloudColorHandlerCustom<pcl::PointXYZ> source_cloud_color_handler(source_cloud, 192, 127, 220);
// We add the point cloud to the viewer and pass the color handler
viewer.addPointCloud(source_cloud, source_cloud_color_handler, "original_cloud");
pcl::visualization::PointCloudColorHandlerCustom<pcl::PointXYZ> transformed_cloud_color_handler(transformed_cloud, 230, 20, 20); // Red
viewer.addPointCloud(transformed_cloud, transformed_cloud_color_handler, "transformed_cloud");
// 设置坐标系系统
viewer.addCoordinateSystem(0.5, "cloud", 0);
// 设置背景色
viewer.setBackgroundColor(0.9647, 0.9412, 0.8392, 0); // Setting background to a dark grey
// 设置渲染属性(点大小)
viewer.setPointCloudRenderingProperties(pcl::visualization::PCL_VISUALIZER_POINT_SIZE, 2, "original_cloud");
// 设置渲染属性(点大小)
viewer.setPointCloudRenderingProperties(pcl::visualization::PCL_VISUALIZER_POINT_SIZE, 2, "transformed_cloud");
//viewer.setPosition(800, 400); // Setting visualiser window position
while (!viewer.wasStopped()) { // Display the visualiser until 'q' key is pressed
viewer.spinOnce();
}
return 0;
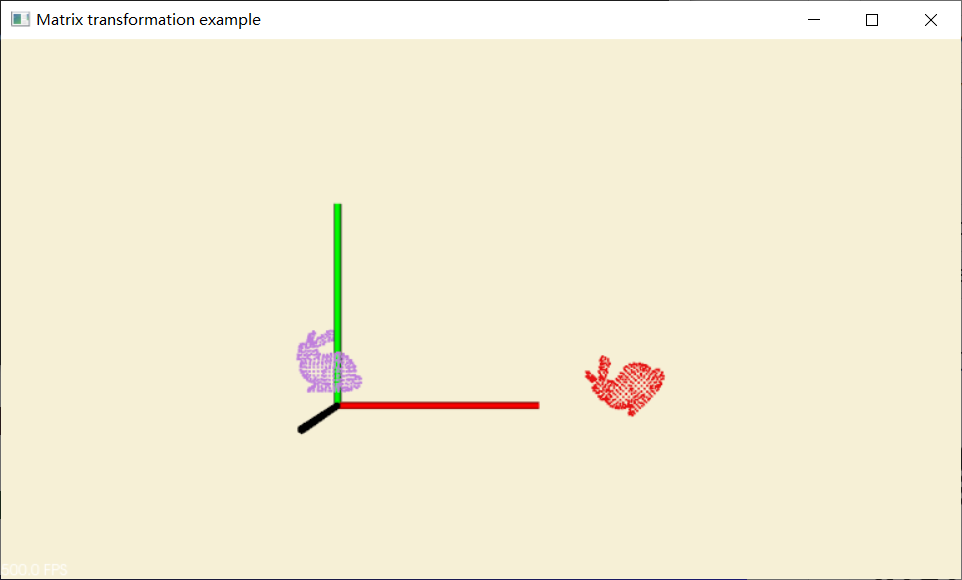
}效果图
|
|