前言
在项目开发过程中,我们离不开多环境的配置。有的同学还是分不清Maven Profiles 和 Spring Profiles的区别。
它们两者即可以独立配置, 也可以结合使用。
Maven Profiles主要用来管理maven项目不同环境的打包配置。
Spring Profiles主要用来管理spring项目不同环境的启动配置。
Spring Profiles使用
配置多套环境
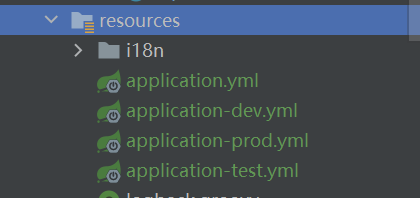
我们在resourcs目录下配置了多套环境。
然后通过spring.profiles.active=dev/test/prod来指定运行的是哪个配置
spring:
  profiles:
    active: dev #表示运行application-dev.yml
这样配置比较麻烦的是,每次启动或是部署要切换环境的话,都需要手动操作。
Maven Profiels使用
在pom.xml中,配置如下:
<profiles>
	<profile>
		<id>dev</id>
		<properties>
			<profiles.active>dev</profiles.active>
			<maven.test.skip>true</maven.test.skip>
		</properties>
		<activation>
			<activeByDefault>true</activeByDefault>
		</activation>
	</profile>
	<profile>
		<id>test</id>
		<properties>
			<profiles.active>test</profiles.active>
			<maven.test.skip>true</maven.test.skip>
		</properties>
	</profile>
	<profile>
		<id>prod</id>
		<properties>
			<profiles.active>prod</profiles.active>
			<maven.test.skip>true</maven.test.skip>
		</properties>
	</profile>
</profiles>
这样定义了,三套环境dev、test、prod, 我们可以在侧栏maven下清晰的看到。

接下来还需要配置一下resources来过滤一些文件
<resources>
	<resource>
		<directory>src/main/resources</directory>
		<excludes>
			<exclude>application*.yml</exclude>
		</excludes>
	</resource>
	<resource>
		<directory>src/main/resources</directory>
		<filtering>true</filtering>
		<includes>
			<!--suppress UnresolvedMavenProperty -->
			<include>application-${profiles.active}.yml</include>
			<include>i18n/**</include>
			<include>application.yml</include>
			<include>logback.groovy</include>
		</includes>
	</resource>
</resources>
其中${profiles.active}与上面的profiles中的配置相对应。


接下来有两种方式来执行打包操作:
- 可以执行maven命令进行打包:mvn clean package -Pprod
- 直接使用maven提供的工具:
①勾选prod
②选中clean
③选中package
④执行运行三角按钮

打包完成之后,解压jar包,验证环境是否正确。

Spring Profiles和 Maven Profiles结合配置来打包
根据前面Spring Profiles和Maven Profiles的配置,修改如下配置:
spring:
  profiles:
    active: @profiles.active@
其中 @profiles.active@中的变量要和maven profiles中的属性保持一致。
Tips:
当我们在pom.xml中配置了profiles环境之后, 先写两个@@, 再从中间开始写profiles.active时,会有提示。
写完之后的@profiles.active@, 是可以按住ctrl点击链接到pom.xml中的相应环境配置上的。
总结步骤:
- 配置多套spring的环境(application.yml, application-dev.yml, application-prod.yml)
- 在 pom.xml 中定义多个 profile 及其它属性
- 在 pom.xml 中定义 resource filtering,可以控制打包之后 jar 中包含的资源文件, 以及@xxx@ 的变量替换
- 在 application.yml 中指定 spring.profiles.active,值为 maven profile 中定义的属性@xxx@。
- 构建时使用 mvm clean package -P 来指定 profile。
注意
在 Intellij IDEA 中启动时, 会报错yml中的@profiles.active@,不会被配置的环境所替换。
需要先执行: mvn resources:resources
然后再次启动,即可。