〇、所需资料
1、JDBC connect的plugins下载地址(confluent)
一、Oracle建表
1、表规划
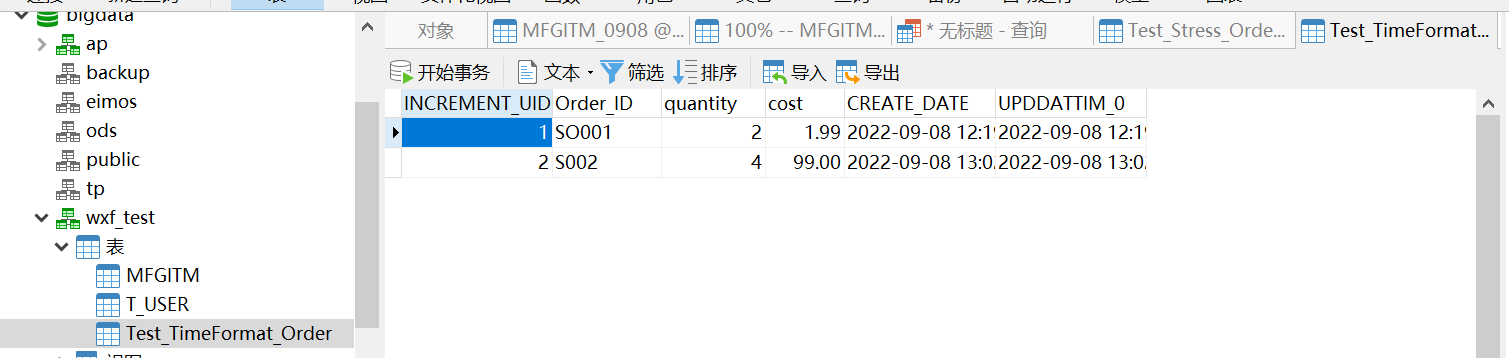
表名:Test_TimeFormat_Order、Test_Stress_Order
字段:INCREMENT_UID/Order_ID/quantity/cost/CREATE_DATE/UPDDATTIM_0
2、建表语句
-- 建表语句
CREATE TABLE "TEST"."Test_TimeFormat_Order"(
"INCREMENT_UID" INTEGER NOT NULL,
"Order_ID" VARCHAR2(255) NOT NULL,
"quantity" INTEGER DEFAULT 0 NOT NULL,
"cost" NUMBER(11,2) DEFAULT 0.99 NOT NULL,
"CREATE_DATE" TIMESTAMP (2) DEFAULT SYSDATE NOT NULL,
"UPDDATTIM_0" TIMESTAMP (2) DEFAULT SYSDATE NOT NULL
);

-- 建自增序列
create sequence test.test_seq_Test_Stress_Order increment by 1 start with 1
minvalue 1 maxvalue 9999999999999 nocache;

-- 创建触发器,将自增序列的值插入
create or replace trigger test.Auto_Trig_Test_TimeFormat_Order
before insert on "TEST"."Test_TimeFormat_Order"
for each row
begin
  select test.test_seq_Test_TimeFormat_Order.Nextval into:new.INCREMENT_UID from dual;
end;

-- 问题:Oracle序列如何归零
3、插入数据
-- 全字段
INSERT INTO "TEST"."Test_TimeFormat_Order"("INCREMENT_UID", "Order_ID", "quantity", "cost", "CREATE_DATE", "UPDDATTIM_0") VALUES ('1', 'SO001', '2', '1.99', TO_TIMESTAMP('2022-09-08 20:19:41.00', 'SYYYY-MM-DD HH24:MI:SS:FF2'), TO_TIMESTAMP('2022-09-08 20:19:44.00', 'SYYYY-MM-DD HH24:MI:SS:FF2'));
-- 最简化
INSERT INTO "TEST"."Test_TimeFormat_Order"("Order_ID") VALUES ('SO001')
4、更新数据
-- 全字段更新
UPDATE "TEST"."Test_TimeFormat_Order" SET "INCREMENT_UID" = '1', "Order_ID" = 'SO001', "quantity" = '2', "cost" = '1.99', "CREATE_DATE" = TO_TIMESTAMP('2022-09-08 20:19:41.00', 'SYYYY-MM-DD HH24:MI:SS:FF2'), "UPDDATTIM_0" = TO_TIMESTAMP('2022-09-08 20:19:44.00', 'SYYYY-MM-DD HH24:MI:SS:FF2') WHERE "INCREMENT_UID" = '1' AND "Order_ID" = 'SO001' AND "quantity" = '2' AND "cost" = '1.99' AND "CREATE_DATE" = '2022-09-08 20:19:41.00' AND "UPDDATTIM_0" = '2022-09-08 20:19:44.00';
-- 单字段更新(只更新时间戳列)
UPDATE "TEST"."Test_TimeFormat_Order" SET "UPDDATTIM_0" = TO_TIMESTAMP('2022-09-08 20:19:44.00', 'SYYYY-MM-DD HH24:MI:SS:FF2') WHERE "Order_ID" = 'SO001';
二、建source connector
PUT 192.168.0.1:8083/connectors/sink_connector_Test_TimeFormat_Order/config
{
    "connector.class": "io.confluent.connect.jdbc.JdbcSourceConnector",
    "mode": "timestamp",
    "timestamp.column.name": "UPDDATTIM_0",
    "topic.prefix": "connector_topic_",
    "connection.password": "system",
    "connection.user": "system",
    "db.timezone": "Asia/Shanghai",
    "name": "source_connector_Test_TimeFormat_Order",
    "connection.url": "jdbc:oracle:thin:@//192.168.0.1:1521/helowin",
    "table.whitelist": "TEST.Test_TimeFormat_Order"
}
三、建sink connector
PUT 192.168.0.2:8083/connectors/sink_connector_Test_TimeFormat_Order/config
{
    "connector.class": "io.confluent.connect.jdbc.JdbcSinkConnector",
    "table.name.format": "ljh.Test_TimeFormat_Order",
    "connection.password": "QAZ123",
    "tasks.max": "1",
    "topics": "connector_topic_Test_TimeFormat_Order",
    "delete.enabled": "false",
    "auto.evolve": "true",
    "connection.user": "postgres",
    "name": "sink_connector_Test_TimeFormat_Order",
    "auto.create": "true",
    "connection.url": "jdbc:postgresql://192.168.0.2:5432/bigdata",
    "insert.mode": "upsert",
    "pk.mode": "record_value",
    "pk.fields": "Order_ID"
}
四、用到的命令
1、启停zk、kafka、connect
kafka:nohup bin/kafka-server-start.sh config/server.properties > nohup_kafka_log.txt 2>&1 &
bin/kafka-server-stop.sh
zookeeper:nohup bin/zookeeper-server-start.sh -daemon config/zookeeper.properties > nohup_zookeeper_log.txt 2>&1 &
bin/zookeeper-server-stop.sh
nohup bin/connect-distributed.sh config/connect-distributed.properties > nohup_connect_log.txt 2>&1 &
kill pid
2、查看状态
sudo /usr/local/jdk1.8.0_291/bin/jps
tail -f nohup_zookeeper.log
3、topic相关
查看topic列表: bin/kafka-topics.sh –bootstrap-server big04:9092,big05:9092,big07:9092 –list
新建topic:bin/kafka-topics.sh –bootstrap-server big04:9092,big05:9092,big07:9092 –create –replication-factor 1 –partitions 1 –topic first
查看topic详细信息:kafka-topics.sh –describe –bootstrap-server big04:9092,big05:9092,big07:9092 –topic first
删除topic:bin/kafka-topics.sh –bootstrap-server big04:9092,big05:9092,big07:9092 –delete –topic first
生产:bin/kafka-console-producer.sh –broker-list big04:9092,big05:9092,big07:9092 –topic first
消费:bin/kafka-console-consumer.sh –bootstrap-server big04:9092,big05:9092,big07:9092 –topic connector_topic_0908_MFGITM_0908
从头消费:bin/kafka-console-consumer.sh –topic connector_topic_bak_MFGITM –from-beginning –bootstrap-server big04:9092,big05:9092,big07:9092
4、connect命令
查询全部connector:GET http://192.168.0.2:8083/connectors
查询可用的插件:GET 192.168.0.2:8083/connector-plugins
查询具体connector:GET 192.168.0.2:8083/connectors/source_connector_docker_oracle_MFGITM_bak/config(status)
新增或修改connector:PUT 192.168.0.2:8083/connectors/sink_connector_Test_TimeFormat_Order/config
新增connector:POST 192.168.0.2:8083/connectors
五、验证
1、Oracle插入数据
(1)插入新纪录

(2)修改记录

2、消费者监听topic
(1)查看创建的topic

(2)从头消费topic

(3)新增数据后

(4)修改数据后

3、pg端查看插入的数据
(1)插入数据后
(2)修改数据后
