
之前debug spark源码,是通过写application debug,这个不是基于spark源码本身的调试。
现在做基于spark单元测试的调试,更方便对Spark源码做修改及测试, 方便更深入了解spark的运行原理。
最后,写了一个简单的单元测试,来获取sql对应的asttree 以及unresolved logical plan。
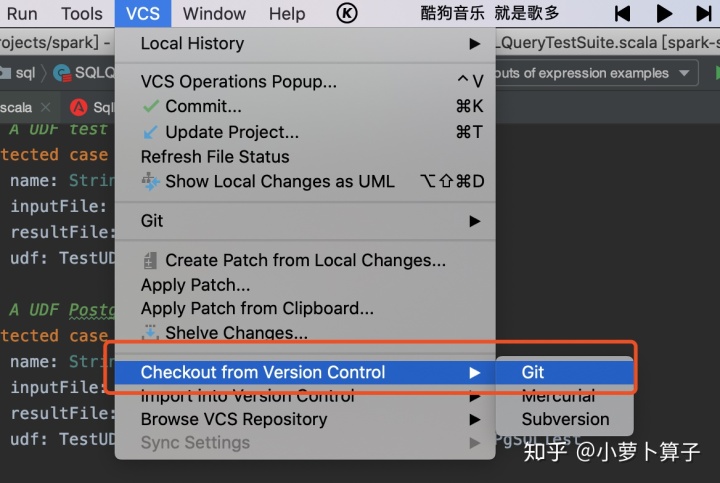
Spark 源码下载编译
https://github.com/apache/spark
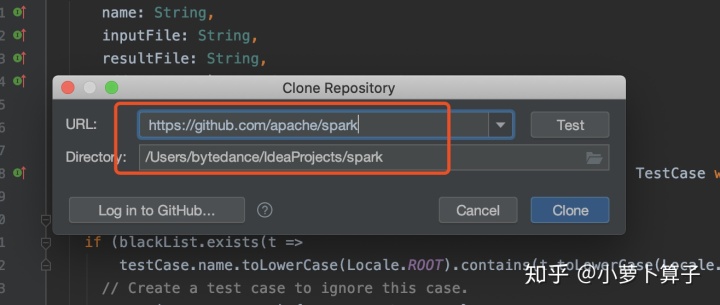
代码down下来之后,等在idea中导入完成之后,用maven编译一下:
cd 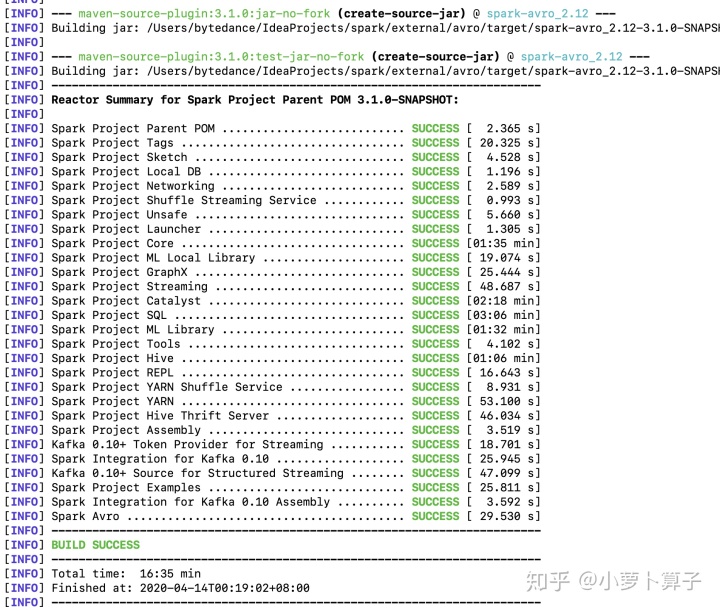
编译成功,就可进行测试了
单元测试
Spark源码提供了大量的TestCase,我们可以学习和模仿。
基于idea
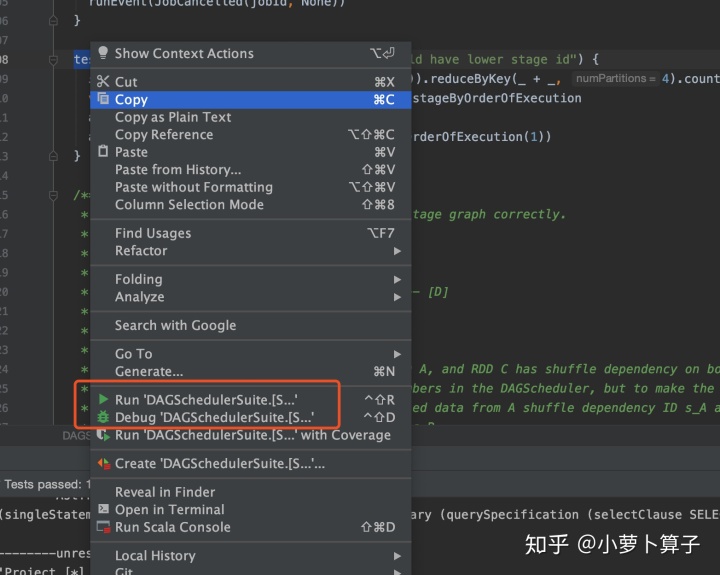
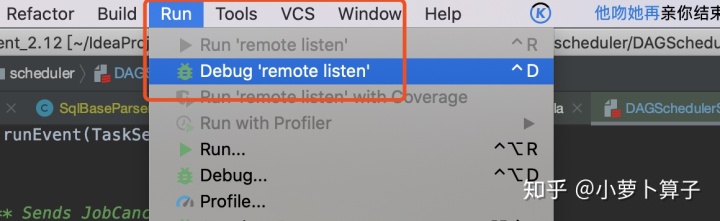
比如我们要运行core模块中 DAGSchedulerSuite.scala “SPARK-3353” 案例:
选中test,右键,可run ;如果打了断点的话,可以debug
使用idea运行调试testcase简单方便,但由于一些原因,如果idea不能搞定的话,可以通过sbt来运行和调试testcase
基于SBT
SBT 配置
Spark SBT build 中包含多个 sub-project,日常开发调试时经常需要切换到不同的 sub-project。
简单调整一下 SBT 的 prompt string,以便显示当前的 project 名称:
vim 添加如下内容:
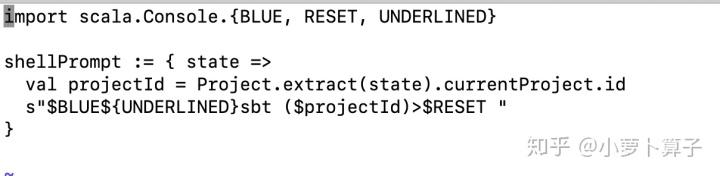
这步只是个人喜好,并不是必须的,添加前,添加后对比如下:
添加前:

添加后:

使用sbt运行测试案例
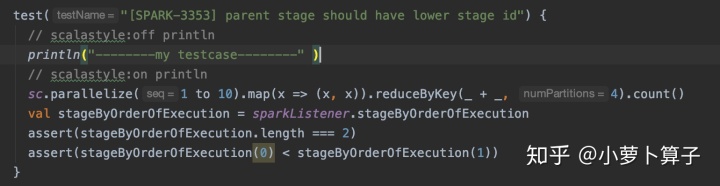
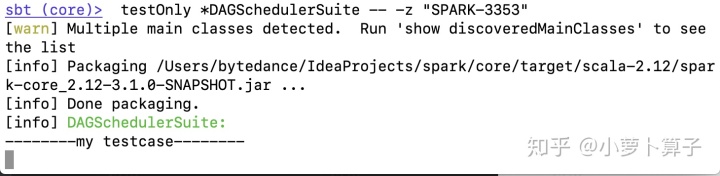
在core模块中 DAGSchedulerSuite.scala “SPARK-3353” 案例 中加入 一行打印:
sbt (core)> testOnly *DAGSchedulerSuite -- -z "SPARK-3353"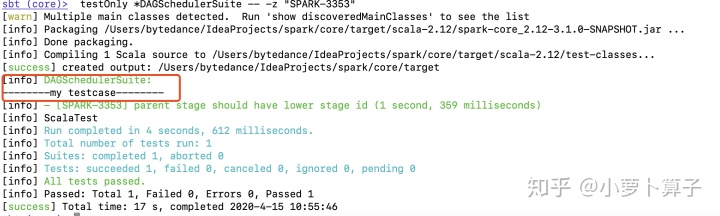
使用sbt debug
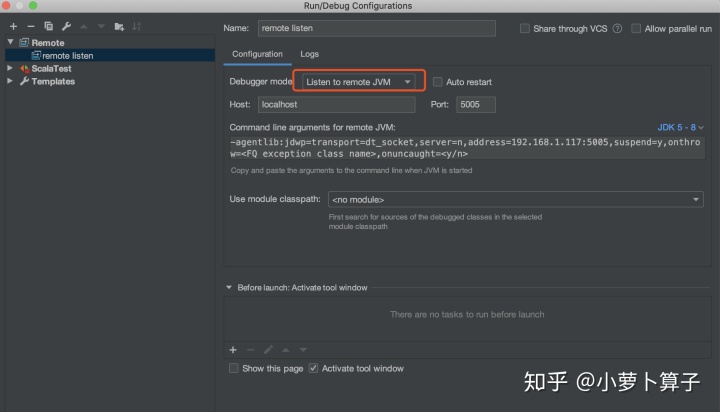
Run > Edit Configurations > + > Remote
to open a default Remote Configuration template

Debugger mode
选项选
Listen to remote JVM
打开debug远程,等着SBT 来联接:
在sbt命令中输入:
sbt (core)> set javaOptions in Test += "-agentlib:jdwp=transport=dt_socket,server=n,suspend=n,address=localhost:5005"

sbt (core)>  testOnly *DAGSchedulerSuite -- -z "SPARK-3353"
可以看到sbt在断点处等待:
idea进入debug状态:

编写测试用例
Spark为了确保代码风格一致规范,在项目引入了scala-style checker(比如每个代码文件头部需要定义Apache的License注释;import的顺序等),如果代码不合规范,执行编译会出错。
我们可以模仿Spark源码提供的TestCase来写我们自己的TestCase,可以避免踩到代码风格检查的坑。
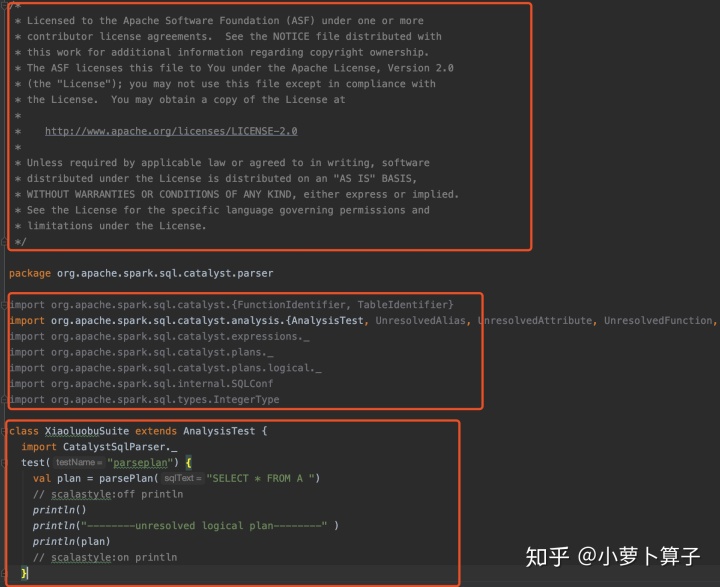
下面简单写一个XiaoluobuSuite.scala,主要用来从源码中 获取一个 sql语句对应的 AstTree,以及unresolved logical plan:
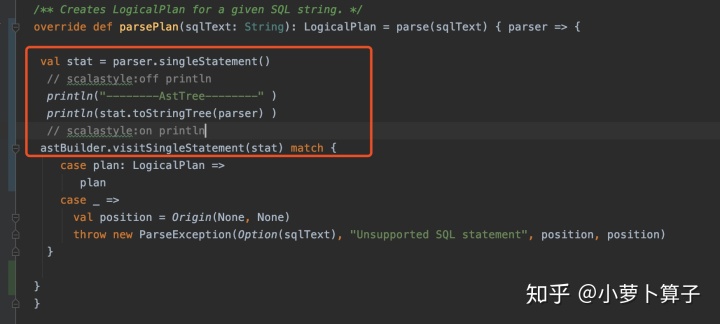
修改ParseDriver.scala中parsePlan部分源码如下:
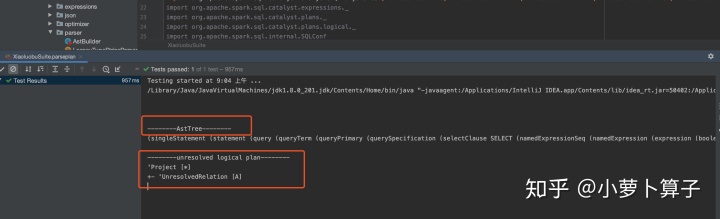
运行XiaoluobuSuite.scala中的test:
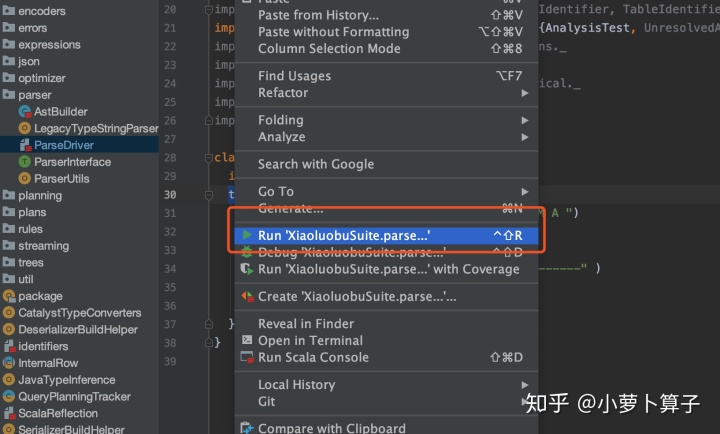
获取AstTree 和 unresolved logical plan:
spark中是借助开源的antlr4库把sql转化为AstTree的。
有关antlr, sql词法,语法解析及 AstTree相关理解,可以看之前写过的文章:
Hive源码系列(六)编译模块之词法、语法解析(上)
Hive源码系列(七)编译模块之词法、语法解析(中)
Hive源码系列(七)编译模块之词法、语法解析(下)
Spark SQL的语法规则文件是:SqlBase.g4
下面我们通过g4语法文件 生成一个AstTree:
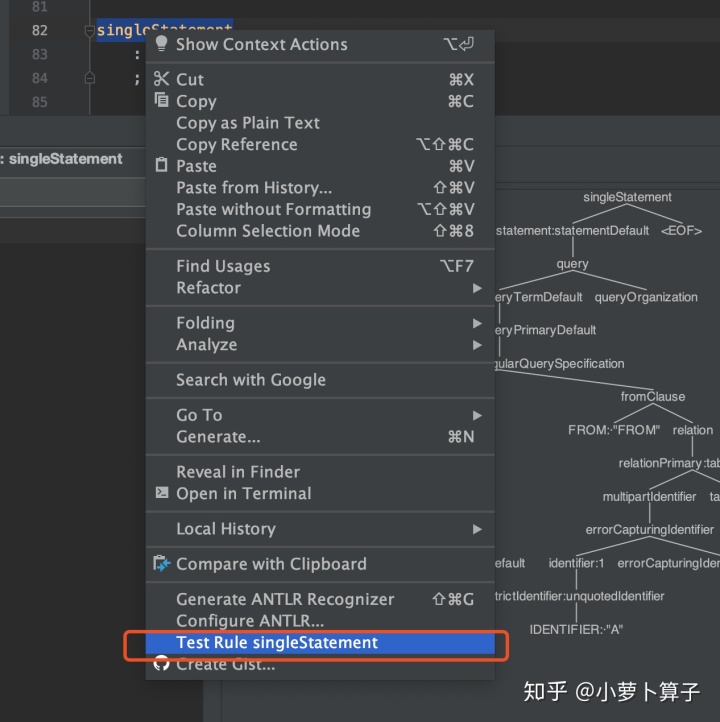
写sql:SELECT * FROM A 生成AstTree如下:
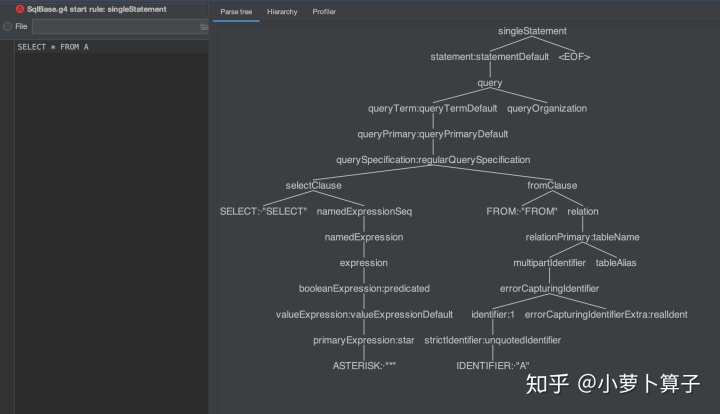
把我们从测试用例中获取的AstTree整理一下:
(
singleStatement
    (
    statement
        (
        query
            (
            queryTerm
                (
                queryPrimary
                    (
                    querySpecification
                        (
                        selectClause
                            SELECT
                            (
                            namedExpressionSeq (namedExpression (expression (booleanExpression (valueExpression (primaryExpression *)))))
                            )
                        )
                        (
                        fromClause
                            FROM
                            (
                            relation (relationPrimary (multipartIdentifier (errorCapturingIdentifier (identifier (strictIdentifier A)) errorCapturingIdentifierExtra)) tableAlias)
                            )
                        )
                    )
                )
            )
            queryOrganization
         )
    )
    <EOF>
)
两个是一样的,这样就还原了 spark中生成AstTree的步骤。

Hey!
我是小萝卜算子
在成为最厉害最厉害最厉害的道路上
很高兴认识你
如果觉得有用的话
关注公众号,看更多干货
参考文档
https://spark.apache.org/developer-tools.html