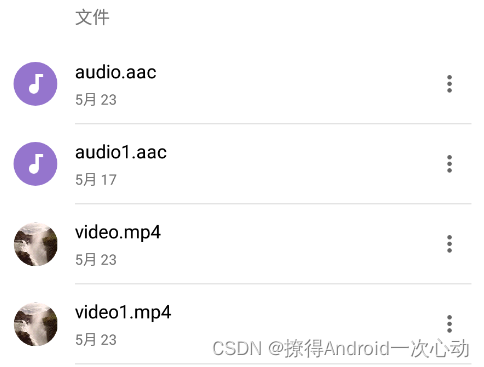
了解了音视频的编解码过程,我们接下来使用一下经常跟MediaCodec一起搭配的MediaExtractor和MediaMuxer。最后会使用一个简单的demo来了解具体了解这两个工具类的使用过程。这一节我们就先不讲MediaCodec了,放到下节的demo。

一、MediaExtractor
Android提供了一个MediaExtractor类,可以用来
分离容器中的
视频track
和
音频track
。
主要API介绍:
- setDataSource(String path):即可以设置本地文件又可以设置网络文件
- getTrackCount():得到源文件通道数
- getTrackFormat(int index):获取指定(index)的通道格式
- getSampleTime():返回当前的时间戳
- readSampleData(ByteBuffer byteBuf, int offset):把指定通道中的数据按偏移量读取到ByteBuffer中;
- advance():读取下一帧数据
- release(): 读取结束后释放资源
MediaExtractor 的使用主要有这么几步:
- 设置数据源
- 获取通道数,切换到想要的轨道
- 循环读取每帧的样本数据
- 完成后释放资源
二、MediaMuxer
MediaMuxer的作用是生成音频或视频文件;还可以把音频与视频混合成一个音视频文件。
相关API介绍:
- MediaMuxer(String path, int format):path:输出文件的名称 format:输出文件的格式;当前只支持MP4格式;
- addTrack(MediaFormat format):添加通道;我们更多的是使用MediaCodec.getOutpurForma()或Extractor.getTrackFormat(int index)来获取MediaFormat;也可以自己创建;
- start():开始合成文件
- writeSampleData(int trackIndex, ByteBuffer byteBuf, MediaCodec.BufferInfo bufferInfo):把ByteBuffer中的数据写入到在构造器设置的文件中;
- stop():停止合成文件
- release():释放资源
参数
|
|
|---|---|
|
3GPP媒体文件格式 |
|
HEIF媒体文件格式 |
|
MPEG4媒体文件格式 |
|
Ogg媒体文件格式 |
|
WEBM媒体文件格式 |
MediaMuxer的使用步骤:
- 设置目标文件路径和音视频格式
- 添加要合成的轨道,包括音轨和视轨
- 开始合成,循环写入每帧样本数据
- 完成后释放
三、MediaFormat
用MediaCodec来进行编解码,在创建MediaCodec时需要调用configure方法进行配置,Mediaformat则是configure需要传入的一个参数。
3.1 视频类型的Mediaformat
可以通过如下代码创建视频类型Mediaformat:
MediaFormat videoFormat = MediaFormat.createVideoFormat(videoType, width, height);方法的参数类型:
videoType
常用的有两种:MediaFormat.MIMETYPE_VIDEO_AVC(
H.264
)
MediaFormat.MIMETYPE_VIDEO_HEVC(
H.265
)
width
和
height
需要根据底层支持的分辨率来设置,如果width和height设置的不符合要求会出现如下错误:E/CameraCaptureSession: Session 1: Failed to create capture session; configuration failed
对于视频类型而言有下列
四个配置是
必须
指定
的:
手动配置
和
直接获取原视频的配置
// 指定编码器颜色格式
videoFormat.setInteger(MediaFormat.KEY_COLOR_FORMAT,
    MediaCodecInfo.CodecCapabilities.COLOR_FormatSurface);

// 指定帧率
videoFormat.setInteger(MediaFormat.KEY_FRAME_RATE, 30);

// 指定比特率
videoFormat.setInteger(MediaFormat.KEY_BIT_RATE, 10000000);

//指定关键帧时间间隔,一般设置为每秒关键帧
videoFormat.setInteger(MediaFormat.KEY_I_FRAME_INTERVAL, 1);
3.2 音频类型的Mediaformat
可以通过如下代码创建音频类型Mediaformat:
MediaFormat audioFormat = MediaFormat.createAudioFormat(audioType, sampleRate, channelCount);方法的参数类型:
audioType
:常用的是MediaFormat.MIMETYPE_AUDIO_AAC
sampleRate
:采样率
channelCount
:声道数量单声道 channelCount=1 , 双声道 channelCount=2
对于音频类型而言有
一个配置是
必须
指定
的:
//音频比特率(码率)
audioFormat.setInteger(MediaFormat.KEY_BIT_RATE, BIT_RATE);
四、MediaCodec.BufferInfo
用于描述解码得到的byte[]数据的相关信息,每缓冲区元数据包括指定相关编解码器(输出)缓冲区中有效数据范围的偏移量和大小。
主要有四个属性:
- int
flags
:与缓冲区关联的缓冲区
标志
。- int
offset
:缓冲区中数据的
起始偏移量
。- long
presentationTimeUs
:缓冲区的
显示时间戳
,以微秒计。这是从相应的输入缓冲区传入的表示时间戳中获得的。对于大小为0的缓冲区,应该忽略这一点。- int
size
:缓冲区中的
数据量(以字节为单位)
。如果这是
0
缓冲区中没有数据,可以丢弃。大小为0的缓冲区的唯一用途是携带流结束标记。
flags详解:
- 与缓冲区关联的缓冲区标志。…的结合
MediaCodec.BUFFER_FLAG_KEY_FRAME
和
MediaCodec.BUFFER_FLAG_END_OF_STREAM
.- 作为关键帧的编码缓冲区标有
MediaCodec.BUFFER_FLAG_KEY_FRAME
.- 对应于输入缓冲区的最后一个输出缓冲区用
MediaCodec.BUFFER_FLAG_END_OF_STREAM
也将标有
MediaCodec.BUFFER_FLAG_END_OF_STREAM
。在某些情况下,
这可能是一个空缓冲区,其唯一目的是携带流结束标记。
值是
0
或以下各项的组合
MediaCodec.BUFFER_FLAG_SYNC_FRAME
,
MediaCodec.BUFFER_FLAG_KEY_FRAME
,
MediaCodec.BUFFER_FLAG_CODEC_CONFIG
,
MediaCodec.BUFFER_FLAG_END_OF_STREAM
,
MediaCodec.BUFFER_FLAG_PARTIAL_FRAME
、以及Android . media . media codec . buffer _ FLAG _ MUXER _ DATA
-
BUFFER_FLAG_CODEC_CONFIG
常数值:
2
:这表明如此标记的缓冲区包含编解码器初始化/编解码器特定数据,而不是媒体数据。
BUFFER_FLAG_END_OF_STREAM
常数值:
4
:这表示流的结束,即在此之后将没有缓冲器可用,当然,除非,flush()如下。
BUFFER_FLAG_KEY_FRAME
常数值:
1
:这表明如此标记的(编码的)缓冲区包含关键帧的数据。
BUFFER_FLAG_PARTIAL_FRAME
常数值:
8
:这表示缓冲区只包含一帧的一部分,解码器应该对数据进行批处理,直到在解码该帧之前出现一个没有该标志的缓冲区。
BUFFER_FLAG_SYNC_FRAME
常数值:
1
:这表明如此标记的(编码的)缓冲区包含关键帧的数据。API 21中不赞成使用此常量。 使用BUFFER_FLAG_KEY_FRAME相反,
都是关键帧
。
五、MediaExtractor和MediaMuxer结合的demo
实现音视频的解封装和封装的过程:
//实现音视频的解封装和封装的过程
public class MediaCodecDemo extends Activity {

    //显示解封装后的视频和音频在SD卡保存的位置
    private TextView tv_out;
    private final String mVideoPath = Environment.getExternalStorageDirectory()
                                     + "/Pictures/送孟浩然之广陵.mp4";
    //解封装和封装在本地使用文件名
    private final String inputAudio = "audio1.aac";
    private final String outPutVideo = "video1.mp4";

    private static final String TAG1 ="解封装MediaExtractor:" ;

    @Override
    protected void onCreate(Bundle savedInstanceState) {
        super.onCreate(savedInstanceState);
        setContentView(R.layout.activity_media_codec);

        initView();
        //提取视频分离出纯音频和纯视频文件
        extractorAndMuxerMP4(mVideoPath);
        //重新合成成音视频文件
        muxerMp4(inputAudio,outPutVideo);
    }

    private void initView() {
        tv_out = findViewById(R.id.tv_out);
    }
}
//提取视频分离出纯音频和纯视频文件
private void extractorAndMuxerMP4(String url){
//提取数据(解封装)
//1. 构造MediaExtractor
MediaExtractor mediaExtractor = new MediaExtractor();
try {
//2.设置数据源,数据源可以是本地文件地址,也可以是网络地址:
mediaExtractor.setDataSource(url);
//3.获取轨道数
int trackCount = mediaExtractor.getTrackCount();
//遍历轨道,查看音频轨或者视频轨道信息
for (int i = 0; i < trackCount; i++) {
//4. 获取某一轨道的媒体格式
MediaFormat trackFormat = mediaExtractor.getTrackFormat(i);
String keyMime = trackFormat.getString(MediaFormat.KEY_MIME);
if (TextUtils.isEmpty(keyMime)) {
continue;
}
//5.通过mime信息识别音轨或视频轨道,打印相关信息
//(默认的是先扫描到视频,在扫描到音频)
if (keyMime.startsWith("video/")) {
File outputFile = extractorAndMuxer(mediaExtractor, i, "/video.mp4");
tv_out.setText("纯视频文件路径:" + outputFile.getAbsolutePath());
} else if (keyMime.startsWith("audio/")) {
File outputFile = extractorAndMuxer(mediaExtractor, i, "/audio.aac");
tv_out.setText(tv_out.getText().toString() + "\n纯音频路径:"
+ outputFile.getAbsolutePath());
tv_out.setVisibility(View.VISIBLE);
}
}
} catch (IOException e) {
e.printStackTrace();
}
}
通过getTrackFormat(int index)来获取各个track的MediaFormat,通过MediaFormat来获取track的详细信息,如:MimeType、分辨率、采样频率、帧率等等
    //确定是音轨或视频轨道后,文件输出
    private File extractorAndMuxer(MediaExtractor mediaExtractor, int i, String outputName) throws IOException{
        //获取传过来的MediaExtractor对应轨道的trackFormat
        MediaFormat trackFormat = mediaExtractor.getTrackFormat(i);
        MediaMuxer mediaMuxer;
        //选择轨道
        mediaExtractor.selectTrack(i);

        File outputFile = new File(getExternalFilesDir(Environment.DIRECTORY_MUSIC).getAbsolutePath() + outputName);
        if (outputFile.exists()) {
            //如果文件存在,就删除
            outputFile.delete();
        }
        //1. 构造MediaMuxer
        mediaMuxer = new MediaMuxer(outputFile.getAbsolutePath(), MediaMuxer.OutputFormat.MUXER_OUTPUT_MPEG_4);
        //2. 添加轨道信息 参数为MediaFormat
        mediaMuxer.addTrack(trackFormat);
        //3. 开始合成
        mediaMuxer.start();
        //4. 设置buffer
        ByteBuffer buffer = ByteBuffer.allocate(500 * 1024);//设置每一帧的大小
        MediaCodec.BufferInfo bufferInfo = new MediaCodec.BufferInfo();

        //5.通过mediaExtractor.readSampleData读取数据流
        int sampleSize = 0;
        //循环读取每帧的样本数据
        //mediaExtractor.readSampleData(buffer, 0)把指定通道中的数据按偏移量读取到ByteBuffer中
        while ((sampleSize = mediaExtractor.readSampleData(buffer, 0)) > 0) {
            bufferInfo.flags = mediaExtractor.getSampleFlags();
            bufferInfo.offset = 0;
            bufferInfo.size = sampleSize;
            bufferInfo.presentationTimeUs = mediaExtractor.getSampleTime();
            //所有解码的帧都已渲染,我们现在可以停止播放了,虽然这里没有用到
            //一般的使用方法是判断 isEOS是否等于0;
            //int isEOS = bufferInfo.flags & MediaCodec.BUFFER_FLAG_END_OF_STREAM;
            //判断输出数据是否为关键帧的方法:
            //boolean keyFrame = (bufferInfo.flags & MediaCodec.BUFFER_FLAG_KEY_FRAME) != 0;
            //6. 把通过mediaExtractor解封装的数据通过writeSampleData写入到对应的轨道
            mediaMuxer.writeSampleData(0, buffer, bufferInfo);
            //读取下一帧数据
            mediaExtractor.advance();
        }
        Log.i(TAG1, "extractorAndMuxer: " + outputName + "提取封装完成");

        mediaExtractor.unselectTrack(i);
        //6.关闭
        mediaMuxer.stop();
        mediaMuxer.release();
        return outputFile;
    }
这里需要科普一下两个正数进行&运算:
两个正数进行&运算的值永远小于或等于最小的数。if ((info.flags & MediaCodec.BUFFER_FLAG_END_OF_STREAM) != 0) { Log.i(TAG, "OutputBuffer BUFFER_FLAG_END_OF_STREAM"); break; }我们知道BUFFER_FLAG_END_OF_STREAM代表的是2^2,也就是
0100
。因为是&运算,我们只用关注
info.flags二进制第三位
即可:
为0即上面判断为false,为1即上面判断为true。
- 正数与负数的与运算:
负数的异或操作需要先把数转换成
补码
才行
(头不变取反+1)
两个数互为相反数位与操作可有特殊用途,位与所剩恰为最低位。
两个数互为相反数异或可能有特殊用途,异或后,所剩最低位左移一位。
到此我们就将音视频解封装成了音频和视频,并且保存在了指定文件当中
,我们分析一下流程:
- 构造MediaExtractor(不需要参数) —> 之后的操作使用try/catch包围 —> setDateSource(url)设置本地或者网络资源 —> getTrackConut()获取该资源的通道数 —> for循环通道数 —> 获取某一轨道的媒体格式:getTrackFormat(i)返回一个MediaFormat —> 判断是什么通道根据trackFormat.getString(MediaFormat.KEY_MIME)返回ketMime的startsWith(“?”) 。
- 接下来的操作就确定了音轨和视频轨道,同时确定文件的输出地点。
- 构造MediaMuxer (需要指定文件和格式)—> addTrack(trackFormat)添加轨道信息 参数为MediaFormat,注意这里的MediaFormat要是对应的轨道 —> start()开始合成 —> 设置ByteBuffer,用于缓存一帧数据 —> MediaCodec.BufferInfo bufferInfo = new MediaCodec.BufferInfo()获取bufferInfo —> 通过mediaExtractor.readSampleData读取数据流,同时也作为一个while循环的判断条件 —> 配置bufferInfo的四个属性 —> 把通过mediaExtractor解封装的数据通过mediaMuxer.writeSampleData写入到对应的轨道 —> 读取下一帧audioExtractor.advance()。
- 循环结束之后mediaExtractor.unselectTrack(i)释放选择 —> mediaMuxer.stop()停止 —> 最后释放mediaMuxer和mediaExtractor。
接下来我们开始合成操作
。
    //把音轨和视频轨再合成新的视频
    private String muxerMp4(String inputAudio , String outPutVideo){
        File videoFile = new File(getExternalFilesDir(Environment.DIRECTORY_MUSIC), "video.mp4");
        File audioFile = new File(getExternalFilesDir(Environment.DIRECTORY_MUSIC), inputAudio);
        File outputFile = new File(getExternalFilesDir(Environment.DIRECTORY_MUSIC), outPutVideo);


        if (outputFile.exists()) {
            outputFile.delete();
        }
        if (!videoFile.exists()) {
            Toast.makeText(this, "视频源文件不存在", Toast.LENGTH_SHORT).show();
            return "";
        }
        if (!audioFile.exists()) {
            Toast.makeText(this, "音频源文件不存在", Toast.LENGTH_SHORT).show();
            return "";
        }

        MediaExtractor videoExtractor = new MediaExtractor();
        MediaExtractor audioExtractor = new MediaExtractor();

        try {
            MediaMuxer mediaMuxer = new MediaMuxer(outputFile.getAbsolutePath(), MediaMuxer.OutputFormat.MUXER_OUTPUT_MPEG_4);
            int videoTrackIndex = 0;
            int audioTrackIndex = 0;

            //先添加视频轨道
            videoExtractor.setDataSource(videoFile.getAbsolutePath());
            int trackCount = videoExtractor.getTrackCount();

            for (int i = 0; i < trackCount; i++) {
                MediaFormat trackFormat = videoExtractor.getTrackFormat(i);
                String mimeType = trackFormat.getString(MediaFormat.KEY_MIME);
                if (TextUtils.isEmpty(mimeType)) {
                    continue;
                }
                if (mimeType.startsWith("video/")) {
                    videoExtractor.selectTrack(i);

                    videoTrackIndex = mediaMuxer.addTrack(trackFormat);
                    break;
                }
            }

            //再添加音频轨道
            audioExtractor.setDataSource(audioFile.getAbsolutePath());
            int trackCountAduio = audioExtractor.getTrackCount();
            for (int i = 0; i < trackCountAduio; i++) {
                MediaFormat trackFormat = audioExtractor.getTrackFormat(i);
                String mimeType = trackFormat.getString(MediaFormat.KEY_MIME);
                if (TextUtils.isEmpty(mimeType)) {
                    continue;
                }
                if (mimeType.startsWith("audio/")) {
                    audioExtractor.selectTrack(i);
                    audioTrackIndex = mediaMuxer.addTrack(trackFormat);
                    Log.i(TAG1, "muxerToMp4: audioTrackIndex=" + audioTrackIndex);
                    break;
                }
            }


            //再进行合成
            mediaMuxer.start();
            ByteBuffer byteBuffer = ByteBuffer.allocate(500 * 1024);
            MediaCodec.BufferInfo bufferInfo = new MediaCodec.BufferInfo();
            int sampleSize = 0;

            while ((sampleSize = videoExtractor.readSampleData(byteBuffer, 0)) > 0) {

                bufferInfo.flags = videoExtractor.getSampleFlags();
                bufferInfo.offset = 0;
                bufferInfo.size = sampleSize;
                bufferInfo.presentationTimeUs = videoExtractor.getSampleTime();
                mediaMuxer.writeSampleData(videoTrackIndex, byteBuffer, bufferInfo);
                videoExtractor.advance();
            }

            int audioSampleSize = 0;

            MediaCodec.BufferInfo audioBufferInfo = new MediaCodec.BufferInfo();


            while ((audioSampleSize = audioExtractor.readSampleData(byteBuffer, 0)) > 0) {

                audioBufferInfo.flags = audioExtractor.getSampleFlags();
                audioBufferInfo.offset = 0;
                audioBufferInfo.size = audioSampleSize;
                audioBufferInfo.presentationTimeUs = audioExtractor.getSampleTime();
                mediaMuxer.writeSampleData(audioTrackIndex, byteBuffer, audioBufferInfo);
                audioExtractor.advance();
            }

            //最后释放资源
            videoExtractor.release();
            audioExtractor.release();
            mediaMuxer.stop();
            mediaMuxer.release();

        } catch (IOException e) {
            e.printStackTrace();
            return "";

        }
        return outputFile.getAbsolutePath();
    }
因为这个与上面例子的流程大致相同,上面看懂了,下面基本上没什么问题,所以注释相对比较少。至于过程也就懒得分析了。
我们在解封装的过程中同时使用到了MediaExtractor和MediaMuxer,包括合成的时候也用了这两个。
不要想当然的认为
MediaExtractor解封装出来两文件,两文件根据MediaMuxer就可以合成!!!
最后遗留两个问题:
1.解封装出来的是不同轨道的资源,可是当做文件输出时,除了文件名不同其他的操作都是一模一样,就连mediaMuxer的参数格式都是MediaMuxer.OutputFormat.MUXER_OUTPUT_MPEG_4,那音频文件是怎样合成成功的???
AAC代表Advanced Audio Coding(高级音频编码),是一种由MPEG-4标准定义的有损音频压缩格式。而且解封装出来的音频acc和视频MP4改了后缀都可以正常播放。
音频文件同样可以理解为一帧帧的说法,之后我回使用实时AAC音频帧并通过AudioTrack来播放,尽情期待。
2.分解出来的轨道是固定的吗?还是根据自定义来的?他的个数只能是一个音频一个视频吗?
- 分解出来的轨道不是固定的但一般是两个轨道(一个音频一个视频)
E/测试Demo: 轨道数量 = 2
E/测试Demo: 0编号通道格式 = video/avc
E/测试Demo: 1编号通道格式 = audio/mp4a-latm
- 这个具体的顺序就是根据你使用mediaMuxer添加合成的顺序
- 当然也可能有多个音频和视频在一个盒子里