一、简介
相信大家在写项目的时候会遇见时间选择器的效果,如下:
二、实现步骤
uni自带选择器组件。类型有好几种。这里以日期案例讲解。
1.找到picker组件,找到日期选择器的案例,找到案例,复制出来。
2、整体代码
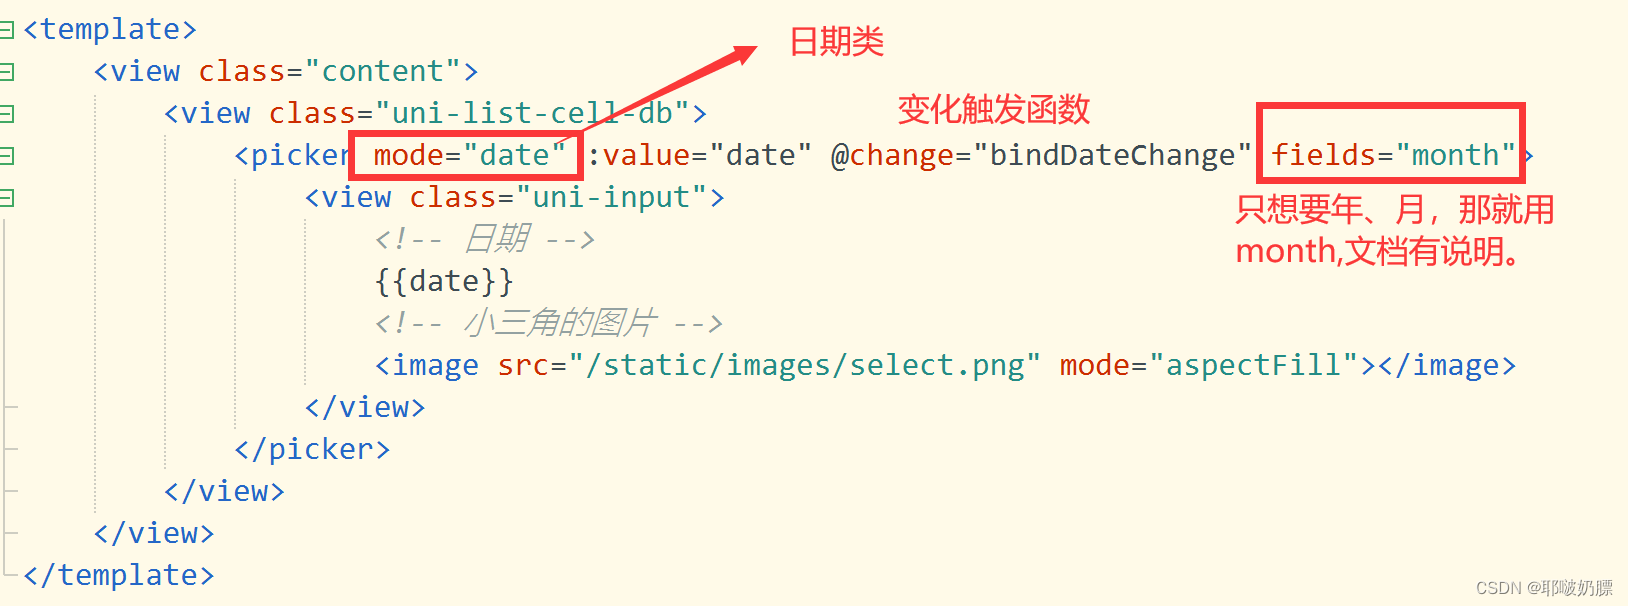
<template>
<view class="content">
<view class="uni-list-cell-db">
<picker mode="date" :value="date" @change="bindDateChange" fields="month">
<view class="uni-input">
<!-- 日期 -->
{{date}}
<!-- 小三角的图片 -->
<image src="/static/images/select.png" mode="aspectFill"></image>
</view>
</picker>
</view>
</view>
</template>
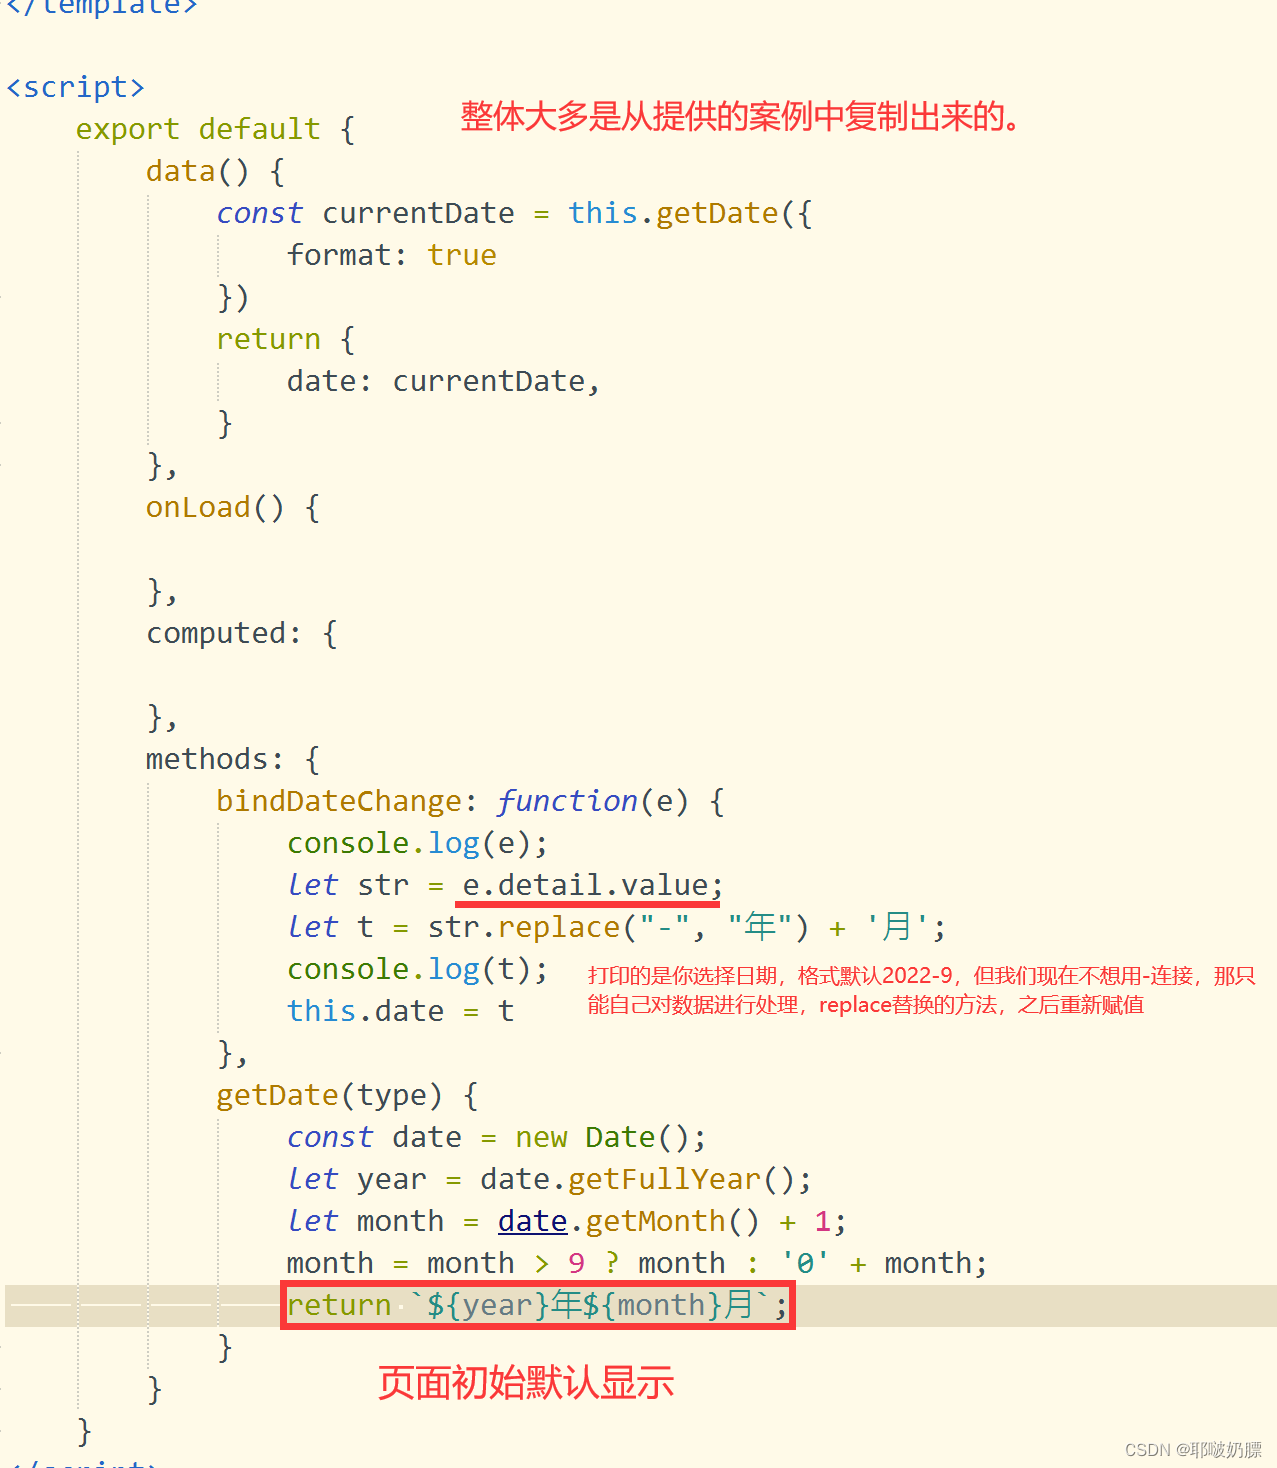
<script>
export default {
data() {
const currentDate = this.getDate({
format: true
})
return {
date: currentDate,
}
},
onLoad() {
},
computed: {
},
methods: {
bindDateChange: function(e) {
console.log(e);
let str = e.detail.value;
let t = str.replace("-", "年") + '月';
console.log(t);
this.date = t
},
getDate(type) {
const date = new Date();
let year = date.getFullYear();
let month = date.getMonth() + 1;
month = month > 9 ? month : '0' + month;
return `${year}年${month}月`;
}
}
}
</script>
<style lang="scss">
.uni-input image {
width: 25rpx;
height: 18rpx;
margin-left: 20rpx;
}
picker {
display: flex;
}
</style>
let str = e.detail.value;
let t = str.split('-');
console.log(t);
this.date =t[0]+'年'+t[1]+'月'+t[2]+'日'
三、总结
-
选择器网址:
https://uniapp.dcloud.net.cn/component/picker.html#%E6%97%A5%E6%9C%9F%E9%80%89%E6%8B%A9%E5%99%A8
- 还是需要多看官方文档,多测试一下。
版权声明:本文为xulihua_75原创文章,遵循 CC 4.0 BY-SA 版权协议,转载请附上原文出处链接和本声明。