百知教育 – 孙帅 – 16_多线程
01_线程的概念和实现线程的方式
-
什么是
进程
-
程序是静止的,只有真正运行时的程序,才被称为
进程
。 -
单核CPU
在任何时间点上,只能运行一个进程;
宏观并行、微观串行
。
-
程序是静止的,只有真正运行时的程序,才被称为
-
什么是线程
-
线程
,又称为
轻量级进程(Light Weight Process)。
是程序中的
一个顺序控制流程
,同时也是
CPU的基本调度单位
。
进程由多个线程组成
,彼此间完成不同的工作,
交替执行
,称为多线程
。
-
-
线程的组成
-
CPU时间片
:
操作系统(OS)
会为每个线程分配执行时间 -
运行数据
:
-
堆空间:
存储
线程需使用的
对象
,多个线程可以
共享
堆中的
对象
。 -
栈空间:
存储
线程需使用的
局部变量
,每个线程都拥有
独立
的栈。
-
-
线程的逻辑代码
-
-
代码:
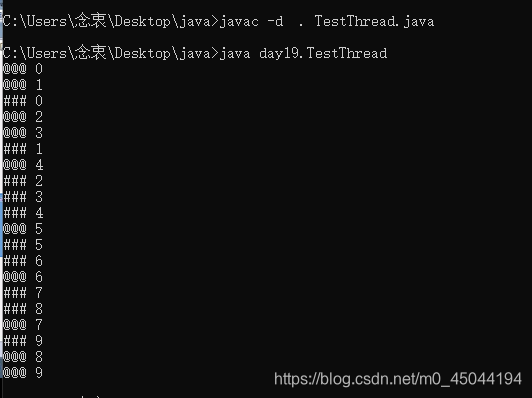
package day19; public class TestThread{ public static void main(String[] args){ Task1 task1 = new Task1(); Thread t1 = new Thread(task1); t1.start(); Thread t2 = new TaskThread(); //Thread类实现了Runnable接口,本身可以充当线程的任务 t2.start(); } } class Task1 implements Runnable{ public void run(){ for(int i = 0; i < 10; i++){ System.out.println("@@@ "+i); } } } class TaskThread extends Thread{ public void run(){ for(int i = 0; i < 10; i++){ System.out.println("### "+i); } } } -
运行结果:
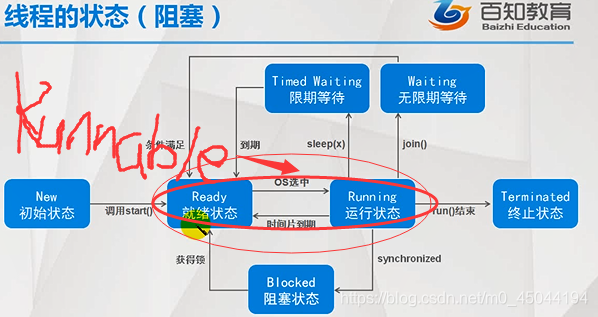
02_Thread的基本状态
-
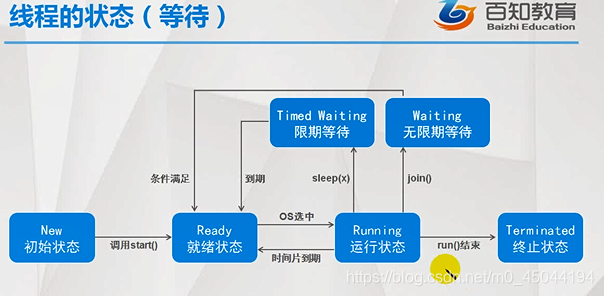
new 初始状态
线程对象被创建,即为初始状态。在堆中开辟内存,与常规对象无异。
-
Ready 就绪状态
调用start() 之后,进入就绪状态,等待OS选中,并分配时间片。
-
Running 运行状态
获得时间片后,进入运行状态 ,如果时间片到期,则回到就绪状态。
-
Terminated 终止状态
主线程main()或独立线程run()结束,进入终止状态,并释放持有的时间片。
-
总结:
-
实际上,
就绪状态与运行状态统称为Runnable
-
可通过设置线程的优先级,保证其执行的顺序:
Thread t1 = new Thread(task1); t1.setPriority(10); //1~10优先级越来越高
。但是由于Java的跨平台性,不同的操作系统会有不同的线程调度策略,对于其他操作系统优先级可能不会发挥作用。
-
实际上,
03_线程的等待状态
-
方法:
-
Thread.sleep()
限时等待,线程进入休眠状态,会抛出**
InterruptedException异常
**。 -
Thread.yield()
放弃CPU,回到就绪状态。 -
setDaemon(true)
设置线程为
守护线程
,不论该线程是否结束,当所有的非守护线程都结束时,进程就会结束。 -
t.join()
当前线程进入
等待状态
,直到
t
线程终止,才会恢复执行,
会抛出异常
。 -
Thread.currentThread()
获得当前线程 -
t.getName()
获得
t
线程的名字(创建线程对象时可以传入一个字符串,当做线程的名字,否则取默认名字)
-
-
代码:
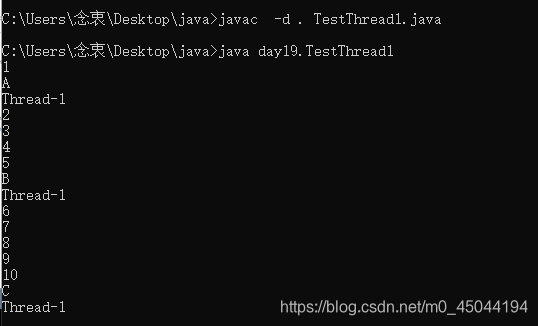
package day19; public class TestThread1{ public static void main(String[] args){ Thread t1 = new Thread(new TaskA()); Thread t2 = new ThreadB(); t2.setDaemon(true); t1.start(); t2.start(); /* t1.join(); t2.join(); System.out.println(Thread.currentThread().getName()); System.out.println("All Thread is Over"); */ } } class TaskA implements Runnable{ public void run(){ for(int i = 1; i <= 10; i++){ System.out.println(i); try{ Thread.sleep(100); }catch(InterruptedException e){ e.printStackTrace(); } } } } class ThreadB extends Thread{ public void run(){ for(char c = 'A'; c <= 'N'; c++){ System.out.println(c); System.out.println(Thread.currentThread().getName()); try{ Thread.sleep(500); }catch(InterruptedException e){ e.printStackTrace(); } } } } -
运行结果:
04_线程安全的问题
-
当多线程共同访问同一个对象(
临界资源
)的时候,如果破坏了不可分割的操作(
原子操作
),就可能发生
数据不一致
。 -
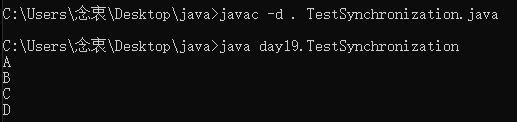
代码:
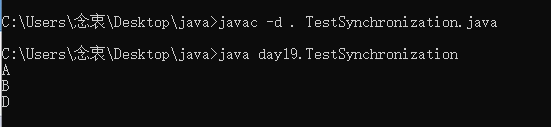
package day19; public class TestSynchronization{ public static void main(String[] args) throws Exception{ MyList list = new MyList(); Thread t1 = new Thread(new Runnable(){ public void run(){ list.add("C"); } }); Thread t2 = new Thread(new Runnable(){ public void run(){ list.add("D"); } }); t1.start(); t2.start(); t1.join(); t2.join(); list.print(); } } class MyList{ String[] s = {"A","B","","","",""}; int index = 2; public void add(String s1){ s[index] = s1; try{ Thread.sleep(100); }catch(InterruptedException e){ e.printStackTrace(); } index++; } public void print(){ for(int i = 0; i < s.length; i++){ System.out.println(s[i]); } } } -
运行结果:
05_同步代码块
- 每个Java对象都有一个互斥锁标记,用来分配给线程
-
synchronized(o){ //代码块 }
对o对象加锁的
同步代码块
,只有拿到o的
锁标记
的线程,才能进入对o加锁的同步代码块。 -
修改上面代码为:
synchronized(list){ list.add("C"); } synchronized(list){ list.add("D"); } -
运行结果:
06_同步方法和死锁
-
synchronized
方法修饰符
,表示对this加锁的同步代码块。只有拿到this的锁标记的线程,才能调用this的同步方法。 -
修改上上代码为(结果正确):
public synchronized void add(String s){
	//代码块
}
07_等待-通知机制
-
线程通信机制:
等待-通知机制
-
o.wait():
必须
出现在对o加锁的同步代码块里
,执行后线程会
释放锁标记
,
进入等待状态(进入o的等待队列)
-
o.notify()/notifyAll():
必须
出现在对o加锁的同步代码块里
,执行后
从等待状态(o的等待队列)中释放一个/全部线程
-
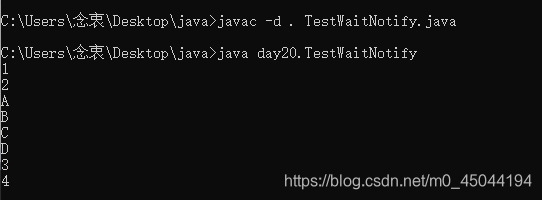
代码:
package day20; public class TestWaitNotify{ public static void main(String[] args) throws Exception{ Object o = new Object(); Thread t = new Thread(new Runnable(){ public void run(){ synchronized(o){ System.out.println("A"); System.out.println("B"); o.notify(); System.out.println("C"); System.out.println("D"); } } }); t.start(); synchronized(o){ System.out.println("1"); System.out.println("2"); o.wait(); System.out.println("3"); System.out.println("4"); } } } -
运行结果:
08_生产者消费者
-
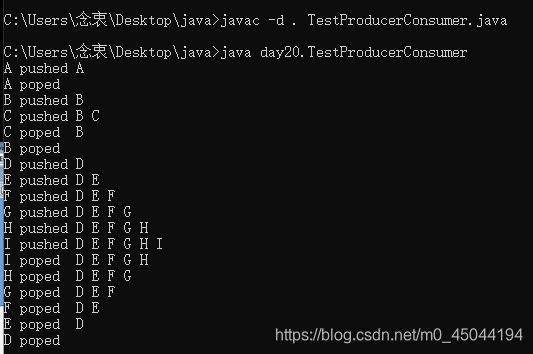
代码:
package day20; public class TestProducerConsumer{ public static void main(String[] args){ MyStack stack = new MyStack(); Runnable task1 = new Runnable(){ public void run(){ for(char c = 'A'; c <= 'I'; c++){ stack.push(c+""); } } }; Runnable task2 = new Runnable(){ public void run(){ for(int i = 1; i <= 9; i++){ stack.pop(); } } }; new Thread(task1).start(); //new Thread(task1).start(); new Thread(task2).start(); //new Thread(task2).start(); } } class MyStack{ String[] data = {"","","","","",""}; int index; public synchronized void push(String s){ while(index == data.length){ try{ this.wait(); }catch(InterruptedException e){ e.printStackTrace(); } } data[index] = s; index++; System.out.print(s+" pushed "); print(); this.notifyAll(); } public synchronized void pop(){ while(index == 0){ try{ this.wait(); }catch(InterruptedException e){ e.printStackTrace(); } } index--; String s = data[index]; data[index] = ""; System.out.print(s+" poped "); print(); this.notifyAll(); } public void print(){ for(int i = 0; i < data.length; i++){ System.out.print(data[i]+" "); } System.out.println(); } } -
运行结果:
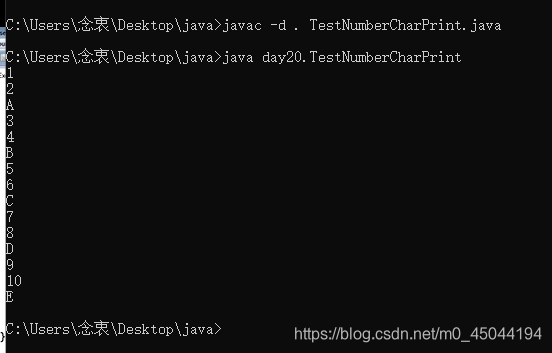
09_数字和字母的交替打印
-
代码:
package day20; public class TestNumberCharPrint{ public static void main(String[] args){ Object o = new Object(); Runnable task1 = new Runnable(){ public void run(){ synchronized(o){ for(int i = 1; i <= 10; i++){ System.out.println(i); if(i % 2 == 0){ o.notifyAll(); try{ if(i != 10) o.wait(); }catch(InterruptedException e){ e.printStackTrace(); } } } } } }; Runnable task2 = new Runnable(){ public void run(){ synchronized(o){ for(char c = 'A'; c <= 'E'; c++){ System.out.println(c); o.notifyAll(); try{ if(c != 'E') o.wait(); }catch(InterruptedException e){ e.printStackTrace(); } } } } }; Thread t1 = new Thread(task1); Thread t2 = new Thread(task2); t1.start(); t2.start(); } } -
运行结果:
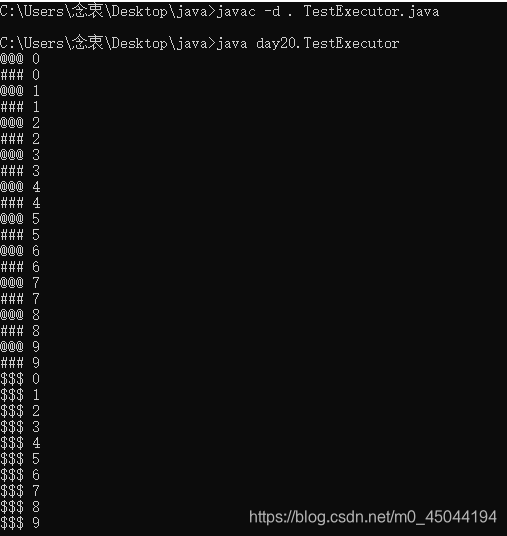
10_线程池
-
代码:
package day20; import java.util.concurrent.ExecutorService; import java.util.concurrent.Executors; public class TestExecutor{ public static void main(String[] args){ ExecutorService es = Executors.newFixedThreadPool(2); //ExecutorService es = Executors.newCachedThreadPool(); Runnable r1 = new Runnable(){ public void run(){ for(int i = 0; i < 10; i++){ System.out.println("### "+i); try{ Thread.sleep(100); }catch(InterruptedException e){ e.printStackTrace(); } } } }; Runnable r2 = new Runnable(){ public void run(){ for(int i = 0; i < 10; i++){ System.out.println("@@@ "+i); try{ Thread.sleep(100); }catch(InterruptedException e){ e.printStackTrace(); } } } }; Runnable r3 = new Runnable(){ public void run(){ for(int i = 0; i < 10; i++){ System.out.println("$$$ "+i); try{ Thread.sleep(100); }catch(InterruptedException e){ e.printStackTrace(); } } } }; es.submit(r1); es.submit(r2); es.submit(r3); es.shutdown(); } } -
运行结果:
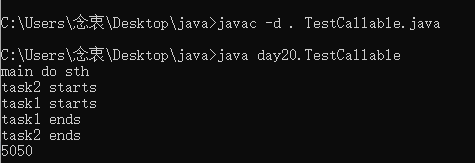
11_Callable和Future
-
代码:
package day20; import java.util.concurrent.Executors; import java.util.concurrent.ExecutorService; import java.util.concurrent.Callable; import java.util.concurrent.Future; public class TestCallable{ public static void main(String[] args) throws Exception{ ExecutorService es = Executors.newCachedThreadPool(); Callable<Integer> task1 = new Callable<Integer>(){ public Integer call() throws Exception{ System.out.println("task1 starts"); int result = 0; for(int i = 1; i < 100; i += 2){ result += i; Thread.sleep(100); } System.out.println("task1 ends"); return result; } }; Callable<Integer> task2 = new Callable<Integer>(){ public Integer call() throws Exception{ System.out.println("task2 starts"); int result = 0; for(int i = 2; i <= 100; i += 2){ result += i; Thread.sleep(100); } System.out.println("task2 ends"); return result; } }; Future<Integer> f1 = es.submit(task1); Future<Integer> f2 = es.submit(task2); System.out.println("main do sth"); int result = f1.get()+f2.get(); System.out.println(result); es.shutdown(); } } -
运行结果:
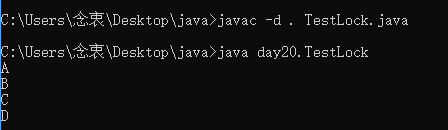
12_Lock对象
-
Lock接口
-
JDK5
加入,与synchronized比较,显示定义,结构更灵活。 - 提供更多实用性方法,功能更强大、性能更优越。
-
常用方法:
-
void lock():
//获取锁,如锁被占用,则等待。 -
boolean tryLock():
//尝试获取锁(成功返回true,失败返回false,不阻塞) -
void unlock():
//释放锁
-
-
-
代码:
package day20; import java.util.concurrent.locks.Lock; import java.util.concurrent.locks.ReentrantLock; public class TestLock{ public static void main(String[] args) throws Exception{ MyList list = new MyList(); Thread t1 = new Thread(new Runnable(){ public void run(){ list.add("C"); } }); Thread t2 = new Thread(new Runnable(){ public void run(){ list.add("D"); } }); t1.start(); t2.start(); t1.join(); t2.join(); list.print(); } } class MyList{ String[] s = {"A","B","","","",""}; int index = 2; Lock lock = new ReentrantLock(); public void add(String s1){ try{ //lock.tryLock(); lock.lock(); s[index] = s1; try{ Thread.sleep(100); }catch(InterruptedException e){ e.printStackTrace(); } index++; } finally{ lock.unlock(); } } public void print(){ for(int i = 0; i < s.length; i++){ System.out.println(s[i]); } } } -
运行结果:
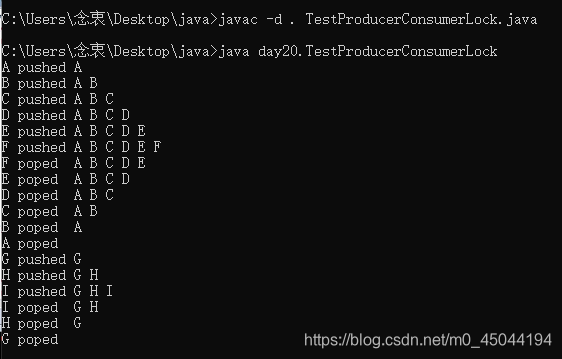
13_Condition对象
-
代码:
package day20; import java.util.concurrent.locks.Condition; import java.util.concurrent.locks.Lock; import java.util.concurrent.locks.ReentrantLock; public class TestProducerConsumerLock{ public static void main(String[] args){ MyStack stack = new MyStack(); Runnable task1 = new Runnable(){ public void run(){ for(char c = 'A'; c <= 'I'; c++){ stack.push(c+""); } } }; Runnable task2 = new Runnable(){ public void run(){ for(int i = 1; i <= 9; i++){ stack.pop(); } } }; new Thread(task1).start(); //new Thread(task1).start(); new Thread(task2).start(); //new Thread(task2).start(); } } class MyStack{ String[] data = {"","","","","",""}; int index; Lock lock = new ReentrantLock(); Condition full = lock.newCondition(); Condition empty = lock.newCondition(); public void push(String s){ try{ lock.lock(); while(index == data.length){ try{ full.await(); }catch(InterruptedException e){ e.printStackTrace(); } } data[index] = s; index++; System.out.print(s+" pushed "); print(); empty.signalAll(); } finally{ lock.unlock(); } } public void pop(){ try{ lock.lock(); while(index == 0){ try{ empty.await(); }catch(InterruptedException e){ e.printStackTrace(); } } index--; String s = data[index]; data[index] = ""; System.out.print(s+" poped "); print(); full.signalAll(); } finally{ lock.unlock(); } } public void print(){ for(int i = 0; i < data.length; i++){ System.out.print(data[i]+" "); } System.out.println(); } } -
运行结果:
版权声明:本文为m0_45044194原创文章,遵循 CC 4.0 BY-SA 版权协议,转载请附上原文出处链接和本声明。