文章目录
上一节 spring boot test
源码
Spring boot mybatis
springboot 整合 mybatis
mybatis 简介
MyBatis 是一款优秀的持久层框架,它支持自定义 SQL、存储过程以及高级映射。MyBatis 免除了几乎所有的 JDBC 代码以及设置参数和获取结果集的工作。MyBatis 可以通过简单的 XML 或注解来配置和映射原始类型、接口和 Java POJO(Plain Old Java Objects,普通老式 Java 对象)为数据库中的记录。
springboot 整合mybatis
-
添加依赖
添加驱动和 mybatis-spring-boot-starter
      <dependency>
           <groupId>org.springframework.boot</groupId>
           <artifactId>spring-boot-starter-web</artifactId>
       </dependency>
       <dependency>
           <groupId>org.mybatis.spring.boot</groupId>
           <artifactId>mybatis-spring-boot-starter</artifactId>
           <version>2.1.3</version>
       </dependency>
       <dependency>
           <groupId>mysql</groupId>
           <artifactId>mysql-connector-java</artifactId>
           <version>5.1.47</version>
       </dependency>
-
配置文件
配置数据源spring: application: name: mybatis-demo datasource: url: jdbc:mysql://localhost:3306/mytest?useSSL=false&charsetEncoding=utf8 username: root password: 123456 driver-class-name: com.mysql.jdbc.Driver配置mabatis相关配置
mybatis:
   # 配置 mybatis 的configuration 文件位置
 #  config-location: classpath:mybatis/mybatis-config.xml
   # 配置 mapper 文件的位置
   mapper-locations: classpath:mybatis/mapper/*
   # 配置别名, 默认是类名首字母小写;也可以使用@Alias
   type-aliases-package: com.xiaodu.mybatis.entity
   # configuration 配置 config-location 和 configuration 不能同时配置
   configuration:
     # 下划线转大写映射实体类字段
     map-underscore-to-camel-case: true
mybatis 配置官方详解:
https://mybatis.org/mybatis-3/zh/configuration.html#
创建数据库表
drop table t_user;
commit;
create table t_user
(
    u_id        varchar(64)                         not null
        primary key,
    u_name      varchar(32)                         not null,
    password    varchar(32)                         not null,
    money       int(10)                             null,
    create_time timestamp default CURRENT_TIMESTAMP not null
);
commit ;
代码示例
-
创建mapper
-
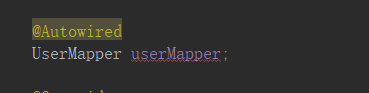
@Mapper 为mybatis 注解,标注为映射器,加入到springbean管理中;@Repository 是spring 带的注解,也可以不加,这里是为了 不让idea 使用@Autowired 的时候报红(如下),当然你也可以设置告警级别。
创建mapper
@Mapper
@Repository
public interface UserMapper {

    UserEntity getOne(String id);


}
-
创建mapper对应的xml文件
-
我们已经在配置文件中通过
mapper-locations: classpath:mybatis/mapper/
* 指定了 mapper.xml文件的地址;
所以我们需要在该路径下创建对应的mapper.xml文件
创建userMapper.xml,并创建对应的select语句
<?xml version="1.0" encoding="UTF-8" ?>
<!DOCTYPE mapper
        PUBLIC "-//mybatis.org//DTD Mapper 3.0//EN"
        "http://mybatis.org/dtd/mybatis-3-mapper.dtd">
<mapper namespace="com.xiaodu.mybatis.mapper.UserMapper">
    <select id="getOne" resultType="userEntity">
        select u_id, u_name, password, money, create_time from t_user where u_id = #{uId}
    </select>
</mapper>
-
service和controller
- 模拟下正常开发下的场景,我们创建对应的service 和controller
service
public interface UserService {

    UserEntity oneUser(String id) throws Exception;

    List<UserEntity> listUser(List<String> ids) throws Exception;

    List<UserEntity> listUser(UserEntity userEntity) throws Exception;

    int addUser(UserEntity userEntity) throws Exception;

    int batchUser(List<UserEntity> users)throws Exception;

    int delUser(String id) throws Exception;

    int updateUser(UserEntity userEntity) throws Exception;
}
...
@Service
@Slf4j
public class UserServiceImpl implements UserService {

    @Autowired
    UserMapper userMapper;

    @Override
    public UserEntity oneUser(String id) throws Exception {
        return userMapper.getOne(id);
    }

    //todo
    @Override
    public List<UserEntity> listUser(List<String> ids) throws Exception {
        return null;
    }
    //todo
    @Override
    public List<UserEntity> listUser(UserEntity userEntity) throws Exception {
        return null;
    }
    //todo
    @Override
    public int addUser(UserEntity userEntity) throws Exception {
        return 0;
    }
    //todo
    @Override
    public int batchUser(List<UserEntity> users) throws Exception {
        return 0;
    }
    //todo
    @Override
    public int delUser(String id) throws Exception {
        return 0;
    }
    //todo
    @Override
    public int updateUser(UserEntity userEntity) throws Exception {
        return 0;
    }
}
controller
@RestController
@RequestMapping("user")
public class UserController {

    @Autowired
    private UserService userService;

    @GetMapping
    public UserEntity getUserOne(@RequestParam String id) throws Exception {
        return userService.oneUser(id);

    }

}
数据库映射实体; @Alias 指定了别名,我们在配置文件中也做了全局配置
type-aliases-package: com.xiaodu.mybatis.entity
; 也可以不加,不过不加有的时候在xml文件 中 使用resultType=“userEntity” 会爆红
@ToString
@Alias("userEntity")
public class UserEntity {

    private String uId;

    private String uName;

    private String password;

    private Long money;

    private Date createTime;

    public String getuId() {
        return uId;
    }

    public void setuId(String uId) {
        this.uId = uId;
    }

    public String getuName() {
        return uName;
    }

    public void setuName(String uName) {
        this.uName = uName;
    }

    public String getPassword() {
        return password;
    }

    public void setPassword(String password) {
        this.password = password;
    }

    public Long getMoney() {
        return money;
    }

    public void setMoney(Long money) {
        this.money = money;
    }

    public Date getCreateTime() {
        return createTime;
    }

    public void setCreateTime(Date createTime) {
        this.createTime = createTime;
    }
}
这样一个完整的使用示例就完成了, 可以正常访问查询数据;
注解版使用介绍
注解版适用简单sql, 复杂sql使用注解很不美观和方便。
@Select
@Delete
@Update
@Insert
简单以其中几个为 代码示例
- select
@Select("select * from t_user where u_id = #{id}")
- update
   @Update("update t_user set password = #{password}, money = #{money}, create_time = #{createTime} where u_id = #{uId}")
    int updateUser(UserEntity userEntity);
- 注解中使用动态sql
    @Select("<script>" +
            "  select * from t_user \n" +
            "        <where>\n" +
            "            u_id in\n" +
            "            <foreach collection=\"list\" item=\"id\" open=\"(\" close=\")\" separator=\",\">\n" +
            "                #{id}\n" +
            "            </foreach>\n" +
            "        </where>\n"+
                   "</script>")
    List<UserEntity> listUser(List<String> ids);
注解中使用动态sql,感觉没有在xml中使用方便,1. 没有自动提示,容易写错,我一般都是在xml中写好 复制过来 2. 不美观,代码太乱。
结果映射
@Results
@Result
@ResultMap
@ResultType
使用示例
@results
 @Select("select * from t_user where u_id = #{id}")
    @Results(id = "userResultMap2", value = {
            @Result(column = "u_name", property = "uName"),
            @Result(column = "u_id", property = "uId"),
            @Result(column = "money", property = "money"),
            @Result(column = "create_time", property = "createTime")
    })
    UserEntity selectOne(String id);
@resultMap
ResultMap 可以指定xml文件中的 resultMap 也可以指定 @Results 的id
    @Select("select * from t_user where u_id = #{id}")
    @ResultMap("userResultMap")
//    @ResultMap("userResultMap2")
    UserEntity selectById(String id);
sql生成器
@DeleteProvider
@SelectProvider
@InsertProvider
@UpdateProvider
以 @DeleteProvider 为代码示例,其他使用方法是一样的; value 指定代码 生成sql的类sqlProvider, 通过method 指定那个方法生成;
若只有一个参数则直接传参就行,多个参数使用map接收
    @DeleteProvider(value = UserProvider.class, method = "delUser")
     int deleteUser(String id);
public class UserProvider {

    public String delUser(String id) {

        return "delete from t_user where u_id = '" + id+ "'";
    }
}
以上只是简单示例,详细请网上查阅。
其他
mybatis分页
mybatis 自带分页
mybatis 使用 rowBounds 进行分页,是逻辑逻辑分页,先全部查询出来,然后再内存中进行分页截取相关数据返回,所以一般
情况下不使用这种分页,只做了解
代码示例
//mapper  我们接收一个rowBounds
     @Select("select * from t_user")
    List<UserEntity> selectAll(RowBounds rowBounds);
    ...
//
    @Override
    public List<UserEntity> pageUser(Integer pageNo, Integer pageSize) {
        pageNo = pageNo <= 0 ? 1 : pageNo;
        pageSize = pageSize <= 0 ? 5 : pageSize;
        RowBounds rowBounds = new RowBounds((pageNo -1) * pageSize, pageSize);
        return userMapper.selectAll(rowBounds);
    }
pageHelper 分页
通常我们会使用第三方框架进行分页,例如 使用 pageHelper 进行分页;这里只是简单示例,
更详细的请查询官网。
添加依赖
   <dependency>
           <groupId>com.github.pagehelper</groupId>
           <artifactId>pagehelper-spring-boot-starter</artifactId>
           <version>1.2.10</version>
       </dependency>
代码示例
使用 PageHelper.startPage 进行分页
    public PageInfo<UserEntity> pageHelperUser(Integer pageNo, Integer pageSize) {
        pageNo = pageNo <= 0 ? 1 : pageNo;
        pageSize = pageSize <= 0 ? 5 : pageSize;
        return PageHelper.startPage(pageNo, pageSize).doSelectPageInfo(() -> userMapper.selectUserAll());
    }
若加入了 pageHelper ,mybatis自带的rowBounds 分页也会拦截 进行物理分页,所以 使用rowBounds 也能进行物理分页了。
mybatis拦截器
分页插件 PageHelper 是使用的mybatis 提供的拦截器进行分页, 分页拦截器 PageInterceptor;
我们这里模拟使用mybatis 拦截器进行 字段 updateTime 和createTime 的赋值。
1. 创建拦截器
使用@Intercepts 声明为拦截器, @Signature 具体拦截哪些类的那些方法
@Intercepts({
        @Signature(type = Executor.class, method = "update", args = {MappedStatement.class, Object.class})
})
public class DateInterceptor implements Interceptor {
    @Override
    public Object intercept(Invocation invocation) throws Throwable {
        Object[] args = invocation.getArgs();
        MappedStatement mappedStatement = (MappedStatement) args[0];
        SqlCommandType sqlCommandType = mappedStatement.getSqlCommandType();
        Object arg = args[1];
        Executor executor = (Executor) invocation.getTarget();
        Field createTime = ReflectionUtils.findField(arg.getClass(), "createTime");
        Field updateTime = ReflectionUtils.findField(arg.getClass(), "updateTime");
        if (createTime != null && sqlCommandType.equals(SqlCommandType.INSERT)) {
            fieldSet(arg, createTime);
        }

        if (updateTime != null && sqlCommandType.equals(SqlCommandType.UPDATE)) {
            fieldSet(arg, updateTime);
        }
        return executor.update(mappedStatement, arg);
    }

    private void fieldSet(Object arg, Field f) {
        ReflectionUtils.makeAccessible(f);
        Class<?> type = f.getType();
        if (type == Date.class) {
            ReflectionUtils.setField(f, arg, new Date());
        } else if (type == java.sql.Date.class) {
            ReflectionUtils.setField(f, arg, new java.sql.Timestamp(new Date().getTime()));

        } else if (type == LocalDateTime.class) {
            ReflectionUtils.setField(f, arg, LocalDateTime.now());
        } else if (type == LocalDate.class) {
            ReflectionUtils.setField(f, arg, LocalDate.now());
        }
    }

    @Override
    public Object plugin(Object target) {
        return Plugin.wrap(target, this);
    }

    @Override
    public void setProperties(Properties properties) {

    }
}
2. 添加拦截器到mybatis中
@Configuration
public class MybatisConfig {

    @Bean
    public ConfigurationCustomizer configurationCustomizer() {
        return configuration -> configuration.addInterceptor(new DateInterceptor());
    }
}
由于我们拦截的是 Executor 的 update 方法; 当执行 insert , update ,delete 命令时 就会走该拦截器,
再拦截器代码中
我们约定 实体bean的属性为 createTime 和 updateTime
;我们动态的判断sql命令
给 属性赋值。
总结
: 以上是 springboot 整合mybatis 后的简单使用;单个知识点还请自行查询。
下一节 spring boot jpa