轮播图制作
这是我的第一篇文章,记录网页中常规的轮播图制作,防止以后会忘记,同时也可以分享给其他人看。
HTML和CSS部分
HTML的架构
由于是我自己用来练习用的,所以图片和样式会比较少。
<div class="box c">
<a href="javascript:;" class=".arrow_l">></a>
<a href="javascript:;" class=".arrow_r"><</a>
<ul class="showbox">
<li><img src="image/n1.jpg" alt="广告1" /></li>
<li><img src="image/n2.jpg" alt="广告2" /></li>
<li><img src="image/n3.jpg" alt="广告3" /></li>
</ul>
<ol class="circle"></ol>
</div>
这里采用
<ul></ul>标签作为轮播移动的对象,移动每个图片就操作这个对象就可以了。<a></a>是左右两个箭头。外面的div是固定位置,通常可以作为版心存在,下面的有序列表标签<ol></ol>用来当作下面的小圆点的框框,小圆点当然还是用<li></li>,当然上面没有相应的标签,我是通过JS动态添加,方便以后代码的维护。
CSS样式
首先肯定是要去除一些默认样式
* {
	padding: 0;
	margin: 0;
}
li {
	list-style-type: none;
	float: left;
}
a {
	text-decoration: none;
}
整个版心部分
.c {
	width: 400px;
	margin: 100px auto;
}
.box {
	position: relative;
	height: 250px;
	overflow: hidden;
}
然后是负责移动和存放图片的<ul>
.c ul {
	position: absolute;
	top: 0;
	left: 0;
	width: 1600px;
	height: 250px;
}
需要注意的是
<ul>的宽度需要足够大,以让图片水平排列,比如我这里的1600px,或者500%,都行,需要比全部图片加在一起大。
哦,忘记了还有里面的<li>和<img>
img {
	width: 400px;
	height: 250px;
}
<li>就不用设置了,由<img>自动撑开
接下来是那两 一对箭头
.box a {
	display: none;
	width: 20px;
	height: 40px;
	z-index: 5;
	background-color: #0f0;
	line-height: 40px;
	text-align: center;
}
.arrow_l {
	position: absolute;
	left: 0;
	top: calc(50% - 20px);
}
.arrow_r {
	position: absolute;
	right: 0;
	top: calc(50% - 20px);
}
这里用到了calc()函数,这里第一个参数是父元素的宽度,在减去本身的宽度(高度)的一半,就居中了。需要注意的另外一点是中间的运算符两边需要留有空格。
再加一个鼠标移入框框时箭头出现,移出时箭头也消失
.box:hover .arrow_l,
.box:hover .arrow_r {
	display: block;
}
最后当然是我们的小圆点们了~~
.circle {
	position: absolute;
	left: calc(50% - 75px);
	top: 210px;
	display: flex;
	justify-content: center;
	width: 150px;
	height: 30px;
	background-color: rgb(41, 40, 40);
	opacity: 0.7;
	border-radius: 19px;
}
.circle li {
	width: 22px;
	height: 22px;
	border-radius: 50%;
	border: 4px solid #fff;
	cursor: pointer;
	margin: 0 4px;
}
.current {
	background-color: #fff;
}
这里用到了flex弹性布局,蛮好用的,我自己还需要进一步熟练
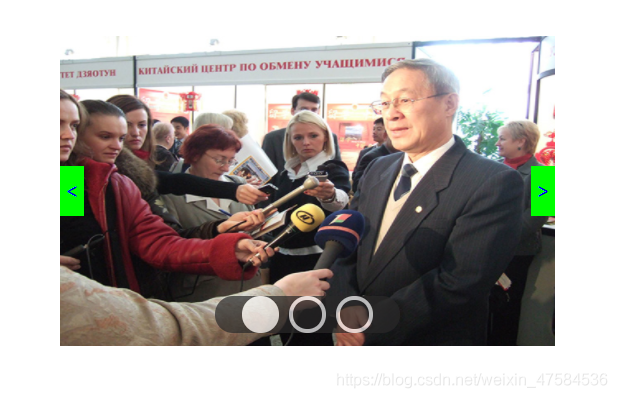
最后一起来看看效果图
接下来是轮播图的核心JS部分
JavaScript部分
自定义函数animate();
用定时器setInterval()实现一个自定义动画函数,用于实现图片的移动,有三个参数:需要动画的对象(obj)、移动到的目标值(target)、回调函数(callback)
function animate(obj, target, callback) {
	//清除之前的定时器,防止多次点击会叠加多个定时器
	clearInterval(obj.timer);
	//把标识符加入到对象里面,节省更多的空间,提高效率
	obj.timer = setInterval(function () {
		//定义一个速度变量,用目标地点-实时当前地点来实现先加速后减速的过程
		var speed = (target - obj.offsetLeft) / 10;
		//将这个变量取整,以便后面判断临界条件
		//向上向下取整的依据是当目标值比当前值大,也就是速度为正时,所得到的最终结果将小于预期值
		//当目标值小于当前位置时,元素的left值最终将大于预期值
		//故速度大于0(目标值大于当前值,往右走)进行向上取整,小于0(目标值在当前值的左边,往回走)向下取整
		speed = speed > 0 ? Math.ceil(speed) : Math.floor(speed);
		//判断当前位置是否是目标值,是则清除定时器
		if (obj.offsetLeft === target) {
			clearInterval(obj.timer);
			//结束定时器后如果有回调函数,就调用回调函数
			callback && callback();
		}
		//否则继续不断移动
		obj.style.left = obj.offsetLeft + speed + "px";
	}, 20);
}
简单的获取对象函数$()
由于需要不断的获取对象,在这里我简单的封装一个函数来根据需要获取相应的对象,这样就不用写这么多遍代码咯
function $(str) {
		return document.querySelector(str);
	}
获取所需要的对象
先获取需要的部分对象,后面的对象等需要的时候再添加获取的代码,这样方便浏览,防止忘记了
	var arrow_l = $(".arrow_l");
	var arrow_r = $(".arrow_r");
	var showbox = $(".showbox");
	var ol = $("ol");
	var width = $("img").clientWidth;
	var num = 0; //利用num来计数图片
	var count = 0; //利用count来计数圆点
动态添加小圆点以及设置默认属性和样式
由于我在HTML中并没有写关于小圆点的标签,这里通过JS来动态生成,更加(就)方(是)便(懒)。然后就是通过for循环给小圆点注册点击事件,顺便设置一些自定义属性,小圆点的点击事件主要包括:利用排他思想将当前样式修改;点击当前小圆点后将自动轮播计时器清除,等待图片移动完之后再重新开启定时器,确保每张图片都能够展示相同的时间,将自定义属性给num和count以实现小圆点和图片同步变化。克隆第一张图片添加到图片队列末尾,用于制作无缝滚动
for (let i = 0; i < showbox.children.length; i++) {
	//根据图片的数量来动态添加小圆点
	var li = document.createElement("li");
	//给ol里的每个li都添加一个自定义属性用于计算
	li.setAttribute("data-index", i);
	//给每个小圆圈绑定事件,当点击该圆圈时先清除所有圆圈的样式,然后给自己添加上相应的样式
	li.addEventListener("click", function () {
		for (let j = 0; j < ol.children.length; j++) {
			ol.children[j].className = "";
		}
		clearInterval(timer); //先清除原先自动轮播的定时器
		this.className = "current"; //给小圆点添加白色背景
		animate(showbox, -this.dataset.index * width, function () {
			autoRun(); //结束移动后重新启用自动轮播的定时器
		}); //将图片移动到指定位置
		//将索引号赋给num和count以达到小圆点和图片出现顺序同步
		num = this.dataset.index;
		count = this.dataset.index;
	});
	ol.appendChild(li);
}
//将ol里的第一个小圆圈变为白色
ol.children[0].className = "current";
//在生成小圆圈之后将第一个节点克隆,添加到图片框的最后面
var firstLi = showbox.children[0].cloneNode(true);
showbox.appendChild(firstLi);
需要注意以下几点:
- 自定义属性的命名规范
data-name以及调用dataset.name或dataset['name'] - this的指向
- 节点克隆,
Node.cloneNode(true);,括号中的参数为true时为深克隆,即整个节点(属性、内容等)都会被克隆;若参数为false时则为浅克隆,只克隆相应的标签(无属性、内容等) - 排他思想:先用for循环把所有对象的样式清除,然后再单独设置一个对象的样式
根据排他思想定义一个函数
	function circleChange() {
		for (let i = 0; i < ol.children.length; i++) {
			ol.children[i].className = "";
		}
		ol.children[count].className = "current";
	}
注册箭头的点击事件
右箭头
这里对左右箭头均设置了一个节流阀valve,需要等待上一个动画滚动完毕之后才能再次点击切换下一张。滚动图片的同时需要对下面的小圆点进行同步变化,因为是右箭头,所以每点击一次全局变量num和count都应该进行加1操作。当到达边界也就是最后一张图片时,将num重置并且将<ul>的left值瞬间归0,由于第一张和最后一张图片是相同的,所以主观感受上就像无缝衔接了一样,同时count的值也需要重置,确保小圆圈能够与图片同步变化
var valve = true;
arrow_r.addEventListener("click", function () {
	if (valve) {
		valve = false; //关上门
		clearInterval(timer);
		if (num == showbox.children.length - 1) {
			num = 0;
			showbox.style.left = 0;
		}
		num++;
		animate(showbox, -num * width, function () {
			valve = true;
			autoRun();
		});
		count++;
		count == ol.children.length ? (count = 0) : count;
		circleChange();
	}
});
左箭头
左箭头与右箭头操作基本一致,只是到达临界条件的逻辑处理不同。图片不断向左移动,当移动到第一张图片时,下次点击将num值置为最后一张图片(被克隆出来的那张)的前一张的data-index值,<ul>的定位也需要改至倒数第1张处
arrow_l.addEventListener("click", function () {
	if (valve) {
		valve = false; //关上门
		clearInterval(timer);
		if (num == 0) {
			num = showbox.children.length - 1;
			showbox.style.left = -num * width + "px";
		}
		num--;
		animate(showbox, -num * width, function () {
			valve = true;
			autoRun();
		});
		//下面小圆点要跟着移动
		count--;
		//判断小圆圈是否是第一个,如果是,则迅速跳转到最后一个
		count < 0 ? (count = ol.children.length - 1) : count;
		circleChange();
	}
});
定义一个自动轮播的函数
设置一个每隔一段时间就自动切换的函数,通过模拟点击右箭头即可快速实现
	var timer = null; //自动轮播的定时器的标识符
	function autoRun() {
		timer = setInterval(function () {
			arrow_r.click(); //每隔一段时间就点击下一张的按钮
		}, 2000);
	}
	autoRun();
结语
这样的话一个简单的轮播图就通过原生的JS写出来了,后面可能会进行补充,如果看到的人有其他更好的方法也可以分享给我哦,以上代码仅供参考。
最后附上部分源码
HTML
<body>
<div class="box c">
<a href="javascript:;" class="arrow_l"><</a>
<a href="javascript:;" class="arrow_r">></a>
<ul class="showbox">
<li><img src="image/n1.jpg" alt="广告1" /></li>
<li><img src="image/n2.jpg" alt="广告2" /></li>
<li><img src="image/n3.jpg" alt="广告3" /></li>
</ul>
<ol class="circle"></ol>
</div>
</body>
CSS
* {
	padding: 0;
	margin: 0;
}
li {
	list-style-type: none;
	float: left;
}
a {
	text-decoration: none;
}
img {
	width: 400px;
	height: 250px;
}
.c {
	width: 400px;
	margin: 100px auto;
}
.box {
	position: relative;
	height: 250px;
	overflow: hidden;
}
.box:hover .arrow_l,
.box:hover .arrow_r {
	display: block;
}
.c ul {
	position: absolute;
	top: 0;
	left: 0;
	width: 1600px;
	height: 250px;
	/* border: 1px solid red; */
}
.circle {
	position: absolute;
	left: calc(50% - 75px);
	top: 210px;
	display: flex;
	justify-content: center;
	width: 150px;
	height: 30px;
	background-color: rgb(41, 40, 40);
	opacity: 0.7;
	border-radius: 19px;
}
.circle li {
	width: 22px;
	height: 22px;
	border-radius: 50%;
	border: 4px solid #fff;
	cursor: pointer;
	margin: 0 4px;
}
.current {
	background-color: #fff;
}
.box a {
	display: none;
	width: 20px;
	height: 40px;
	z-index: 5;
	background-color: #0f0;
	line-height: 40px;
	text-align: center;
}
.arrow_l {
	position: absolute;
	left: 0;
	top: calc(50% - 20px);
}
.arrow_r {
	position: absolute;
	right: 0;
	top: calc(50% - 20px);
}
JavaScript
window.addEventListener("load", function () {
	function $(str) {
		return document.querySelector(str);
	}
	function animate(obj, target, callback) {
		clearInterval(obj.timer);
		obj.timer = setInterval(function () {
			var speed = (target - obj.offsetLeft) / 10;
			speed = speed > 0 ? Math.ceil(speed) : Math.floor(speed);
			if (obj.offsetLeft === target) {
				clearInterval(obj.timer);
				callback && callback();
			}
			obj.style.left = obj.offsetLeft + speed + "px";
		}, 20);
	}
	var arrow_l = $(".arrow_l");
	var arrow_r = $(".arrow_r");
	var showbox = $(".showbox");
	var ol = $("ol");
	var width = $("img").clientWidth;
	for (let i = 0; i < showbox.children.length; i++) {
		var li = document.createElement("li");
		li.setAttribute("data-index", i);
		li.addEventListener("click", function () {
			for (let j = 0; j < ol.children.length; j++) {
				ol.children[j].className = "";
			}
			clearInterval(timer);
			this.className = "current";
			animate(showbox, -this.dataset.index * width, function () {
				autoRun();
			});
			num = this.dataset.index;
			count = this.dataset.index;
		});
		ol.appendChild(li);
	}
	ol.children[0].className = "current";
	var firstLi = showbox.children[0].cloneNode(true);
	showbox.appendChild(firstLi);
	var num = 0;
	var count = 0;
	var valve = true;
	arrow_r.addEventListener("click", function () {
		if (valve) {
			valve = false;
			clearInterval(timer);
			if (num == showbox.children.length - 1) {
				num = 0;
				showbox.style.left = 0;
			}
			num++;
			animate(showbox, -num * width, function () {
				valve = true;
				autoRun();
			});
			count++;
			count == ol.children.length ? (count = 0) : count;
			circleChange();
		}
	});
	arrow_l.addEventListener("click", function () {
		if (valve) {
			valve = false;
			clearInterval(timer);
			if (num == 0) {
				num = showbox.children.length - 1;
				showbox.style.left = -num * width + "px";
			}
			num--;
			animate(showbox, -num * width, function () {
				valve = true;
				autoRun();
			});
			count--;
			count < 0 ? (count = ol.children.length - 1) : count;
			circleChange();
		}
	});
	function circleChange() {
		for (let i = 0; i < ol.children.length; i++) {
			ol.children[i].className = "";
		}
		ol.children[count].className = "current";
	}
	var timer = null;
	function autoRun() {
		timer = setInterval(function () {
			arrow_r.click();
		}, 2000);
	}
	autoRun();
});