一个良好的图像预处理能够有效提升模型的准确率。本文总结了常用的图像预处理方法。
常见的模型输入一般为固定大小的图像输入,而数据集中的图像常常是不规则大小的图像,因此,对于大小不规则的图像需要放缩至固定大小,而直接使用resize()函数会使得图像变形,因此需要对图像继续填充后继续放缩。
图像大小变化
import cv2
import numpy as np
def preprocess(img, imgsize, jitter, random_placing=False):
    """
    Image preprocess for yolo input
    Pad the shorter side of the image and resize to (imgsize, imgsize)
    Args:
        img (numpy.ndarray): input image whose shape is :math:`(H, W, C)`.
            Values range from 0 to 255.
        imgsize (int): target image size after pre-processing
        jitter (float): amplitude of jitter for resizing
        random_placing (bool): if True, place the image at random position

    Returns:
        img (numpy.ndarray): input image whose shape is :math:`(C, imgsize, imgsize)`.
            Values range from 0 to 1.
        info_img : tuple of h, w, nh, nw, dx, dy.
            h, w (int): original shape of the image
            nh, nw (int): shape of the resized image without padding
            dx, dy (int): pad size
    """
    h, w, _ = img.shape
    img = img[:, :, ::-1]
    assert img is not None
    #尺寸大小的随机抖动,jitter越大,长宽的的变化越大
    if jitter > 0:
        # add jitter
        dw = jitter * w
        dh = jitter * h
        new_ar = (w + np.random.uniform(low=-dw, high=dw))\
                 / (h + np.random.uniform(low=-dh, high=dh))
    else:
        new_ar = w / h

    if new_ar < 1:
        nh = imgsize
        nw = nh * new_ar
    else:
        nw = imgsize
        nh = nw / new_ar
    nw, nh = int(nw), int(nh)
    #图像填充位置的随机性
    if random_placing:
        dx = int(np.random.uniform(imgsize - nw))
        dy = int(np.random.uniform(imgsize - nh))
    else:
        dx = (imgsize - nw) // 2
        dy = (imgsize - nh) // 2

    img = cv2.resize(img, (nw, nh))
    sized = np.ones((imgsize, imgsize, 3), dtype=np.uint8) * 127
    sized[dy:dy+nh, dx:dx+nw, :] = img

    info_img = (h, w, nh, nw, dx, dy)
    return sized, info_img

jitter=0
andom_placing=False
img_size=416
img=cv2.imread('data/1.jpg')
print(img.shape)
sized, info_img=preprocess(img, img_size, jitter=jitter,random_placing=andom_placing)
print(sized.shape)
sized=sized[:,:,::-1]
cv2.imshow('imgs',img)
cv2.imshow('img',sized)
cv2.waitKey()
#jitter为尺寸大小的随机抖动,jitter参数越大,长宽的的变化越大。
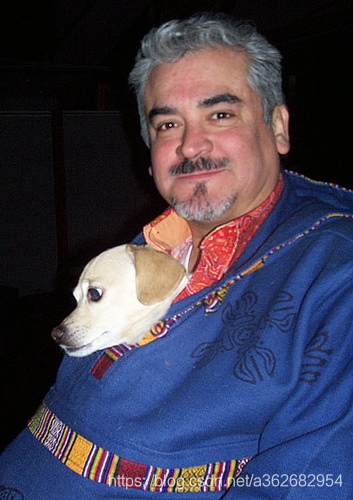
原图
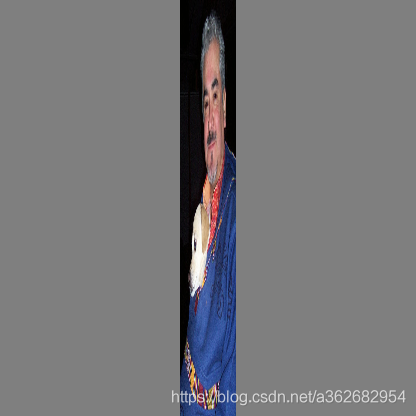
抖动幅度为0.9
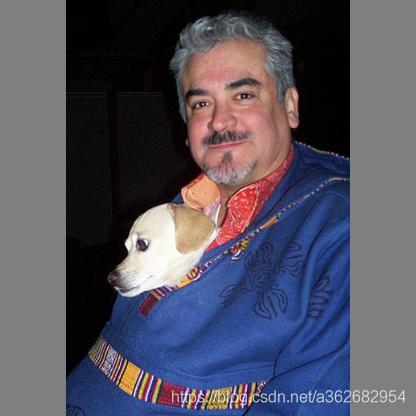
抖动幅度为0.1
andom_placing为图像位置,上面图像为andom_placing=False,因此在两侧均匀填充空白。
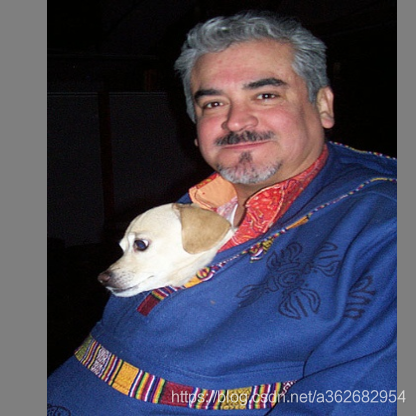
打开后可以看到填充位置偏左,图像位置偏右。
图像翻转
def random_flip(img, y_random=False, x_random=False,
                return_param=False, copy=False):

    y_flip, x_flip = False, False
    if y_random:
        y_flip = random.choice([True, False])
    if x_random:
        x_flip = random.choice([True, False])

    if y_flip:
        img = img[:, ::-1, :]
    if x_flip:
        img = img[:, :, ::-1]

    if copy:
        img = img.copy()

    if return_param:
        return img, {'y_flip': y_flip, 'x_flip': x_flip}
    else:
        return img
建议只进行左右翻转,如果是目标检测任务或者目标分割任务,标签也要进行相对应的处理,下面给出目标检测标签的翻转。
def flip_bbox(bbox, size, y_flip=False, x_flip=False):

    H, W = size
    bbox = bbox.copy()
    if y_flip:
        y_max = H - bbox[:, 0]
        y_min = H - bbox[:, 2]
        bbox[:, 0] = y_min
        bbox[:, 2] = y_max
    if x_flip:
        x_max = W - bbox[:, 1]
        x_min = W - bbox[:, 3]
        bbox[:, 1] = x_min
        bbox[:, 3] = x_max
    return bbox
Random Distortion
先讲RGB色彩空间转换乘HSV空间(H:图像的色彩/色度;S:图像的饱和度;V:图像的亮度)
def random_distort(img, hue, saturation, exposure):
    """
    perform random distortion in the HSV color space.
    Args:
        img (numpy.ndarray): input image whose shape is :math:`(H, W, C)`.
            Values range from 0 to 255.
        hue (float): random distortion parameter.
        saturation (float): random distortion parameter.
        exposure (float): random distortion parameter.
    Returns:
        img (numpy.ndarray)
    """
    #hue 调整色彩度,越大色彩度变化的程度越大;sat 调整对比度,越大对比度变化越大; exp调整亮度
    dhue = np.random.uniform(low=-hue, high=hue)
    dsat = rand_scale(saturation)
    dexp = rand_scale(exposure)

    img = cv2.cvtColor(img, cv2.COLOR_RGB2HSV)
    img = np.asarray(img, dtype=np.float32) / 255.
    img[:, :, 1] *= dsat
    img[:, :, 2] *= dexp
    H = img[:, :, 0] + dhue

    if dhue > 0:
        H[H > 1.0] -= 1.0
    else:
        H[H < 0.0] += 1.0

    img[:, :, 0] = H
    img = (img * 255).clip(0, 255).astype(np.uint8)
    img = cv2.cvtColor(img, cv2.COLOR_HSV2RGB)
    img = np.asarray(img, dtype=np.float32)

    return img
随机乘除
def rand_scale(s):
    #乘或者除一定倍数
    """
    calculate
    random scaling factor
    Args:
        s (float): range of the random scale.
    Returns:
        random scaling factor (float) whose range is
        from 1 / s to s .
    """
    scale = np.random.uniform(low=1, high=s)
    if np.random.rand() > 0.5:
        return scale
    return 1 / scale
hue=0.8
saturation=1.5
exposure=1.0
img2 = random_distort(sized, hue, saturation, exposure)
sized=sized[:,:,::-1]
img2=img2[:,:,::-1]
cv2.imwrite('img_or.jpg',sized)
cv2.imwrite('img_dis.jpg',img2)通过HSV空间变换可以达到不改变图像大小的情况下扩增图像,但是存在一个问题,该变换可能改变现实图像的表象,比如人的皮肤是黑,黄,白,可能因为变换而变成绿色,不符合现实意义,但是这样的变换可能有利于模型的鲁棒性,以及应对对抗攻击。应对对抗攻击和扩增图像的另外一个方法是mixup方法。个人觉得如果没有对抗攻击的可能,只对亮度进行变换的的图像扩增比较合理(这里只对图像HSV变换后的img[:,:,2]进行增减变换就可以了)。
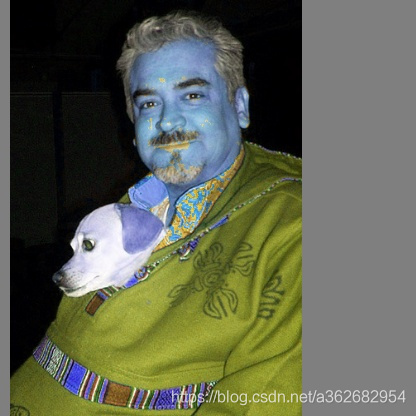
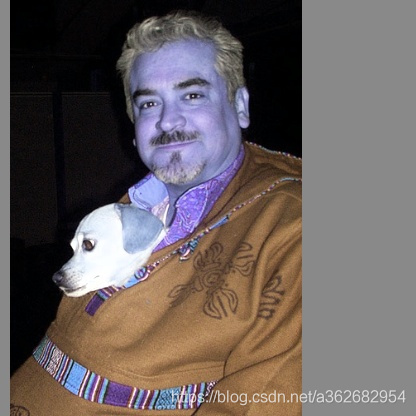
变换结果
完(笑)
版权声明:本文为a362682954原创文章,遵循 CC 4.0 BY-SA 版权协议,转载请附上原文出处链接和本声明。