
1.pytest-repeat 重复跑
-
安装包
pip install pytest-repeat
第一种用法: 装饰器 @pytest.mark.repeat(次数)
-
示例代码
import pytest
@pytest.mark.repeat(5)
def test_001():
assert 1==2
if __name__ == ‘__main__’:
pytest.main([‘-sv’,__file__])
第二种用法: 命令行参数
-
语法
pytest –count=5 test.py
-
示例代码
import pytest
def test_001():
assert 1==2
if __name__ == ‘__main__’:
pytest.main([‘-sv’,’–count=5′,__file__])
第三种用法: 结合repeat-scope运行
-
function (默认)范围针对每个用例重复执行,再执行下一个用例
-
class 以class为用例集合单位,重复执行class里面的用例,再执行下一个
-
module 以模块为单位,重复执行模块里面的用例,再执行下一个
-
如果我们要对多个测试函数进行重复运行,要么加多个装饰器,要么用命令行参数
-
但是上述两种方法都是A重复,B重复这样,无法做到AB-AB-AB的模式
-
如果要实现组合重复运行,那就要用到–repeat-scope
-
–repeat-scope类似于pytest fifixture的scope参数,–repeat-scope也可以设置参数:session, module , class 或者 function (默认值)
-
session 重复整个测试会话,即所有收集的测试执行一次,然后所有这些测试再次执行等等
-
示例代码1:A运行2次,B运行2次
import pytest
def test_002():
assert 1==2
def test_001():
assert 1==2
if __name__ == ‘__main__’:
pytest.main([‘-sv’,’–count=2′,__file__])
#运行结果
FAILED test_demo1.py::test_002[1-2] – assert 1 == 2
FAILED test_demo1.py::test_002[2-2] – assert 1 == 2
FAILED test_demo1.py::test_001[1-2] – assert 1 == 2
FAILED test_demo1.py::test_001[2-2] – assert 1 == 2
-
示例代码:A-B运行2次
import pytest
def test_002():
assert 1==2
def test_001():
assert 1==2
if __name__ == ‘__main__’:
pytest.main([‘-sv’,’–count=2′,’–repeat-scope=session’,__file__])
#AB运行1次后再运行1次AB
FAILED test_demo1.py::test_002[1-2] – assert 1 == 2
FAILED test_demo1.py::test_001[1-2] – assert 1 == 2
FAILED test_demo1.py::test_002[2-2] – assert 1 == 2
FAILED test_demo1.py::test_001[2-2] – assert 1 == 2
2.pytest-assume 断言后继续跑
-
安装
pip install pytest-assume
-
实际测试的过程中,有可能遇到一种情况,就是你某个断言执行失败也想要做下去(比如登录的测试,测试失败后,还是要返回主页继续下一轮的测试)。而默认情况下,如果断言失败,assert后面的语句是不会执行的了。
-
可以应用在多重断言的场景!(可以同时做多个断言)
-
没有assume的示例
import pytest
def test_001():
assert 1==2 #如果改为1==1,下面是不会执行的
print(‘\n对了会做,错了不会做’)
if __name__ == ‘__main__’:
pytest.main([‘-s’,’test_order_001.py’])
-
有assume的示例
import pytest
def test_001():
pytest.assume(1==2)
print(‘\n对了会做,错了也会做’)
if __name__ == ‘__main__’:
pytest.main([‘-sv’,’test_order_001.py’])
-
assume的另外一种写法:上下文管理器
def test_assume2():
with pytest.assume:
assert 1==2
assert 1==3
-
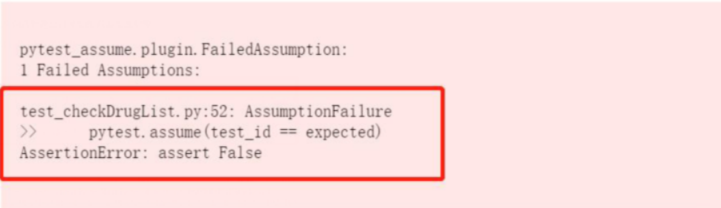
下面图1直接用pytest.assume不会显式testid的内容,而图2中assert就能显示变量的值,要解决这个问题就可以用with的写法

3.pytest-ordering 用例顺序
-
安装
pip install pytest-ordering
-
pytest默认按字母顺序去执行的(小写英文—>大写英文—>0-9数字)
-
用例之间的顺序是文件之间按照ASCLL码排序,文件内的用例按照从上往下执行。
-
改变测试用例的执行顺序,用法是加上装饰器
@pytest.mark.run(order=[number])
-
示例
import pytest
@pytest.mark.run(order=2) #
def test_001():
assert 1==1
@pytest.mark.run(order=1) #如果没有这两句话,那么运行顺序就是001再002
def test_002():
assert 2==2
if __name__ == ‘__main__’:
pytest.main([‘-v’,’test_order_001.py’])
-
其他的运行方式
方式一
第一个执行:@ pytest.mark.first
第二个执行:@ pytest.mark.second
倒数第二个执行:@ pytest.mark.second_to_last
最后一个执行:@pytest.mark.last
方式二
第一个执行:@ pytest.mark.run(‘first’)
第二个执行:@ pytest.mark.run(‘second’)
倒数第二个执行:@ pytest.mark.run(‘second_to_last’)
最后一个执行:@ pytest.mark.run(‘last’)
4.pytest-dependency 用例依赖
-
主要解决用例之间的依赖关系。如果依赖的上下文失败后续的用例会被标识为跳过执行,相当于执
行了 pytest.mark.skip
-
安装
pip install pytest-dependency
-
函数示例:
import pytest
@pytest.mark.dependency() #打上标记
def test_001():
assert 1==2
@pytest.mark.dependency(depends=[‘test_001’]) #依赖于test_001,test_001断言
成功了才会继续这个。
def test_002():
assert 1==1
if __name__ == ‘__main__’:
pytest.main([‘-sv’,’test_order_001.py’])
-
name示例:
import pytest
@pytest.mark.dependency(name=’a’)
def test_001():
assert 1==2
@pytest.mark.dependency(depends=[‘a’])
def test_002():
assert 1==1
if __name__ == ‘__main__’:
pytest.main([‘-sv’,’test_order_001.py’])
-
类示例
import pytest
class Test_001():
@pytest.mark.dependency()
def test_001(self):
assert 1==2
@pytest.mark.dependency(depends=[‘Test_001::test_001’])
def test_002():
assert 1==1
if __name__ == ‘__main__’:
pytest.main([‘-sv’,’test_order_001.py’])
5.pytest-rerunfailures 用例失败重跑
-
安装
pip install pytest-rerunfailures
使用方法一: 装饰器
import pytest
import random
from arrow import now
@pytest.mark.flaky(reruns=50,reruns_delay=2) #重跑50次,每次间隔2s
def test_001():
print(now().format(‘YYYY-MM-DD HH:mm:ss’))
assert 1==random.randint(1,5) #只要在多次RERUN中遇到一次成功,即可停止,并最终结果
为PASSED
if __name__ == ‘__main__’:
pytest.main([‘-sv’,__file__])
使用方法二: 命令行
import pytest
def test_001():
assert 1==2
if __name__ == ‘__main__’:
pytest.main([‘-sv’,’–reruns=2′,’–reruns-delay=2′,__file__])
#参数前千万不要有空格,会报错
6.pytest-xdist 分布式执行
-
pytest-xdist,让自动化测试用例可以分布式执行,从而大大节省测试时间。pytest-xdist 是属于进程级别的并发。
-
分布式测试用例的设计原则:
(1)独立运行:用例之间是独立的,并且没有依赖关系,还可以完全独立运行。
(2)随机执行:用例执行不强制按顺序执行,支持顺序执行或随机执行。
(3)不影响其他用例:每个用例都能重复运行,运行结果不会影响其他用例
-
pytest-xdist 通过一些独特的测试执行模式扩展了 pytest:
(1)测试运行并行化:如果有多个CPU或主机,则可以将它们用于组合的测试运行。这样可以加快开发速度或使用远程计算机的特殊资源。
(2)–looponfail:在子进程中重复运行测试。每次运行之后,pytest 都会等到项目中的文件更改后再
运行之前失败的测试。重复此过程,直到所有测试通过,然后再次执行完整运行。
(3)跨平台覆盖:可以指定不同的 Python 解释器或不同的平台,并在所有这些平台上并行运行测
试。
用法:
-
其实就是参数
-n numprocesses #如 -n 2 就是用2个
-n auto #自动检测物理CPU个数
-n logical #检测逻辑CPU个数
逻辑CPU个数=物理cpu数量x cpu核数 x 1(不支持ht超线程技术,如果开启就是2)
超线程:一个CPU核就是一个物理线程,由英特尔开发超线程技术可以把一个物理线程模拟出两个线程来
使用,使得单个核心用起来像两个核一样,以充分发挥CPU的性能.
-
参数
distributed and subprocess testing:
-n numprocesses, –numprocesses=numprocesses
Shortcut for ‘–dist=load –tx=NUM*popen’. With
‘auto’,
attempt to detect physical CPU count. With
‘logical’,
detect logical CPU count. If physical CPU count
cannot
be found, falls back to logical count. This will be
0
when used with –pdb.
–maxprocesses=maxprocesses
limit the maximum number of workers to process the
tests
when using –numprocesses=auto
–max-worker-restart=MAXWORKERRESTART
maximum number of workers that can be restarted when
crashed (set to zero to disable this feature)
–dist=distmode set mode for distributing tests to exec
environments.
each: send each test to all available environments.
load: load balance by sending any pending test to
any
available environment.
loadscope: load balance by sending pending groups of
tests in the same scope to any available
environment.
loadfile: load balance by sending test grouped by
file
to any available environment.
(default) no: run tests inprocess, don’t distribute.
–tx=xspec add a test execution environment. some examples: —
tx
popen//python=python2.5 –tx
socket=192.168.1.102:8888
–tx ssh=user@codespeak.net//chdir=testcache
-d load-balance tests. shortcut for ‘–dist=load’
–rsyncdir=DIR add directory for rsyncing to remote tx nodes.
–rsyncignore=GLOB add expression for ignores when rsyncing to remote
tx
nodes.
–boxed backward compatibility alias for pytest-forked —
forked
–testrunuid=TESTRUNUID
provide an identifier shared amongst all workers as
the
value of the ‘testrun_uid’ fixture,
,if not provided, ‘testrun_uid’ is filled with a new
unique string on every test run.
-f, –looponfail run tests in subprocess, wait for modified files and
re•run failing test set until all pass.
7.pytest-xfail 预期失败
第一种用法:
import pytest
@pytest.mark.xfail(True,reason=’预期失败,结果成功’)
def test_xfail1():
assert True
@pytest.mark.xfail(True,reason=’预期失败,结果失败’)
def test_xfail2():
assert False
@pytest.mark.xfail(False,reason=’预期成功,结果失败’)
def test_xfail3():
assert False
@pytest.mark.xfail(False,reason=’预期成功,结果成功’)
def test_xfail4():
assert True
if __name__ == ‘__main__’:
pytest.main([‘-sv’,__file__])
输出:
test_xfail.py::test_xfail1 XPASS (预期失败,结果成功)
test_xfail.py::test_xfail2 XFAIL (预期失败,结果失败)
test_xfail.py::test_xfail3 FAILED
test_xfail.py::test_xfail4 PASSED
第二种用法:
import pytest
@pytest.mark.xfail(raises=AssertionError)
def test_xfail2():
assert 1==2
if __name__ == ‘__main__’:
pytest.main([‘-sv’,__file__])
输出:
test_xfail2.py::test_xfail2 XFAIL
-
如果这个时候带上–runxfail参数,就会忽略所有的xfail
import pytest
@pytest.mark.xfail(raises=AssertionError)
def test_xfail2():
assert 1==2
if __name__ == ‘__main__’:
pytest.main([‘-sv’,’–runxfail’,__file__])
###输出就相当于没有那个装饰器
test_xfail2.py::test_xfail2 FAILED
================================== FAILURES
===================================
_________________________________ test_xfail2
_________________________________
@pytest.mark.xfail(raises=AssertionError)
def test_xfail2():
> assert 1==2
E assert 1 == 2
E +1
E -2
test_xfail2.py:6: AssertionError
=========================== short test summary info
===========================
FAILED test_xfail2.py::test_xfail2 – assert 1 == 2
============================== 1 failed in 0.06s
==============================
第三种用法:
def test_xfail3():
pytest.xfail()
assert 1==2
if __name__ == ‘__main__’:
pytest.main([‘-sv’,__file__])
-
同上输出