idea快速搭建springbootweb服务
springboot helloworld
1.使用iidea创建新工程
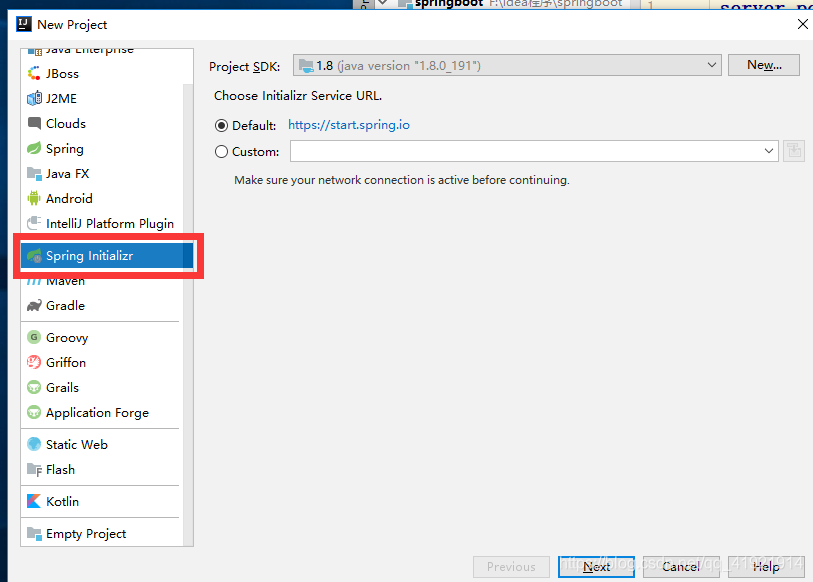
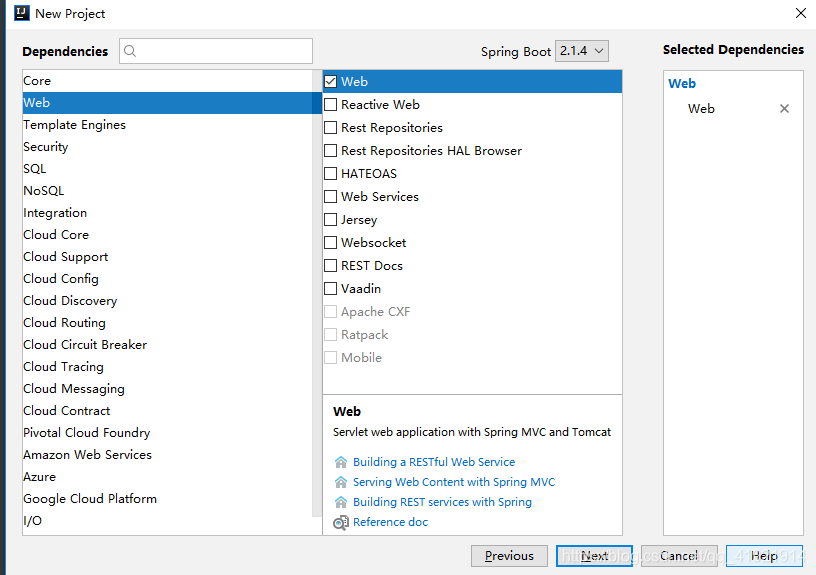
2.一路next,开发web应用,我们就选web模块,后面加上数据库,我们还可以选择SQL 里面的JDBC,Mybatis等。
3.然后一路next,可以看出,idea自动帮我们创建了目录,pom.xml 也插入了依赖(需要在联网环境下)。
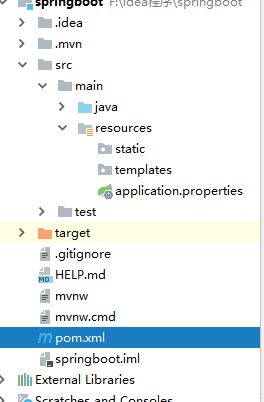
(1)主程序已经生成好了我们只需要我们自己的逻辑
(2)resources文件夹中目录结构 static:保存所有的静态资源; js css images;
(3) templates:保存所有的模板页面;(Spring Boot默认jar包使用嵌入式的Tomcat,默认不支持JSP页 面);可以使用模板引擎(freemarker、thymeleaf);
(4)application.properties:Spring Boot应用的配置文件;可以修改一些默认设置
4.helloword
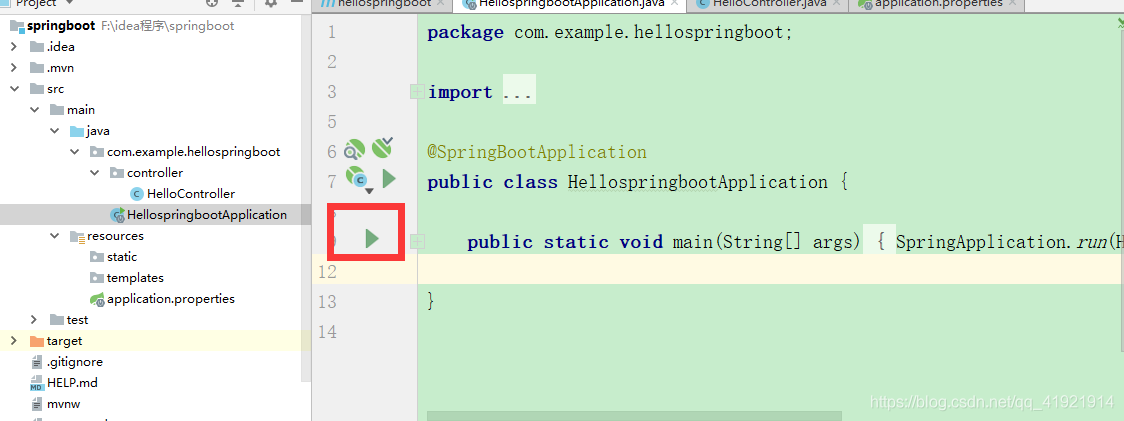
(1)创建一个controller包,编写一个Hellocontroller
//@RestController这个注解 是@Controller 和 @Responsebody的合体,添加这个注解,那么这个类所有的方法返回的数据直接写给浏览器。
@Controller
public class HelloController {

    @ResponseBody
    @RequestMapping("/hello")
    public  String hello(){
        return  "hello world";
    }
}
(2) 运行主程序,来到浏览器,输入http://localhost:8080/hello ,页面展现hello,world 字样。
配置文件
1.springboot使用全局的配置文件,文件名固定,用来修改springboot默认自动配置的值。
(1)application.properties
(2)application.yml
2.YAML
YAML:以数据为中心,比以前常用的json、xml等更适合做配置文件。
(1)在resources下新建一个applica.yml文件
(2)配置端口号
server:
  port: 8081
(3)YAML语法
1) 大小写敏感
2)k: v ,中间一定要有空格(idea 写的时候有提示,但也要注意)
3)以空格的缩进来控制层级关系(几个空格没关系),左对齐的数据,代 表同一级。
server:
   port: 8080
   path: /hello
4) 字符串默认不用加上单引号或者双引号。
(4)YAML配置文件注入
1)写两个bean对象
/**
 * 将配置文件中配置的每一个属性的值,映射到这个组件中
 * @ConfigurationProperties:告诉SpringBoot将本类中的所有属性和配置文件中相关的配置进行绑定;
 *      prefix = "user":配置文件中哪个下面的所有属性进行一一映射
 *
 * @Component只有这个组件是容器中的组件,才能容器提供的
  *
 */
@Component
@ConfigurationProperties(prefix = "user")
public class User {
    private String name;
    private String phone;
    private String address;
    private  Order order;

    public User() {
    }

    public User(String name, String phone, String address, Order order) {
        this.name = name;
        this.phone = phone;
        this.address = address;
        this.order = order;
    }

    @Override
    public String toString() {
        return "User{" +
                "name='" + name + '\'' +
                ", phone='" + phone + '\'' +
                ", address='" + address + '\'' +
                ", order=" + order +
                '}';
    }

    public String getName() {
        return name;
    }

    public void setName(String name) {
        this.name = name;
    }

    public String getPhone() {
        return phone;
    }

    public void setPhone(String phone) {
        this.phone = phone;
    }

    public String getAddress() {
        return address;
    }

    public void setAddress(String address) {
        this.address = address;
    }

    public Order getOrder() {
        return order;
    }

    public void setOrder(Order order) {
        this.order = order;
    }
}
public class Order {
    private int price;
    private String order_name;
    private int amount;

    public Order() {
    }

    public Order(int price, String order_name, int amount) {
        this.price = price;
        this.order_name = order_name;
        this.amount = amount;
    }

    @Override
    public String toString() {
        return "Order{" +
                "price=" + price +
                ", order_name='" + order_name + '\'' +
                ", amount=" + amount +
                '}';
    }

    public int getPrice() {
        return price;
    }

    public void setPrice(int price) {
        this.price = price;
    }

    public String getOrder_name() {
        return order_name;
    }

    public void setOrder_name(String order_name) {
        this.order_name = order_name;
    }

    public int getAmount() {
        return amount;
    }

    public void setAmount(int amount) {
        this.amount = amount;
    }
}
2)在maven中添加依赖,导入文件处理器,编写配置文件有提示
		<dependency>
			<groupId>org.springframework.boot</groupId>
			<artifactId>spring-boot-configuration-processor</artifactId>
			<optional>true</optional>
		</dependency>
3)编写yml
user:
  name: zhangsan;
  phone: 1375555777
  address: 北京
  order:
    price: 100
    order_name: 面包
    amount: 10
4)在controller中
 @Autowired
    User user;
    @ResponseBody
    @RequestMapping("/user")
    public String outUser(){
        return  user.toString() ;
    }
5) 测试 http://localhost:8081/user
(5)YMAL多文档块
YMAL的语法输入‘—’,可以分成多个文档快
server:
  port: 8081
spring:
  profiles:
    active: dev    # 激活开发环境
---
server:
     port: 8082
spring:
  profiles: dev  #开发环境
---
server:
  port: 8083
spring:
  profiles: prod #生产环境
3.@Configuration和@Bean
(1)配置类@Configuration——>Spring配置文件
(2)使用@Bean给容器中添加组件
4.配置文件加载位置
springboot 启动会扫描以下位置的application.properties或者application.yml文件作为springboot的默认配置文 件。
–file:./config/
–file:./
–classpath:/config/
–classpath:/
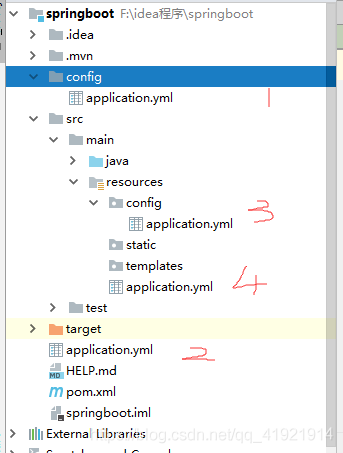
优先级由高到底,高优先级的配置会覆盖低优先级的配置,但同时也会也有互补配置,springboot加载的时候,这四个地方都会去扫描配置文件,可能高优先级没有低优先级的配置,那么他们就会互补。
5.简述springboot自动配置原理
1.springbootq启动时加载主配置类,就通过@EnableAutoConfiguration开启了自动配置功能。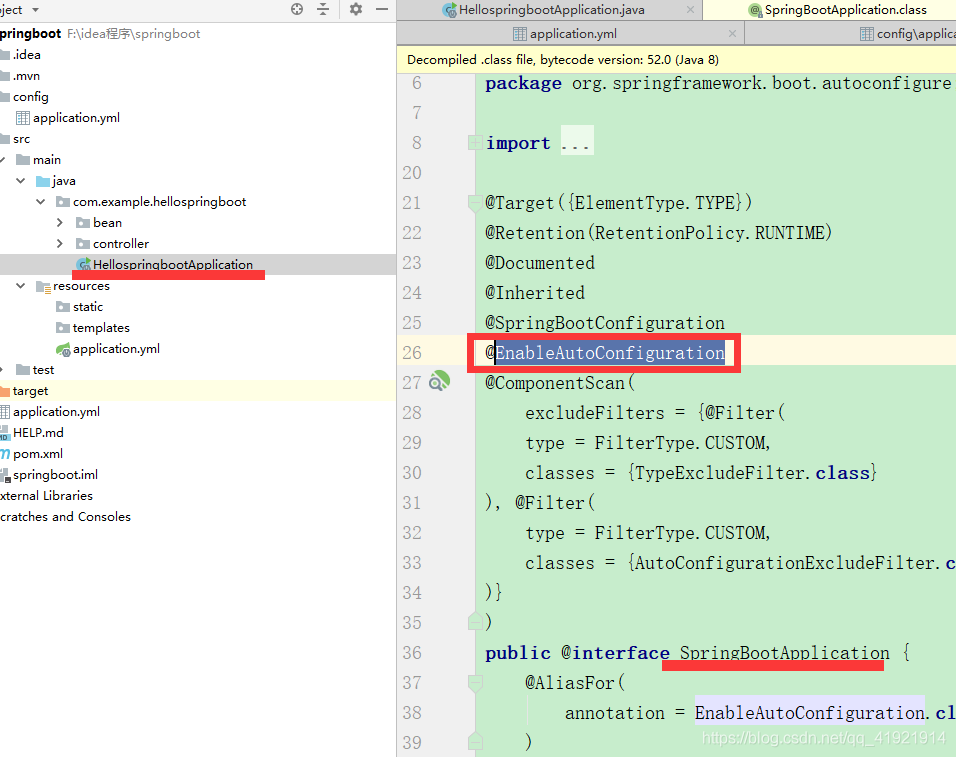
2.@EnableAutoConfiguration 就会扫描所有jar包类路径下 META‐INF/spring.factories 里面配置的所有有****AutoConfiguration的值加入到了容器中,每一个这样的 xxxAutoConfiguration类都是容器中的一个组件,都加入到容器中,用他们来做自动配置;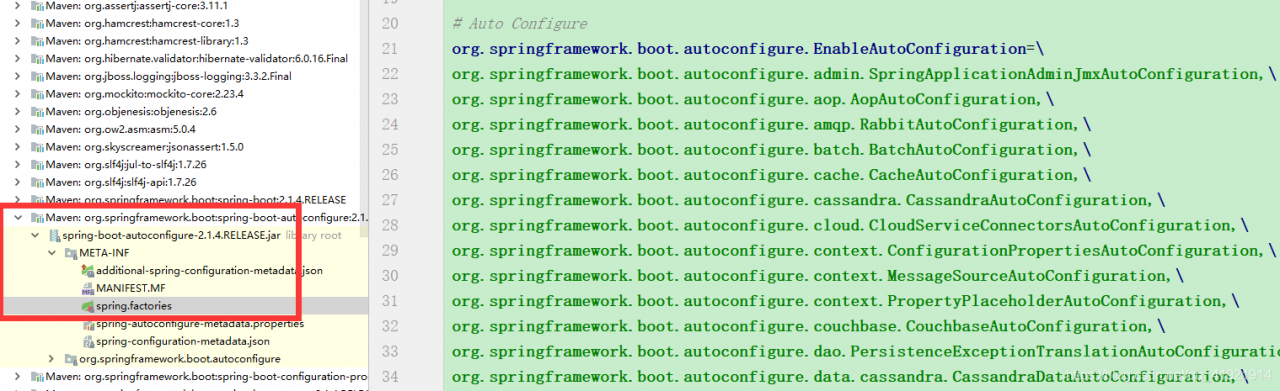
3.接下来以CacheAutoConfiguration为例
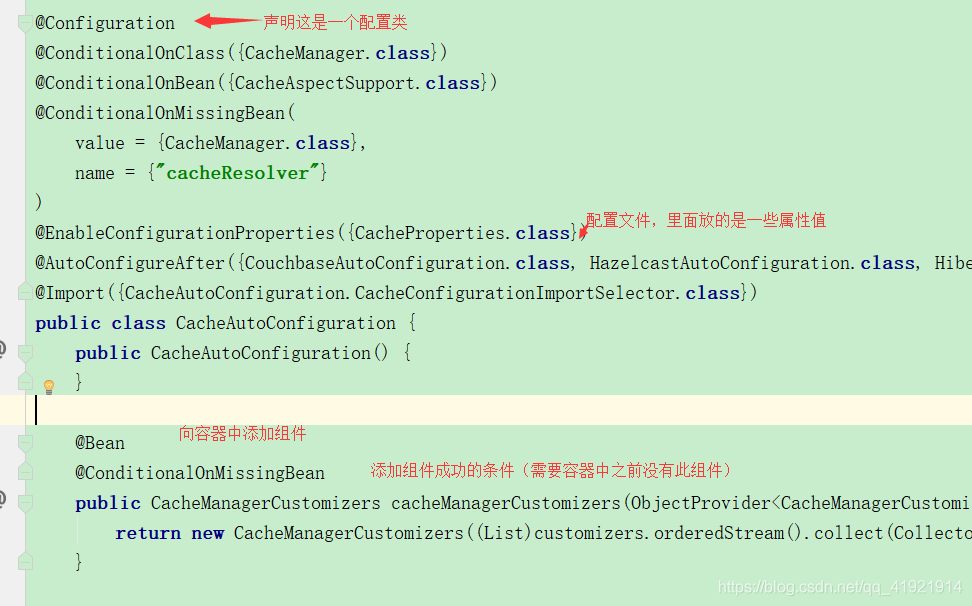
4. 给容器中自动配置类添加组件的时候,会从properties类中获取某些属性。我们就可以在配置文件中指定这 些属性的值;
5.xxxxAutoConfigurartion:自动配置类;
xxxxProperties:封装配置文件中相关属性;
6.@Conditional派生注解(Spring注解版原生的@Conditional作用
作用:必须是@Conditional指定的条件成立,才给容器中添加组件,配置配里面的所有内容才生效;
