这两天接到一个需求,是通过百度生成的轨迹制作成一个图片,好废话不多说,上干货
注释:这里我是用react编写的,不过代码逻辑都一样,看的懂就会搬运,不懂出可以留言,我会及时回复,每天每时都在
全部代码
import React, { useEffect } from 'react'
declare const BMapGL: any;
import html2canvas from 'html2canvas'
let bmap: any;
const Map = () => {
  const downLoad = (png: any) => {
    //创建一个a标签
    const a = document.createElement('a')
    //指定下载文件名称
    a.href = png;
    a.download = '截图'
    //a 标签 需要点击触发。所以强制给他分派一个点击事件
    //创建一个鼠标事件
    const event = document.createEvent("MouseEvents")
    // 初始化鼠标事件
    event.initMouseEvent("click", true, false, window, 0, 0, 0, 0, 0, false, false, false, false, 0, null)
    // 指定元素对象触发事件
    a.dispatchEvent(event)
  };
  const screenShot = () => {
    const element: any = document.getElementById('container')
    const options = {
      useCORS: true,
      // preserveDrawingBuffer: true,
      //foreignObjectRendering: true,
      allowTaint: true,
    };

    html2canvas(element, options).then(canvas => {
      const png = canvas.toDataURL("image/png") //拿到截图后转换为png图片
      const img = document.createElement('img')
      img.setAttribute('src', png)
      window.document.body.appendChild(img) //将png图片添加到页面验证
      console.log('png:', png)
      downLoad(png)
    })
  };
  useEffect(() => {
    bmap = new BMapGL.Map("container");
    const point = new BMapGL.Point(116.404, 39.915);
    // bmap.centerAndZoom(point, 15);
    bmap.enableScrollWheelZoom(true);
    bmap.centerAndZoom(new BMapGL.Point(116.404, 39.915), 11);

    const p1 = new BMapGL.Point(116.301934, 39.977552);
    const p2 = new BMapGL.Point(116.508328, 39.919141);

    const driving = new BMapGL.DrivingRoute(bmap, { renderOptions: { map: bmap, autoViewport: true } });
    driving.search(p1, p2);
  }, [])
  return (
    <div style={{ width: "100%", height: "100%" }}>
      <button onClick={screenShot}>下载</button>
      {/* <div id="r-result">请输入:<input type="text" id="suggestId" style={{ width: "200px" }} /></div> */}
      <div id="container" style={{ width: "100%", height: "100%" }}></div>
    </div>
  )
}

export default Map
该代码会展示一个空白的地图

在index.htlm文件中加入改代码,用来解决空白问题
<script>

  HTMLCanvasElement.prototype.getContext = function (origFn) {
      return function (type, attributes) {
        if (type === 'webgl') {
          attributes = Object.assign({}, attributes, {
            preserveDrawingBuffer: true,
          });
        }
        return origFn.call(this, type, attributes);
      };
    }(HTMLCanvasElement.prototype.getContext);
</script>
流程
一、展示地图
1、在根文件index.html中引入百度地图
<script type="text/javascript" src="http://api.map.baidu.com/api?v=1.0&type=webgl&ak=你的key"></script>
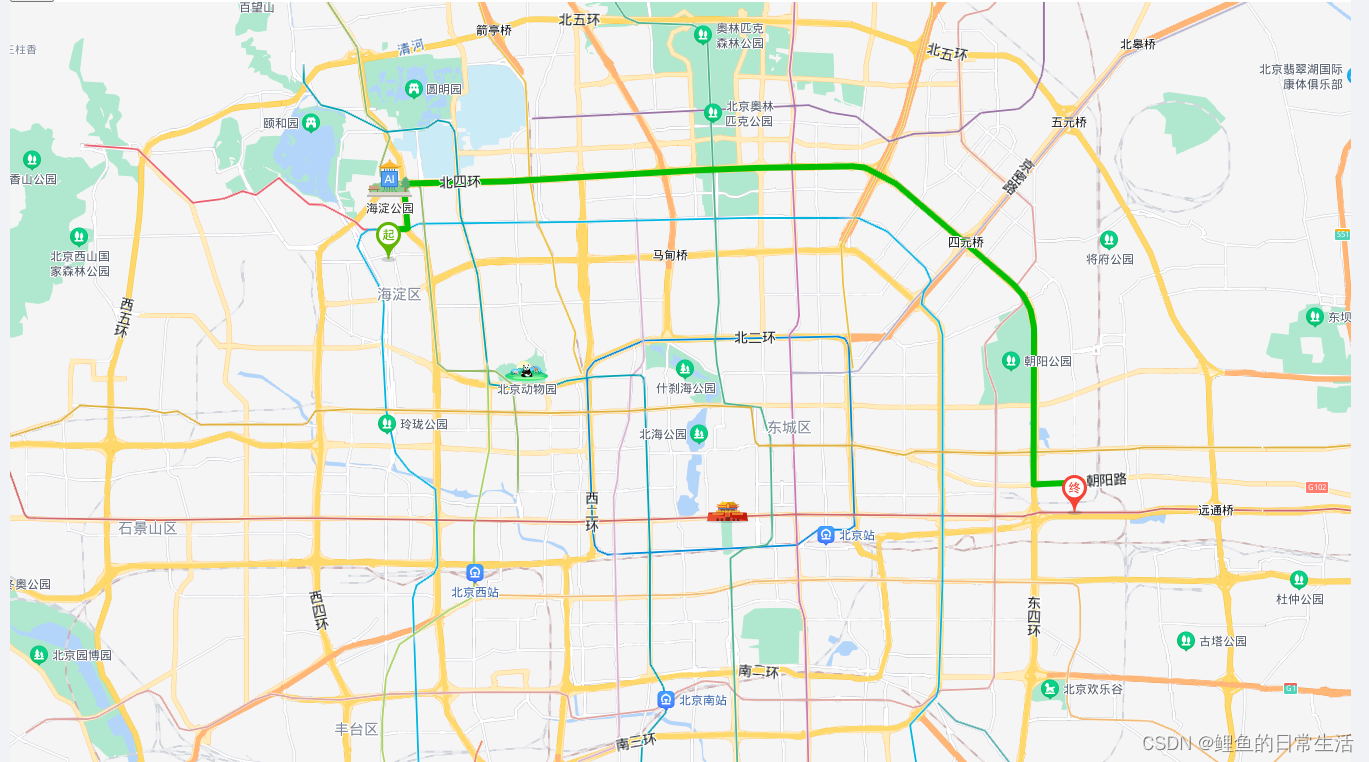
2、展示地图并显示轨迹
由于我这边用的时ts的语法,用使用要仔细观看
import React, { useEffect } from 'react'
declare const BMapGL: any;
let bmap: any;
const Map = () => {

  useEffect(() => {
    bmap = new BMapGL.Map("container");
    const point = new BMapGL.Point(116.404, 39.915);
    bmap.centerAndZoom(new BMapGL.Point(116.404, 39.915), 11);
    bmap.enableScrollWheelZoom(true);
    const p1 = new BMapGL.Point(116.301934, 39.977552);
    const p2 = new BMapGL.Point(116.508328, 39.919141);
    const driving = new BMapGL.DrivingRoute(bmap, { renderOptions: { map: bmap, autoViewport: true } });
    driving.search(p1, p2);
  }, [])
  return (
    <div style={{ width: "100%", height: "100%" }}>
      {/* <button onClick={screenShot}>下载</button> */}
      {/* <div id="r-result">请输入:<input type="text" id="suggestId" style={{ width: "200px" }} /></div> */}
      <div id="container" style={{ width: "100%", height: "100%" }}></div>
    </div>
  )
}

export default Map
效果图:
二、开始制作百度地图图片
1、首先下载一个第三方包html2canvas
npm i html2canvas / yarn add html2canvas
2、我们需要在index.htlm文件中修改这个包在展示地图的时候空白问题
<script>

  HTMLCanvasElement.prototype.getContext = function (origFn) {
      return function (type, attributes) {
        if (type === 'webgl') {
          attributes = Object.assign({}, attributes, {
            preserveDrawingBuffer: true,
          });
        }
        return origFn.call(this, type, attributes);
      };
    }(HTMLCanvasElement.prototype.getContext);
</script>
3、我们可以制作一个点击按钮,给他加点击事件,到这差不多就结束了,点击按钮就可以下载图片了
const downLoad = (png: any) => {
//创建一个a标签
const a = document.createElement('a')
//指定下载文件名称
a.href = png;
a.download = '截图'
//a 标签 需要点击触发。所以强制给他分派一个点击事件
//创建一个鼠标事件
const event = document.createEvent("MouseEvents")
// 初始化鼠标事件
event.initMouseEvent("click", true, false, window, 0, 0, 0, 0, 0, false, false, false, false, 0, null)
// 指定元素对象触发事件
a.dispatchEvent(event)
};
const screenShot = () => {
const element: any = document.getElementById('container')
const options = {
useCORS: true,
// preserveDrawingBuffer: true,
//foreignObjectRendering: true,
allowTaint: true,
};
html2canvas(element, options).then(canvas => {
const png = canvas.toDataURL("image/png") //拿到截图后转换为png图片
const img = document.createElement('img')
img.setAttribute('src', png)
window.document.body.appendChild(img) //将png图片添加到页面验证
console.log('png:', png)
downLoad(png)
})
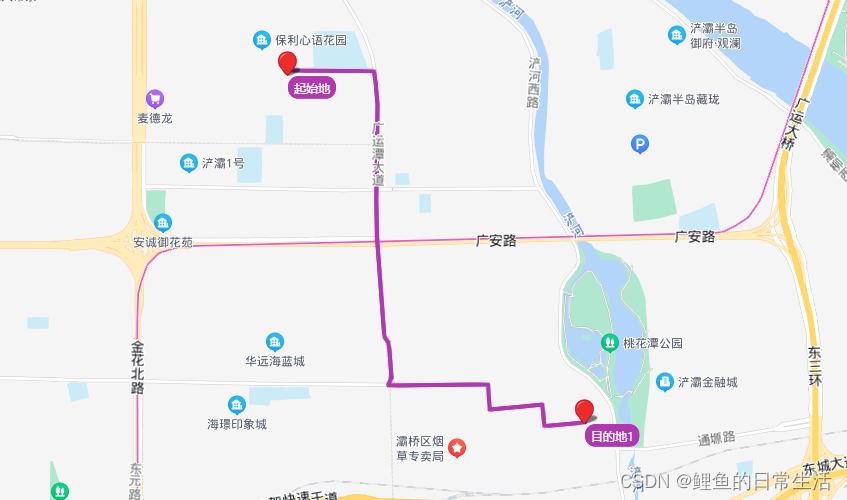
};下载下来的效果图(备注:这个是通过公司的经纬度数据产生的数据)
到这差不多就结束
完美结束,完结撒花
版权声明:本文为liyu_ya原创文章,遵循 CC 4.0 BY-SA 版权协议,转载请附上原文出处链接和本声明。