转载于 http://blog.csdn.net/liboyang71/article/details/73459909
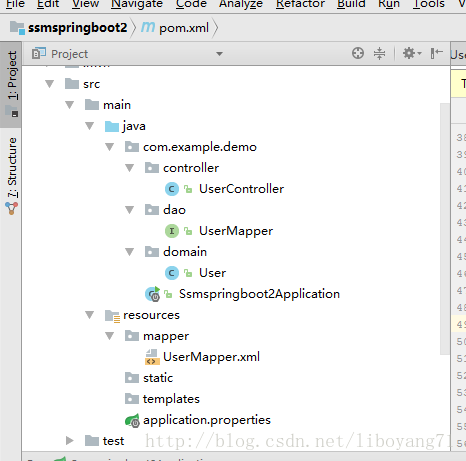
最终项目目录结构
创建过程
1.创建开关SpringBootApplication
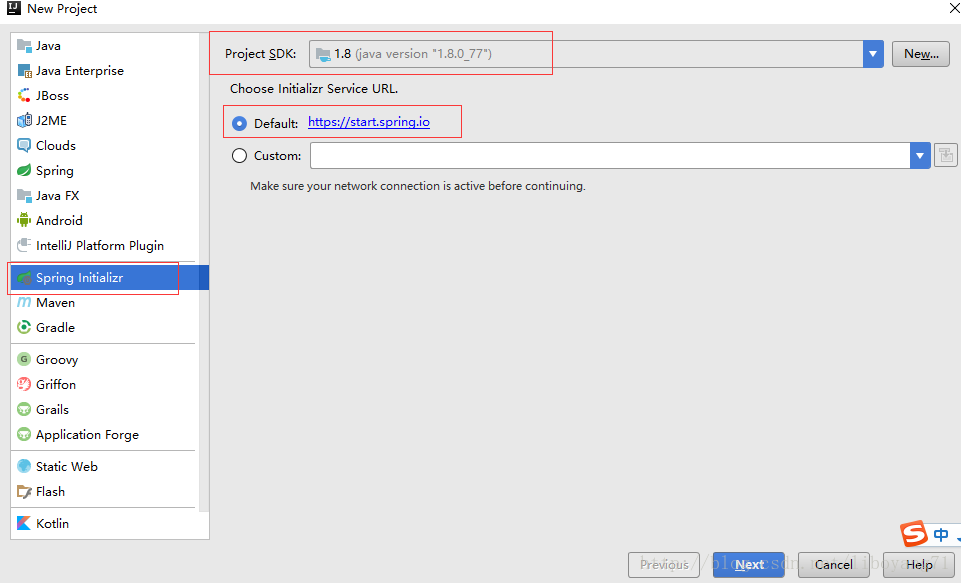
为了创建快速。我们使用idea自带的创建springboot来创建结构,当然创建普通的web项目也是可以的。(使用eclipse的同学可以按照一会的图来自己创建目录结构)
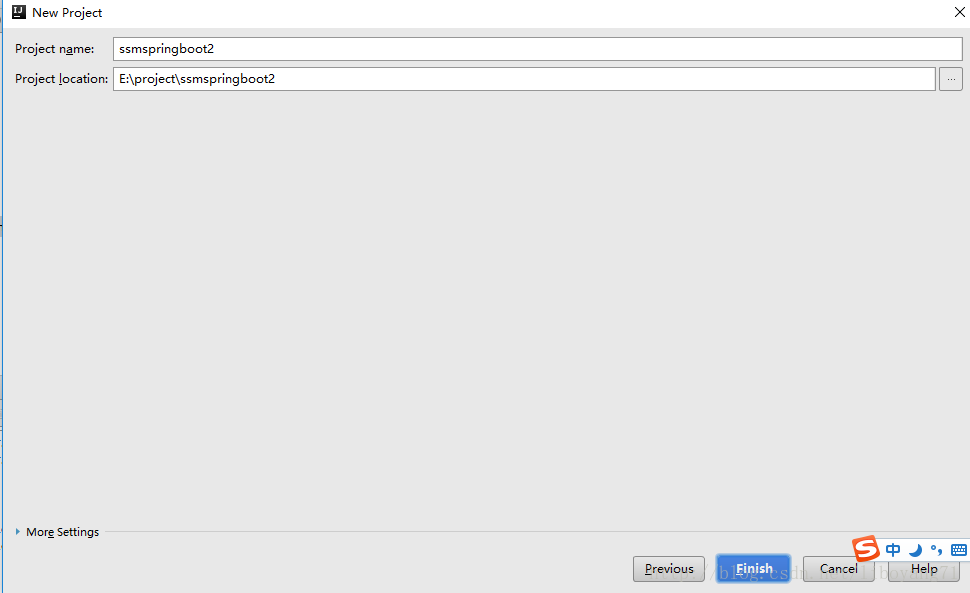
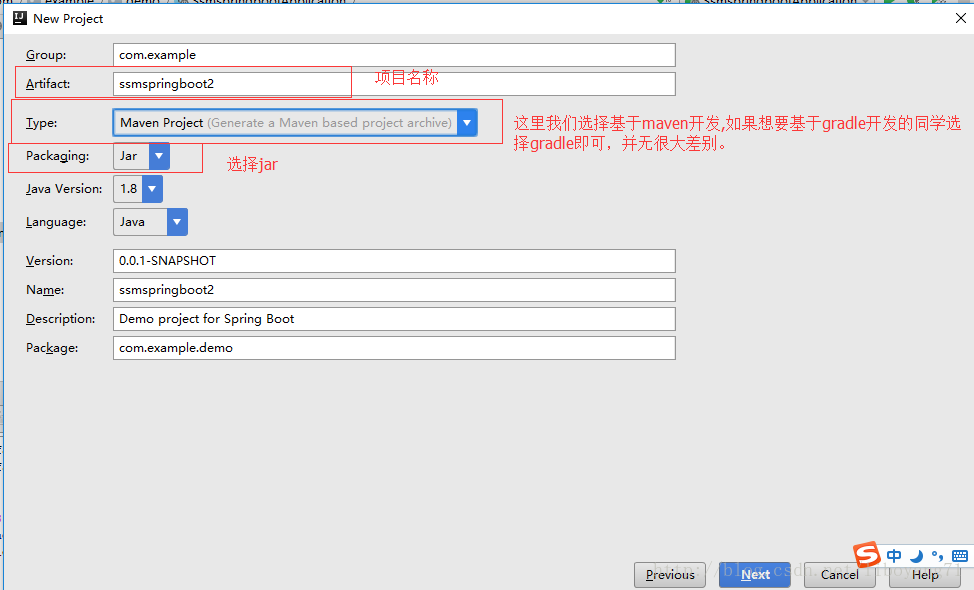
1.1 创建项目,按照图示进行选择
1.2
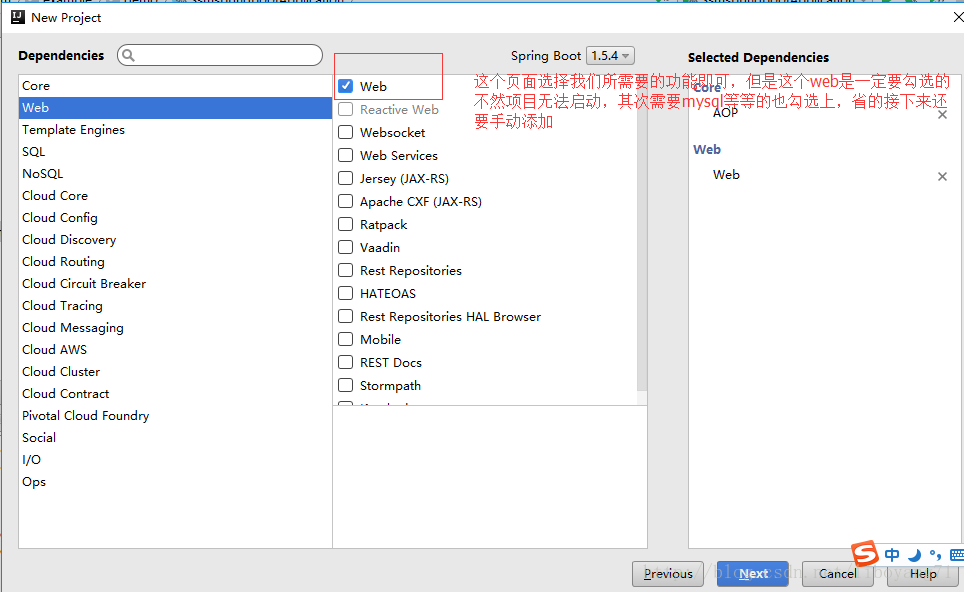
1.3
1.4
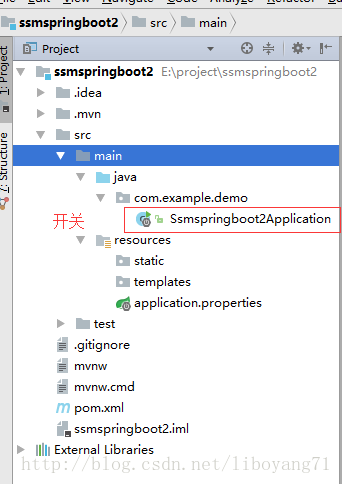
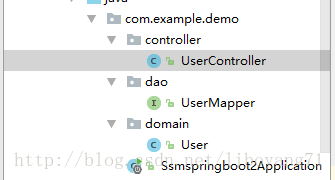
好了 我们的初始项目算是创建完成了。项目结构如下图所示,其中 Ssmspringboot2Application就是我们的开关文件

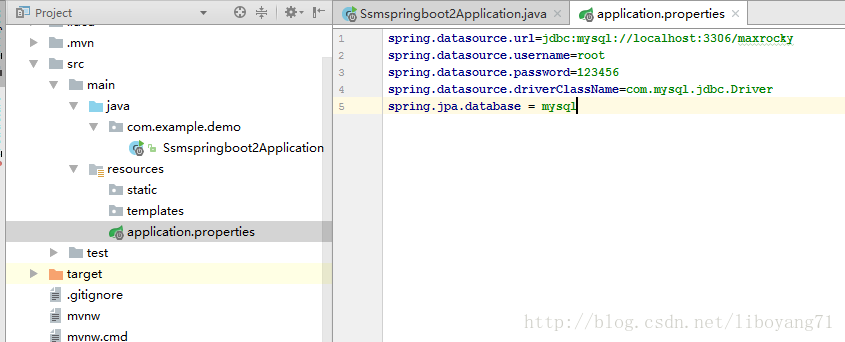
其实现在一个最简单的springboot项目我们已经搭建完成了。什么?不相信?,你可以运行一下Ssmspringboot2Application这个文件呀。会报你未配置dataSource,我们如下图所示进行一下配置即可完成一个最简单的springboot项目进行跑通
- 1
- 2
- 3
- 4
- 5
账号密码当然你要配置成你自己的。OK 项目跑起来了。最简单的springboot项目搭建完成。结束了?不不不 我们要搭建ssm项目呀。
现在我们开始加入我们的ssm。
2.目录结构简单介绍
在给同学们演示如何将ssm融入到项目中之前。先和各位同学讲一下目录结构方便各位同学理解。
2.1 java
这个就不用多说了。放我们写的java文件的
2.2 resources
springboot主张无xml配置,但是还是需要一些最基础的信息配置的,例如sql账号密码的设置,在简洁你的账号密码还是需要你自己配置滴,它是没办法帮你自动生成的。所以一般配置文件都是放到resources下的。具体默认生成的文件都是做什么的以及什么资源放到什么文件下可以看我之前写过的一片关于各文件夹作用的文章
springboot目录结构详解
2.3 开关文件
Ssmspringboot2Application文件就是springboot的核心开关了。
3.整合
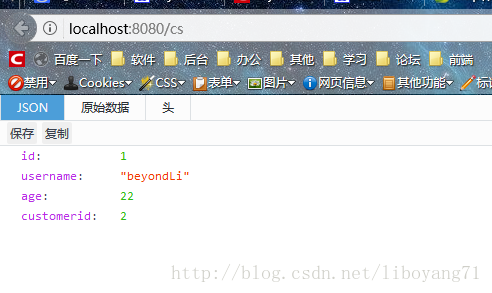
需求:从数据库中查询出某一用户的所有信息返回给前台页面
好了,上面做了简单的声明。开始整合。还是基于开发的最基本的三层架架构进行开发。但是为了方便省略service层。
添加后的结构如下,具体解释我放在了代码的注释中
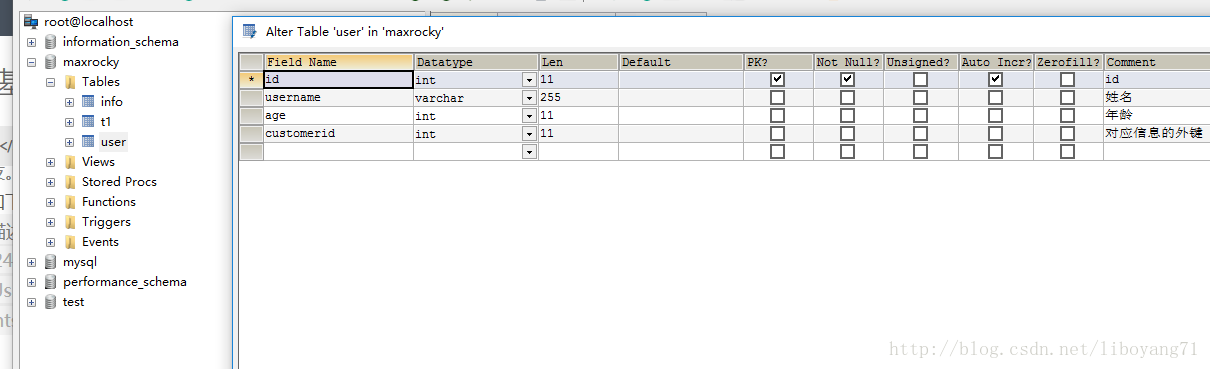
数据库如下
3.1 User(创建一个来接收查询出来数据的对象)
- 1
- 2
- 3
- 4
- 5
- 6
- 7
- 8
- 9
- 10
- 11
- 12
- 13
- 14
- 15
- 16
- 17
- 18
- 19
- 20
- 21
- 22
- 23
- 24
- 25
- 26
- 27
- 28
- 29
- 30
- 31
- 32
- 33
- 34
- 35
- 36
- 37
- 38
- 39
- 40
- 41
- 42
- 43
- 44
- 45
- 46
- 47
- 48
- 49
- 50
- 51
- 52
- 53
- 54
- 55
3.2 dao层创建接口
- 1
- 2
- 3
- 4
- 5
- 6
- 7
- 8
- 9
- 10
- 11
- 12
- 13
- 14
- 15
3.3 controller层
- 1
- 2
- 3
- 4
- 5
- 6
- 7
- 8
- 9
- 10
- 11
- 12
- 13
- 14
- 15
- 16
- 17
- 18
- 19
- 20
- 21
- 22
- 23
- 24
- 25
- 26
- 27
3.4 主开关Ssmspringboot2Application
- 1
- 2
- 3
- 4
- 5
- 6
- 7
- 8
- 9
- 10
- 11
- 12
- 13
- 14
- 15
- 16
- 17
我们一般基于mybatis都是将sql写到xml配置文件中。现在我们来添加映射
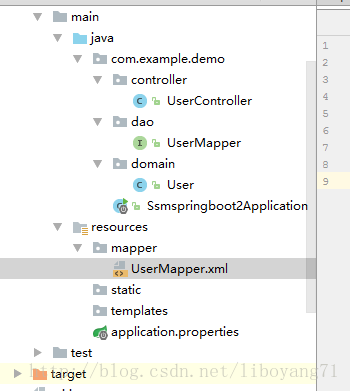
3.5 创建对应的mapper映射
- 1
- 2
- 3
- 4
- 5
- 6
- 7
- 8
- 9
3.6 重点重点,不要跑项目。需要配置application.properties
- 1
- 2
- 3
- 4
- 5
- 6
- 7
- 8
- 9
3.7 pom文件。我们为了使用mapper注解还需要手动添加一个依赖
- 1
- 2
- 3
- 4
- 5
- 6
- 7
- 8
- 9
- 10
- 11
- 12
- 13
- 14
- 15
- 16
- 17
- 18
- 19
- 20
- 21
- 22
- 23
- 24
- 25
- 26
- 27
- 28
- 29
- 30
- 31
- 32
- 33
- 34
- 35
- 36
- 37
- 38
- 39
- 40
- 41
- 42
- 43
- 44
- 45
- 46
- 47
- 48
- 49
- 50
- 51
- 52
- 53
- 54
- 55
- 56
- 57
- 58
- 59
- 60
- 61
- 62
- 63
- 64
- 65
- 66
- 67
- 68
- 69
- 70
- 71
- 72
撒花!!!完结!!!大功告成。