前言
我们之前学习的模板引擎是jsp,将后台的数据绑定,通过模板引擎渲染输出到前端。
我们现在不使用jsp,我们使用
Thymeleaf
。
官网地址:
https://www.thymeleaf.org/
代码托管地址:
https://github.com/thymeleaf/thymeleaf
在springboot中不就是starter,导入相关依赖即可。
依赖:
      <!--thymeleaf我们都是基于3.x进行开发的-->
        <dependency>
            <groupId>org.thymeleaf</groupId>
            <artifactId>thymeleaf-spring5</artifactId>
        </dependency>
        <dependency>
            <groupId>org.thymeleaf.extras</groupId>
            <artifactId>thymeleaf-extras-java8time</artifactId>
        </dependency>
注意:
thymeleaf我们都是基于3.x进行开发的
我们来看源码:thymeleafproperties

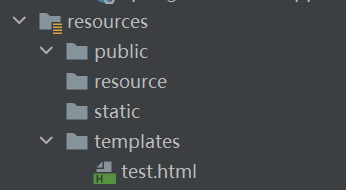
这里可以很明显的知道,thymeleaf是放在
classpath:/templates/
,并且会扫描里面以
.html
结尾的所有文件。
简单测试
我们在templates目录下建一个标准的html页面,然后通过controller来实现页面的跳转。
package com.cjh.controller;

import org.springframework.stereotype.Controller;
import org.springframework.web.bind.annotation.RequestMapping;

//templates目录下的所有页面,只能通过controller来跳转!
//这个模板需要模板引擎的支持!thymeleaf
@Controller
public class indexController {

    @RequestMapping("/test")
    public String test(){
        return "test";
    }
}
结果:

成功跳转
使用
我们看官方文档如何使用thymeleaf?

第一步就是导入相应的约束
xmlns:th="http://www.thymeleaf.org"
接下来就需要相应的语法了,这里看官方文档

如果是一个变量,就用$
如果是一个选择表达式,就用*
如果是一个消息,就用#
如果是一个链接,就用@
如果是一个组件,就用~

我们简单测试一下语法。
先在后端传递一个值。
public class indexController {

    @RequestMapping("/test")
    public String test(Model model){
        model.addAttribute("msg","hello,springboot");
        return "test";
    }
}
这里给model传递了一个msg,值为”hello,springboot”,这个时候,把msg传递给前端,msg是变量,用$来传递值
<!DOCTYPE html>
<html lang="en" xmlns:th="http://www.thymeleaf.org">
<head>
    <meta charset="UTF-8">
    <title>Title</title>
</head>
<body>
<h1>${msg}</h1>
</body>
</html>
注意,一定要导入相应的约束。
测试:失败了

原因:我们需要使用thymeleaf的语法

我们要使用
th:
<h1 th:text="${msg}"></h1>
再试一次:成功

<!--所有的html元素都可以被thymeleaf替换接管:th:元素名
     例如th:class    /th:style
-->
<!--所有的html元素都可以被thymeleaf替换接管:th:元素名
     例如th:class    /th:style
-->
<div th:text="${msg}"></div>

<!--下面的可以被转译-->
<div th:utext="${msg}"></div>


<hr>

<!--遍历数据-->
<h3 th:each="user:${users}" th:text="${user}"></h3>
<!--<h3 th:each="user:${users}" >[[ ${user} ]]</h3>-->

</body>
结论
只要需要使用thymeleaf,只需要导入
相应的依赖
即可,如果你使用
springboot2.x
以上的话,需要使用
thymeleaf3.x
以上的版本才可以,不写版本号,他也会根据springboot的版本自动导入他对应版本的thymeleaf,原因是在springboot的配置文件中有说明。
我们只需要将需要跳转的
html
放在
templates
目录下面即可。
使用thymeleaf需要使用它的相应语法才可以。
所有的html元素都可以被thymeleaf替换接管:只需要th:元素名
例如th:class / th:style / th:text