1 vscode下载与安装
下载地址:
Download Visual Studio Code – Mac, Linux, Windows
根据windows版本选择32bit或者64bit,推荐选择
User Installer
(用户安装),不需要管理员权限,vscode会被安装到本地AppData文件夹下,而系统安装则需要管理员权限,vscode会默认安装到Program Files文件夹下面。

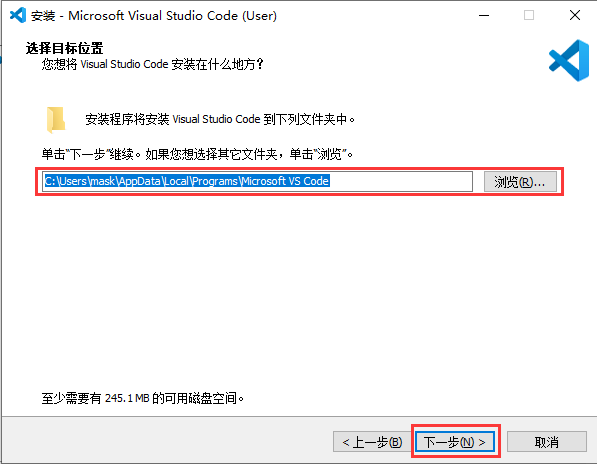
选择安装的目录,默认是在
C:\Users\mask\AppData\Local\Programs\Microsoft VS Code
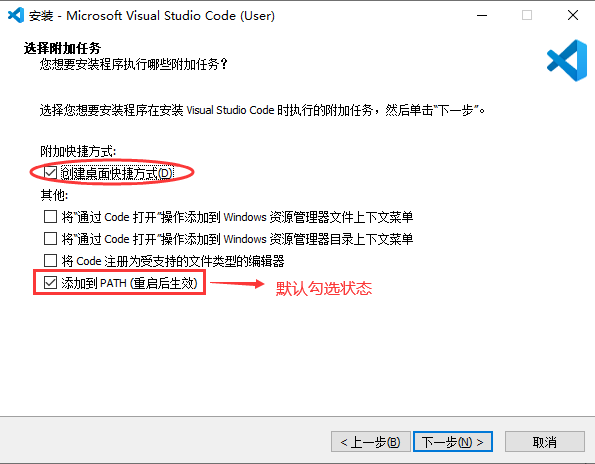
安装的时候注意勾选“
添加到PATH
”,会自动添加到用户环境变量。
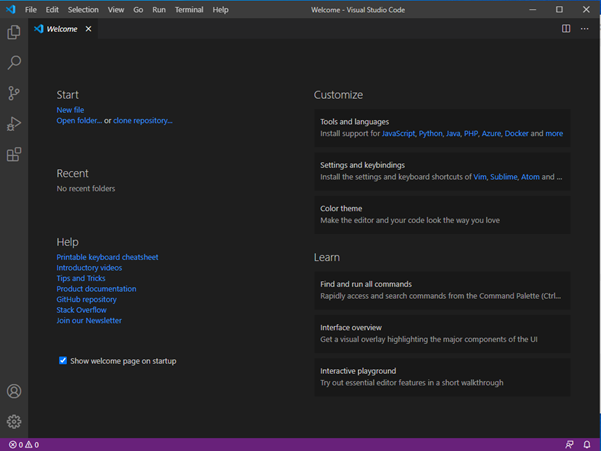
安装完成界面:

可以在终端cmd中输入“code”来打开vscode或者直接点击桌面图标打开
vscode 安装扩展:
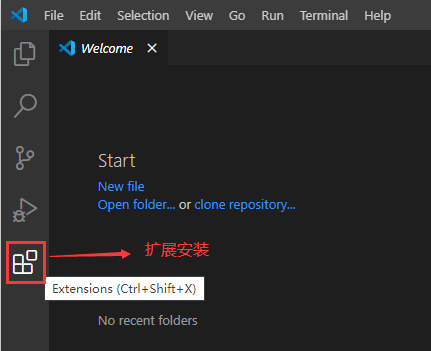
1、中文扩展:
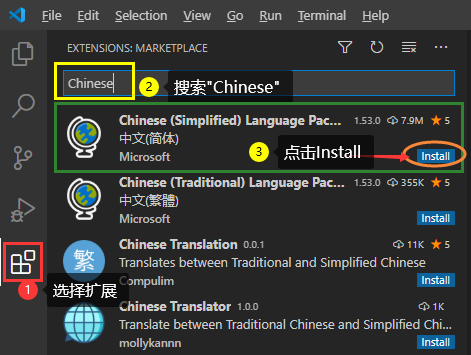
2、C/C++扩展:
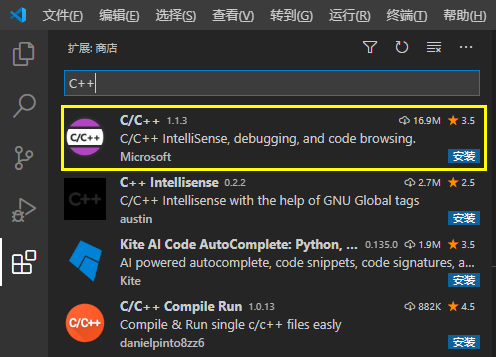
3、Code Runner扩展:

2 配置C/C++环境
安装gcc:
MinGW-w64 – for 32 and 64 bit Windows – Browse Files at SourceForge.net
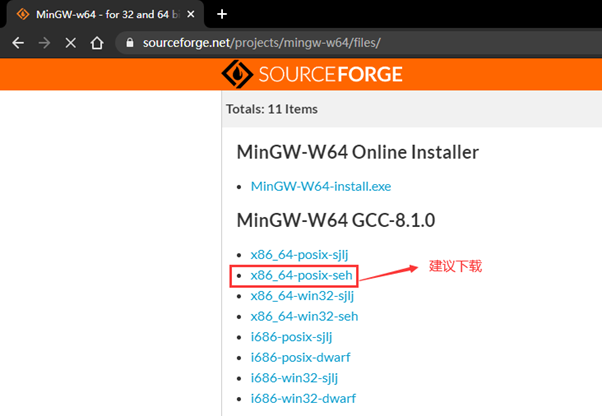

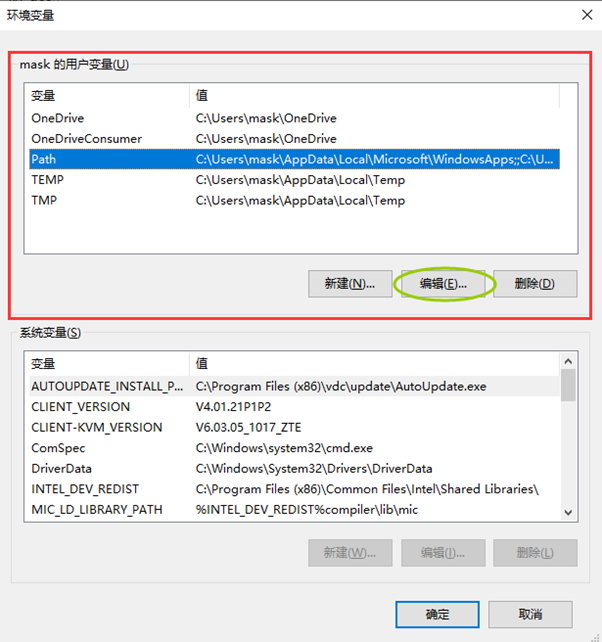
将下载的压缩包解压,并添加
C:\mingw-w64\mingw64\bin
到环境变量
打开CMD命令窗口,执行
g++ –version
或者
gcc -version
,有如下打印说明c/c++编译器安装成功
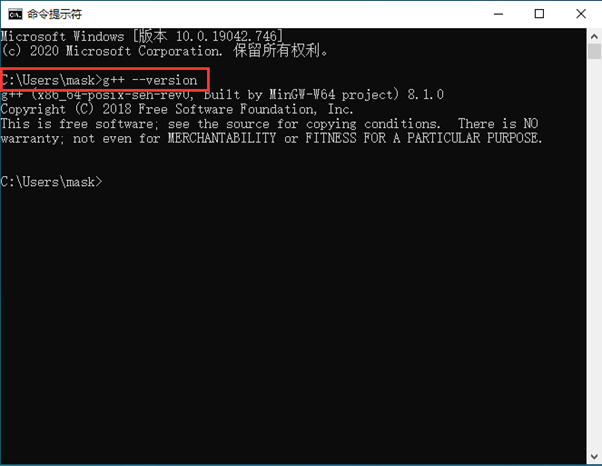
新建一个文件夹,并在此文件夹里面添加一个C++文件

右击该文件,或者在代码区任意位置右击,选择“Run Code”
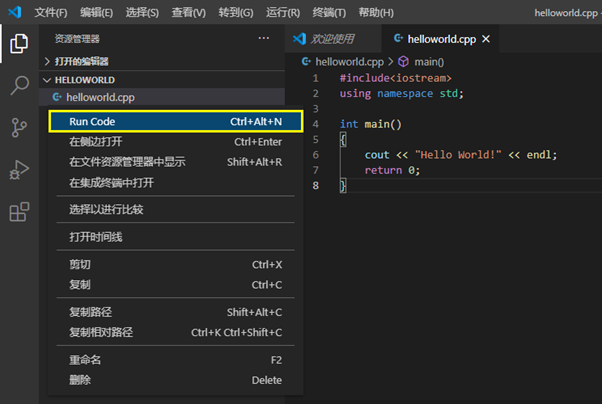
执行结果会输出到vscode的下方:

3 编译文件配置
3.1 创建tasks.json
选择终端里面的配置默认生成任务:
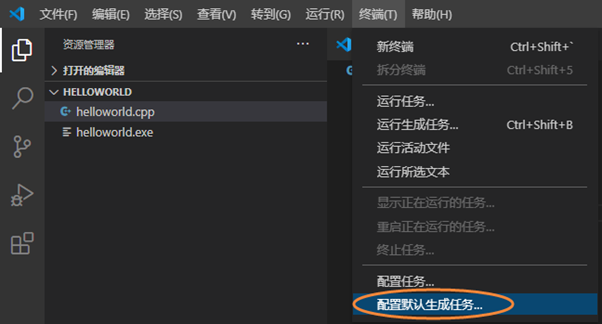
选择g++编译方式

会弹出tasks.json的配置:
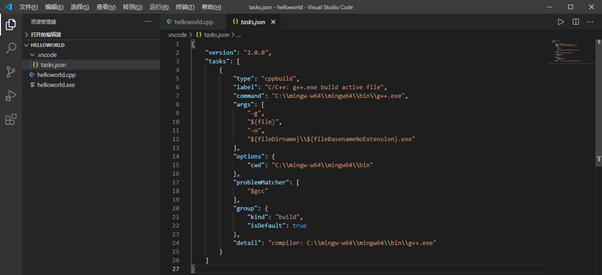
配置代码如下:
{
    "version": "2.0.0",
    "tasks": [
        {
            "type": "cppbuild",
            "label": "C/C++: g++.exe build active file",
            "command": "C:\\mingw-w64\\mingw64\\bin\\g++.exe",
            "args": [
                "-g",
                "${file}",
                "-o",
                "${fileDirname}\\${fileBasenameNoExtension}.exe"
            ],
            "options": {
                "cwd": "C:\\mingw-w64\\mingw64\\bin"
            },
            "problemMatcher": [
                "$gcc"
            ],
            "group": {
                "kind": "build",
                "isDefault": true
            },
            "detail": "compiler: C:\\mingw-w64\\mingw64\\bin\\g++.exe"
        }
    ]
}
3.2 创建launch.jason


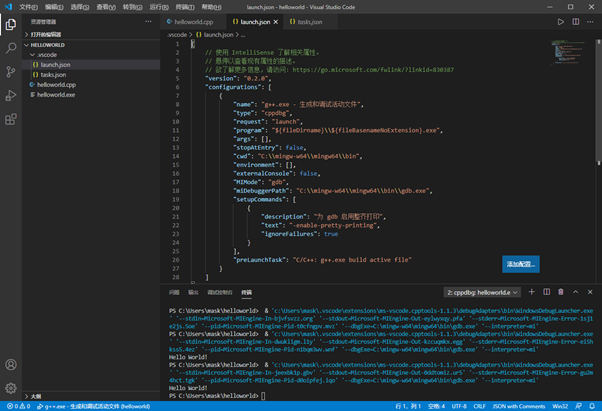
配置launch.jason的代码如下:
{
    // 使用 IntelliSense 了解相关属性。
    // 悬停以查看现有属性的描述。
    // 欲了解更多信息,请访问: https://go.microsoft.com/fwlink/?linkid=830387
    "version": "0.2.0",
    "configurations": [
        {
            "name": "g++.exe - 生成和调试活动文件",
            "type": "cppdbg",
            "request": "launch",
            "program": "${fileDirname}\\${fileBasenameNoExtension}.exe",
            "args": [],
            "stopAtEntry": false,
            "cwd": "C:\\mingw-w64\\mingw64\\bin",
            "environment": [],
            "externalConsole": false,
            "MIMode": "gdb",
            "miDebuggerPath": "C:\\mingw-w64\\mingw64\\bin\\gdb.exe",
            "setupCommands": [
                {
                    "description": "为 gdb 启用整齐打印",
                    "text": "-enable-pretty-printing",
                    "ignoreFailures": true
                }
            ],
            "preLaunchTask": "C/C++: g++.exe build active file"
        }
    ]
}
3.3 创建c_cpp_properties.json
<1> 快捷键ctrl+shift+p,输入C/C++,找到“编辑配置(UI)”的选项,并执行
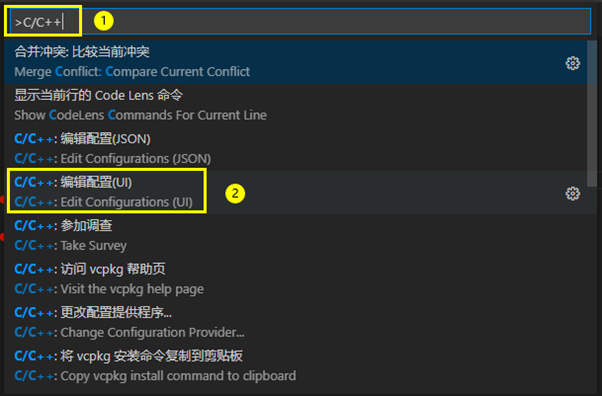
在此图形界面的配置改动会同步到c_cpp_properties.json中

配置c_cpp_properties.json的代码如下:
{
    "configurations": [
        {
            "name": "Win32",
            "includePath": [
                "${workspaceFolder}/**"
            ],
            "defines": [
                "_DEBUG",
                "UNICODE",
                "_UNICODE"
            ],
            "compilerPath": "C:\\mingw-w64\\mingw64\\bin\\gcc.exe",
            "cStandard": "gnu17",
            "cppStandard": "gnu++14",
            "intelliSenseMode": "gcc-x64"
        }
    ],
    "version": 4
}