效果展示

废话不说直接上代码
前提:主项目是vue2 子项目是vite+vue3
一、主项目搭建
1、创建vue2项目 vue create main-vue


# vue2 框架
npm i wujie-vue2 -S
# vue3 框架
npm i wujie-vue3 -S

2、安装wujie组件 npm i wujie-vue2 -S

//vue2路由只能用3.x vue3则是4.x
3、安装路由 yarn add vue-router@3.2.0
二、主项目主要代码
1)首先设置vue.config跨域
module.exports = {
  lintOnSave: false,
  publicPath: process.env.NODE_ENV === "production" ? "/demo-main-vue/" : "/",
  devServer: {
    headers: {
      "Access-Control-Allow-Origin": "*",
    },
    open: process.env.NODE_ENV === "development",
    port: "8100",
  },
  transpileDependencies: [ "sockjs-client" ],
};
2)在我们入口文件进行
无界
组件挂载
import WujieVue from "wujie-vue2";
Vue.use(WujieVue);

// 在 xxx-sub 路由下子应用将激活路由同步给主应用,主应用跳转对应路由高亮菜单栏
bus.$on("sub-route-change", (name, path) => {
  const mainName = `${name}-sub`;
  const mainPath = `/${name}-sub${path}`;
  const currentName = router.currentRoute.name;
  const currentPath = router.currentRoute.path;

  if (mainName === currentName && mainPath !== currentPath) {
    console.log(mainPath,'5555555');
    router.push({ path: mainPath });
  }
});

setupApp({
  name: "vite",
  url: hostMap("//localhost:7500/"),
  attrs,
  exec: true,
  props,
  fetch: credentialsFetch,
  degrade,
  ...lifecycles,
});
3)、在界面使用wujie 进行子应用加载
<WujieVue :key="update" width="100%" height="100%" name="vite" :url="viteUrl" :props="{ data: dataProps ,method:{propsMethod}}"></WujieVue>

 computed:{
     viteUrl(){
       return hostMap("//localhost:7500/") + `#/${this.$route.params.path}`;
     }
  },

 propsMethod(){
      alert("触发了主程序的弹窗");
    }
子应用
1)、main挂载
declare global {
  interface Window {
    // 是否存在无界
    $wujie: any;
    __POWERED_BY_WUJIE__?: boolean;
    // 子应用mount函数
    __WUJIE_MOUNT: () => void;
    // 子应用unmount函数
    __WUJIE_UNMOUNT: () => void;
    // 子应用无界实例
    __WUJIE: { mount: () => void };
  }
}

if (window.__POWERED_BY_WUJIE__) {
  let instance: any;
  window.__WUJIE_MOUNT = () => {
    const router = createRouter({ history: createWebHistory(basename), routes });
    instance = createApp(App)
      .use(router);
    instance.mount("#app");
  };
  window.__WUJIE_UNMOUNT = () => {
    instance.unmount();
  };
  // module脚本异步加载,应用主动调用生命周期
  window.__WUJIE.mount();
} else {
  createApp(App)
    .use(createRouter({ history: createWebHistory(basename), routes }))
    .mount("#app");
}
2)app.vue
<script setup lang="ts">
import {watch} from "vue";
import { useRouter } from "vue-router";
const $route = useRouter();

watch($route.currentRoute,(newVal,oldVal)=>{
  setTimeout(()=>{
    console.log(newVal,'vite');
  },200)
  if(newVal.fullPath.length > 1){
    window.$wujie?.bus.$emit("sub-route-change", "vite",newVal.fullPath.length > 1 ? newVal.path : '/');
  }
  // console.log($route.path,'routeraaa');
  // window.$wujie?.bus.$emit("sub-route-change", "vite", $route.path)
},{
  immediate:true
});

</script>

<template>
  <div id="nav">
    <router-link to="/home">home</router-link> | <router-link to="/dialog">dialog</router-link>
  </div>
  <router-view />
</template>

<style scoped>
.logo {
  height: 6em;
  padding: 1.5em;
  will-change: filter;
  transition: filter 300ms;
}
.logo:hover {
  filter: drop-shadow(0 0 2em #646cffaa);
}
.logo.vue:hover {
  filter: drop-shadow(0 0 2em #42b883aa);
}
</style>
nginx部署
#wujie 配置
server {
        listen 80;
        server_name www.wujie.com wujie.com;
        index index.jsp index.html index.htm;
        root /data/webapps/wujie;
        #iframe跨域问题 配置
 #       proxy_set_header Upgrade $http_upgrade;
  #      proxy_set_header Connection "Upgrade";
   #     proxy_set_header X-Forwarded-For $proxy_add_x_forwarded_for;
    #    proxy_set_header X-Real-IP $remote_addr;
      #  proxy_hide_header X-Frame-Options;
      #  add_header X-Frame-Options ALLOWALL;
       # add_header Access-Control-Allow-Origin *; # 必须要有
      #  add_header Access-Control-Allow-Headers *; # 必须要有
      #  proxy_cookie_domain remote localhost;  # 重要 对应upstream remote #注意别写错位置了 proxy_cookie_path //;
       # 主应用基座
        location / {
                index index.html index.htm;
                try_files $uri $uri/ /index.html last;
                if (!-e $request_filename) {
                    proxy_pass http://192.168.20.32;
                       }
                 }
        location /demo-main-vue {
                alias   /data/webapps/wujie/;
        #       if ($uri ~* "b1000") {
                    #访问/product/b1000,重写为/p/1000
        #           rewrite ^/(.*)/(.*)$ /p/1000 permanent;
        #           break;
        #      }
                index index.html index.htm;
        }
        #微应用基座
        location /demo-vite {
                alias /data/webapps/wujie/childer/;
                index index.html index.htm;
        #       add_header Access-Control-Allow-Origin *;
         #       add_header Access-Control-Allow-Methods *;
          #      add_header Access-Control-Allow-Headers *;
                try_files $uri $uri/ /index.html last;

        }
               access_log  logs/jvm_web/jvm_wujie/access.log  main;
               error_log   logs/jvm_web/jvm_wujie/error.log  crit;

 }
注意⚠️:
这个地址一定要与自己服务器匹配这个才是部署的关键
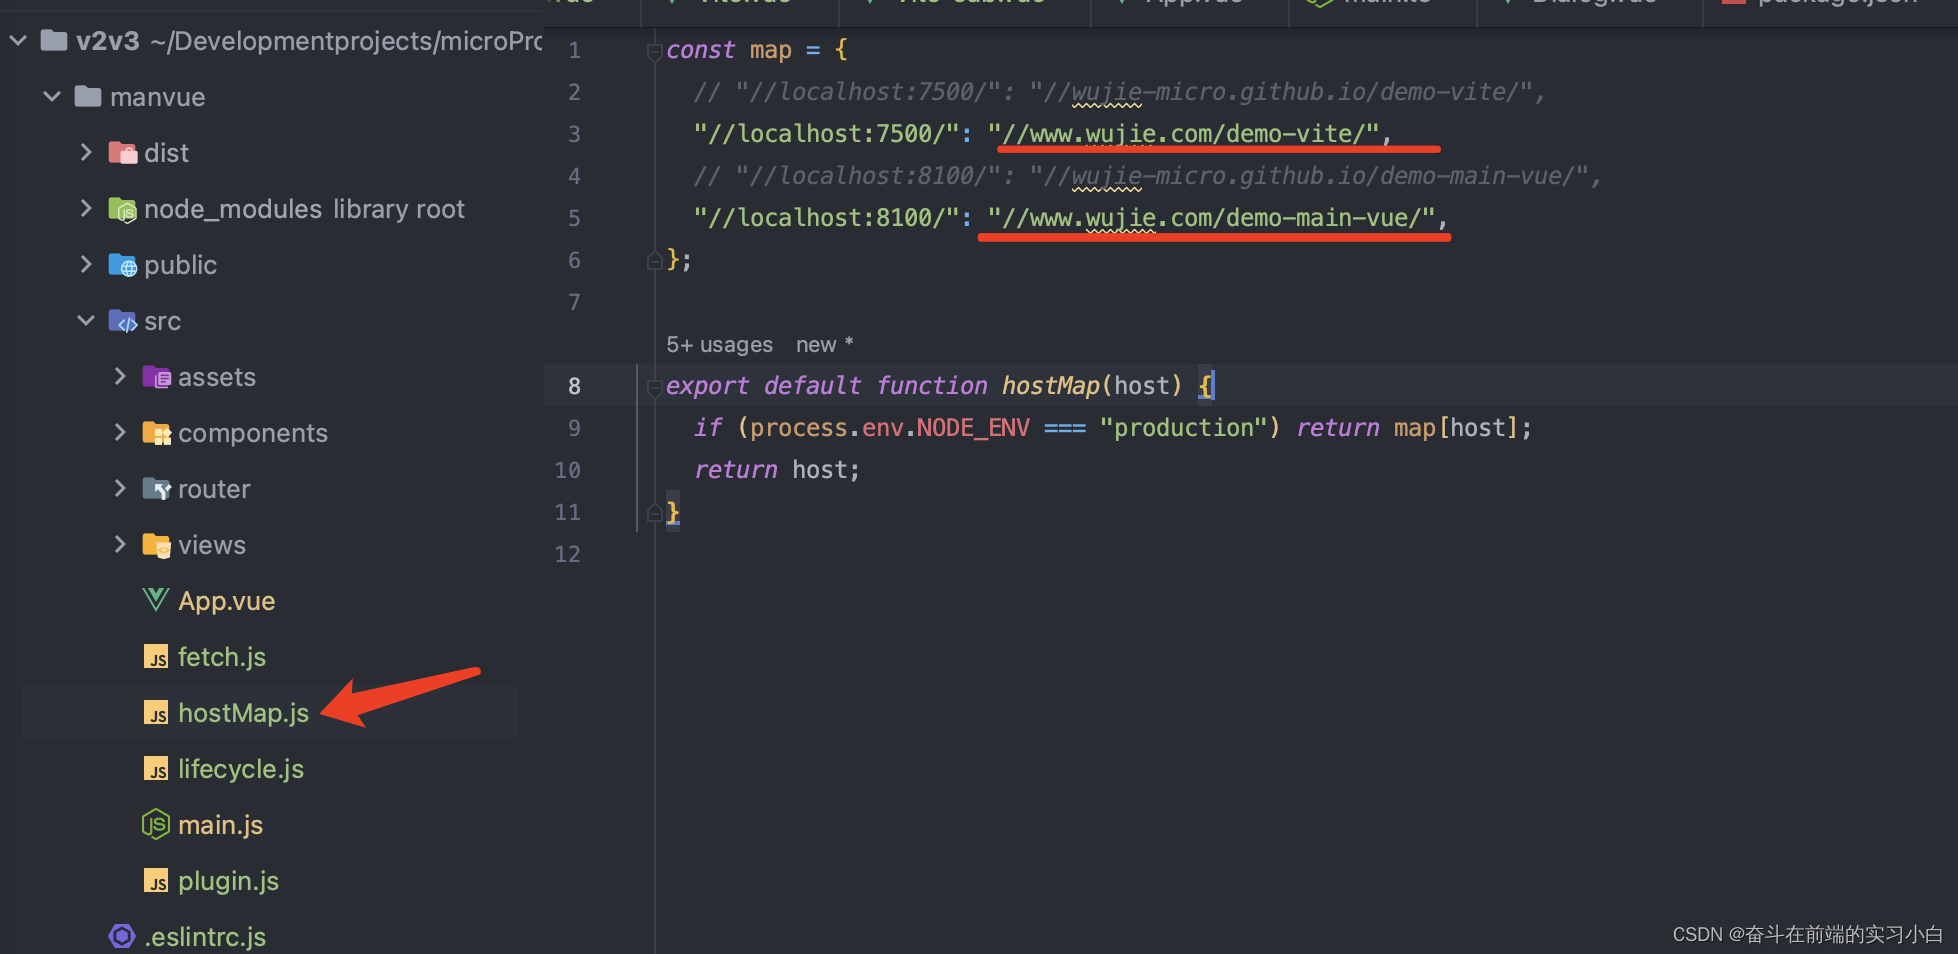
希望能帮到正在遇到部署问题的小伙伴
附:代码
demo
版权声明:本文为qq_41030766原创文章,遵循 CC 4.0 BY-SA 版权协议,转载请附上原文出处链接和本声明。