VMware虚拟机配置网络
创建虚拟机
vmvare网络配置
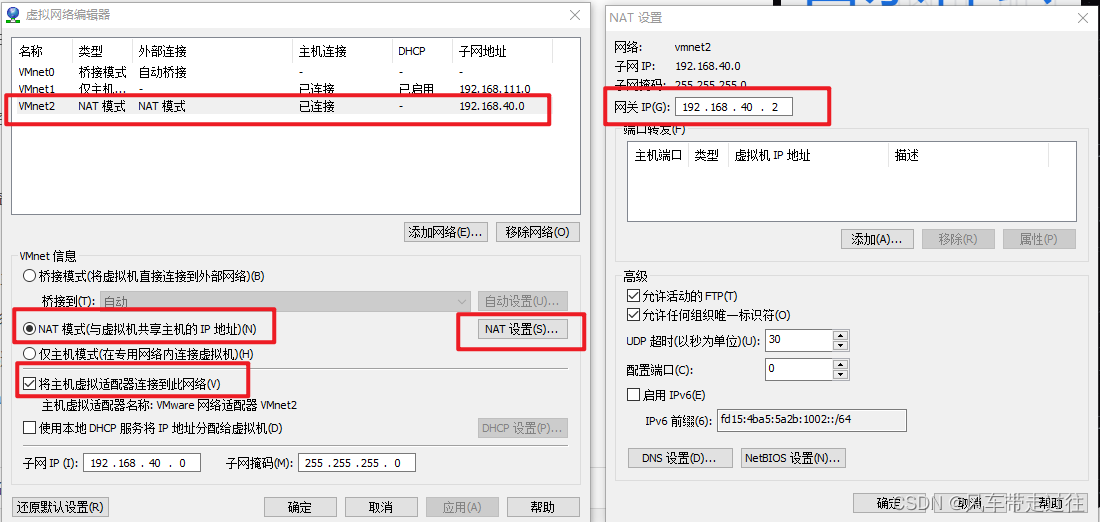
打开虚拟网络编辑器,查看当前VMnat8的子网地址,以及子网掩码,之后更改本机的适配器

宿主机网络配置
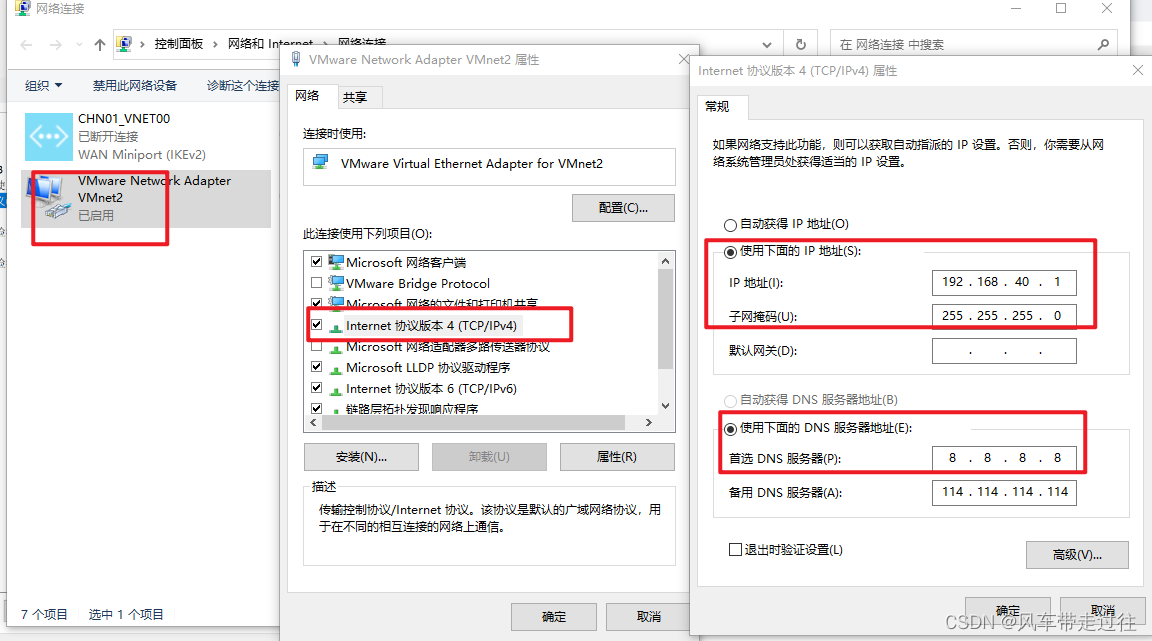
打开控制面板,编辑vmnet2这个适配器,使里面子网和子网掩码与VMware里的一致

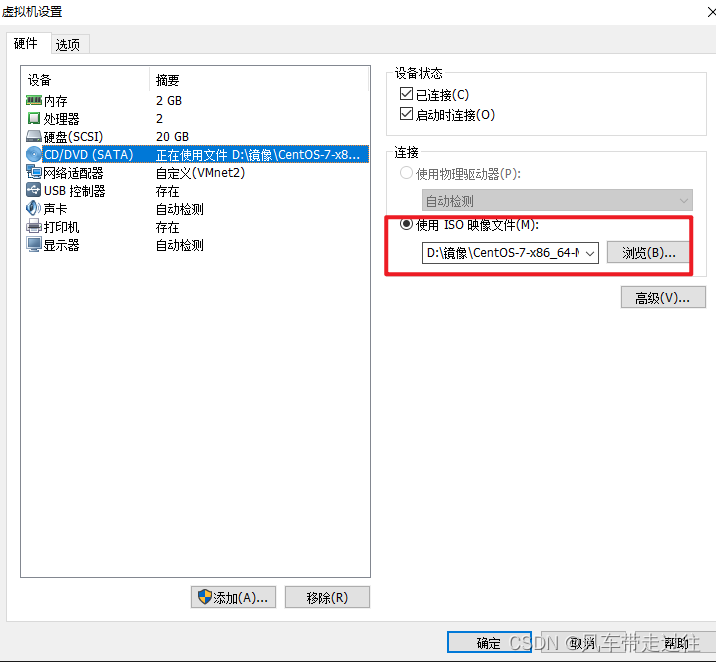
点击单台虚拟机,配置网络适配器为vmnet2

安装centos操作系统
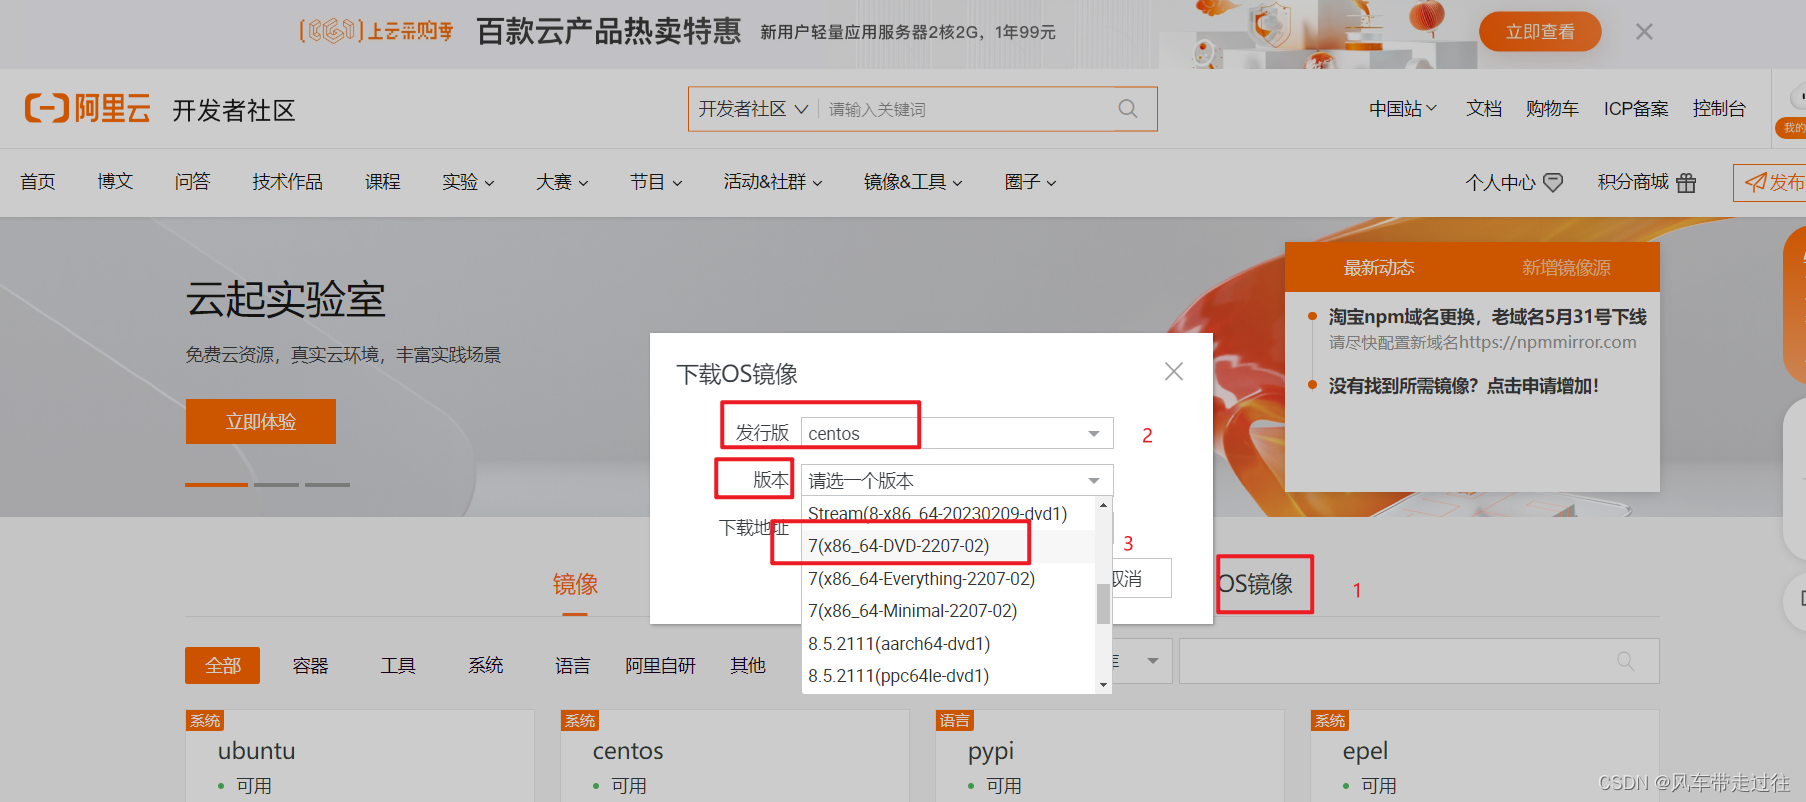
使用下载好的本地镜像,可以从阿里云下载:
https://developer.aliyun.com/mirror/?spm=a2c6h.13651104.0.d1002.4c4a12b2AyLdOa

或者通过百度云盘:
链接:https://pan.baidu.com/s/14LYAHDODh-8Ie8bpqAo7pA?pwd=sc8k
提取码:sc8k

虚拟机内配置
开启虚拟机,配置网卡
vi /etc/sysconfig/network-scripts/ifcfg-ens33
下面是需要变更的行
BOOTPROTO=static
ONBOOT=yes
IPADDR=192.168.40.11
NETMASK=255.255.255.0
GATEWAY=192.168.40.2
systemctl restart network #重启网卡
修改主机名
修改主机名为docker
hostnamectl set-hostname docker && bash
#docker为服务器名称
测试远程连接工具进行连接

配置网络YUM源
wget -O /etc/yum.repos.d/CentOS-Base.repo https://mirrors.aliyun.com/repo/Centos-7.repo
yum makecache
sed -i -e '/mirrors.cloud.aliyuncs.com/d' -e '/mirrors.aliyuncs.com/d' /etc/yum.repos.d/CentOS-Base.repo
关闭防火墙
systemctl stop firewalld.service   #停止firewall
systemctl disable firewalld.service    #禁止firewall开机启动
firewall-cmd --state          #查看防火墙状态
yum install -y iptables-services     #安装iptables
service iptables stop && systemctl  disable iptables   #停用iptables并关闭开机启动iptables
service iptables status
iptables -F    #清空防火墙规则
关闭selinux
sed -i 's/SELINUX=enforcing/SELINUX=disabled/g' /etc/selinux/config
reboot    #重启服务器生效
getenforce   #查看是否为Disabled
配置时间同步
yum install -y ntpdate ntp
ntpdate cn.pool.ntp.org    #与网络源时间同步

每小时进行时间同步
crontab -e
* */1 * * * /usr/sbin/ntpdate cn.pool.ntp.org
systemctl restart crond #重启计划任务
多台虚拟机之间免密登录
前提:在同个vm nat 下默认能互相通信的服务器。如不能通信,检查防火墙,以及selinux,以及网络配置
vim /etc/hosts    #配置主机 hosts 文件,相互之间通过主机名互相访问
192.168.40.10 k8smaster1
192.168.40.11 k8snode1
192.168.40.12 k8snode2
在k8smaster1 执行
ssh-keygen #一路回车,不输入密码
ssh-copy-id k8smaster1
ssh-copy-id k8snode1
ssh-copy-id k8snode2
在k8snode1 执行
ssh-keygen #一路回车,不输入密码
ssh-copy-id k8smaster1
ssh-copy-id k8snode1
ssh-copy-id k8snode2
在k8snode2 执行
ssh-keygen #一路回车,不输入密码
ssh-copy-id k8smaster1
ssh-copy-id k8snode1
ssh-copy-id k8snode2
版权声明:本文为weixin_43258559原创文章,遵循 CC 4.0 BY-SA 版权协议,转载请附上原文出处链接和本声明。
