云音乐小程序开发知识小记(上)
在云音乐小程序开发中学到的
分
上中下
,因为本人也是在学习中,请多指教
本次的**云音乐小程序开发知识小记(上)**主要涉及四个方面:
- 轮播图
- 数字格式化处理
- 自定义组件
- 云函数创建,数据库插入数据
首先介绍一下这部分涉及到的页面,就是小程序的第一个主页,歌单(playlist),以及每个歌单点击后的具体音乐列表(musiclist)
然后介绍一下这部分涉及的文件
1.云函数:
* getplaylist
* music
2.自定义组件:
* playlist
* musiclist
3.pages:
* playlist
* musiclist

1.轮播图
首先实现的是歌单上面的轮播图,这个轮播图使用到的是小程序开发文档中的轮播图组件

使用方法:
① 在playlist.wxml中直接应用上面的代码
<swiper
indicator-dots="true" autoplay="true" circular="{{circular}}" vertical="{{vertical}}"
interval="2000" duration="1000" previous-margin="{{previousMargin}}px" next-margin="{{nextMargin}}px">
<block wx:for="{{imgUrls}}" wx:key="index">
<swiper-item>
<image src="{{item}}" mode="widthFix" class="my_img"></image>
</swiper-item>
</block>
</swiper>
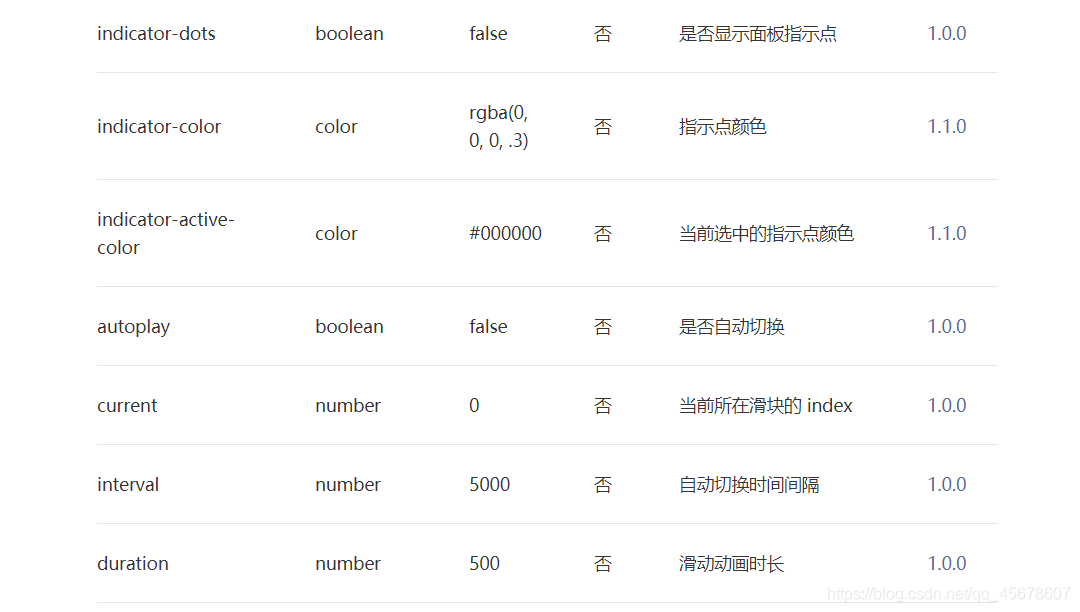
其中有几个属性
包括indicator-dots 轮播图小点
autoplay 是否自动播放
Interval 切换时间间隔
duration 滑动时长
(具体取值如下,当然还有很多属性,这里举例)
②在playlist.js里面data设置
data: {
imgUrls: [
'/images/1.png',
'/images/2.png',
'/images/3.png',
    ]
},
③加上wxss
.playlist-container {
	display: flex;
	flex-wrap: wrap;
	justify-content: space-around;
	margin-top: 10rpx;
	flex-direction: row;
	}
.my_img{width: 100%;}
.img {width: 100%;height: 100%;}
到这里可以知道,在playlist.js中的data里面定义的imgUrl(包含三张图片),通过在playlist.wxml里面的wx:for=”{
{imgUrls}}”依次取出。
就可以实现轮播图的效果了
但是有一个要注意的就是:
开发文档上的例子:<view class="swiper-item {{item}}"></view>
老师视频的代码:<image src="{{item}}" mode="widthFix"class="my_img"></image>
2.数字格式化处理
完成数字格式化处理操作
我们知道,传过来的数字是未处理好的,想要把它变成以万,亿做单位的数字

首先用到的数据监听器obververs
这里我们需要监听的数据是,playlist对象里面的playCount属性
可以这样表示:[‘playlist.playCount’]
(count)是我们需要传的参数
同时我们需要定义一个格式化数字的方法_tranNumber
通过this.setData将格式化好的数字返回界面
observers: {
['playlist.playCount'](count) {
this.setData({
_count: this._tranNumber(count, 2)
})
}
},
注意:在利用setData传值过程中,不能直接使用,会造死循环
错误:[‘playlist.playCount’]: this._tranNumber(count, 2)
正确:_count: this._tranNumber(count, 2)
其中_count直接定义在data{}中就可以
具体定义的_tranNumber函数写在methods{}方法中
_tranNumber(num, point) {
let numStr = num.toString().split('.')[0]//将传过来的数字以小数点为界限后面的舍去
if (numStr.length < 6) {
return numStr
} else if (numStr.length >= 6 && numStr.length <= 8) {
let decimal = numStr.substring(numStr.length - 4, numStr.length - 4 + point)//先截出小数点之后的值
return parseFloat(parseInt(num / 10000) + '.' + decimal) +'万'//parseInt取整作为小数点前的数字,在拼接之前截好的小数点后的数字,parseFloat转化成数字
} else if (numStr.length > 8) {
let decimal = numStr.substring(numStr.length - 8, numStr.length - 8 + point)
return parseFloat(parseInt(num / 100000000) + '.' + decimal) + '亿'
}
}
3.自定义组件
首先看一下,我歌单页面总共分成了两个部分。轮播图和歌单列表
所以接下来需要完成的就是歌单列表的内容
在这里我们可以看到,每个歌单的都是一样的组件,包括它的封面,歌单介绍以及播放的数量

一开始前的准备
现在playlist.js中的data里定义playlist数组,其中包括六项,内容有点多,我只展现一项,有助于之后分析
data: {
playlist:[
{"_id":"08560c9e5d042a5c0174f1ca26f1d7b2",
"copywrier":"热门推荐",
"playCount":1.4641238e+06,
"highQuality":false,
"type":0.0,
"canDislike":true,
"name":"天气转热了,适合听点凉爽的歌。",
"alg":"cityLevel_unknow",
"createTime":{"$date":"2019-06-14T23:14:36.746Z"},
"id":2.780381322e+09,
"picUrl":"https://p2.music.126.net/Biky7TE4CtW6NjGuqoUKZg==/109951164041827987.jpg",
"trackCount":53.0},
]
},
二:在playlist.json中引用组件
{
"usingComponents": {
"x-playlist": "/components/playlist/playlist"
},
}
三在playlist.wxml中使用
<view class="playlist-container">
<block wx:for="{{playlist}}" wx:key="index">
<x-playlist playlist="{{item}}"></x-playlist>
</block>
</view>
通过wx:for遍历已经定义好的playlist
其中我们使用了组件x-playlist
四自定义组件的实现
首先需要在组件components文件下创建自定义组件playlist
.js中:
properties: {
playlist: {
type: Object,
}
},
这里我们要注意,properties与data的区别: properties是使用组件时外部可以传参数的,也就是调用者可以外部修改该属性,但是如果该属性放在data里就不能修改。
.wxml中:
<view class="playlist-container" >
<image src="{{playlist.picUrl}}" class="playlist-img"></image>
<text class="playlist-playcount">{{_count}}</text>
<view class="playlist-name">{{playlist.name}}</view>
</view>
.wxss中:
.playlist-container {
display: flex;
flex-wrap: wrap;//让弹性盒元素在必要的时候拆行
justify-content: space-around;
margin-top: 10rpx;
flex-direction: row;
}
.my_img{
width: 100%;
}
.img {
width: 100%;
height: 100%;
}
在定义完组件之后,需要在页面playlist.wxss中定义组件早页面的显示样式。
.playlist-container {
	display: flex;
	flex-wrap: wrap;
	justify-content: space-around;
	margin-top: 10rpx;
	flex-direction: row;
}
.my_img{width: 100%;}
.img {width: 100%;height: 100%;}
4.云函数创建,数据库插入数据
首先创建云函数getplaylist,在终端依次输入
* node -v
* npm -v
* npm install --save request
* npm install --save request-promise
在云函数里面引用request-promise:
var rp = require(‘request-promise’);
声明服务器地址:
const URL = ‘http://musicapi.xiecheng.live/personalized’
请求数据,利用JSON.parse()将字符串数据转化成对象类型
const playlist= await rp(URL).then((res)=>{
return JSON.parse(res).result
})
将请求完的数据插入数据库中
首先在云数据库中新定义一个集合playlist,并初始化数据库:
const db = cloud.database()
因为数据中的数据list.data与从服务器中请求来的数据playlist可能有重复的
所以这里,我们先实现去重操作
const newData=[]//首先声明一个数组,用来存储playlist里面的数据在list里面找不到的数据
for(let i=0,len1=playlist.length;i<len1;i++){
let flag=true//声明标志位
for(let j=0,len2=list.data.length;j<len2;j++){
if(playlist[i].id===list.data[j].id){
flag=false
break
}
}
if(flag){
newData.push(playlist[i])
}
}
进行完去重处理后,将数据插入到数据库中
for (let i = 0, len = newData.length;i<len;i++){
await playlistCollection.add({
data:{
...newData[i],
createTime:db.serverDate(),//插入时间
}
}).then((res)=>{
console.log('插入成功')
}).catch((err)=>{
console.error('插入失败')
})
}
随着学习,会写完中下
如有描述不当,请各位大佬多多指点。