SpringBoot
自动配置
-Enable
注解原理

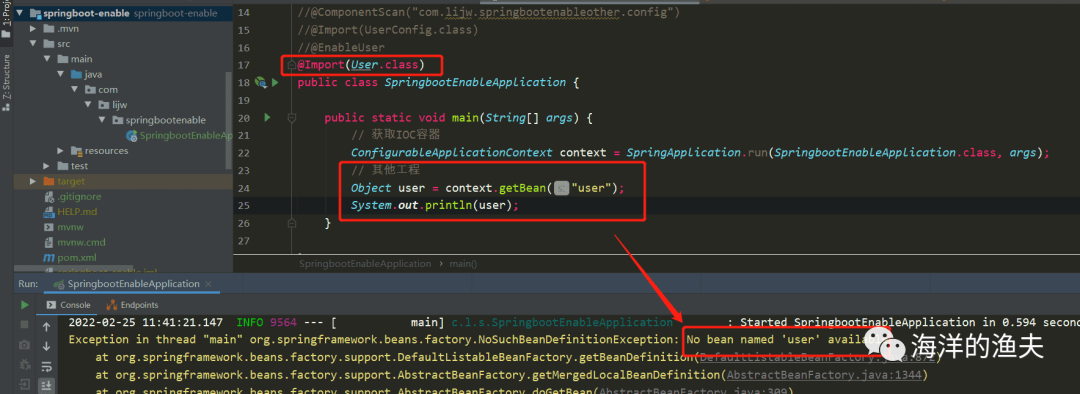
※要知道:SpringBoot
不能直接获取在其他工程中定义的
Bean
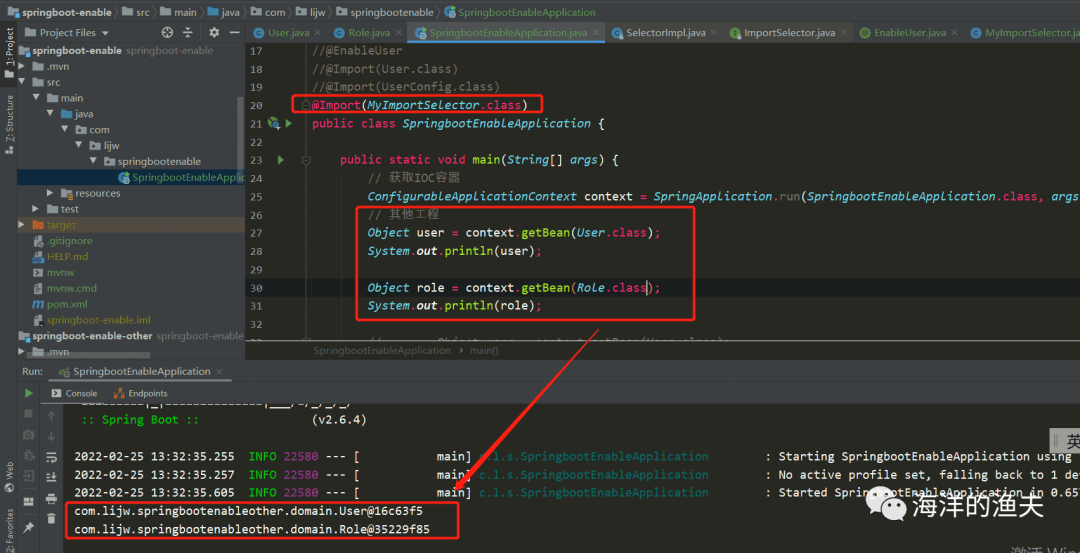
SpringBoot中提供了很多Enable开头的注解,这些注解都是用于动态启动某些功能的。而其底层原理是使用Import注解导入一些配置类,实现Bean的动态加载。

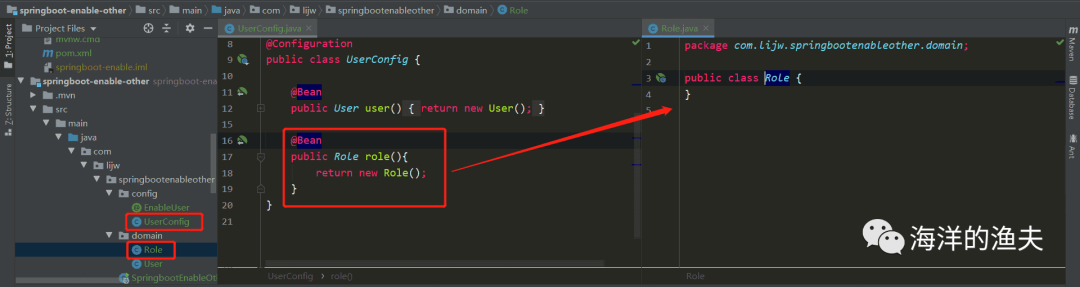
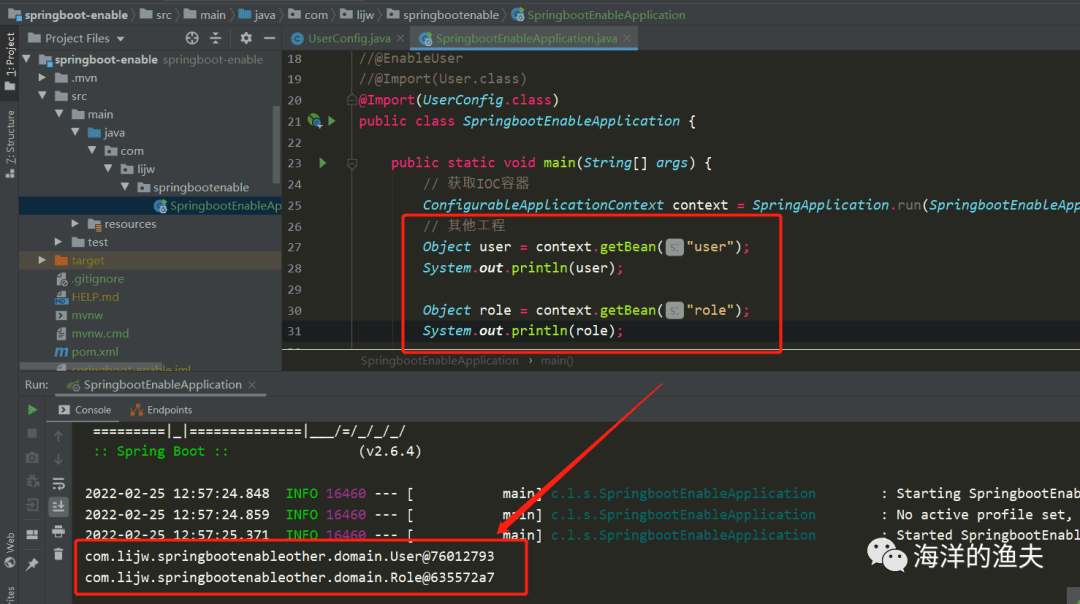
第二种方式:使用@Import注解外部的加载类。这些类都会被Spring创建,并放入IoC容器中

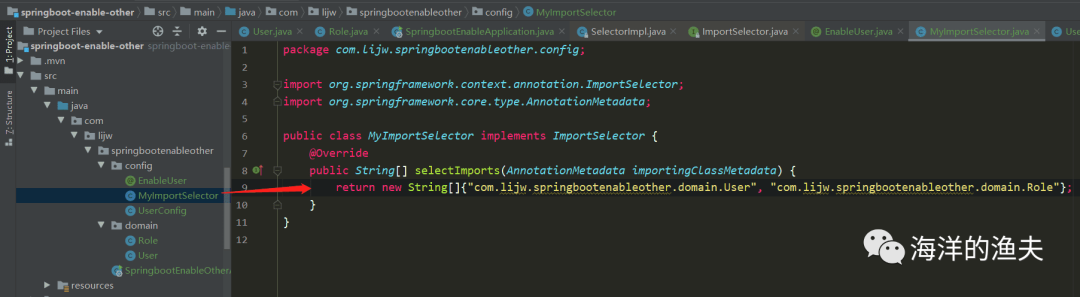
第三种方式:对Import注解进行封装
首先在外部的工程中创建个注解


要导入的工程直接在启动类上开启@EnableUser注解,即可获取到外部的User bean

SpringBoot
自动配置
-@Import
详解
@Enable*
底层依赖于
@Import
注解导入一些类,使用
@Import
导入的类会被
Spring
加载到
IOC
容器中。
而
@Import
提供
4
中用法:
①导入
Bean
②导入配置类
③导入
ImportSelector
实现类。一般用于加载配置文件中的类
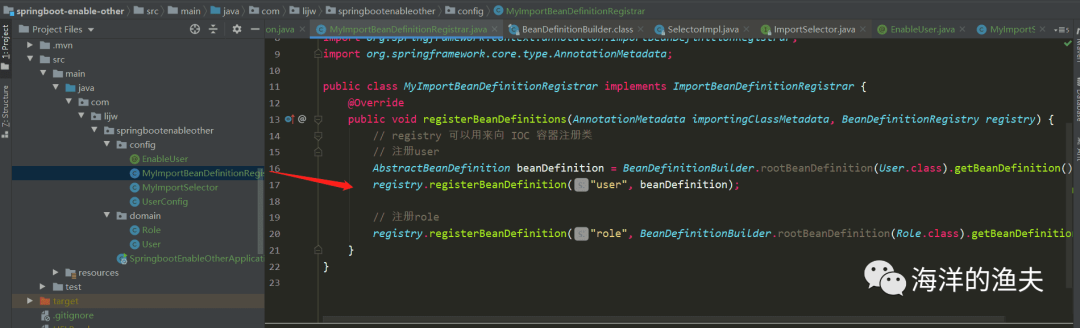
④导入
ImportBeanDefinitionRegistrar
实现类。
①导入
Bean
②导入配置类
③导入
ImportSelector
实现类。一般用于加载配置文件中的类
④导入
ImportBeanDefinitionRegistrar
实现类。

SpringBoot自定义一个Starter
Starter原理
springboot通过一个@SpringBootApplication注解启动项目,springboot在项目启动的时候,会将项目中所有声明为Bean对象(注解、xml)的实例信息全部加载到ioc容器当中。 除此之外也会将所有依赖到的starter里的bean信息加载到ioc容器中,从而做到所谓的零配置,开箱即用。
加载starter:
通过@EnableAutoConfiguration注解进行加载starter,@EnableAutoConfiguration在@
SpringBootApplication注解
里面
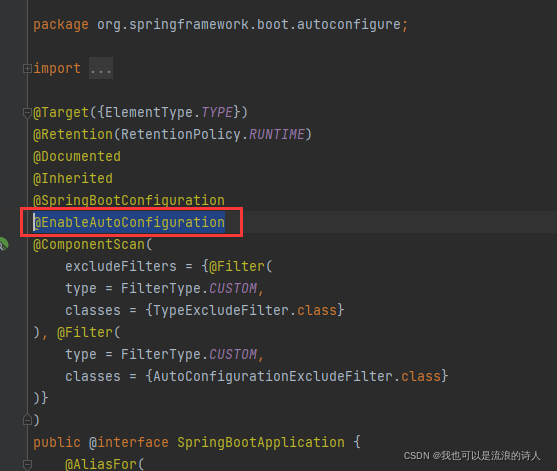
具体的加载实现是由@EnableAutoConfiguration注解下import了一个AutoConfigurationImportSelector加载器实现
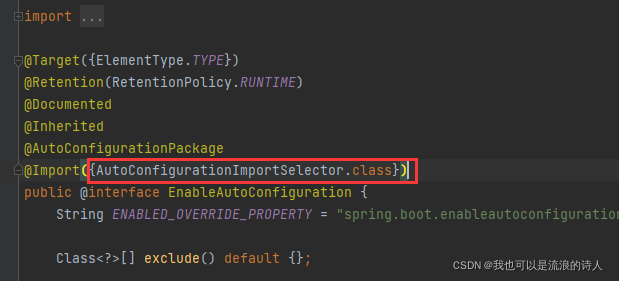
这个AutoConfigurationImportSelector会去所引用的依赖jar包下,找到一个””文件,
一般spring.factories文件里都会声明

找到后将这个文件里声明的配置信息进行加载,从而达到加载全部bean信息的效用。
也就是说,我们如果想把初始化bean加入到starter中,只需要在spring.factories增加配置即可。完后,spring的@EnableAutoConfiguration会自动把我们的bean引导进来
开始操作:
第三方项目构建完成后,在resources文件夹下面新建META-INF文件夹,并新建spring.factories文件
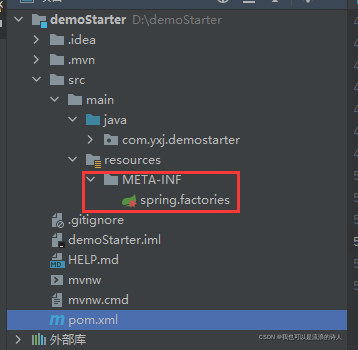
因为我们是作为提供服务模块,所以不需要启动类,
删除启动类
并新建
服务提供
和
统一配置
两个类
统一配置类:
package com.yxj.demostarter;

import org.springframework.beans.factory.annotation.Value;
import org.springframework.context.annotation.Bean;
import org.springframework.context.annotation.Configuration;

@Configuration
public class DemoConfig {

    @Value("${demo}")
    private String demo;

    @Bean
    public DemoService demoService(){
        return new DemoService(demo);
    }
}
服务提供类
package com.yxj.demostarter;

public class DemoService {


    private String demo;

    public DemoService(String demo) {
        this.demo = demo;
    }

    public String getService(){
        return demo;
    }
}
新建好后,在spring.factories文件里,将上面的统一配置类DemoConfig配置到文件里
org.springframework.boot.autoconfigure.EnableAutoConfiguration=com.yxj.demostarter.DemoConfig配置完后就可以开始maven install安装到maven仓库中了
mvn clean install -Dmaven.test.skip=true
测试:
在另一个项目中,引入刚刚打包的pom依赖
 <dependency>
      <groupId>com.yxj</groupId>
      <artifactId>demoStarter</artifactId>
      <version>0.0.1-SNAPSHOT</version>
</dependency>
而后新建一个测试controller,里面注入上面提供的DemoService类。然后调用其方法。
package com.yxj.yosmfa.controller;

import com.yxj.demostarter.DemoService;
import org.springframework.http.HttpStatus;
import org.springframework.http.ResponseEntity;
import org.springframework.web.bind.annotation.GetMapping;
import org.springframework.web.bind.annotation.RequestMapping;
import org.springframework.web.bind.annotation.RestController;

@RestController
public class DemoController {

    private DemoService demoService;

    @GetMapping("demo")
    public ResponseEntity demo(){
        String service = demoService.getService();
        return new ResponseEntity(service, HttpStatus.OK);
    }

    public DemoController(DemoService demoService) {
        this.demoService = demoService;
    }
}
此时还要注意,提供服务的starter里有引用一个demo属性,所以需要在你测试项目的yml文件里加一个demo属性的配置

所有准备完成后,启动项目,调用测试类demo方法
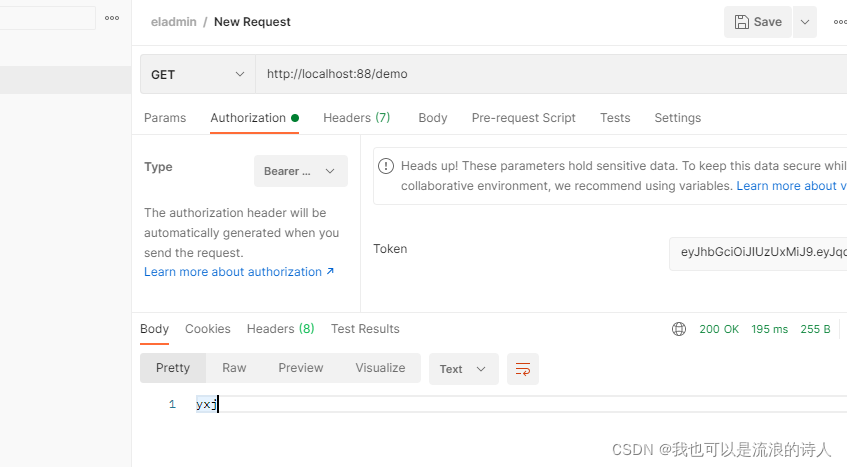
可以看到正常将测试项目配置文件里的demo属性,通过自定义starter提供的服务,调用返回了。且测试项目并没有为自定义starter项目做任何bean的配置,就能在测试项目的controller中注入使用DemoService类的功能。
最后再来看下,我们自定义的springbootstarter在测试项目中的依赖情况
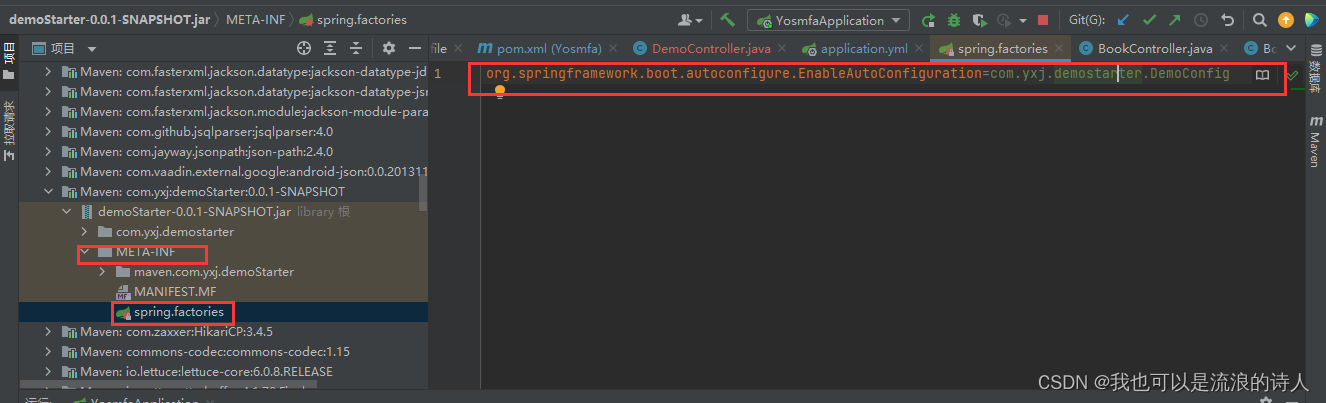
这就印证了上面说的,sprinboot是通过加载META-INF文件夹下的spring.factories文件完成自动配置的功能以及开箱即用的效果