时间:2019.08.15
环境:腾讯云服务器CentOS7系统(64位)
目的:在Centos7系统安装部署Brat
说明:中级教程:
https://blog.csdn.net/anyedianxia/article/details/99429224
作者:Zhong
QQ交流群:121160124 欢迎加入!
Brat,
NLP
常用的一个工具,用于标注文本语言。
详细的安装过程官网有介绍,主要是介绍基于Ubuntu平台安装和配置过程,不过由于太简单而遭到一些人吐槽,并且网上教程较少且有一些误导性!这里结合最近几天在研究Brat的过程中安装和配置时遇到的一些问题,做一下记录!
平台:CentOS7(Ubuntu稍有不同!)
用户:root(普通用户加前缀sudo)
推荐安装基于Apache2的web server模式使用Bart,比使用独立模式(standalone server)功能更全面稳定,独立模式是试验性质!
1.首先,安装Apache2:
yum install httpd安装完成后,编辑配置文件httpd.conf
vim /etc/httpd/conf/httpd.conf添加如下内容:
<Directory /var/www/html/brat>
    AllowOverride Options Indexes FileInfo Limit
    Require all granted
    AddType application/xhtml+xml .xhtml
    AddType font/ttf .ttf
    # For CGI support
    AddHandler cgi-script .cgi
    # Comment out the line above and uncomment the line below for FastCGI
    #AddHandler fastcgi-script fcgi
</Directory>
上面内容第一行 /var/www/html/brat路径是与后面要安装brat的路径对应!
上面的配置如果无法启动httpd服务 可以按照官方的方式如下配置
<Directory /var/www/html/brat>
    AllowOverride Options Indexes FileInfo Limit
    AddType application/xhtml+xml .xhtml
    AddType font/ttf .ttf
    # For CGI support
    AddHandler cgi-script .cgi
    # Comment out the line above and uncomment the line below for FastCGI
    #AddHandler fastcgi-script fcgi
</Directory>
开启userdir模块(此步骤不配置也没有发现什么影响):
vim /etc/httpd/conf.d/userdir.conf找到如下内容并修改:
<IfModule mod_userdir.c>
    #
    # UserDir is disabled by default since it can confirm the presence
    # of a username on the system (depending on home directory
    # permissions).
    #
    UserDir disabled

    #
    # To enable requests to /~user/ to serve the user's public_html
    # directory, remove the "UserDir disabled" line above, and uncomment
    # the following line instead:
    #
    #UserDir public_html
</IfModule>
修改为:
<IfModule mod_userdir.c>
    #
    # UserDir is disabled by default since it can confirm the presence
    # of a username on the system (depending on home directory
    # permissions).
    #
    #UserDir disabled

    #
    # To enable requests to /~user/ to serve the user's public_html
    # directory, remove the "UserDir disabled" line above, and uncomment
    # the following line instead:
    #
    UserDir brat
</IfModule>
UserDir brat也可不配置,保持默认的即可!
然后启动或重新载入Apache服务:
service httpd start
2.安装配置Brat
下载Brat! 网址:
http://brat.nlplab.org/index.html
版本好久没更新了!
下载完成后,解压文件:
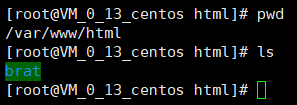
tar xzf brat-v1.3_Crunchy_Frog.tar.gz移动或确认目录brat-v1.3_Crunchy_Frog在路径/var/www/html/目录下,把目录改名为brat(好记):

进入brat目录:
cd brat执行安装:
./install.sh安装过程中会提示输入用户名、密码、邮箱信息,用户名和密码用于web浏览器用户登录。
安装完成后,更改data和work目录的用户组和权限:
chgrp -R apache data work
chmod -R g+rwx data work
至此,就可以在浏览器进行测试一下了,默认的url是IP/brat/,example:127.0.0.1/brat/。
配置支持中文:
vim /var/www/html/brat/server/src/projectconfig.py找到n = re.sub(r'[^a-zA-Z0-9_-]’, ‘_’, n)这一行并修改:
def normalize_to_storage_form(t):
    """
    Given a label, returns a form of the term that can be used for
    disk storage. For example, space can be replaced with underscores
    to allow use with space-separated formats.
    """
    if t not in normalize_to_storage_form.__cache:
        # conservative implementation: replace any space with
        # underscore, replace unicode accented characters with
        # non-accented equivalents, remove others, and finally replace
        # all characters not in [a-zA-Z0-9_-] with underscores.

        import re
        import unicodedata

        n = t.replace(" ", "_")
        if isinstance(n, unicode):
            ascii = unicodedata.normalize('NFKD', n).encode('ascii', 'ignore')
        #n  = re.sub(r'[^a-zA-Z0-9_-]', '_', n)
        n  = re.sub(u'[^a-zA-Z\u4e00-\u9fa5<>,0-9_-]', '_', n)

        normalize_to_storage_form.__cache[t] = n

    return normalize_to_storage_form.__cache[t]
normalize_to_storage_form.__cache = {}
增加测试文件:
在/var/www/html/brat/data/目录新建hero测试目录,然后在hero目录里面新建文档test1.txt,test2.txt,test3.txt,随便写点内容进去,然后在brat目录下执行命令:
find data -name '*.txt' | sed -e 's|\.txt|.ann|g' | xargs touch查看下目录:

浏览器测试:

浏览器推荐使用Google或
Safari
,具体如下图:

本文参考官网说明:
http://brat.nlplab.org/installation.html
BratQQ探讨群:121160124
关注微信公众号:
更多精彩 。。。


