VTK8.2+VS2019编译
最近用到VTK库,打算重新编译,发现能找到的资源中VTK库的编译比较详细,但是VS的环境配置比较乱,这里简述VTK的源码编译并提供VS环境配置的保姆教学。
准备工作
1.安装VS2019(自查)Visual Studio, Qt, VTK, ITK安装(For Windows) – 知乎 (zhihu.com)
2.安装QT5.12(自查)Visual Studio, Qt, VTK, ITK安装(For Windows) – 知乎 (zhihu.com)
3.cmake(自查)Visual Studio, Qt, VTK, ITK安装(For Windows) – 知乎 (zhihu.com)
4.源码下载:
https://vtk.org/files/release/8.2/VTK-8.2.0.zip
源码编译过程简述
解压缩,cmake路径设置,我的是D:\library\VTK8.2\VTK-8.2.0
binaries path :D:\library\VTK8.2\VTK-8.2.0\build
configure之后需要把CMAKE_INSTALL_PREFIX 改成后面引用路径 我的是D:\library\VTK8.2\VTKReleaseLib(VS的包含路径和库路径)
VTK_GTOUP_Qt 勾选 因为要和qt联合编译
configure
generate
OpenProject
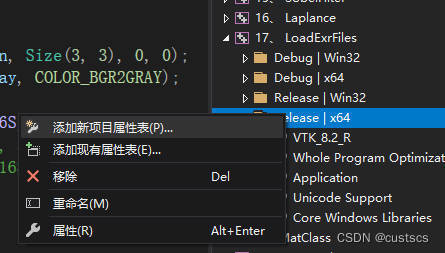
VS内改成release x64,并在解决方案资源管理器内找到All_BUILD,右键生成
再找到INSTALL 右键生成
可以再找到cube右键设置启动项,然后F5本地调试测试结果。
VS2019 环境
1️⃣在新建项目中找到属性管理器

2️⃣右键点击项目新建属性表,命名(随便名)
3️⃣在VC++目录->包含目录加入D:\library\VTK8.2\VTKReleaseLib\include\vtk-8.2 (就是上面自定义的CMAKE_INSTALL_PREFIX后面加\include\vtk-8.2)

4️⃣在VC++目录->库目录加入D:\library\VTK8.2\VTKReleaseLib\lib (同理)


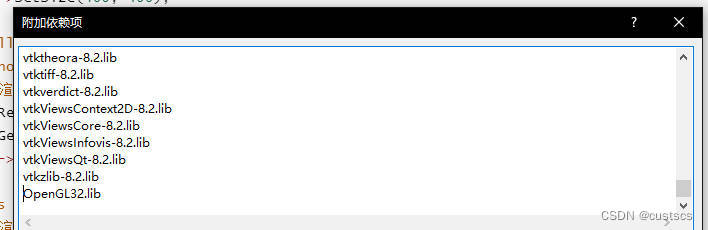
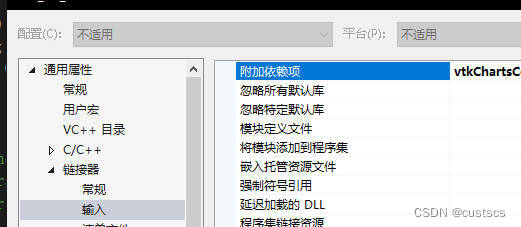
5️⃣在链接器->输入->附加依赖项加入D:\library\VTK8.2\VTKReleaseLib\lib 文件夹下的文件名
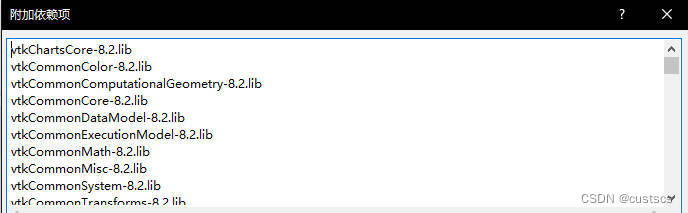
当然你可能会在这里累死,为了避免这个悲剧发生,你可以选择一个简单的方法获取.lib文件名:tips
6️⃣复制代码测试
/*=========================================================================

  Program:   Visualization Toolkit
  Module:    Cylinder.cxx

  Copyright (c) Ken Martin, Will Schroeder, Bill Lorensen
  All rights reserved.
  See Copyright.txt or http://www.kitware.com/Copyright.htm for details.

     This software is distributed WITHOUT ANY WARRANTY; without even
     the implied warranty of MERCHANTABILITY or FITNESS FOR A PARTICULAR
     PURPOSE.  See the above copyright notice for more information.

=========================================================================*/
//
// This simple example shows how to do basic rendering and pipeline
// creation using C++.
//
#include <vtkCylinderSource.h>
#include <vtkPolyDataMapper.h>
#include <vtkActor.h>
#include <vtkRenderer.h>
#include <vtkRenderWindow.h>
#include <vtkRenderWindowInteractor.h>
#include <vtkProperty.h>
#include <vtkCamera.h>
#include <vtkAutoInit.h>
VTK_MODULE_INIT(vtkRenderingOpenGL2);
VTK_MODULE_INIT(vtkInteractionStyle);
VTK_MODULE_INIT(vtkRenderingFreeType);
int main()
{
    // This creates a polygonal cylinder model with eight circumferential facets.
    // 创建圆柱体 并设置为八边形圆柱体
    vtkCylinderSource* cylinder = vtkCylinderSource::New();
    cylinder->SetResolution(8);

    // The mapper is responsible for pushing the geometry into the graphics
    // library. It may also do color mapping, if scalars or other attributes
    // are defined.
    // 将上面定义好的图形推送到图形库中
    vtkPolyDataMapper* cylinderMapper = vtkPolyDataMapper::New();
    cylinderMapper->SetInputConnection(cylinder->GetOutputPort());

    // The actor is a grouping mechanism: besides the geometry (mapper), it
    // also has a property, transformation matrix, and/or texture map.
    // Here we set its color and rotate it -22.5 degrees.
    // 设置纹理 颜色 点击后的旋转角度
    vtkActor* cylinderActor = vtkActor::New();
    cylinderActor->SetMapper(cylinderMapper);
    cylinderActor->GetProperty()->SetColor(1.0000, 0.3882, 0.2784);
    cylinderActor->RotateX(3.0);
    cylinderActor->RotateY(-45.0);

    // Create the graphics structure. The renderer renders into the
    // render window. The render window interactor captures mouse events
    // and will perform appropriate camera or actor manipulation
    // depending on the nature of the events.
    // 创建图形结构 渲染器会将其渲染到渲染窗口 渲染窗口的交互器捕获鼠标事件并执行适当的相机或操作
    vtkRenderer* ren1 = vtkRenderer::New();
    vtkRenderWindow* renWin = vtkRenderWindow::New();
    renWin->AddRenderer(ren1);
    vtkRenderWindowInteractor* iren = vtkRenderWindowInteractor::New();
    iren->SetRenderWindow(renWin);

    // Add the actors to the renderer, set the background and size
    // 将反应器添加到渲染器中,设置渲染厚度额背景和初始尺寸
    ren1->AddActor(cylinderActor);
    ren1->SetBackground(0.1, 0.2, 0.4);
    renWin->SetSize(400, 400);

    // We'll zoom in a little by accessing the camera and invoking a "Zoom"
    // method on it.
    // 缩放渲染后的图形
    ren1->ResetCamera();
    ren1->GetActiveCamera()->Zoom(1.5);
    renWin->Render();

    // This starts the event loop and as a side effect causes an initial render.
    // 开始渲染
    iren->Start();

    // Exiting from here, we have to delete all the instances that
    // have been created.
    // 开始退出,清空所有创建的对象
    cylinder->Delete();
    cylinderMapper->Delete();
    cylinderActor->Delete();
    ren1->Delete();
    renWin->Delete();
    iren->Delete();

    return 0;
}
当然你一定会报错
是由于缺少OpenGL2的lib文件导致的,因此需要在依赖项的最后加入:OpenGL32.lib