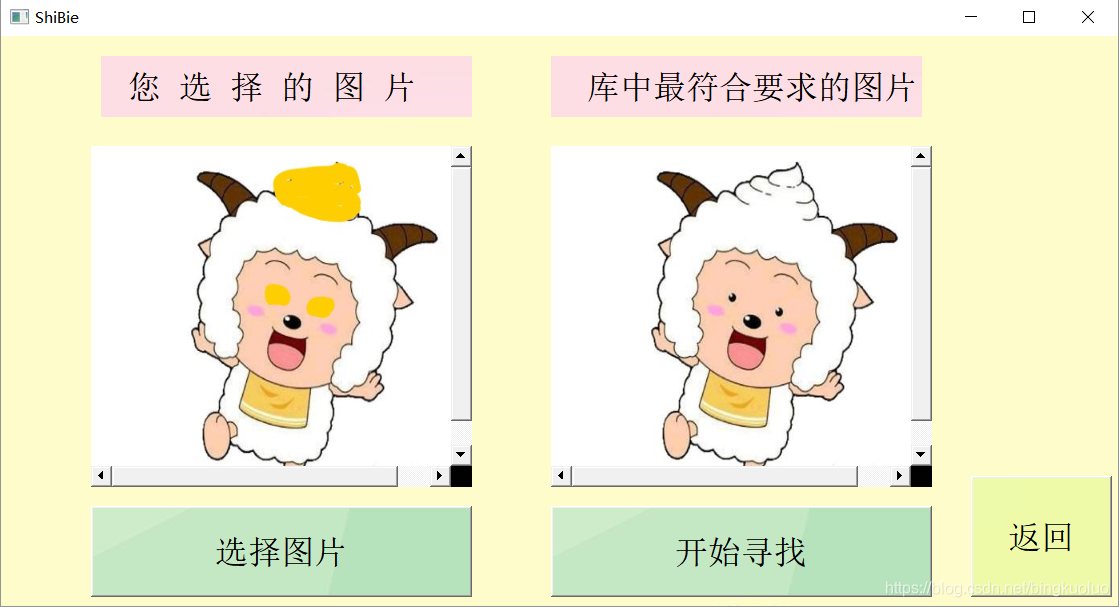
为了识别宠物的种类以及其他的扩展功能,我参考网上的识图软件原理,写了一个简化版的demo:从本地的库中匹配与所选图片最像的图片。(1.具体的其他代码可以参考其他博客的文件;2.所有文件路径改成自己的即可)
ShiBie.h:
#pragma once

#ifdef WIN32

#pragma execution_character_set("utf-8")

#endif

#include <opencv2/opencv.hpp>
#include <QtWidgets/QMainWindow>
#include "ui_ShiBie.h"
#include "qmessagebox.h"
#include<QGraphicsScene>
#include<QGraphicsView>                   //graphicsview类
#include<opencv2\imgproc\imgproc.hpp>
#include <opencv2\core\core.hpp>
#include <opencv2\highgui\highgui.hpp>  //opencv申明
#include <qfiledialog.h>                //getopenfilename 类申明
#include <qlabel.h>
#include "QtMainWin.h"
#include <vector>
#include <string>
#include <iostream>
#include <fstream>
using namespace cv;
using namespace std;

class ShiBie : public QMainWindow					//注意继承
{
	Q_OBJECT

public:
	ShiBie(QWidget *parent = Q_NULLPTR);
	~ShiBie();

public slots:
	void on_Return_ShiBie_clicked();
	void on_Choose_but_clicked();
	void on_Start_but_clicked();

private:
	Ui::ShiBie ui;
	Mat image_chose;
	QString filename;
	string str;
	QLabel *label_1;
	QLabel *label_2;
};
ShiBie.cpp:
#include "ShiBie.h"
#include "progress.h"
using namespace cv;
using namespace std;
ShiBie::ShiBie(QWidget *parent)
	: QMainWindow(parent)
{
	ui.setupUi(this);
}

ShiBie::~ShiBie()
{

}

void ShiBie::on_Return_ShiBie_clicked()
{
	QtMainWin *w = new QtMainWin(this);
	w->show();
	this->hide();


}
void ShiBie::on_Choose_but_clicked()
{
	filename = QFileDialog::getOpenFileName(this,
		tr("选择图片"),
		"",
		tr("Images(*.png *.bmp *.jpg *.tif *.GIF)"));
	if (filename.isEmpty())
	{
		return;
	}
	else
	{
		str = filename.toStdString();  // 将filename转变为string类型;
		image_chose = imread(str, CV_LOAD_IMAGE_COLOR);
		cvtColor(image_chose, image_chose, CV_BGR2RGB);
		cv::resize(image_chose, image_chose, Size(400, 350));
		QImage img_1 = QImage((const unsigned char*)(image_chose.data), image_chose.cols, image_chose.rows, QImage::Format_RGB888);
		label_1 = new QLabel();
		label_1->setPixmap(QPixmap::fromImage(img_1));
		label_1->resize(QSize(img_1.width(), img_1.height()));
		ui.Picture1->setWidget(label_1);

	}

}
void ShiBie::on_Start_but_clicked()
{
	if (image_chose.empty())
	{
		QMessageBox::warning(this, "Warning", "请确认选择添加图片",
			QMessageBox::Ok);

		return;
	}
	int min_value = 100;
	int now_value;
	Mat similar_img;
	string catalog = "D:\\PicPro\\Picture_Lib";
	std::vector<cv::String> image_files ;

	glob(catalog, image_files);
	for (unsigned int frame = 0; frame < image_files.size(); ++frame) {
		Mat image = imread(image_files[frame]);
		if (image.empty())
		{
			QMessageBox::warning(this, "Warning", "没有图片",
				QMessageBox::Ok);

			return;
		}
		progress pro;
		now_value=pro.chuli(image,image_chose);
		if (now_value < min_value)
		{
			min_value = now_value;
			similar_img = image.clone();
		}
	}
	if (similar_img.empty())
	{
		QMessageBox::warning(this, "Warning", "没有相似的图片",
			QMessageBox::Ok);

		return;
	}
	cvtColor(similar_img, similar_img, CV_BGR2RGB);
	cv::resize(similar_img, similar_img, Size(400, 350));
	QImage img_2 = QImage((const unsigned char*)(similar_img.data), similar_img.cols, similar_img.rows, QImage::Format_RGB888);
	label_2 = new QLabel();
	label_2->setPixmap(QPixmap::fromImage(img_2));
	label_2->resize(QSize(img_2.width(), img_2.height()));
	ui.Picture1_2->setWidget(label_2);

}
效果图:

总结:
1.学习了opencv中批量读取图像的文件的办法。
2.基本功能目前已全部解决,对opencv的基础使用用了一定了解。
3.算法都是基于一个最简单的哈希值算法,想要接触更多的算法务必要进行进一步的理论学习了。
版权声明:本文为bingkuoluo原创文章,遵循 CC 4.0 BY-SA 版权协议,转载请附上原文出处链接和本声明。