背景介绍
问题来源
机器A(192.168.1.14)上安装了
gitlab
程序,gitlab使用的web端口为
1111
,机器A的ssh端口为22。
从机器A上的gitlab检出程序需要使用的端口情况如下:
| 检出协议 | 端口 |
|---|---|
| http | 1111 |
| git | 22 |
如果由于网络策略限制,机器B只能访问机器A的80端口,那么问题来了,如何让机器B可以
通过80端口同时访问机器A上的http服务和ssh服务
呢?
要实现的访问协议及端口如下
| 检出协议 | 端口 |
|---|---|
| http | 80 |
| git | 80 |
问题解决方式
请求转发第一个想到的是nginx,问题在于监听一个端口的时候(这里是80),如何识别不同的请求协议(此处为http,ssh)。
在github上找到了一个可以完成协议识别的项目
lua-resty-multiplexer
,本文将介绍下如何使用这个lua-resty-multiplexer完成在80端口上同时处理http和ssh请求。
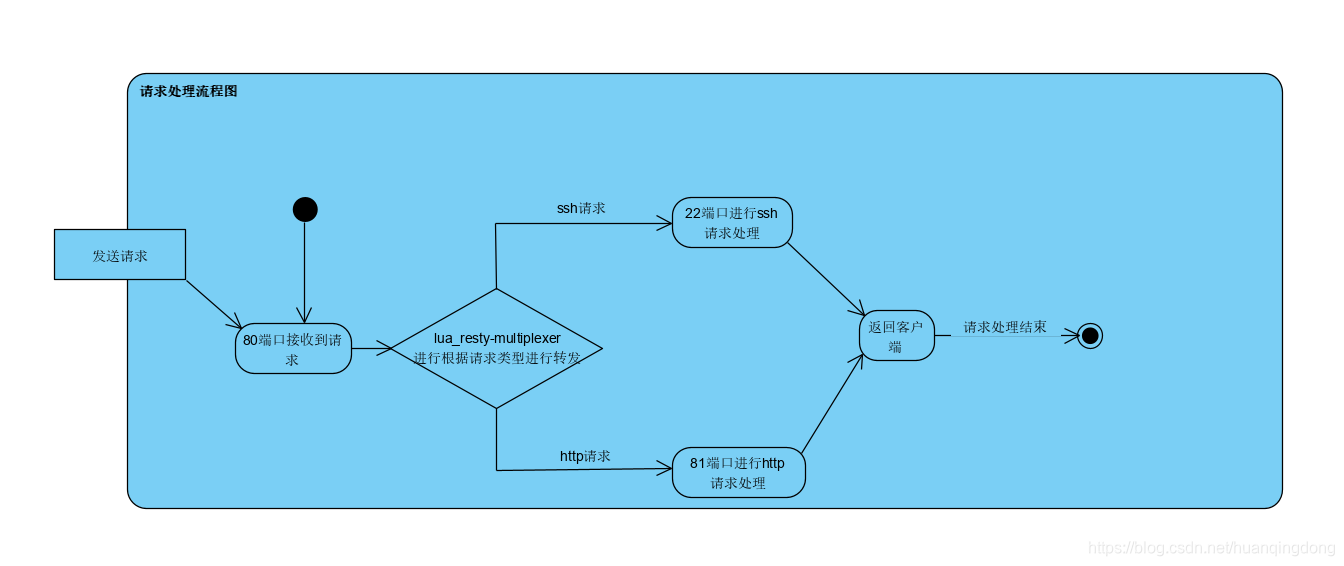
实现后请求处理流程图:
OpenResty安装
OpenResty是啥
OpenResty® 是一个基于 Nginx 与 Lua 的高性能 Web 平台,其内部集成了大量精良的 Lua 库、第三方模块以及大多数的依赖项。用于方便地搭建能够处理超高并发、扩展性极高的动态 Web 应用、Web 服务和动态网关。
软件下载
| 软件 | 地址 |
|---|---|
| openresty | https://openresty.org/download/openresty-1.13.6.2.tar.gz |
| lua-resty-multiplexer | https://github.com/huanqingdong/lua-resty-multiplexer |
此处我使用的是
openresty
版本为
1.13.6.2
,直接用wget命令下载即可
# 安装wget,已安装可忽略
yum -y install wget
# 此处下载到/opt下
wget -P /opt https://openresty.org/download/openresty-1.13.6.2.tar.gz
lua-resty-multiplexer
下载,可以通过git命令下载或者直接下载zip包,此处使用git下载
# 进入/opt目录
cd  /opt
# 安装git,已安装请忽略
yum install -y git
# 下载
git clone https://github.com/huanqingdong/lua-resty-multiplexer.git
下载完成后,/opt目录下的内容如下图所示

解压打pache
# 解压openresty
[root@localhost opt]# tar -xf openresty-1.13.6.2.tar.gz
项目
lua-resty-multiplexer
中提供了一个patch文件,需要应用到openresty源码中。

根据
stream-lua-readpartial.patch
中的内容,修改
ngx_stream_lua_socket_tcp.c
文件,

提供两种方式进行patch升级
- 手动修改升级
主要涉及三个地方修改(此处是针对openresty-1.13.6.2,其余版本可能行号会稍微有些诧异)
- 96行后添加一行内容
static ngx_int_t ngx_stream_lua_socket_read_partial(void *data, ssize_t bytes);

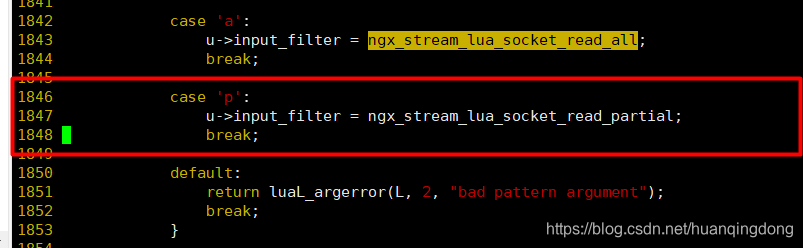
2. 1844行(完成第一步后的行号,非源码)后添加如下内容
            case 'p':
                u->input_filter = ngx_stream_lua_socket_read_partial;
                break;
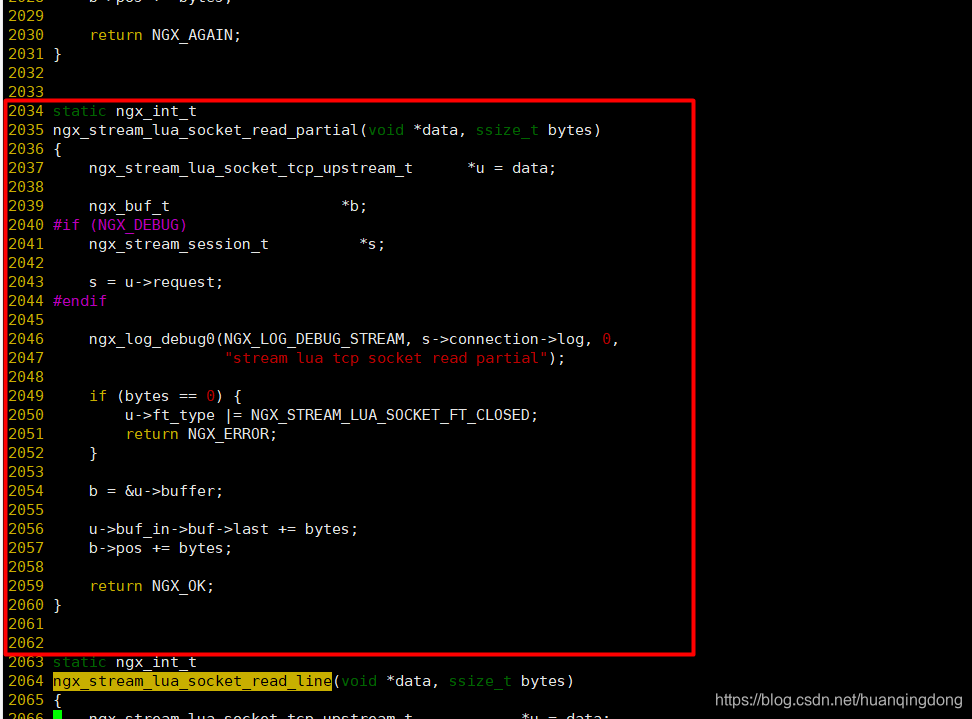
3. 在2033行(完成第二步后行号),添加如下内容
static ngx_int_t
ngx_stream_lua_socket_read_partial(void *data, ssize_t bytes)
{
    ngx_stream_lua_socket_tcp_upstream_t      *u = data;

    ngx_buf_t                   *b;
#if (NGX_DEBUG)
    ngx_stream_session_t          *s;

    s = u->request;
#endif

    ngx_log_debug0(NGX_LOG_DEBUG_STREAM, s->connection->log, 0,
                   "stream lua tcp socket read partial");

    if (bytes == 0) {
        u->ft_type |= NGX_STREAM_LUA_SOCKET_FT_CLOSED;
        return NGX_ERROR;
    }

    b = &u->buffer;

    u->buf_in->buf->last += bytes;
    b->pos += bytes;

    return NGX_OK;
}
经过上面三步修改,patch修改完成。
- 直接使用我修改完成的文件替换
# 备份源文件
[root@localhost opt]# mv /opt/openresty-1.13.6.2/bundle/ngx_stream_lua-0.0.5/src/ngx_stream_lua_socket_tcp.c /opt/openresty-1.13.6.2/bundle/ngx_stream_lua-0.0.5/src/ngx_stream_lua_socket_tcp.c_bk
# 替换
cp /opt/lua-resty-multiplexer/patches/1.13.6.2/ngx_stream_lua_socket_tcp.c /opt/openresty-1.13.6.2/bundle/ngx_stream_lua-0.0.5/src/
# 检查是否替换成功
[root@localhost opt]# find /opt/openresty-1.13.6.2 -name ngx_stream_lua_socket_tcp.c*
/opt/openresty-1.13.6.2/bundle/ngx_stream_lua-0.0.5/src/ngx_stream_lua_socket_tcp.c_bk
/opt/openresty-1.13.6.2/bundle/ngx_stream_lua-0.0.5/src/ngx_stream_lua_socket_tcp.c
编译安装
# 安装需要的包
yum install -y gcc pcre-devel openssl openssl-devel
# 进入源码目录
cd /opt/openresty-1.13.6.2
# 配置,安装到/opt/openresty下
./configure --prefix=/opt/openresty
# 配置完成后根据提示执行gmake和gmake install进行安装
gmake
gmake install
集成lua-resty-multiplexer
# 将lua-resty-multiplexer的lua脚本复制到openresty的lualib中
cp -r /opt/lua-resty-multiplexer/lib/resty/* /opt/openresty/lualib/resty
# 验证是否复制完成
[root@localhost resty]# ll -h /opt/openresty/lualib/resty |grep mul
drwxr-xr-x. 4 root root   53 12月  8 17:41 multiplexer
配置nginx
根据
lua-resty-multiplexer
项目的README.md配置nginx,针对本文要实现的功能,完整的nginx.conf(/opt/openresty/nginx/conf/nginx.conf)文件如下
#user  nobody;
worker_processes  1;

events {
    worker_connections  1024;
}

stream {

    # 将http请求转发到81端口,由http段配置进行处理;将ssh请求转发到22段
    init_by_lua_block {
        local mul = require("resty.multiplexer")
        mul.load_protocols(
            "http", "ssh", "dns", "tls", "xmpp"
        )
        mul.set_rules(
            {{"protocol", "http"}, "192.168.1.14", 80},
            {{"protocol", "ssh"}, "192.168.1.14", 22},
            {{"default", nil}, "192.168.1.14", 80}
        )
    }

    # 根据情况改为自己的DNS服务器地址,此处使用谷歌的
    resolver 8.8.8.8;

    server {
        # 监听80端口
        listen 80;
        content_by_lua_block {
            local mul = require("resty.multiplexer")
            local mp = mul:new()
            mp:run()
        }
    }
}

http {
    include       mime.types;
    default_type  application/octet-stream;
    sendfile        on;
    keepalive_timeout  65;

    server {
        # http服务监听81端口
        listen       81;
        server_name  localhost;

        location / {
            root   html;
            index  index.html index.htm;
        }
    }
}
启动测试
配置完nginx.conf后,启动nginx进行测试
# 进入nginx目录
[root@localhost resty]# cd /opt/openresty/nginx/
# 启动
[root@localhost nginx]# ./sbin/nginx
# 查看80,81端口是否被监听
[root@localhost nginx]# ss -tanl|grep 8[01]
LISTEN     0      128          *:80                       *:*
LISTEN     0      128          *:81                       *:*
-
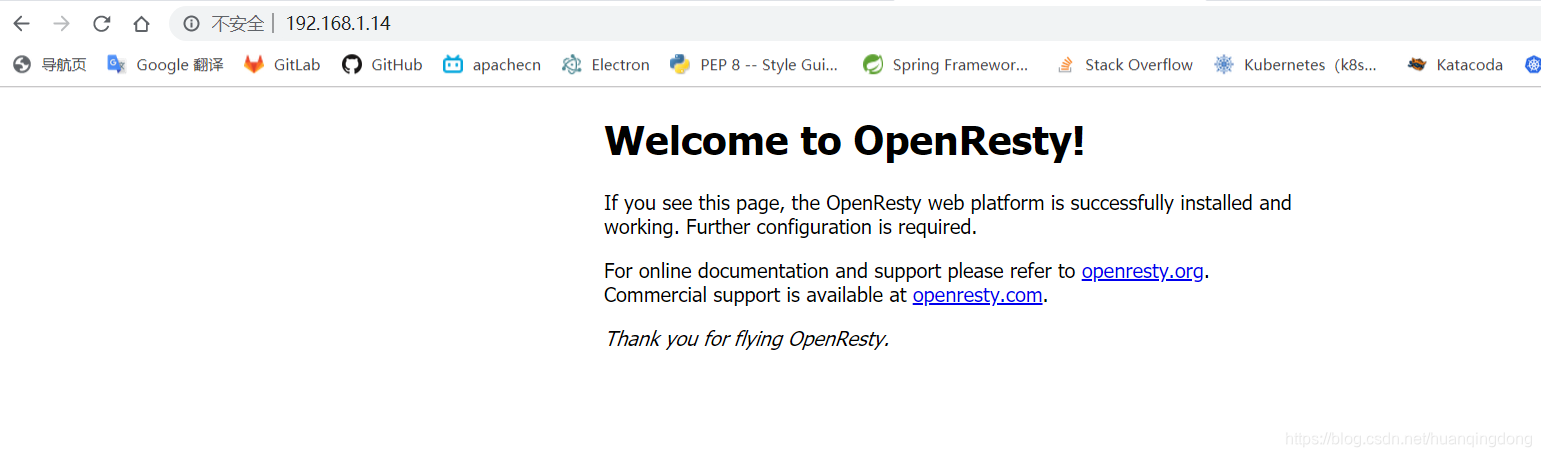
http测试
机器B(我的是本地电脑)使用浏览器访问192.168.1.14,出现如下界面,说明http请求已经转发到192.168.1.14的81端口处理
-
ssh测试
打开一个
git bash
窗口,执行如下命令进行ssh连接
ssh -p 80 root@192.168.1.14

如果能正常连接,则说明ssh请求已转发到192.168.1.14的22端口处理