目录
二、安装使用(以下为windows安装,linux步骤相似)
一、seata是什么?
Seata 是一款开源的分布式事务解决方案,致力于提供高性能和简单易用的分布式事务服务。Seata 将为用户提供了 AT、TCC、SAGA 和 XA 事务模式,为用户打造一站式的分布式解决方案。
以下内容以默认的AT模式,减少对项目代码的侵入,简单的实现分布式事务
二、安装使用(以下为windows安装,linux步骤相似)
1.下载seata及配置
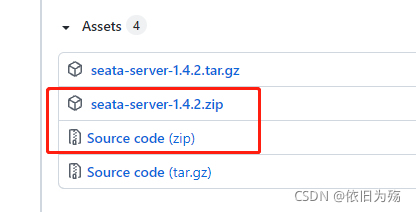
1.1 需下载两个包:安装包,源码包

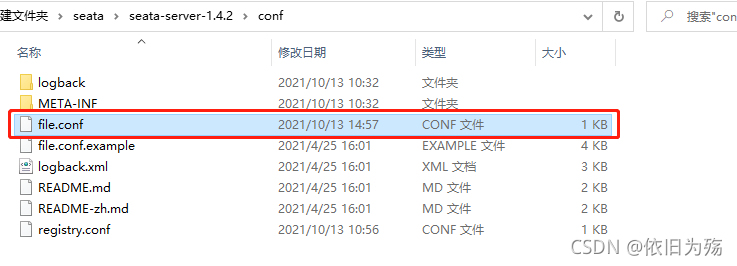
1.2 解压文件后,修改 /seata/seata-server-1.4.2/conf/file.conf


1.3 修改文件 /seata/seata-server-1.4.2/conf/registry.conf


1.4 删除文件 /seata/seata-server-1.4.2/lib/jdbc/mysql.5x
因为我们需要连接的mysql是8x版本,因此删除低版本mysql依赖,否则会报错,反之则删除高版本依赖的文件

1.5 修改seata源代码 /seata-1.4.2/script/config-conter/config.txt


2. 数据库配置
打开上述配置数据库,新建库seata,对应sql地址:\seata-1.4.2\script\server\db\mysql.sql

对应业务数据库,新建表:undo_log,构建sql语句:
CREATE TABLE `undo_log` (
  `id` bigint(20) NOT NULL AUTO_INCREMENT,
  `branch_id` bigint(20) NOT NULL,
  `xid` varchar(100) NOT NULL,
  `context` varchar(128) NOT NULL,
  `rollback_info` longblob NOT NULL,
  `log_status` int(11) NOT NULL,
  `log_created` datetime NOT NULL,
  `log_modified` datetime NOT NULL,
  PRIMARY KEY (`id`),
  UNIQUE KEY `ux_undo_log` (`xid`,`branch_id`)
) ENGINE=InnoDB AUTO_INCREMENT=1 DEFAULT CHARSET=utf8;
3. nacos配置
1.1打开nacos,新建一个命名空间,名字为seata

1.2 到目录\seata-1.4.2\script\config-center\nacos下

使用git方法运行文件nacos-config.sh,其中abb73为第六点中命名空间的id
sh nacos-config.sh -h 192.168.2.169 -p 8848 -g SEATA_GROUP -t abb738c7-13f7-44c5-8ed7-d8a3c397684d -u nacos -w nacos
1.3 查看nacos是否生成对应配置文件

4. 启动seata
启动本地的seate,\seata\seata-server-1.4.2\bin
自行选择合适方法启动seata,我选择的是bat运行

提示启动成功

5. spring项目接入
1.1 项目基础结构如下

seata-common:公共依赖
seata-server1:服务1,引入seata-common
seata-server2:服务2,引入seata-common,seata-server1-feign
seata-server1-feign:seata-server1的feign接口API
1.2 引入依赖(server1和server2引入)
<dependency>
    <groupId>com.alibaba.cloud</groupId>
    <artifactId>spring-cloud-starter-alibaba-seata</artifactId>
    <version>2021.1</version>
    <exclusions>
        <exclusion>
            <groupId>io.seata</groupId>
            <artifactId>seata-spring-boot-starter</artifactId>
        </exclusion>
    </exclusions>
</dependency>
<dependency>
    <groupId>io.seata</groupId>
    <artifactId>seata-spring-boot-starter</artifactId>
    <version>1.4.2</version>
</dependency>
1.3 修改配置文件
seata:
  enabled: true
  enable-auto-data-source-proxy: true
  tx-service-group: my_test_tx_group
  registry:
    type: nacos
    nacos:
      application: seata-server
      server-addr: 192.168.2.169:8848
      username: nacos
      password: nacos
      namespace: abb738c7-13f7-44c5-8ed7-d8a3c397684d #对应nacos中命名空间的地址
      group: SEATA_GROUP #选择正确的分组
  config:
    type: nacos
    nacos:
      server-addr: 192.168.2.169:8848
      group: SEATA_GROUP #选择正确的分组
      username: nacos
      password: nacos
      namespace: abb738c7-13f7-44c5-8ed7-d8a3c397684d #对应nacos中命名空间的地址
  service:
    vgroup-mapping:
      my_test_tx_group: default
    disable-global-transaction: false
  client:
    rm:
      report-success-enable: false
1.4 启动项目
server1:人脸信息新增
server2:用户信息新增
业务流程
:用户新增(server2) —-成功—–>人脸新增接口(feign) —–成功——> 人脸新增(server1)
手动将server1返回接口异常,server2接口上新增事务注解

测试代码,日志输出显示回滚成功

总结
以上内容作为个人学习累积,仅供回顾