目录
一、关于Shell
对于Openstack平台部署现在有许多强悍的工具,从Devstack、到红帽的RDO、再到Mirantis的Fuel(完全Web化)。另外,配置管理工具也越发的强大,从chef、puppet、saltstack,再到现在酷酷的Ansible,真可谓百花齐放。手工操作->脚本自动化->WEB自动化->调度自动化是运维的四个阶段,无论DevOps怎么发展,高质量的脚本也总能发挥其敏捷而不可替代的作用。相对于其他新潮的脚本语言,Shell脚本基本上是每个*inuxer最早接触的脚本语言,学习成本不是太高。另外,对于一些私有云的部署场景,比如自己设计的HA部署架构,Shell总能够快速的完成部署任务。
二、脚本简介
脚本运行在CentOS7.2环境下,之前实际部署时撰写了一版shell脚本,虽然能够完成部署工作,但是存在以下两个主要缺点:
- 串行执行:某些耗时操作无法并行执行,比如yum upgrade;
- 代码冗余:之前是将一些脚本scp到各个节点,然后再执行,其中有很多参数传递、增加权限和文件拷贝的操作,导致重复的代码比较多。
脚本最近进行了简单重构,力主解决以上问题,设计如下:
- 采用统一配置文件
部署环境统一配置文件0-set-config.sh包含部署架构的信息,包括主机名称、主机类型、主机IP、网段、网卡名称、安装源、软件版本、硬盘、密码等信息。
|
1 2 3 4 5 6 7 8 9 10 11 12 13 14 15 16 17 18 19 20 21 22 23 24 25 26 27 28 29 30 31 32 33 34 35 36 37 38 39 40 41 42 43 44 45 46 47 48 49 50 51 52 53 54 55 56 57 58 59 |
#!/bin/sh ### 设置部署节点主机名和IP,nodes_map为全部节点、controller_map为三个控制节点、hypervisor_map为计算节点(与存储节点融合) declare -A nodes_map=([“controller01″]=”192.168.2.11” [“controller02″]=”192.168.2.12” [“controller03″]=”192.168.2.13” [“network01″]=”192.168.2.14” [“network02″]=”192.168.2.15” [“network03″]=”192.168.2.16” [“compute01″]=”192.168.2.17” [“compute02″]=”192.168.2.18” [“compute03″]=”192.168.2.19”) declare -A controller_map=([“controller01″]=”192.168.2.11” [“controller02″]=”192.168.2.12” [“controller03″]=”192.168.2.13”); declare -A networker_map=([“network01″]=”192.168.2.14” [“network02″]=”192.168.2.15” [“network03″]=”192.168.2.16”); declare -A hypervisor_map=([“compute01″]=”192.168.2.17” [“compute02″]=”192.168.2.18” [“compute03″]=”192.168.2.19”); declare -A monitor_map=([“controller01″]=”192.168.2.11” [“network01″]=”192.168.2.14” [“compute01″]=”192.168.2.17”); declare nodes_name=(${!nodes_map[@]}); declare controller_name=(${!controller_map[@]}); declare networker_name=(${!networker_map[@]}); declare hypervisor_name=(${!hypervisor_map[@]}); ### NTP主机 ref_host=controller01 ### 网络HA集群默认部署节点(必须存在该主机名的节点) #network_host=network01 network_host=controller01 ### 网络节点是否单独部署,若是设置为yes,否设置为no networker_split=no ### 计算节点默认部署节点(必须存在该主机名的节点) compute_host=compute01 ### 设置虚拟IP,virtual_ip为openstack服务的虚拟IP,virtual_ip_redis为Redis为虚拟IP virtual_ip=192.168.2.241 virtual_ip_redis=192.168.2.242 ### 设置网卡信息 local_nic为管理网网卡名称 data_nic为虚拟网网卡名称 storage_nic为存储网网卡信息 local_bridge为外网网桥名称 local_nic=eno16777736 data_nic=eno33554960 storage_nic=eno50332184 local_bridge=br-ex ### 设置网络网段信息,分别对应管理网、虚拟网、存储网 local_network=192.168.2.0/24 data_network=10.10.10.0/24 store_network=11.11.11.0/24 ### 离线安装源的FTP目录信息 ftp_info=”ftp://192.168.100.81/pub/” ### 存储节点上OSD盘 declare -A blks_map=([“osd01″]=”sdb” [“osd02″]=”sdc” [“osd03″]=”sdd”); ### ceph安装版本 ceph_release=jewel ### 每个pool的pg_num,参考http://ceph.com/pgcalc/计算 pg_num_volumes=512 pg_num_images=1024 pg_num_backups=128 pg_num_vms=512 ### Openstack各组件的数据库密码,所有服务统一成一个 password=123456 ### Pacemaker密码 password_ha_user=123456 ### Mariadb数据库Root密码 password_galera_root=123456 ### Mongodb数据库Root密码 password_mongo_root=123456 ### Rabbitm密码 passsword_rabbitmq=123456 ### Openstack admin用户密码 password_openstack_admin=123456 |
- 采用pssh进行某些操作的并行执行
pssh是一个python编写可以在多台服务器上执行命令的工具, 可以将通常循环变量各个节点然后执行某个命令换成pssh一行代码,并且还是
并行执行
(脑补一下加速比哈),代码如下:
|
1 |
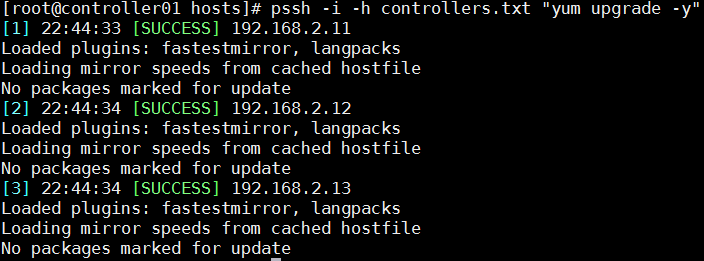
pssh -i -h nodes.txt “yum upgrade -y” |
其中,-h 为执行命令的远程主机列表,文件内容格式[user@]host[:port],可简写成ip列表,-i为每台主机执行完后的标准输出和标准错误输出,运行一下画风是这样的:
目前epel中已经pssh的rpm包,直接yum install安装即可,但并行传输的pscp没有找到。
为了配合pssh的使用节点IP列表,写了一个简单的生成节点IP列表的脚本,能够从统一配置文件自动生成节点IP列表,如下:
|
1 2 3 4 5 6 7 8 9 10 11 12 13 14 15 16 17 18 19 20 21 22 23 24 25 26 27 28 29 30 31 |
#!/bin/sh . ../0-set-config.sh > hosts/nodes.txt > hosts/controllers.txt > hosts/networkers.txt > hosts/hypervisors.txt for ((i=0; i<${#controller_map[@]}; i+=1)); do name=${controller_name[$i]}; ip=${controller_map[$name]}; echo “$ip” >> hosts/nodes.txt echo “$ip” >> hosts/controllers.txt done; for ((i=0; i<${#networker_map[@]}; i+=1)); do name=${networker_name[$i]}; ip=${networker_map[$name]}; echo “$ip” >> hosts/nodes.txt echo “$ip” >> hosts/networkers.txt done; for ((i=0; i<${#hypervisor_map[@]}; i+=1)); do name=${hypervisor_name[$i]}; ip=${hypervisor_map[$name]}; echo “$ip” >> hosts/nodes.txt echo “$ip” >> hosts/hypervisors.txt done; |
- 简单封装
封装了文件传输和并行执行的操作,以及一些带颜色的回显提示消息。
并行执行命令的封装:pssh-exe,这里首先检查部署节点是否安装pssh,未安装直接安装,然后判断是在哪种类型节点上执行命令,控制节点、网络节点、计算节点还是全部节点。
|
1 2 3 4 5 6 7 8 9 10 11 12 13 14 15 16 17 18 19 20 21 22 23 24 25 26 27 28 29 30 31 |
#!/bin/sh installed=$(rpm -qa|grep “pssh”) ### Check pssh is installed if [ -z “$installed” ];then ./style/print-info.sh “Install Pssh” yum install -y pssh fi ### update hosts files ./0-gen-hosts.sh ### pssh to execute commmand if [ $# -ne 2 ];then ./style/print-warnning.sh “Please input two paras, Nodes & Command” else case $1 in A|all) echo “All” pssh -i -h ./hosts/nodes.txt $2;; C|controllers ) echo “Controllers” pssh -i -h ./hosts/controllers.txt $2;; N|networks) echo “Networks” pssh -i -h ./hosts/networkers.txt $2;; H|hypervisors ) echo “Hypervisors” pssh -i -h ./hosts/hypervisors.txt $2;; *) ./style/print-warnning.sh “No nodes were listed!”;; esac fi |
拷贝文件到各个节点的封装:scp-exe,同上,目的节点也是按类型区分的。
|
1 2 3 4 5 6 7 8 9 10 11 12 13 14 15 16 17 18 19 20 21 22 23 24 25 26 27 28 29 30 31 32 33 |
#!/bin/sh ### update hosts files ./0-gen-hosts.sh ###
scpToNodes(){ for host in $(cat $1) do scp -r $2 root@${host}:$3 echo “scp -r $2 root@${host}:$3” done } ### pssh to execute commmand if [ $# -ne 3 ];then ./style/print-warnning.sh “Please input three paras: Nodes/SourceFile/TargetDir” else case $1 in A|all) echo “All” scpToNodes ./hosts/nodes.txt $2 $3;; C|controllers ) echo “Controllers” scpToNodes ./hosts/controllers.txt $2 $3;; N|networks) echo “Networks” scpToNodes ./hosts/networkers.txt $2 $3;; H|hypervisors ) echo “Hypervisors” scpToNodes ./hosts/hypervisors.txt $2 $3;; *) ./style/print-warnning.sh “No nodes were listed!”;; esac fi |
其他的带颜色的输出信息的简单封装,类似与log输出:
提示消息输出print-info.sh
|
1 2 |
#!/bin/sh echo -e “\033[34m$1———— \033[0m” |
警告消息输出print-warnning.sh
|
1 2 |
#!/bin/sh echo -e “\033[33mWARNNING:$1———— \033[0m” |
进度分割线print-split.sh
|
1 2 3 |
#!/bin/sh echo -e “\t\t\033[31m STEP: $1 \033[0m” echo -e “\033[31m******************************************************************** \033[0m” |
输出样式如下:


基本目录结构
|
1 2 3 4 5 |
├── 0-set-config.sh ## 安装环境变量配置 ├── all-in-one.sh ## 一键安装脚本 ├── bin ## 存放目录 ├── conf ## 临时存放配置文件目录 └── README.md |
三、基本配置
1、SSH配置
配置部署节点到其他节点的无密码认证。
|
1 2 3 4 5 6 7 8 9 10 11 |
#!/bin/sh ../0-set-config.sh ./print-split.sh “Configure SSH” ssh-keygen for ((i=0; i<${#nodes_map[@]}; i+=1)); do name=${nodes_name[$i]}; ip=${nodes_map[$name]}; echo “————-$name————” ssh-copy-id root@$ip done; |
2、网络配置
假设已经配置好管理网络,设置每个节点上的管理、虚拟、存储网络所对应网卡开机自动连接,并检验三套网络IP尾数是否一致,如果不一致时会统一修改,最后测试每个节点上的三套网络的连通性。
|
1 2 3 4 5 6 7 8 9 10 11 12 13 14 15 16 17 18 19 20 21 22 23 24 25 26 27 28 29 30 31 32 33 34 35 36 37 38 39 40 41 42 |
#!/bin/sh . ../0-set-config.sh ./style/print-split.sh “Configure Network” for ((i=0; i<${#nodes_map[@]}; i+=1)); do name=${nodes_name[$i]}; ip=${nodes_map[$name]}; ./style/print-info.sh $name old_data_ip=$(ssh $ip cat /etc/sysconfig/network-scripts/ifcfg-$data_nic |grep IPADDR=|egrep -v “#IPADDR”|awk -F “=” ‘{print $2}’) new_data_ip=$(echo ${data_network}|cut -d “.” -f1-3).$(echo ${ip}|awk -F “.” ‘{print $4}’) old_storage_ip=$(ssh $ip cat /etc/sysconfig/network-scripts/ifcfg-$storage_nic |grep IPADDR=|egrep -v “#IPADDR”|awk -F “=” ‘{print $2}’) new_storage_ip=$(echo $store_network|cut -d “.” -f1-3).$(echo $ip|awk -F “.” ‘{print $4}’) #echo $old_data_ip $new_data_ip ssh $ip /bin/bash << EOF #echo “$local_nic $data_nic $storage_nic” sed -i -e ‘s#ONBOOT=no#ONBOOT=yes#g’ /etc/sysconfig/network-scripts/ifcfg-$local_nic sed -i -e ‘s#ONBOOT=no#ONBOOT=yes#g’ /etc/sysconfig/network-scripts/ifcfg-$data_nic sed -i -e ‘s#ONBOOT=no#ONBOOT=yes#g’ /etc/sysconfig/network-scripts/ifcfg-$storage_nic sed -i -e ‘s#BOOTPROTO=dhcp#BOOTPROTO=none#g’ /etc/sysconfig/network-scripts/ifcfg-$data_nic sed -i -e ‘s#BOOTPROTO=dhcp#BOOTPROTO=none#g’ /etc/sysconfig/network-scripts/ifcfg-$storage_nic ### set network suffix cat /etc/sysconfig/network-scripts/ifcfg-$data_nic |grep IPADDR= if [ $old_data_ip = $new_data_ip ];then echo “The suffix of data network is same as the local network!” else echo “The suffix of data network is not same as the local network, Renew it as following! ” sed -i -e ‘s/^IPADDR=.*/IPADDR=$new_data_ip/’ /etc/sysconfig/network-scripts/ifcfg-$data_nic ifdown $data_nic ifup $data_nic fi if [ $old_storage_ip = $new_storage_ip ];then echo “The suffix of storage network is same as the local network!” else echo “The suffix of storage network is not same as the local network, Renew it as following! ” sed -i -e ‘s/^IPADDR=.*/IPADDR=$new_storage_ip/’ /etc/sysconfig/network-scripts/ifcfg-$storage_nic ifdown $storage_nic ifup $storage_nic fi EOF done; |
3、主机名及Hosts文件配置
生成根据统一配置文件,生成hosts文件,拷贝到每个节点,并设置主机名。
|
1 2 3 4 5 6 7 8 9 10 11 12 13 14 15 16 17 18 19 20 21 22 23 24 25 26 27 28 29 30 31 32 33 34 35 36 37 38 39 40 41 42 43 44 45 46 47 48 49 50 51 52 53 54 55 56 57 58 59 60 61 62 63 64 65 66 67 68 |
#!/bin/sh . ../0-set-config.sh ./style/print-split.sh “Set HOSTNAME & HOSTS” curr_dir=$(echo `pwd`) tmp_file=../conf/hosts.bak target=/etc/hosts rm -rf $tmp_file #!/bin/sh . ../0-set-config.sh ./style/print-split.sh “Configure Network” for ((i=0; i<${#nodes_map[@]}; i+=1)); do name=${nodes_name[$i]}; ip=${nodes_map[$name]}; ./style/print-info.sh $name old_data_ip=$(ssh $ip cat /etc/sysconfig/network-scripts/ifcfg-$data_nic |grep IPADDR=|egrep -v “#IPADDR”|awk -F “=” ‘{print $2}’) new_data_ip=$(echo ${data_network}|cut -d “.” -f1-3).$(echo ${ip}|awk -F “.” ‘{print $4}’) old_storage_ip=$(ssh $ip cat /etc/sysconfig/network-scripts/ifcfg-$storage_nic |grep IPADDR=|egrep -v “#IPADDR”|awk -F “=” ‘{print $2}’) new_storage_ip=$(echo $store_network|cut -d “.” -f1-3).$(echo $ip|awk -F “.” ‘{print $4}’) #echo $old_data_ip $new_data_ip ssh $ip /bin/bash << EOF #echo “$local_nic $data_nic $storage_nic” sed -i -e ‘s#ONBOOT=no#ONBOOT=yes#g’ /etc/sysconfig/network-scripts/ifcfg-$local_nic sed -i -e ‘s#ONBOOT=no#ONBOOT=yes#g’ /etc/sysconfig/network-scripts/ifcfg-$data_nic sed -i -e ‘s#ONBOOT=no#ONBOOT=yes#g’ /etc/sysconfig/network-scripts/ifcfg-$storage_nic sed -i -e ‘s#BOOTPROTO=dhcp#BOOTPROTO=none#g’ /etc/sysconfig/network-scripts/ifcfg-$data_nic sed -i -e ‘s#BOOTPROTO=dhcp#BOOTPROTO=none#g’ /etc/sysconfig/network-scripts/ifcfg-$storage_nic ### set network suffix cat /etc/sysconfig/network-scripts/ifcfg-$data_nic |grep IPADDR= if [ $old_data_ip = $new_data_ip ];then echo “The suffix of data network is same as the local network!” else echo “The suffix of data network is not same as the local network, Renew it as following! ” sed -i -e ‘s/^IPADDR=.*/IPADDR=$new_data_ip/’ /etc/sysconfig/network-scripts/ifcfg-$data_nic ifdown $data_nic ifup $data_nic fi if [ $old_storage_ip = $new_storage_ip ];then echo “The suffix of storage network is same as the local network!” else echo “The suffix of storage network is not same as the local network, Renew it as following! ” sed -i -e ‘s/^IPADDR=.*/IPADDR=$new_storage_ip/’ /etc/sysconfig/network-scripts/ifcfg-$storage_nic ifdown $storage_nic ifup $storage_nic fi EOF done; touch $tmp_file ### generate host file for ((i=0; i<${#nodes_map[@]}; i+=1)); do name=${nodes_name[$i]}; ip=${nodes_map[$name]}; echo “$ip $name”>>$tmp_file ssh root@$ip hostnamectl –static set-hostname $name done; cat $tmp_file ### scp to other nodes ./scp-exe A $tmp_file $target ## check . 0-gen-hosts.sh pssh -i -h hosts/nodes.txt hostname ### update hostname echo “Re-login to update the local hostname!” ssh `hostname` cd $curr_dir |
4、NTP配置
采用chrony时间同步软件,假设离线环境,所有节点时间同步参考controller01,设置时区,将验证结果写到临时的文件result.log中。
|
1 2 3 4 5 6 7 8 9 10 11 12 13 14 15 16 17 18 19 20 21 22 23 24 25 26 |
#!/bin/sh . ../0-set-config.sh ./style/print-split.sh “Set NTP” rm -rf result.log for ((i=0; i<${#nodes_map[@]}; i+=1)); do name=${nodes_name[$i]}; ip=${nodes_map[$name]}; echo “————-$name————” if [ $name = $ref_host ]; then echo “”$ip sed -i -e ‘/server [0 1 2 3].centos.pool.ntp.org/d’ /etc/chrony.conf sed -i -e “s#\#local stratum#local stratum#g” /etc/chrony.conf echo “allow “$local_network >>/etc/chrony.conf else ssh root@$ip /bin/bash <<EOF sed -i -e ‘s#server 0.centos.pool.ntp.org#server ‘”$ref_host”‘#g’ /etc/chrony.conf sed -i -e ‘/server [0 1 2 3].centos.pool.ntp.org/d’ /etc/chrony.conf EOF fi ssh root@$ip systemctl enable chronyd.service && systemctl restart chronyd.service ssh root@$ip cp /usr/share/zoneinfo/Asia/Shanghai /etc/localtime ssh root@$ip date +%z >>result.log ssh root@$ip chronyc sources>>result.log done; |
5、防火墙及SELinux配置
关闭防火墙,禁用SELinux,SELinux禁用时需要重启,这里提示确认操作。disable_firewall_selinux.sh
|
1 2 3 4 5 6 7 8 9 10 11 12 13 14 15 16 17 18 19 20 21 22 23 24 25 26 27 28 29 30 31 32 33 |
#!/bin/sh . ../0-set-config.sh ./style/print-split.sh “Disable Firewall and SELinux” for ((i=0; i<${#nodes_map[@]}; i+=1)); do name=${nodes_name[$i]}; ip=${nodes_map[$name]}; echo “————-$name————” sestatus=$(ssh root@$ip sestatus -v |grep “SELinux status:”|awk ‘{print $3}’) flag=unknown if [ $sestatus = “enabled” ];then ./style/print-info.sh “SELinux is enforce!Reboot now? (yes/no)” read flag else echo “SELinux is disabled!” fi ssh root@$ip /bin/bash << EOF systemctl disable firewalld.service systemctl stop firewalld.service sed -i -e “s#SELINUX=enforcing#SELINUX=disabled#g” /etc/selinux/config sed -i -e “s#SELINUXTYPE=targeted#\#SELINUXTYPE=targeted#g” /etc/selinux/config echo $flag if [ $flag = “yes” ];then echo “Reboot now!” reboot elif [ $flag = “no” ];then echo -e “\033[33mWARNNING:You should reboot manually!———— \033[0m” fi EOF ssh root@$ip systemctl status firewalld.service|grep Active: ssh root@$ip sestatus -v done; |
6、Yum安装源配置
set-local-yum-repos.sh设置本地源,并利用pssh执行安装更新。
|
1 2 3 4 5 6 7 8 9 10 11 12 13 |
#!/bin/sh . ../0-set-config.sh ./style/print-split.sh “Set Yum Repositories” yum_repos_dir=$(echo `pwd`)/../conf/yum.repos.d/ mkdir -p $yum_repos_dir #### generate yum repos in current node ./generate_repo.sh $ftp_info $yum_repos_dir $ceph_release ### clear old yum ./pssh-exe A “rm -rf /etc/yum.repos.d/*” ### scp to all nodes ./scp-exe A “$yum_repos_dir/” “/etc/” ### ./pssh-exe A “rpmdb –rebuilddb && yum repolist all && yum upgrade -y ” |
generate_repo.sh为一般Yum repo的安装源模版文件,以下列出CentOS和EPEL的模版,其他请查考源码中conf/yum.repos.d/目录。
|
1 2 3 4 5 6 7 8 9 10 11 12 13 14 15 16 17 18 19 20 21 22 23 24 25 26 27 28 29 30 31 |
#!/bin/sh #base_location=”ftp://192.168.100.81/pub/” base_location=$1 target_dir=$2 ceph_release=$3 ###### centos.repo echo “[centos-base] name=centos-base baseurl=${base_location}CentOS-7.2-X86_64/base gpgcheck=0 enabled=1 # centos-extras reporisoty [centos-extras] name=centos-extras baseurl=${base_location}CentOS-7.2-X86_64/extras gpgcheck=0 enabled=1 # centos-updates reporisoty [centos-updates] name=centos-updates baseurl=${base_location}CentOS-7.2-X86_64/updates gpgcheck=0 enabled=1″>${target_dir}/centos.repo # dl.fedoraproject.org_pub_epel_7_x86_64_.repo echo “[dl.fedoraproject.org_pub_epel_7_x86_64_] name=added from: dl.fedoraproject.org/pub/epel/7/x86_64// baseurl=${base_location}dl.fedoraproject.org/pub/epel/7/x86_64// enabled=1 gpgcheck=0 “>${target_dir}/dl.fedoraproject.org_pub_epel_7_x86_64_.repo |
四、其他
完整目录结构如下:
|
1 2 3 4 5 6 7 8 9 10 11 12 13 14 15 16 17 18 19 20 21 22 23 24 25 26 27 28 29 30 31 32 |
├── 0-set-config.sh ## 全局配置文件 ├── all-in-one.sh ## 一键安装配置脚本 ├── bin ## 脚本目录 │ ├── 0-gen-hosts.sh ## 根据全局配置文件生成主机IP文件 │ ├── disable_firewall_selinux.sh ## 禁用防火墙及SELinux │ ├── generate_repo.sh ## 辅助生成repo安装源文件 │ ├── hosts ## 主机IP文件 │ │ ├── controllers.txt ## 控制节点IP │ │ ├── hypervisors.txt ## 计算节点IP │ │ ├── networkers.txt ## 网络节点IP │ │ └── nodes.txt ## 全部节点IP │ ├── pssh-exe ## 并行执行SSH命令 │ ├── scp-exe ## 拷贝文件到其他节点的脚本 │ ├── set-chrony.sh ## 配置时间同步 │ ├── set-hostname.sh ## 设置主机名及hosts文件 │ ├── set-local-yum-repos.sh ## 配置Yum安装源 │ ├── set-network-config.sh ## 配置网络 │ ├── set-ssh-nodes.sh ## 设置部署节点到其他节点的无密码访问 │ ├── style ## 带颜色的echo │ │ ├── print-info.sh ## 蓝色提示消息 │ │ ├── print-split.sh ## 红色分割线 │ │ └── print-warnning.sh ## 黄色警告消息 │ └── template.sh ## 临时模版文件 ├── conf ## 生成临时配置文件的目录 │ ├── hosts.bak │ └── yum.repos.d │ ├── centos.repo │ ├── ceph.repo │ ├── dl.fedoraproject.org_pub_epel_7_x86_64_.repo │ ├── Galera.repo │ └── openstack-mitaka.repo └── README.md |
五、系列文章
“
Openstack云平台脚本部署
”系列文章目录如下:
Openstack云平台脚本部署之Galera高可用集群配置(二)
Openstack云平台脚本部署之RabbitMQ高可用集群部署(三)
Openstack云平台脚本部署之Memcached配置(五)
Openstack云平台脚本部署之Keystone认证服务配置(六)
Openstack云平台脚本部署之Glance镜像服务配置(七)
Openstack云平台脚本部署之Nova计算服务配置(八)
Openstack云平台脚本部署之Neutron网络服务配置(九)
Openstack云平台脚本部署之Dashboard配置(十)
Openstack云平台脚本部署之Cinder块存储服务配置(十一)
Openstack云平台脚本部署之Ceilometer数据收集服务配置(十二)
Openstack云平台脚本部署之Aodh告警服务配置(十三)
Openstack云平台脚本部署之Ceph存储集群配置(十四)