1.导入jar包和配置
-
Jar包 导入 SSH整合jar包 +
struts2-convention-plugin.jar
(约定扫描)共38个 - 配置文件
src下log4j.properties 日志配置
src下创建db.properties文件,配置数据库的连接
jdbc.driverClass=com.mysql.jdbc.Driver
jdbc.url jdbc:mysql:///itcastspring
jdbc.username = root
jdbc.password = root
<beans xmlns="http://www.springframework.org/schema/beans"
       xmlns:xsi="http://www.w3.org/2001/XMLSchema-instance"
       xmlns:context="http://www.springframework.org/schema/context"
       xmlns:aop="http://www.springframework.org/schema/aop"
       xmlns:tx="http://www.springframework.org/schema/tx"
       xsi:schemaLocation="http://www.springframework.org/schema/beans
                           http://www.springframework.org/schema/beans/spring-beans.xsd
                           http://www.springframework.org/schema/context
                           http://www.springframework.org/schema/context/spring-context.xsd
                           http://www.springframework.org/schema/aop
                           http://www.springframework.org/schema/aop/spring-aop.xsd
                           http://www.springframework.org/schema/tx
                           http://www.springframework.org/schema/tx/spring-tx.xsd">

    <!-- 引入外部属性配置文件 -->
    <context:property-placeholder location="classpath:db.properties"/>
    <!-- c3p0连接池 -->
    <bean id="dataSource" class="com.mchange.v2.c3p0.ComboPooledDataSource">
        <property name="driverClass" value="${jdbc.driverClass}"/>
        <property name="jdbcUrl" value="${jdbc.url}"/>
        <property name="user" value="${jdbc.username}"/>
        <property name="password" value="${jdbc.password}"/>
    </bean>

</beans>
2.Hibernate 实体类 映射采用JPA的注解完成
在cn.itcast.ssh.domain包下创建Book.java对象,添加注解的方式,取代Book.hbm.xml文件
//po实体类
@Entity (name="book")
public class Book {
	@Id
	@GeneratedValue(strategy=GenerationType.AUTO)//自动
	private Integer id;//oid
	private String name;
	private Double price;

	public Integer getId() {
		return id;
	}
	public void setId(Integer id) {
		this.id = id;
	}
	public String getName() {
		return name;
	}
	public void setName(String name) {
		this.name = name;
	}
	public Double getPrice() {
		return price;
	}
	public void setPrice(Double price) {
		this.price = price;
	}

	public String toString() {
		return "Book [id=" + id + ", name=" + name + ", price=" + price + "]";
	}

}
遇到异常:
修改注解:将@Table注解去掉
3.spring整合hibernate配置sessionFactory
我们在Hibernate第四天中学习了JPA,使用了JPA后,我们通过
EntityManager
来操作数据库
package cn.itcast.util;
import javax.persistence.EntityManager;
import javax.persistence.EntityManagerFactory;
import javax.persistence.Persistence;
import javax.persistence.SynchronizationType;
/**
 * JPA的工具类:
 *    加载JPA的persistence.xml文件,用于生成工厂
 *    调用工厂中的方法,创建操作数据库的对象,并返回
 *
 * @author Administrator
 *
 */
public class JPAUtil {
   //JPA的实体管理器工厂(相当于Hibernate的SessionFactory)
   private static EntityManagerFactory factory ;
   //使用静态代码块赋值
  static{
	  try{
		  factory = Persistence.createEntityManagerFactory("myPersistenceUnit");
	  }catch(Exception ex){
		  ex.printStackTrace();
	  }
  }
  /**
   * 使用管理器工厂生产一个管理器对象(获取一个新的实体管理对象)
   * @return
   */
  public static EntityManager getEntityManager(){
	  //相当于Hibernate中的openSession()
	  return factory.createEntityManager();
  }
}
其实我们同样也可以使用sessionFactory
第一步:配置sessionFactory
<bean id="sessionFactory" class="org.springframework.orm.hibernate5.LocalSessionFactoryBean">
			<!-- 数据源注入 -->
	<property name="dataSource" ref="dataSource" />

	<!-- 配置hibernate的相关属性 -->
	<property name="hibernateProperties">
		<props>
		<!-- 设置方言 -->
			<prop key="hibernate.dialect">org.hibernate.dialect.MySQL5Dialect</prop>
			<!-- 设置打印sql语句 -->
			<prop key="hibernate.show_sql">true</prop>
			<!-- 格式化sql语句 -->
			<prop key="hibernate.format_sql">true</prop>
			<!-- 自动建表 -->
			<prop key="hibernate.hbm2ddl.auto">update</prop>
		</props>
	</property>

	<!-- 引入映射配置 -->
	<property name="packagesToScan">
		<list>
			<value>cn.itcast.ssh.domain</value>
		</list>
	</property>

</bean>
第二步:在web.xml 注册struts2 (Filter器) 和 spring (Listener器 )
<!-- struts2的前端控制器 -->
<filter>
	<filter-name>struts2</filter-name>
	<filter-class>org.apache.struts2.dispatcher.ng.filter.StrutsPrepareAndExecuteFilter</filter-class>
</filter>
<filter-mapping>
	<filter-name>struts2</filter-name>
	<url-pattern>/*</url-pattern>
</filter-mapping>
<!-- spring的核心监听器:初始化spring容器 -->
<listener>
	<listener-class>org.springframework.web.context.ContextLoaderListener</listener-class>
</listener>
<context-param>
	<param-name>contextConfigLocation</param-name>
	<param-value>classpath:applicationContext.xml</param-value>
</context-param>
第三步:测试,将项目部署到tomcat,删除数据表,启动项目如果能自动建表 —- 整合成功 !
4.编写Action、Service、Dao注解注册
4.1 编写BookDao
第一步:配置applicationContext.xml,配置组件扫描Bean,开启注解功能
<!-- bean组件扫描配置,开启注解功能,可以在类上使用@Repository,@Service,@Action,@Component -->
<context:component-scan base-package="cn.itcast.ssh"/>
新建包:cn.itcast.ssh.dao,用来编写dao:
第二步:创建IBookDao接口
public interface IBookDao {

	//保存图书
	public void save(Book book);
	//更新图书(根据id)
	public void update(Book book);
	//删除图书(根据id)
	public void delete(Book book);

	//根据id查询
	public Book findById(Integer id);

	//查询所有
	public List<Book> findAll();

	//复杂条件条件
	//1.命名查询:QBN
	public List<Book> findByNamedQuery(String queryName, Object... values);

	//2.离线条件查询:QBC
	public List<Book> findByCriteria(DetachedCriteria criteria);
}
第三步:创建BookDaoImpl的实现类
使用HibernateTemplate 实现增删改查,使用注解@Repository和@Autowired
//图书的持久层
//HibernateDaoSupport用来简化代码,能提供HibernateTemplate,
@Repository("bookDao")
public class BookDaoImpl extends HibernateDaoSupport implements IBookDao {
	//注入sessionFactory:注意写法,这样才可以使用hibernateTemplate
	@Autowired
	public void setSuperSessionFactory(SessionFactory sessionFactory){
		super.setSessionFactory(sessionFactory);
	}

	//保存图书
	public void save(Book book){
		//注入sesson工厂,获取session--不会写了
		//因为:spring提供了模版类,来整合Hibernate
		super.getHibernateTemplate().save(book);
	}
	//更新图书(根据id)
	public void update(Book book){
		super.getHibernateTemplate().update(book);
	}
	//删除图书(根据id)
	public void delete(Book book){
		super.getHibernateTemplate().delete(book);
	}

	//根据id查询
	public Book findById(Integer id){
		return super.getHibernateTemplate().get(Book.class, id);
	}

	//查询所有
	public List<Book> findAll(){
		return super.getHibernateTemplate().loadAll(Book.class);
//			return super.getHibernateTemplate().find("from Book");//hql方式
	}

	//复杂条件条件
	//1.命名查询:QBN
	public List<Book> findByNamedQuery(String queryName, Object... values){
		return super.getHibernateTemplate().findByNamedQuery(queryName, values);
	}

	//2.离线条件查询:QBC
	public List<Book> findByCriteria(DetachedCriteria criteria){
		return super.getHibernateTemplate().findByCriteria(criteria);
	}

}
那么如何注入SessionFactory呢?使用@Autowired
//注入sessionFactory:注意写法,这样才可以使用hibernateTemplate
@Autowired
public void setSuperSessionFactory(SessionFactory sessionFactory){
	super.setSessionFactory(sessionFactory);
}
4.2 编写BookService(业务层)
新建包cn.itcast.ssh.service:用来存放service
业务层代码,将dao注入到service,可以使用@Autowired存放到属性上
第一步:创建接口类IBookService.java
public interface IBookService {

	//保存图书
	//方法名不能随便写,配置事务save*,事务才能可写
	public void saveBook(Book book);

	//查询:复杂条件查询,根据书名模糊查询,配置事务find*,表示查询,事务只读
	public List<Book> findBookListByNameLike(String name);
}
第二步:创建接口类的实现类BookServiceImpl实现接口类
//图书业务层
@Service("bookService")
@Transactional(readOnly=true)//事务(类级别的事务,一般定义成只读,方法级别的事务定义成可写)
public class BookServiceImpl implements IBookService{
	//注入dao层
	@Autowired
	private IBookDao bookDao;

	//保存图书
	@Transactional(readOnly=false)//事务(方法级别的事务,覆盖类级别的事务)
	public void saveBook(Book book){
		//调用dao层
		bookDao.save(book);
	}

	//查询:复杂条件查询,根据书名模糊查询
	public List<Book> findBookListByNameLike(String name){
		//1.qbn
//		return bookDao.findByNamedQuery("Book.findBookListByNameLike", "%"+name+"%");

		//2.qbc
		DetachedCriteria criteria =DetachedCriteria.forClass(Book.class);//root对象类型
		criteria.add(Restrictions.like("name",  "%"+name+"%"));
		return bookDao.findByCriteria(criteria);
	}

}
第三步:声明式事务管理 ,在Service层完成,添加注解@Transactional
(1)在applicationContext.xml文件中配置事务控制的注解写法
<!-- 平台事务管理器 -->
<bean id="transactionManager" class="org.springframework.orm.hibernate5.HibernateTransactionManager">
	<!-- 注入sessionFactory -->
	<property name="sessionFactory" ref="sessionFactory"/>
</bean>
<!-- 声明式事务(注解驱动) -->
<tx:annotation-driven transaction-manager="transactionManager"/>
(2)类上定义只读,因为一个类中查询的方法比较多
@Transactional(readOnly=true)//事务(类级别的事务,一般定义成只读,方法级别的事务定义成可写)
public class BookServiceImpl implements IBookService{

}
(3)增删改方法上定义可写,可写的操作需要将事务定义可写
//保存图书
@Transactional(readOnly=false)//事务(方法级别的事务,覆盖类级别的事务)
public void saveBook(Book book){

}
第四步:使用SrpingTest.java进行测试:
@RunWith(SpringJUnit4ClassRunner.class)
@ContextConfiguration(locations="classpath:applicationContext.xml")
public class SpringTest {

	//注入service
	@Autowired
	private IBookService bookService;

	@Test
	public void testSave(){
		//保存图书
		Book book = new Book();
		//book.setId(id)
		book.setName("约会专家周星星");
		book.setPrice(998d);
		bookService.saveBook(book);
	}

	@Test
	public void testFind(){
		//查询
		List<Book> list = bookService.findBookListByNameLike("会");
		System.out.println(list);
	}
}
4.3 编写BookAction
在cn.itcast.ssh.web.action中创建BookAction类,注解完成Service注入Action
//图书管理的表现层
@Controller("bookAction")
@Scope("prototype")//多例!!!!!
public class BookAction extends ActionSupport implements ModelDriven<Book>{
	//数据模型对象
	private Book book=new Book();

	public Book getModel() {
		return book;
	}

	//成员变量
	@Autowired
	private IBookService bookService;

	//业务方法:保存图书
	public String add(){
		System.out.println(book);
		//调用业务层保存...
		bookService.saveBook(book);
		return NONE;
	}

}
4.4 使用struts2注解,页面访问Action
第一步:在WebRoot下新建:addbook.jsp
<%@ page language="java" contentType="text/html; charset=UTF-8"
    pageEncoding="UTF-8"%>
<%@taglib uri="/struts-tags" prefix="s"%>
<!DOCTYPE html PUBLIC "-//W3C//DTD HTML 4.01 Transitional//EN" "http://www.w3.org/TR/html4/loose.dtd">
<html>
<head>
<meta http-equiv="Content-Type" content="text/html; charset=UTF-8">
<title>添加图书</title>
</head>
<body>
	<h1>欢迎使用Xxx的图书管理系统</h1>
	<s:form action="book_add" namespace="/" method="post">
		图书的名称:<s:textfield name="name"/><br/>
		图书的价格:<s:textfield name="price"/><br/>
		<s:submit value="保存"/><s:reset value="重置"/>
	</s:form>
</body>
</html>
如果添加namespace:
<s:form action="book_add" namespace="/ann" method="post"><!--或者是action="/ann/book_add" namespace="/"-->
	图书的名称:<s:textfield name="name"/><br/>
	图书的价格:<s:textfield name="price"/><br/>
	<s:submit value="保存"/><s:reset value="重置"/>
</s:form>
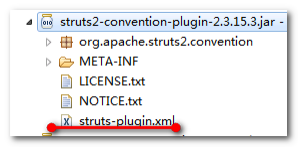
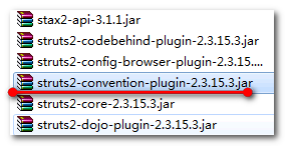
第二步:导入Struts2 注解开发,基于约定扫描 (导入 struts2-convention-plugin.jar ),从struts2的struts-2.3.15.3-all\struts-2.3.15.3\lib查找
找到struts-plugin.xml文件