SMBMS(超市管理项目)
准备工作
-
搭建一个maven web 项目
-
配置Tomcat
-
测试项目是否能够跑起来
-
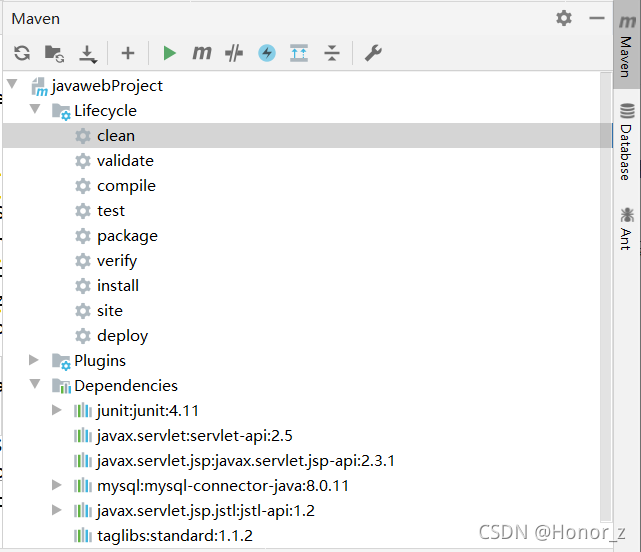
导入项目中需要的jar包
jsp,Servlet,mysql驱动jstl,stand… -
构建项目包结构
pojo、dao、service、servlet、filter包。
-
数据库及实体类
数据库
CREATE DATABASE `smbms`CHARACTER SET utf8mb4 COLLATE utf8mb4_bin;
USE `smbms`;

DROP TABLE IF EXISTS `smbms_address`;

CREATE TABLE `smbms_address` (
  `id` bigint(20) NOT NULL AUTO_INCREMENT COMMENT '主键ID',
  `contact` varchar(15) COLLATE utf8_unicode_ci DEFAULT NULL COMMENT '联系人姓名',
  `addressDesc` varchar(50) COLLATE utf8_unicode_ci DEFAULT NULL COMMENT '收货地址明细',
  `postCode` varchar(15) COLLATE utf8_unicode_ci DEFAULT NULL COMMENT '邮编',
  `tel` varchar(20) COLLATE utf8_unicode_ci DEFAULT NULL COMMENT '联系人电话',
  `createdBy` bigint(20) DEFAULT NULL COMMENT '创建者',
  `creationDate` datetime DEFAULT NULL COMMENT '创建时间',
  `modifyBy` bigint(20) DEFAULT NULL COMMENT '修改者',
  `modifyDate` datetime DEFAULT NULL COMMENT '修改时间',
  `userId` bigint(20) DEFAULT NULL COMMENT '用户ID',
  PRIMARY KEY (`id`)
) ENGINE=InnoDB AUTO_INCREMENT=7 DEFAULT CHARSET=utf8 COLLATE=utf8_unicode_ci;

insert  into `smbms_address`(`id`,`contact`,`addressDesc`,`postCode`,`tel`,`createdBy`,`creationDate`,`modifyBy`,`modifyDate`,`userId`) values (1,'王丽','北京市东城区东交民巷44号','100010','13678789999',1,'2016-04-13 00:00:00',NULL,NULL,1),(2,'张红丽','北京市海淀区丹棱街3号','100000','18567672312',1,'2016-04-13 00:00:00',NULL,NULL,1),(3,'任志强','北京市东城区美术馆后街23号','100021','13387906742',1,'2016-04-13 00:00:00',NULL,NULL,1),(4,'曹颖','北京市朝阳区朝阳门南大街14号','100053','13568902323',1,'2016-04-13 00:00:00',NULL,NULL,2),(5,'李慧','北京市西城区三里河路南三巷3号','100032','18032356666',1,'2016-04-13 00:00:00',NULL,NULL,3),(6,'王国强','北京市顺义区高丽营镇金马工业区18号','100061','13787882222',1,'2016-04-13 00:00:00',NULL,NULL,3);

DROP TABLE IF EXISTS `smbms_bill`;

CREATE TABLE `smbms_bill` (
  `id` bigint(20) NOT NULL AUTO_INCREMENT COMMENT '主键ID',
  `billCode` varchar(20) COLLATE utf8_unicode_ci DEFAULT NULL COMMENT '账单编码',
  `productName` varchar(20) COLLATE utf8_unicode_ci DEFAULT NULL COMMENT '商品名称',
  `productDesc` varchar(50) COLLATE utf8_unicode_ci DEFAULT NULL COMMENT '商品描述',
  `productUnit` varchar(10) COLLATE utf8_unicode_ci DEFAULT NULL COMMENT '商品单位',
  `productCount` decimal(20,2) DEFAULT NULL COMMENT '商品数量',
  `totalPrice` decimal(20,2) DEFAULT NULL COMMENT '商品总额',
  `isPayment` int(10) DEFAULT NULL COMMENT '是否支付(1:未支付 2:已支付)',
  `createdBy` bigint(20) DEFAULT NULL COMMENT '创建者(userId)',
  `creationDate` datetime DEFAULT NULL COMMENT '创建时间',
  `modifyBy` bigint(20) DEFAULT NULL COMMENT '更新者(userId)',
  `modifyDate` datetime DEFAULT NULL COMMENT '更新时间',
  `providerId` bigint(20) DEFAULT NULL COMMENT '供应商ID',
  PRIMARY KEY (`id`)
) ENGINE=InnoDB AUTO_INCREMENT=19 DEFAULT CHARSET=utf8 COLLATE=utf8_unicode_ci;

insert  into `smbms_bill`(`id`,`billCode`,`productName`,`productDesc`,`productUnit`,`productCount`,`totalPrice`,`isPayment`,`createdBy`,`creationDate`,`modifyBy`,`modifyDate`,`providerId`) values (2,'BILL2016_002','香皂、肥皂、药皂','日用品-皂类','块','1000.00','10000.00',2,1,'2016-03-23 04:20:40',NULL,NULL,13),(3,'BILL2016_003','大豆油','食品-食用油','斤','300.00','5890.00',2,1,'2014-12-14 13:02:03',NULL,NULL,6),(4,'BILL2016_004','橄榄油','食品-进口食用油','斤','200.00','9800.00',2,1,'2013-10-10 03:12:13',NULL,NULL,7),(5,'BILL2016_005','洗洁精','日用品-厨房清洁','瓶','500.00','7000.00',2,1,'2014-12-14 13:02:03',NULL,NULL,9),(6,'BILL2016_006','美国大杏仁','食品-坚果','袋','300.00','5000.00',2,1,'2016-04-14 06:08:09',NULL,NULL,4),(7,'BILL2016_007','沐浴液、精油','日用品-沐浴类','瓶','500.00','23000.00',1,1,'2016-07-22 10:10:22',NULL,NULL,14),(8,'BILL2016_008','不锈钢盘碗','日用品-厨房用具','个','600.00','6000.00',2,1,'2016-04-14 05:12:13',NULL,NULL,14),(9,'BILL2016_009','塑料杯','日用品-杯子','个','350.00','1750.00',2,1,'2016-02-04 11:40:20',NULL,NULL,14),(10,'BILL2016_010','豆瓣酱','食品-调料','瓶','200.00','2000.00',2,1,'2013-10-29 05:07:03',NULL,NULL,8),(11,'BILL2016_011','海之蓝','饮料-国酒','瓶','50.00','10000.00',1,1,'2016-04-14 16:16:00',NULL,NULL,1),(12,'BILL2016_012','芝华士','饮料-洋酒','瓶','20.00','6000.00',1,1,'2016-09-09 17:00:00',NULL,NULL,1),(13,'BILL2016_013','长城红葡萄酒','饮料-红酒','瓶','60.00','800.00',2,1,'2016-11-14 15:23:00',NULL,NULL,1),(14,'BILL2016_014','泰国香米','食品-大米','斤','400.00','5000.00',2,1,'2016-10-09 15:20:00',NULL,NULL,3),(15,'BILL2016_015','东北大米','食品-大米','斤','600.00','4000.00',2,1,'2016-11-14 14:00:00',NULL,NULL,3),(16,'BILL2016_016','可口可乐','饮料','瓶','2000.00','6000.00',2,1,'2012-03-27 13:03:01',NULL,NULL,2),(17,'BILL2016_017','脉动','饮料','瓶','1500.00','4500.00',2,1,'2016-05-10 12:00:00',NULL,NULL,2),(18,'BILL2016_018','哇哈哈','饮料','瓶','2000.00','4000.00',2,1,'2015-11-24 15:12:03',NULL,NULL,2);

DROP TABLE IF EXISTS `smbms_provider`;

CREATE TABLE `smbms_provider` (
  `id` bigint(20) NOT NULL AUTO_INCREMENT COMMENT '主键ID',
  `proCode` varchar(20) COLLATE utf8_unicode_ci DEFAULT NULL COMMENT '供应商编码',
  `proName` varchar(20) COLLATE utf8_unicode_ci DEFAULT NULL COMMENT '供应商名称',
  `proDesc` varchar(50) COLLATE utf8_unicode_ci DEFAULT NULL COMMENT '供应商详细描述',
  `proContact` varchar(20) COLLATE utf8_unicode_ci DEFAULT NULL COMMENT '供应商联系人',
  `proPhone` varchar(20) COLLATE utf8_unicode_ci DEFAULT NULL COMMENT '联系电话',
  `proAddress` varchar(50) COLLATE utf8_unicode_ci DEFAULT NULL COMMENT '地址',
  `proFax` varchar(20) COLLATE utf8_unicode_ci DEFAULT NULL COMMENT '传真',
  `createdBy` bigint(20) DEFAULT NULL COMMENT '创建者(userId)',
  `creationDate` datetime DEFAULT NULL COMMENT '创建时间',
  `modifyDate` datetime DEFAULT NULL COMMENT '更新时间',
  `modifyBy` bigint(20) DEFAULT NULL COMMENT '更新者(userId)',
  PRIMARY KEY (`id`)
) ENGINE=InnoDB AUTO_INCREMENT=16 DEFAULT CHARSET=utf8 COLLATE=utf8_unicode_ci;

insert  into `smbms_provider`(`id`,`proCode`,`proName`,`proDesc`,`proContact`,`proPhone`,`proAddress`,`proFax`,`createdBy`,`creationDate`,`modifyDate`,`modifyBy`) values (1,'BJ_GYS001','北京三木堂商贸有限公司','长期合作伙伴,主营产品:茅台、五粮液、郎酒、酒鬼酒、泸州老窖、赖茅酒、法国红酒等','张国强','13566667777','北京市丰台区育芳园北路','010-58858787',1,'2013-03-21 16:52:07',NULL,NULL),(2,'HB_GYS001','石家庄帅益食品贸易有限公司','长期合作伙伴,主营产品:饮料、水饮料、植物蛋白饮料、休闲食品、果汁饮料、功能饮料等','王军','13309094212','河北省石家庄新华区','0311-67738876',1,'2016-04-13 04:20:40',NULL,NULL),(3,'GZ_GYS001','深圳市泰香米业有限公司','初次合作伙伴,主营产品:良记金轮米,龙轮香米等','郑程瀚','13402013312','广东省深圳市福田区深南大道6006华丰大厦','0755-67776212',1,'2014-03-21 16:56:07',NULL,NULL),(4,'GZ_GYS002','深圳市喜来客商贸有限公司','长期合作伙伴,主营产品:坚果炒货.果脯蜜饯.天然花茶.营养豆豆.特色美食.进口食品.海味零食.肉脯肉','林妮','18599897645','广东省深圳市福龙工业区B2栋3楼西','0755-67772341',1,'2013-03-22 16:52:07',NULL,NULL),(5,'JS_GYS001','兴化佳美调味品厂','长期合作伙伴,主营产品:天然香辛料、鸡精、复合调味料','徐国洋','13754444221','江苏省兴化市林湖工业区','0523-21299098',1,'2015-11-22 16:52:07',NULL,NULL),(6,'BJ_GYS002','北京纳福尔食用油有限公司','长期合作伙伴,主营产品:山茶油、大豆油、花生油、橄榄油等','马莺','13422235678','北京市朝阳区珠江帝景1号楼','010-588634233',1,'2012-03-21 17:52:07',NULL,NULL),(7,'BJ_GYS003','北京国粮食用油有限公司','初次合作伙伴,主营产品:花生油、大豆油、小磨油等','王驰','13344441135','北京大兴青云店开发区','010-588134111',1,'2016-04-13 00:00:00',NULL,NULL),(8,'ZJ_GYS001','慈溪市广和绿色食品厂','长期合作伙伴,主营产品:豆瓣酱、黄豆酱、甜面酱,辣椒,大蒜等农产品','薛圣丹','18099953223','浙江省宁波市慈溪周巷小安村','0574-34449090',1,'2013-11-21 06:02:07',NULL,NULL),(9,'GX_GYS001','优百商贸有限公司','长期合作伙伴,主营产品:日化产品','李立国','13323566543','广西南宁市秀厢大道42-1号','0771-98861134',1,'2013-03-21 19:52:07',NULL,NULL),(10,'JS_GYS002','南京火头军信息技术有限公司','长期合作伙伴,主营产品:不锈钢厨具等','陈女士','13098992113','江苏省南京市浦口区浦口大道1号新城总部大厦A座903室','025-86223345',1,'2013-03-25 16:52:07',NULL,NULL),(11,'GZ_GYS003','广州市白云区美星五金制品厂','长期合作伙伴,主营产品:海绵床垫、坐垫、靠垫、海绵枕头、头枕等','梁天','13562276775','广州市白云区钟落潭镇福龙路20号','020-85542231',1,'2016-12-21 06:12:17',NULL,NULL),(12,'BJ_GYS004','北京隆盛日化科技','长期合作伙伴,主营产品:日化环保清洗剂,家居洗涤专卖、洗涤用品网、墙体除霉剂、墙面霉菌清除剂等','孙欣','13689865678','北京市大兴区旧宫','010-35576786',1,'2014-11-21 12:51:11',NULL,NULL),(13,'SD_GYS001','山东豪克华光联合发展有限公司','长期合作伙伴,主营产品:洗衣皂、洗衣粉、洗衣液、洗洁精、消杀类、香皂等','吴洪转','13245468787','山东济阳济北工业区仁和街21号','0531-53362445',1,'2015-01-28 10:52:07',NULL,NULL),(14,'JS_GYS003','无锡喜源坤商行','长期合作伙伴,主营产品:日化品批销','周一清','18567674532','江苏无锡盛岸西路','0510-32274422',1,'2016-04-23 11:11:11',NULL,NULL),(15,'ZJ_GYS002','乐摆日用品厂','长期合作伙伴,主营产品:各种中、高档塑料杯,塑料乐扣水杯(密封杯)、保鲜杯(保鲜盒)、广告杯、礼品杯','王世杰','13212331567','浙江省金华市义乌市义东路','0579-34452321',1,'2016-08-22 10:01:30',NULL,NULL);

DROP TABLE IF EXISTS `smbms_role`;

CREATE TABLE `smbms_role` (
  `id` bigint(20) NOT NULL AUTO_INCREMENT COMMENT '主键ID',
  `roleCode` varchar(15) COLLATE utf8_unicode_ci DEFAULT NULL COMMENT '角色编码',
  `roleName` varchar(15) COLLATE utf8_unicode_ci DEFAULT NULL COMMENT '角色名称',
  `createdBy` bigint(20) DEFAULT NULL COMMENT '创建者',
  `creationDate` datetime DEFAULT NULL COMMENT '创建时间',
  `modifyBy` bigint(20) DEFAULT NULL COMMENT '修改者',
  `modifyDate` datetime DEFAULT NULL COMMENT '修改时间',
  PRIMARY KEY (`id`)
) ENGINE=InnoDB AUTO_INCREMENT=4 DEFAULT CHARSET=utf8 COLLATE=utf8_unicode_ci;

insert  into `smbms_role`(`id`,`roleCode`,`roleName`,`createdBy`,`creationDate`,`modifyBy`,`modifyDate`) values (1,'SMBMS_ADMIN','系统管理员',1,'2016-04-13 00:00:00',NULL,NULL),(2,'SMBMS_MANAGER','经理',1,'2016-04-13 00:00:00',NULL,NULL),(3,'SMBMS_EMPLOYEE','普通员工',1,'2016-04-13 00:00:00',NULL,NULL);

DROP TABLE IF EXISTS `smbms_user`;

CREATE TABLE `smbms_user` (
  `id` bigint(20) NOT NULL AUTO_INCREMENT COMMENT '主键ID',
  `userCode` varchar(15) COLLATE utf8_unicode_ci DEFAULT NULL COMMENT '用户编码',
  `userName` varchar(15) COLLATE utf8_unicode_ci DEFAULT NULL COMMENT '用户名称',
  `userPassword` varchar(15) COLLATE utf8_unicode_ci DEFAULT NULL COMMENT '用户密码',
  `gender` int(10) DEFAULT NULL COMMENT '性别(1:女、 2:男)',
  `birthday` date DEFAULT NULL COMMENT '出生日期',
  `phone` varchar(15) COLLATE utf8_unicode_ci DEFAULT NULL COMMENT '手机',
  `address` varchar(30) COLLATE utf8_unicode_ci DEFAULT NULL COMMENT '地址',
  `userRole` bigint(20) DEFAULT NULL COMMENT '用户角色(取自角色表-角色id)',
  `createdBy` bigint(20) DEFAULT NULL COMMENT '创建者(userId)',
  `creationDate` datetime DEFAULT NULL COMMENT '创建时间',
  `modifyBy` bigint(20) DEFAULT NULL COMMENT '更新者(userId)',
  `modifyDate` datetime DEFAULT NULL COMMENT '更新时间',
  PRIMARY KEY (`id`)
) ENGINE=InnoDB AUTO_INCREMENT=16 DEFAULT CHARSET=utf8 COLLATE=utf8_unicode_ci;

insert  into `smbms_user`(`id`,`userCode`,`userName`,`userPassword`,`gender`,`birthday`,`phone`,`address`,`userRole`,`createdBy`,`creationDate`,`modifyBy`,`modifyDate`) values (1,'admin','系统管理员','1234567',1,'1983-10-10','13688889999','北京市海淀区成府路207号',1,1,'2013-03-21 16:52:07',NULL,NULL),(2,'liming','李明','0000000',2,'1983-12-10','13688884457','北京市东城区前门东大街9号',2,1,'2014-12-31 19:52:09',NULL,NULL),(5,'hanlubiao','韩路彪','0000000',2,'1984-06-05','18567542321','北京市朝阳区北辰中心12号',2,1,'2014-12-31 19:52:09',NULL,NULL),(6,'zhanghua','张华','0000000',1,'1983-06-15','13544561111','北京市海淀区学院路61号',3,1,'2013-02-11 10:51:17',NULL,NULL),(7,'wangyang','王洋','0000000',2,'1982-12-31','13444561124','北京市海淀区西二旗辉煌国际16层',3,1,'2014-06-11 19:09:07',NULL,NULL),(8,'zhaoyan','赵燕','0000000',1,'1986-03-07','18098764545','北京市海淀区回龙观小区10号楼',3,1,'2016-04-21 13:54:07',NULL,NULL),(10,'sunlei','孙磊','0000000',2,'1981-01-04','13387676765','北京市朝阳区管庄新月小区12楼',3,1,'2015-05-06 10:52:07',NULL,NULL),(11,'sunxing','孙兴','0000000',2,'1978-03-12','13367890900','北京市朝阳区建国门南大街10号',3,1,'2016-11-09 16:51:17',NULL,NULL),(12,'zhangchen','张晨','0000000',1,'1986-03-28','18098765434','朝阳区管庄路口北柏林爱乐三期13号楼',3,1,'2016-08-09 05:52:37',1,'2016-04-14 14:15:36'),(13,'dengchao','邓超','0000000',2,'1981-11-04','13689674534','北京市海淀区北航家属院10号楼',3,1,'2016-07-11 08:02:47',NULL,NULL),(14,'yangguo','杨过','0000000',2,'1980-01-01','13388886623','北京市朝阳区北苑家园茉莉园20号楼',3,1,'2015-02-01 03:52:07',NULL,NULL),(15,'zhaomin','赵敏','0000000',1,'1987-12-04','18099897657','北京市昌平区天通苑3区12号楼',2,1,'2015-09-12 12:02:12',NULL,NULL);
根据所建立的表创建相关model(ORM),以下例子一个
package com.kuang.pojo;

import java.util.Date;

public class UserModel {
    private int id; //id
    private String userCode; //用户编码
    private String userName; //用户名称
    private String userPassword; //用户密码
    private int gender;  //性别
    private Date birthday;  //出生日期
    private String phone;   //电话
    private String address; //地址
    private int userRole;    //用户角色
    private int createdBy;   //创建者
    private Date creationDate; //创建时间
    private int modifyBy;     //更新者
    private Date modifyDate;   //更新时间

    private int age;//年龄
    private String userRoleName;    //用户角色名称

    public String getUserRoleName() {
        return userRoleName;
    }
    public void setUserRoleName(String userRoleName) {
        this.userRoleName = userRoleName;
    }
    public Integer getAge() {
        Date date = new Date();
        @SuppressWarnings("deprecation")
        Integer age = date.getYear()-birthday.getYear();
        return age;
    }

    public int getId() {
        return id;
    }
    public void setId(int id) {
        this.id = id;
    }
    public String getUserCode() {
        return userCode;
    }
    public void setUserCode(String userCode) {
        this.userCode = userCode;
    }
    public String getUserName() {
        return userName;
    }
    public void setUserName(String userName) {
        this.userName = userName;
    }
    public String getUserPassword() {
        return userPassword;
    }
    public void setUserPassword(String userPassword) {
        this.userPassword = userPassword;
    }
    public int getGender() {
        return gender;
    }
    public void setGender(int gender) {
        this.gender = gender;
    }
    public Date getBirthday() {
        return birthday;
    }
    public void setBirthday(Date birthday) {
        this.birthday = birthday;
    }
    public String getPhone() {
        return phone;
    }
    public void setPhone(String phone) {
        this.phone = phone;
    }
    public String getAddress() {
        return address;
    }
    public void setAddress(String address) {
        this.address = address;
    }
    public int getUserRole() {
        return userRole;
    }
    public void setUserRole(int userRole) {
        this.userRole = userRole;
    }
    public int getCreatedBy() {
        return createdBy;
    }
    public void setCreatedBy(int createdBy) {
        this.createdBy = createdBy;
    }
    public Date getCreationDate() {
        return creationDate;
    }
    public void setCreationDate(Date creationDate) {
        this.creationDate = creationDate;
    }
    public int getModifyBy() {
        return modifyBy;
    }
    public void setModifyBy(int modifyBy) {
        this.modifyBy = modifyBy;
    }
    public Date getModifyDate() {
        return modifyDate;
    }
    public void setModifyDate(Date modifyDate) {
        this.modifyDate = modifyDate;
    }
    public void setAge(int age) {
        this.age = age;
    }

    @Override
    public String toString() {  //也可以好好自己写格式,方便以后输出查看。
        return "UserModel{" +
                "id=" + id +
                ", userCode='" + userCode + '\'' +
                ", userName='" + userName + '\'' +
                ", userPassword='" + userPassword + '\'' +
                ", gender=" + gender +
                ", birthday=" + birthday +
                ", phone='" + phone + '\'' +
                ", address='" + address + '\'' +
                ", userRole=" + userRole +
                ", createdBy=" + createdBy +
                ", creationDate=" + creationDate +
                ", modifyBy=" + modifyBy +
                ", modifyDate=" + modifyDate +
                ", age=" + age +
                ", userRoleName='" + userRoleName + '\'' +
                '}';
    }
}
-
编写基础公共类
(1)数据库配置文件,放在resource目录下,其作用就是干这个的
driver=com.mysql.cj.jdbc.Driver
url=jdbc:mysql://localhost:3306/smbms?useUnicode=true&characterEncoding=utf8&serverTimezone=GMT%2B8&useSSL=false
user=root
password=456852
(2)
编写数据库的基础公共类
package com.kuang.util;

import java.io.IOException;
import java.io.InputStream;
import java.sql.*;
import java.util.Properties;

/**
 * 数据库公共类,主要负责Connection,PrepareStatement,ResultSet的
 */
public class BaseDataBase {
    private static String driver;
    private static String url;
    private static String user;
    private static String password;

    static {    //静态代码块,类加载时候执行
        Properties properties = new Properties();
        String configPath = "db.properties";
        //因为该资源文件在resources目录下,我经过查看了,打包后,直接就在项目目录下,所以配置文件都放在resources目录(有颜色的)下
        InputStream is = BaseDataBase.class.getClassLoader().getResourceAsStream(configPath);
        try {
            properties.load(is);
            driver = properties.getProperty("driver");
            url = properties.getProperty("url");
            user = properties.getProperty("user");
            password = properties.getProperty("password");
        } catch (IOException e) {
            e.printStackTrace();
        }
    }

    /**
     *
     * 仅仅只是建立一个connection,一个connection就是访问一个数据库的基础,就是一个数据库。
     */
    public static Connection getConnection() {
        Connection connection = null;
        try {
            Class.forName(driver);
            connection = DriverManager.getConnection(url,user,password);
        } catch (ClassNotFoundException e) {
            e.printStackTrace();
        } catch (SQLException e) {
            e.printStackTrace();
        }
        return connection;
    }

    /**
     *返回值为ResultSet的原因:如何操作这个ResultSet我不管,我也管不着,返回给用户去操作
     */
    public static ResultSet executeQuery(Connection connection, PreparedStatement preparedStatement,
                                         ResultSet resultSet, String sql, Object[] paras) throws SQLException {
        preparedStatement = connection.prepareStatement(sql);
        for (int i = 0; i < paras.length; i++) {
            preparedStatement.setObject(i + 1, paras[i]);
        }
        resultSet = preparedStatement.executeQuery();
        return resultSet;
    }

    public static int executeUpdate(Connection connection,PreparedStatement preparedStatement,String sql,
                                    Object[] paras) throws SQLException {
        int result;
        preparedStatement = connection.prepareStatement(sql);
        for (int i = 0; i < paras.length; i++) {
            preparedStatement.setObject(i + 1, paras[i]);
        }
        result = preparedStatement.executeUpdate();
        return result;
    }

    /**
     * 提取出来,统一关闭。
     */
    public static boolean closeDataBaseResource(Connection connection, PreparedStatement preparedStatement, ResultSet resultSet){
        boolean flag = true;

        try {
            if(resultSet != null && !resultSet.isClosed()) {
                resultSet.close();
                resultSet = null;   //让GC及时回收
            }
        } catch (SQLException e) {
            e.printStackTrace();
            flag = false;
        }

        try {
            if (preparedStatement != null && preparedStatement.isClosed()) {
                preparedStatement.close();
                preparedStatement = null;
            }
        } catch (SQLException e) {
            e.printStackTrace();
            flag = false;
        }

        try {
            if(connection != null && !connection.isClosed()) {
                connection.close();
                connection = null;
            }
        } catch (SQLException e) {
            e.printStackTrace();
            flag = false;
        }
        return flag;
    }
}
ResultSet结果集,PrepareStatement预编译,Connection访问一个数据库的基础。
这里把三个对象都设置为参数,让外面(上层)去建立相关对象实例,以得到
复用
,同时资源掌握在高层手里方便关闭。到时候使用时候就清楚了。
- 编写字符编码过滤器
为所有请求响应(Request-Response)添加UTF-8编码过滤器。
package com.kuang.filter;

import javax.servlet.*;
import java.io.IOException;

public class CharacterEncodingFilter implements Filter {
    @Override
    public void init(FilterConfig filterConfig) throws ServletException {
        System.out.println("Request-Response编码UTF-8过滤器启动");
    }

    @Override
    public void doFilter(ServletRequest servletRequest, ServletResponse servletResponse, FilterChain filterChain) throws IOException, ServletException {
        servletRequest.setCharacterEncoding("utf-8");
        servletResponse.setCharacterEncoding("utf-8");
        filterChain.doFilter(servletRequest, servletResponse);
    }

    @Override
    public void destroy() {
        System.out.println("Request-Response编码UTF-8过滤器关闭");
    }
}
写完filter也立马去web.xml注册。
<filter>
        <filter-name>characterEncodingFilter</filter-name>
        <filter-class>com.kuang.filter.CharacterEncodingFilter</filter-class>
    </filter>
    <filter-mapping>
        <filter-name>characterEncodingFilter</filter-name>
        <url-pattern>/*</url-pattern>
    </filter-mapping>
-
导入静态资源
导入到webapp下。可以边做边导可以发现需求来源。
1、登录功能实现(一次完整的MVC)
流程图

(1)编写前端页面(login.jsp),直接放在webapp目录下,不是特殊权限的网页。
(2)设置为首页,web.xml里
<!--设置欢迎页面-->
    <welcome-file-list>
        <welcome-file>/login.jsp</welcome-file>
    </welcome-file-list>
(3)编写dao层登录用户登录的接口
package com.kuang.dao.user;

import com.kuang.pojo.UserModel;

import java.sql.Connection;

public interface IUserDao {

    //通过UserCode得到一个用户
    public UserModel getUserByUserCode(Connection connection, String userCode);
}
(4)
编写dao层接口的实现类
package com.kuang.dao.user;

import com.kuang.pojo.UserModel;
import com.kuang.util.BaseDataBase;

import java.sql.Connection;
import java.sql.PreparedStatement;
import java.sql.ResultSet;
import java.sql.SQLException;

//DAO(数据访问层)只做查询数据的内容
public class UserDaoImpl implements IUserDao {

    public UserModel getUserByUserCode(Connection connection, String userCode) {

        PreparedStatement preparedStatement = null;
        ResultSet resultSet = null;
        UserModel user = null;
        try {
            if(null != connection) {    //connection是访问数据库的基础
                String sql = "select * from smbms_user where userCode=?";
                Object[] paras = {userCode};
                resultSet = BaseDataBase.executeQuery(connection, preparedStatement,resultSet,sql,paras);
                if (resultSet.next()) { //因为此时只能查的一条数据,所以直接if不用while
                    user = new UserModel();
                    user.setId(resultSet.getInt("id"));
                    user.setUserCode(resultSet.getString("userCode"));
                    user.setUserName(resultSet.getString("userName"));
                    user.setUserPassword(resultSet.getString("userPassword"));
                    user.setGender(resultSet.getInt("gender"));
                    user.setBirthday(resultSet.getDate("birthday"));
                    user.setPhone(resultSet.getString("phone"));
                    user.setAddress(resultSet.getString("address"));
                    user.setUserRole(resultSet.getInt("userRole"));
                    user.setCreatedBy(resultSet.getInt("createdBy"));
                    user.setCreationDate(resultSet.getTimestamp("creationDate"));
                    user.setModifyBy(resultSet.getInt("modifyBy"));
                    user.setModifyDate(resultSet.getTimestamp("modifyDate"));
                }
                BaseDataBase.closeDataBaseResource(null,preparedStatement,resultSet);
                //在这里开了什么就关什么,这里只开了preparestatment和resultset
            }
        } catch (SQLException e) {
            e.printStackTrace();
            return null;
        }
        return user;
    }
}
(5)业务层接口
package com.kuang.service.user;

import com.kuang.pojo.UserModel;

public interface IUserService {

    //用户登录业务
    public UserModel login(String userCode, String userPassword);
}
(6)
业务层实现类
package com.kuang.service.user;

import com.kuang.dao.user.IUserDao;
import com.kuang.dao.user.UserDaoImpl;
import com.kuang.pojo.UserModel;
import com.kuang.util.BaseDataBase;
import org.junit.Test;

import java.sql.Connection;

public class UserServiceImpl implements IUserService {

    //业务层都会调用DAO层,所以我们引入DAO层

    private IUserDao userDao;

    public UserServiceImpl() {
        userDao = new UserDaoImpl();
    }

    @Override
    public UserModel login(String userCode, String userPassword) {

        Connection connection = null;
        //通过业务层调用对应的具体数据库操作
        UserModel user = null;
        connection = BaseDataBase.getConnection();
        user = userDao.getUserByUserCode(connection,userCode);
        if(!user.getUserPassword().equals(userPassword)) {
            return null;    //密码错误。可返回一个error的UserModel
        }
        BaseDataBase.closeDataBaseResource(connection,null,null);
        //业务层这边掌控了connection,所以使用完要关闭
        return user;
    }

    //junit局部测试
    //@Test
    //public void test() {
    //    UserServiceImpl userService = new UserServiceImpl();
    //    UserModel admin = userService.login("liming", "0000000");
    //    System.out.println(admin);
    //}
}
(7)
编写Servlet
这个Servlet的整个代码具体就是再说是
针对前端哪个事件/表单提交/其他控件所(映射/绑定)作出相对应的后台的响应代码
。就是所谓的相关servlet起到中间人作用,联系前后端。
package com.kuang.servlet.user;

import com.kuang.pojo.UserModel;
import com.kuang.service.user.IUserService;
import com.kuang.service.user.UserServiceImpl;
import com.kuang.util.Constant;

import javax.servlet.ServletException;
import javax.servlet.http.HttpServlet;
import javax.servlet.http.HttpServletRequest;
import javax.servlet.http.HttpServletResponse;
import java.io.IOException;

//Servlet接受用户参数,调用业务层,转发视图
public class UserLoginServlet extends HttpServlet {

    @Override
    protected void doGet(HttpServletRequest req, HttpServletResponse resp) throws ServletException, IOException {
        //获取用户名和密码,这里getParameter一定要记得和前端name属性保持一致
        String userCode = req.getParameter("userCode");
        String userPassword = req.getParameter("userPassword");

        //调用service方法,进行用户匹配
        IUserService userService = new UserServiceImpl();
        UserModel user = userService.login(userCode, userPassword);
        if(null != user) {  //登陆成功
            //放入session
            req.getSession().setAttribute(Constant.USER_SESSION,user);
            //页面跳转,有权限的网页放在web-inf里
            //resp.sendRedirect(req.getContextPath() + "/WEB-INF/jsp/frame.jsp");   //todo 一如何安全重定向webinf下的网页
            resp.sendRedirect(req.getContextPath() + "/frame.jsp");//解决方法在在web.xml配置映射,因为web.xml(web-inf下)是安全的
        } else{
            req.setAttribute("error","用户名或密码不正确");//返回信息塞到req里,前端可以取得输出
            //req.getRequestDispatcher(req.getContextPath() + "/login.jsp").forward(req,resp);//再转发给用户登录页面
            //转发不需要加子项目路径!转发不需要加子项目路径!转发不需要加子项目路径!已经在子项目路径下了!
            req.getRequestDispatcher("/login.jsp").forward(req,resp);
        }
    }

    @Override
    protected void doPost(HttpServletRequest req, HttpServletResponse resp) throws ServletException, IOException {
        doGet(req, resp);
    }
}
(8)写完servlet,立刻去web.xml注册并添加映射
<!--配置userLogin的servlet-->
<servlet>
        <servlet-name>userLoginServlet</servlet-name>
        <servlet-class>com.kuang.servlet.user.UserLoginServlet</servlet-class>
    </servlet>
    <servlet-mapping>
        <servlet-name>userLoginServlet</servlet-name>
        <url-pattern>/login.do</url-pattern>
        <!-- url-pattern一定要和前端的匹配 -->
    </servlet-mapping>
(9)测试。一切正常。
下面是总结,以及我遇到的一些情况。
1.1、MVC理解
可以看到,写这里的代码是有序的。DAO—>Service—>Servlet—>JSP。
它们之间就是层的概念,每一层有自己的任务,
各司其职
。其结构是很清晰的。
-
DAO层
:用来在数据库里进行操作的并返回结果 -
Service层
:负责处理相应的业务,判断等一些逻辑操作在这里进行 -
Servlet(controller)层
:负责接受用户参数(来自前端),调用Service层(后端),转发跳转视图(view)。所以说Servlet很重要,它经过绑定操作将前后端联系起来了 -
JSP(view)层
:前端,只负责展示页面。可以展示从后端发来并塞进request的数据。
再细一点分析。
仔细看我DAO和Service的相关方法命名
我从命名上就很认真的区分DAO和Service层。DAO层方法名称为
getUserByUserCode
,仅仅就是由userCode查询得到一个用户实体类,没有别的一点含义,没有受到高层的login的影响,你可以这样认为,DAO层根本不认识也不理解login,它只认识查询Query和更改Update相关数据库操作,
我DAO层该做数据库操作就只做数据库操作,login这种DAO层根本感知不到,上层对它屏蔽了,我只提供一个根据userCode查询得到一个用户实体类,高层会怎么调用,或者调不调用和我一点关系都没有,只做好自己分内的事情。这就是
分离思想!
而Service层就不一样了,它的方法名称为
login
,说明service层已经可以从前端分析出,我现在需要一个登陆的业务,所以才会这样命名;我不做查询数据库的苦活累活儿,这些都有个DAO帮我做了,我直接拿来即用。因为我有我自己需要注意的问题,我需要进行一些逻辑上的判断,合法性,安全性等都需要考虑。这就是层与层之间的区分。Service层为DAO指导目标需要你干什么,DAO为Service提供方法以便调用。
这就是层设计理念,从底层开始写起,但也需要高层的一些指导,然后再修补。
为什么Service层掌握Connection,DAO层掌握prepareStatment和ResultSet
Connection是一个数据库的基础,有了它才可以做数据库操作。它与数据库有关为什么不放在DAO呢?
原因就是Service层处理
事务
,有可能发生异常导致事务需要回滚(rollback),而这显然是DAO不能处理的,说了一切业务逻辑放在Service层,所以Service持有了Connection才能执行回滚操作
。
那这样为什么prepareStatment(预编译)和ResultSet(结果集)不也直接提升到Service层?预编译指的是哪个SQL语句,结果集是一次SQL语句查询得到的,
也就是说哪个SQL语句的预编译,哪个SQL语句执行后的结果集,这显然都是SQL执行时需要的东西,因此放在DAO层更合适。
然后,你现在就能理解为什么提出的这个
BaseDataBase
类,为什么参数有Connection,prepareStatment和ResultSet了吧,最重要的还是关闭资源方法体现,因为它们是在不同层申请打开和关闭的,
资源在哪创建就在哪关闭
,因此作为参数最好。
1.2、重定向访问WEB-INF目录问题(权限页面的访问)
我们知道登录成功有了权限,就可以进入有权限限制的网页(早期VIP就是这样实现的),安全的网页放在WEB-INF目录下。前面我们的博文说过了
WEB-INF是Javaweb的安全目录。也就是浏览器无法访问,只有服务端可以源访问的目录
。也就是说你在浏览器地址栏输入
http://localhost:8080/WEB-INF/XXX
是没办法访问的。所以在做这次练习的时候,我犯了如下错误(具体可看TODO一)。
一开始这样写的
resp.sendRedirect(req.getContextPath() + "/WEB-INF/jsp/frame.jsp");
,然后访问一直404,查错查了半天。
分析原因
直接重定向WEB-INF下的目录,是不可以的,页面会一直报404;The origin server did not find a current representation for the target resou。分析其原因就又是回顾
重定向和转发区别。重定向更改URL,转发不更改URL
。URL不能出现WEB-INF这是铁律,所以这样直接跳转会失败。
解决方法:添加Servlet内部映射放在web.xml,因为web.xml就在WEB-INF下,所以是安全的。
解决方法
改为
resp.sendRedirect(req.getContextPath() + "/frame.jsp");
并且在web.xml配置
Servlet内部映射
!
    <!--安全重定向有权限的页面-->
    <servlet>
        <servlet-name>frame</servlet-name>
        <jsp-file>/WEB-INF/jsp/frame.jsp</jsp-file>
    </servlet>
    <servlet-mapping>
        <servlet-name>frame</servlet-name>
        <url-pattern>/frame.jsp</url-pattern>
    </servlet-mapping>
边角料注意点
前面博文说过了,任何有关路径的问题都需要将项目路径加上,如今见了啥都加,有点搞糊涂了。在此铭记。
转发不需要加子项目路径!转发不需要加子项目路径!转发不需要加子项目路径!已经在子项目路径下了!
重定向需要加子项目路径,因为重定向可以跳转到其他项目下的页面,所以要是本项目内跳转也说清楚,这样语义性更强!
2、登录功能优化
注销功能
思路:移除session,返回登录页面
package com.kuang.servlet.user;

import com.kuang.util.Constant;

import javax.servlet.ServletException;
import javax.servlet.http.HttpServlet;
import javax.servlet.http.HttpServletRequest;
import javax.servlet.http.HttpServletResponse;
import java.io.IOException;

public class UserLogoutServlet extends HttpServlet {
    @Override
    protected void doGet(HttpServletRequest req, HttpServletResponse resp) throws ServletException, IOException {
        //清除session,返回登录页面
        req.getSession().removeAttribute(Constant.USER_SESSION);
        resp.sendRedirect(req.getContextPath() + "/login.jsp");
    }

    @Override
    protected void doPost(HttpServletRequest req, HttpServletResponse resp) throws ServletException, IOException {
        doGet(req, resp);
    }
}
写完一个servlet,立刻去web.xml绑定注册
<!--配置userLogout的servlet-->
    <servlet>
        <servlet-name>userLogoutServlet</servlet-name>
        <servlet-class>com.kuang.servlet.user.UserLogoutServlet</servlet-class>
    </servlet>
    <servlet-mapping>
        <servlet-name>userLogoutServlet</servlet-name>
        <url-pattern>/jsp/logout.do</url-pattern>
    </servlet-mapping>
2.1、如何为WEB-INF目录下文件加过滤器
我们知道,为了防止用户复制相关URL直接进入带有权限的页面,前面我们已经将相关网页(frame.jsp)放在WEB-INF下了,但还是有成功登陆一次复制相关URL即可再登录,这显然是不安全的,因此,参照前面博文说的添加有关session判断的过滤器。
package com.kuang.filter;

import com.kuang.pojo.UserModel;
import com.kuang.util.Constant;

import javax.servlet.*;
import javax.servlet.http.HttpServletRequest;
import javax.servlet.http.HttpServletResponse;
import java.io.IOException;

public class SysFilter implements Filter {
    @Override
    public void init(FilterConfig filterConfig) throws ServletException {
        System.out.println("SysFilter过滤器启动");
    }

    @Override
    public void doFilter(ServletRequest servletRequest, ServletResponse servletResponse, FilterChain filterChain) throws IOException, ServletException {
        HttpServletRequest request = (HttpServletRequest) servletRequest;
        HttpServletResponse response = (HttpServletResponse) servletResponse;

        //过滤器,从session中获取用户
        UserModel user = (UserModel) request.getSession().getAttribute(Constant.USER_SESSION);
        if(user == null) {  //已经被移除或者注销了,或者未登录
            response.sendRedirect(request.getContextPath() + "/error.jsp");
        } else {
            filterChain.doFilter(servletRequest,servletResponse);   //别忘了让chain往下走下去。
        }
    }

    @Override
    public void destroy() {
        System.out.println("SysFilter过滤器关闭");
    }
}
写好过滤器,要配置相关web.xml。此时问题出现了,
如何为web-inf目录下的jsp文件添加过滤器呢
?答案是有的,设置一个形同虚设的目录(其实就是供外访问路径)。
web.xml
    <filter>
        <filter-name>sysFilter</filter-name>
        <filter-class>com.kuang.filter.SysFilter</filter-class>
    </filter>
    <filter-mapping>
        <filter-name>sysFilter</filter-name>
        <url-pattern>/jsp/*</url-pattern>
    <!--  这个/jsp神似在项目下,其实在安全的WEB-INF下,只不过路径是这个罢了  -->
    </filter-mapping>

    <!--安全重定向有权限的页面-->
    <servlet>
        <servlet-name>frame</servlet-name>
        <jsp-file>/WEB-INF/jsp/frame.jsp</jsp-file>
    </servlet>
    <servlet-mapping>
        <servlet-name>frame</servlet-name>
        <url-pattern>/jsp/frame.jsp</url-pattern>
    <!--  为WEB-INF下添加过滤器修改了这里,牵一发动全身,全局搜索进行相关修改  -->
    </servlet-mapping>
我们可以看到项目目录结构,/jsp神似在当前项目下,其实实际在安全的WEB-INF下。
web.xml进行了修改
!
这一改可不得了,我们知道web.xml是十分重要的中间人,保存前端页面和后端servlet的映射关系,现在牵一发动全身,一改所有相关的地方都要改。
修改建议:使用
全局搜索
搜索改动的关键字,然后查看并思考哪个地方要随着修改!全局搜索
Edit–>Find–>Find in path
。
也从这个问题深刻明白了过滤器很重要的参数就是最后一行
url-pattern
,过滤哪种形式。
需要安全的访问WEB-INF下的目录,去web.xml写这个文件的映射路径,然后转发/重定向路径根据这个跳转。
3、密码修改
导入前端素
<li><a href="${pageContext.request.contextPath }/jsp/pwdmodify.jsp">密码修改</a></li>
需要安全地访问WEB-INF目录下的,所以在web.xml加
<!--安全的访问WEB-INF下的文件-->
    <servlet>
        <servlet-name>pwdmodify</servlet-name>
        <jsp-file>/WEB-INF/jsp/pwdmodify.jsp</jsp-file>
    </servlet>
    <servlet-mapping>
        <servlet-name>pwdmodify</servlet-name>
        <url-pattern>/jsp/pwdmodify.jsp</url-pattern>
    </servlet-mapping>
又是一遍MVC。
(1)UserDao接口
    //修改指定id的用户的密码
    public int updatePwdById(Connection connection, int id,String password);
(2)UserDao接口实现类
@Override
    public int updatePwdById(Connection connection, int id, String password) {

        PreparedStatement preparedStatement = null;
        int result = 0;
        try {
            if (connection != null) {
                String sql = "UPDATE smbms_user SET userPassword = ? WHERE id = ?";
                Object[] paras = {password, id};
                result = BaseDataBase.executeUpdate(connection,preparedStatement,sql,paras);
                BaseDataBase.closeDataBaseResource(null,preparedStatement,null);
            }
        } catch (SQLException e) {
            e.printStackTrace();
        }
        return result;
    }
(3)UserService接口
//更改用户密码,返回值为boolean,更具人性化,更新失败或成功。而DAO的是int返回值,受影响的行数
    public boolean updatePassword(int id, String password);
(4)UserService实现类
 @Override
    public boolean updatePassword(int id, String password) {
        Connection connection = null;
        boolean flag = false;
        connection = BaseDataBase.getConnection();
        if(userDao.updatePwdById(connection,id,password) > 0) {
            flag = true;
        }
        BaseDataBase.closeDataBaseResource(connection,null,null);
        //Connection 在service创建,在service关闭。资源在哪创建就在那关闭。
        return flag;
    }
(5)Servlet
//实现servlet复用
public class UserDoServlet extends HttpServlet {

    @Override
    protected void doGet(HttpServletRequest req, HttpServletResponse resp) throws ServletException, IOException {
        //给前端放个隐藏域
        String method = req.getParameter("method");
        if (method != null && method.equals("savepwd")) {
            updatePassword(req, resp);
        }
        //实现复用~~~~~~
        // 想添加新的增删改查,直接用if(method != "savepwd" && method != null);
    }

    @Override
    protected void doPost(HttpServletRequest req, HttpServletResponse resp) throws ServletException, IOException {
        doGet(req, resp);
    }

    private void updatePassword(HttpServletRequest req, HttpServletResponse resp) {
        Object o = req.getSession().getAttribute(Constant.USER_SESSION);

        String newpassword = req.getParameter("newpassword");
        boolean flag = false;
        if(o != null && newpassword != null && newpassword.length() > 0) {
            IUserService userService = new UserServiceImpl();
            flag = userService.updatePassword(((UserModel) o).getId(), newpassword);
            if (flag) {
                req.setAttribute("message","密码修改成功,请退出,使用新密码登录");
                // 密码修改成功,移除当前session(移除后不能再次修改密码,建议不移除)
                req.getSession().removeAttribute(Constant.USER_SESSION);
            } else {
                // 密码修改失败
                req.setAttribute("message", "密码修改失败");
            }
        } else {
            //密码修改有问题
            req.setAttribute("message", "新密码有问题");
        }
        try {
            req.getRequestDispatcher("/jsp/pwdmodify.jsp").forward(req,resp);
        } catch (ServletException e) {
            e.printStackTrace();
        } catch (IOException e) {
            e.printStackTrace();
        }
    }
}
(6)写完Servlet,就去web.xml注册绑定
    <servlet>
        <servlet-name>userDoServlet</servlet-name>
        <servlet-class>com.kuang.servlet.user.UserDoServlet</servlet-class>
    </servlet>
    <servlet-mapping>
        <servlet-name>userDoServlet</servlet-name>
        <url-pattern>/jsp/user.do</url-pattern>
    </servlet-mapping>
(7)测试
还是MVC那一套,行云流水的过。不过期间遇到的问题,在此记录一下。
问题一:浏览器控制台报错js文件net::ERR_ ABORTED 404
项目之前有js文件,现在新引入一个js文件,出错。
检查target目录,没有相关新引入的js文件,所以需要把target清理(clean)一下,然后再重新启动项目部署。
问题二:对JS文件进行修改,或者是CSS等源代码进行修改,没有加载上去。
和问题一的根本原因是一模一样的,就是因为现在浏览器太过智能了,缓存了未进行及时修改的代码文件,下次查询还需要用它,发现自己有就用缓存的了,所以新修改的被屏蔽了。解决方法:1.清除浏览器缓存 2.清理target目录,重新部署发布
问题三:实现Servlet复用
以前写servlet都是直接doGet和doPost,只针对一种事件/功能,如果一个用户有很多功能要完成要写多少个servlet啊,后台需要管理多少servlet,web.xml就是配置地狱了。
所以出现了servlet复用,一个servlet对应用户的操作功能。具体做法是:前端加
隐藏域
,隐藏域传递参数。
<form id="userForm" name="userForm" method="post" action="${pageContext.request.contextPath }/jsp/user.do">
    <input type="hidden" name="method" value="savepwd">
    <%--隐藏域随着表单一起传输后台--%>
</form>
4、优化密码修改使用Ajax
导入jar包阿里巴巴的fastjson
<!-- https://mvnrepository.com/artifact/com.alibaba/fastjson -->
<dependency>
    <groupId>com.alibaba</groupId>
    <artifactId>fastjson</artifactId>
    <version>1.2.68</version>
</dependency>
所需要的js代码
oldpassword.on("blur",function(){
		$.ajax({
			type:"GET",		//什么方式
			url:path+"/jsp/user.do",	//提交到哪里
			data:{method:"pwdmodify",oldpassword:oldpassword.val()},	//ajax传递的参数
			//经过查看前端输出发现发了个XHR请求。 user.do?method=pwdmodify&oldpassword=1234567
			dataType:"json",
			success:function(data){	//成功时接受什么东西
				if(data.result == "true"){//旧密码正确
					validateTip(oldpassword.next(),{"color":"green"},imgYes,true);
				}else if(data.result == "false"){//旧密码输入不正确
					validateTip(oldpassword.next(),{"color":"red"},imgNo + " 原密码输入不正确",false);
				}else if(data.result == "sessionerror"){//当前用户session过期,请重新登录
					validateTip(oldpassword.next(),{"color":"red"},imgNo + " 当前用户session过期,请重新登录",false);
				}else if(data.result == "error"){//旧密码输入为空
					validateTip(oldpassword.next(),{"color":"red"},imgNo + " 请输入旧密码",false);
				}
			},
			error:function(data){	//失败时接受什么东西
				//请求出错
				validateTip(oldpassword.next(),{"color":"red"},imgNo + " 请求错误",false);
			}
		});
UserDoServlet加
@Override
    protected void doGet(HttpServletRequest req, HttpServletResponse resp) throws ServletException, IOException {
        //给前端放个隐藏域
        String method = req.getParameter("method");
        if (method != null && method.equals("savepwd")) {
            updatePassword(req, resp);
        }else if (method.equals("pwdmodify")) {
            oldPasswordCheck(req, resp);
        }
    }


//验证旧密码
    private void oldPasswordCheck(HttpServletRequest req, HttpServletResponse resp) {
        Object o = req.getSession().getAttribute(Constant.USER_SESSION);
        String oldpassword = req.getParameter("oldpassword");   //ajax传的

        Map<String, String> resultMap = new HashMap<>();//结果集
        if(o == null) { //session过期失效
            resultMap.put("result","sessionerror");
        } else if(oldpassword == null || oldpassword.length() <= 0) {
            resultMap.put("result","error");
        } else {
            String userPassword = ((UserModel) o).getUserPassword();//seesion中的用户密码
            if(oldpassword.equals(userPassword)) {
                resultMap.put("result","true");     //一样,代表输对了
            }else {
                resultMap.put("result","false");    //不为空,但输错了
            }
        }

        //关键还是这句话dataType:"json",,说明它传输的是json,因此后台转为json
        try {
            resp.setContentType("application/json");
            PrintWriter writer = resp.getWriter();
            writer.write(JSONArray.toJSONString(resultMap));
            writer.flush();
            writer.close();
        } catch (IOException e) {
            e.printStackTrace();
        }
    }
关键还是ajax里的这句
dataType:"json",
说明它们之间传输的是json,因此后台需要转成json字符串。
页面没有刷新的情况下,实现了了交互,局部刷新。因为是XHR(异步的)。ajax这种解决方法。 其实也可以写成servlet去解决,但servlet解决并不高效,这里ajax只是种解决方式,理解就好。看ajax的response包就是个json字符串。
5、用户管理实现

1.导入分页的工具类-PageSupport
在资源文件中找到对应类PageSupport导入到util包下即可。
里面关键有一个知识点。
面向的对象思想(OOP)——封装
回顾OOP三大特性:封装、继承、多态。老生常谈了。说到封装,我们原来以为就是内部属性私有化,只给提供相关getter和setter以便使用;内部方法私有化,只给外提供一些接口进行使用。而如今看了PageSupport对封装概念更深刻了。
private int pageSize = 0;

public void setPageSize(int pageSize) {
		if(pageSize > 0){
			this.pageSize = pageSize;
		}
	}
set方法不仅仅只是把参数的值赋值给内部属性。setter方法还可以进行一些不安全的逻辑判断,以避免错误的发生。像一些常识性的判断age在0到150之间的小逻辑在set进行排错即可,小逻辑放在底层的set方法中实现,上面的service层就不需要操心了。
一个setter方法把封装思想体现的淋漓尽致
。
2.用户列表页面导入-userlist.jsp rollpage.jsp
5.1、获取用户数量
(1)UserDao接口
//查询用户总数,其实本来这个方法就是单纯的查用户表的用户总数的。
    //后来,发现可以添加参数以得到不同情形下的总数量,所以写到一个以便复用
    //其实这也就是一个眼界的问题,你只有看到了,才会想到如何去实现
    //看到前端写的,写个姓氏进行模糊查询,因此有了userName参数
    //选中不同职责进行查询,因此有了userRole参数
    public int getUserCount(Connection connection, String userName, int userRole);
(2)UserDaoImpl
    @Override
    public int getUserCount(Connection connection, String userName, int userRole){
        PreparedStatement preparedStatement = null;
        ResultSet resultSet = null;
        int count = 0;
        if(connection != null) {
            StringBuilder sql = new StringBuilder();    //StringBuilder线程不安全,但效率高。Stringbuffer线程安全,但所有方法有syn。
            sql.append("select count(1) as count from smbms_user u,smbms_role r where u.userRole = r.id");  //count1和count*区别
            List<Object> list = new ArrayList<>();  //参数值放在list中
            if(StringUtils.isNullOrEmpty(userName)) {
                sql.append(" and u.userName like ? "); //一定要注意加空格,SQL异常敏感空格,哪怕加多,不要少加
                list.add("%"+ userName + "%");
            }
            if(userRole > 0) {  //只有大于0才是有角色的
                sql.append(" and u.userRole = ? ");
                list.add(userRole);
            }
            Object[] paras = list.toArray();
            System.out.println("底层构建的sql语句为:\n" + sql.toString());
            try {
                resultSet = BaseDataBase.executeQuery(connection,preparedStatement,resultSet,sql.toString(),paras);
                if(resultSet.next()) {  //根据上面sql语句此时结果只有一行且列名称为count
                    count = resultSet.getInt("count");
                }
                BaseDataBase.closeDataBaseResource(null,preparedStatement,resultSet);
            } catch (SQLException e) {
                e.printStackTrace();
            }
        }
        return count;
    }
count(*)和count(1)区别
count(*)count(1)都不会去过滤空值,count(列名)会去过滤空值。
count(1)字段就是固定值1,计算一共有多少个1。
count(*),执行时会把星号翻译成字段的具体名字。
表中只有一列时:count(*) > count(1)。 其余情况:count(1) > count(*)
万能的list和map
以前我们构造sql语句,相关参数的值我们直接塞进一个Object[]数组里面。
现在放在list里面,以后就知道作用很大。
	 List<Object> list = new ArrayList<>();	//放参数列表
	Object[] paras = list.toArray();
(3)UserService
	//查询所指定情形的用户数量
    //情形(1) 传参:null,0 代表:都不用,无限制所有用户数量
    //情形(2) 传参:“张”,0 代表:第一个参数,模糊查询/精确姓名查询用户数量
    //情形(3) 传参:null,3 代表:第二个参数,按照角色类型查询用户数量
    //情形(4) 传参:“张”,3 代表:两个一起用,张经理用户个数用户数量
    public int getUserCount(String queryUserName, int queryRoleId);
(4)UserServiceImpl
    @Override
    public int getUserCount(String queryUserName, int queryRoleId) {
        Connection connection = null;
        int count = 0;

        connection = BaseDataBase.getConnection();
        count = userDao.getUserCount(connection,queryUserName,queryRoleId);
        BaseDataBase.closeDataBaseResource(connection,null,null);

        return count;
    }
junit测试ok。
5.2、获取用户列表
(1)UserDao
//通过条件查询-userList
    public List<UserModel> getUserList(Connection connection, String userName,int roleId, int currentPageNo, int pagesize);
(2)UserDaoImpl
 @Override
    public List<UserModel> getUserList(Connection connection, String userName, int roleId, int currentPageNo, int pageSize) {

        PreparedStatement pstm = null;
        ResultSet rs = null;
        List<UserModel> userList = new ArrayList<UserModel>();
        if(connection != null) {
            StringBuffer sql = new StringBuffer();
            sql.append("select u.*,r.roleName as userRoleName from smbms_user u,smbms_role r where u.userRole = r.id");
            List<Object> list = new ArrayList<Object>();
            if (!StringUtils.isNullOrEmpty(userName)) {
                sql.append(" and u.userName like ?");
                list.add("%" + userName + "%");
            }
            if(roleId > 0) {
                sql.append(" and u.userRole = ?");
                list.add(roleId);
            }

            sql.append(" order by creationDate DESC limit ?,?");
            currentPageNo = (currentPageNo-1)*pageSize;
            list.add(currentPageNo);
            list.add(pageSize);
            Object[] params = list.toArray();

            try {
                rs = BaseDataBase.executeQuery(connection,pstm,rs,sql.toString(),params);
                while (rs.next()) {
                    UserModel _user = new UserModel();
                    _user.setId(rs.getInt("id"));
                    _user.setUserCode(rs.getString("userCode"));
                    _user.setUserName(rs.getString("userName"));
                    _user.setGender(rs.getInt("gender"));
                    _user.setBirthday(rs.getDate("birthday"));
                    _user.setPhone(rs.getString("phone"));
                    _user.setUserRole(rs.getInt("userRole"));
                    _user.setUserRoleName(rs.getString("userRoleName"));
                    userList.add(_user);
                }
                BaseDataBase.closeDataBaseResource(null,pstm,rs);
            } catch (SQLException e) {
                e.printStackTrace();
            }
        }
        return userList;
    }
(3)UserService
//根据条件查询用户列表
	public List<UserModel> getUserList(String queryUserName, int queryUserRole, int currentPageNo, int pageSize);
(4)UserServiceImpl
@Override
    public List<UserModel> getUserList(String queryUserName, int queryUserRole, int currentPageNo, int pageSize) {
        Connection connection = null;
        List<UserModel> userList = null;
        System.out.println("queryUserName ---- > " + queryUserName);
        System.out.println("queryUserRole ---- > " + queryUserRole);
        System.out.println("currentPageNo ---- > " + currentPageNo);
        System.out.println("pageSize ---- > " + pageSize);
        connection = BaseDataBase.getConnection();
        userList = userDao.getUserList(connection, queryUserName,queryUserRole,currentPageNo,pageSize);
        BaseDataBase.closeDataBaseResource(connection, null,null);
        return userList;
    }
5.3、获取角色列表
又是一遍MVC。不过需要注意的点是,获取角色操作放在role包下!
查询另一张表就用另一个DAO,这就是分类思想!
为了我们的职责统一,我们可以把
角色的操作
单独放在一个包中,和pojo类对应。
(1)RoleDao
//获取角色列表
    public List<RoleModel> getRoleList(Connection connection);
(2)RoleDaoImpl
@Override
    public List<RoleModel> getRoleList(Connection connection) {
        PreparedStatement pstm = null;
        ResultSet rs = null;
        List<RoleModel> roleList = new ArrayList<RoleModel>();
        if(connection != null) {
            String sql = "select * from smbms_role";
            Object[] params = {};
            try {
                rs = BaseDataBase.executeQuery(connection,pstm,rs,sql,params);
                while (rs.next()){
                    RoleModel role = new RoleModel();
                    role.setId(rs.getInt("id"));
                    role.setRoleCode(rs.getString("roleCode"));
                    role.setRoleName(rs.getString("roleName"));
                    roleList.add(role);
                }
                BaseDataBase.closeDataBaseResource(null,pstm,rs);
            } catch (SQLException e) {
                e.printStackTrace();
            }
        }
        return roleList;
    }
(3)RoleService
//角色列表查询
    public List<RoleModel> getRoleList();
(4)RoleServiceImpl
public List<RoleModel> getRoleList() {
        Connection connection = null;
        List<RoleModel> roleList = null;
        connection = BaseDataBase.getConnection();
        roleList = roleDao.getRoleList(connection);
        BaseDataBase.closeDataBaseResource(connection,null,null);
        return roleList;
    }
junit测试,ok。
5.4、用户管理的Servlet
- 获取用户前端的数据(查询)
- 判断请求是否需要执行,看参数的值判断
- 为了实现分页,需要计算出当前页面和总页面,页面大小…
- 用户列表展示
- 返回前端
UserDoServlet里
//用户管理操作。从前端head.jsp分析,用户管理跳转一个user.do?method=query
    private void query(HttpServletRequest req, HttpServletResponse resp) {
        //1.从前端获取数据
        String queryUserName = req.getParameter("queryname");
        String temp = req.getParameter("queryUserRole");
        String pageIndex = req.getParameter("pageIndex");   //都是从userlist.jsp的相关标签的name属性获得的
        int queryUserRole = 0;  //显示定义查询角色默认为0,防止未选择角色信息

        IUserService userService = new UserServiceImpl();   //servlet调service层
        List<UserModel> userList = null;    //最终结果要获得一个userlist。
        //起名为userList原因来自于前端userlist.jsp的<c:forEach var="user" items="${userList }" varStatus="status">

        //第一此请求肯定是走第一页,页面大小固定的。默认初始化参数。
        int pageSize = 5;   //一页显示几个。可以把它设置在配置文件里,读取后面方便修改
        int currentPageNo = 1;  //当前页码

        //2.参数有效值判断
        if(queryUserName == null){
            queryUserName = "";
        }
        if(temp != null && !temp.equals("")){
            queryUserRole = Integer.parseInt(temp); //解析前端字符串为int,知道是哪种角色id
        }

        if(pageIndex != null) {
            currentPageNo = Integer.parseInt(pageIndex);
        }

        //3.获取用户总数(分页	上一页:下一页的情况)
        //总数量(表)
        int totalCount	= userService.getUserCount(queryUserName,queryUserRole);

        //总页数支持
        PageSupport pageSupport = new PageSupport();
        pageSupport.setCurrentPageNo(currentPageNo);
        pageSupport.setPageSize(pageSize);
        pageSupport.setTotalCount(totalCount);

        int totalPageCount =pageSupport.getTotalPageCount();//总共有几页
        //控制首页和尾页
        //如果页面小于 1 就显示第一页的东西
        if(currentPageNo < 1) {
            currentPageNo = 1;
        }else if(currentPageNo > totalPageCount) {//如果页面大于了最后一页就显示最后一页
            currentPageNo =totalPageCount;
        }

        userList = userService.getUserList(queryUserName, queryUserRole, currentPageNo, pageSize);
        req.setAttribute("userList", userList);
        //不用放在session里,放在一次请求响应(request)的作用域即可。
        //因为每点一次就显示一个页面,没必要持久化保存在seesion中,一次请求对应一个即可,所以放在request作用域中。
        //这里可以看出setAttribute,userlist命名就是来自于前端,和前端保持一致,就是给前端塞数据。

        IRoleService roleService = new RoleServiceImpl();
        List<RoleModel> roleList = roleService.getRoleList();
        req.setAttribute("roleList", roleList);
        req.setAttribute("totalCount", totalCount);
        req.setAttribute("currentPageNo", currentPageNo);
        req.setAttribute("totalPageCount", totalPageCount);
        req.setAttribute("queryUserName", queryUserName);
        req.setAttribute("queryUserRole", queryUserRole);
        //根据前端发现,需要回显这些数据的值,返回给以便显示。

        //返回前端
        try {
            //req.getRequestDispatcher("/jsp/userlist.jsp").forward(req,resp);  错了,转发不到

            //这里是转发,而不是重定向。
            //从这深入理解转发,URL还没变还在这个页面,当前页面需要一些其他页面数据支持,用转发。
            req.getRequestDispatcher("/WEB-INF/jsp/userlist.jsp").forward(req,resp);
            //学到了,转发本来就是在后台的操作,URL不会变,因此可以直接访问WEB-INF路径,是安全的,且根本不用配置web.xml进行映射绑定。
            //从这再次深入理解转发和重定向。
            //转发其URL不会变,就是在后台,前端不可见。因此可以直接转发WEB-INF目录下的文件
            //重定向URL会发生变化,前端可见,所以重定向WEB-INF目录下的文件需要在web.xml添加相关映射以便安全访问。
        } catch (ServletException e) {
            e.printStackTrace();
        } catch (IOException e) {
            e.printStackTrace();
        }
    }
其中分页等逻辑,狂神视频就能理解,但是我在编写过程中遇到其他这些问题,在此记一下。
5.4.1、数据获取和数据回显
这部分都是要结合前端文件看的,变量命名是什么等之类的。
可以看到代码中从前端相关标签的name属性获取数据,
req.getParameter("queryname")
;
从前端拿来的数据,
还需要进行相关的有效值判断,不是拿来即用。
同时,看到最后把计算/操作的相关数据要返回给前端,
req.setAttribute("roleList", roleList)
。
注意的点是不要重名,否则会覆盖!
可以看到,这两步操作都不是放在session作用域中的,而是放在request作用域中的,session和request两者都是放键值对的池子,但是作用域不同,如何选择需要自己进行定夺。我们这个例子因为每点一次就显示一个页面,没必要持久化保存在seesion中,一次请求对应一个即可,所以放在request作用域中。
所以,从这里学习到。
深入理解前端${变量名},后台代码给他塞这个变量。把值都放在作用域里,然后前端jsp通过el表达式获取值。
5.4.2、转发访问WEB-INF目录问题
前面讲过了重定向访问WEB-INF目录的问题。
因为在这个例子,需要在当前页面拼接一个新页面,URL不会变,所以用转发。
一开始我写的是
req.getRequestDispatcher("/jsp/userlist.jsp").forward(req,resp);
,并且在web.xml声明并绑定了相关跳转映射。但是出错了,页面加载不出来。
进行了修改。
req.getRequestDispatcher("/WEB-INF/jsp/userlist.jsp").forward(req,resp);
转发本来就是在后台的操作,URL不会变,因此可以直接访问WEB-INF路径,是安全的,且根本不用配置web.xml进行映射绑定。
从这再次深入理解转发和重定向。
转发
:其URL不会变,就是在后台,前端不可见。因此可以直接转发WEB-INF目录下的文件
重定向
:URL会发生变化,前端可见,所以重定向WEB-INF目录下的文件需要在web.xml添加相关映射以便安全访问。
至此,subms教学视频就结束了,仅完成一部分功能,剩下的一部分功能还是MVC模式,如果需要锻炼可以参照文件继续进行练习。
底层数据库访问公共类存在的坑
记录一个编程时遇到的问题,就是狂神最开始编写的BaseDao(我命名的是BaseDataBase)。
有一次,为了排SQL语句的错误,我想在DAO输出下构建下的sql语句,发现preparestatment是null。然后经过一些仔细分析后,我理解了。
这里特别重要,说明我们除了DAO层之外的上层的preparestatment一直持有的是一个空对象,执行是正常执行了,可是,上层就不能及时做到真正的关闭资源了。
同时,IDEA也智能的告诉我们发现了错误(我这个人有强迫症,见不得一点黄色感叹号警告)。IDEA发现我们两个参数根本就没用,一直是null。

我分析了底部原因是形参与实参的知识,只可意会不可言传,能当面讲明白,写不出来,以后写个形参实参专题。改代码吧,最底层的公共类。
public class BaseDataBase {

    private static String driver;
    private static String url;
    private static String user;
    private static String password;

    static {
        Properties properties = new Properties();
        String configPath = "db.properties";
        InputStream is = BaseDataBase.class.getClassLoader().getResourceAsStream(configPath);
        try {
            properties.load(is);
            driver = properties.getProperty("driver");
            url = properties.getProperty("url");
            user = properties.getProperty("user");
            password = properties.getProperty("password");
        } catch (IOException e) {
            e.printStackTrace();
        }
    }

    public static Connection getConnection() {
        Connection connection = null;

        try {
            Class.forName(driver);
            connection = DriverManager.getConnection(url,user,password);
        } catch (ClassNotFoundException | SQLException e) {
            e.printStackTrace();
        }
        return connection;
    }

    public static PreparedStatement getPreparedStatement(String sql) {
        Connection connection = BaseDataBaseFix.getConnection();
        if(connection == null) {
            return null;
        }
        PreparedStatement result = null;
        try {
            result = connection.prepareStatement(sql);
        } catch (SQLException e) {
            e.printStackTrace();
        }
        return result;
    }

    public static ResultSet executeQuery(Connection connection, PreparedStatement preparedStatement,
                                         Object[] paras) throws SQLException {
        ResultSet resultSet;
        for (int i = 0; i < paras.length; i++) {
            preparedStatement.setObject(i + 1, paras[i]);
        }
        System.out.println("底层构建的QuerySQL语句为:\n" + preparedStatement.toString());
        resultSet = preparedStatement.executeQuery();
        return resultSet;
    }

    public static int executeUpdate(Connection connection,PreparedStatement preparedStatement,Object[] paras) throws SQLException {

        int result;
        for (int i = 0; i < paras.length; i++) {
            preparedStatement.setObject(i + 1, paras[i]);
        }
        System.out.println("底层构建的UpdateSQL语句为:\n" + preparedStatement.toString());
        result = preparedStatement.executeUpdate();
        return result;
    }

    public static boolean closeDataBaseResource(Connection connection, PreparedStatement preparedStatement, ResultSet resultSet) {
        boolean flag = true;

        try {
            if(resultSet != null && !resultSet.isClosed()) {
                resultSet.close();
                resultSet = null;
            }
        } catch (SQLException e) {
            e.printStackTrace();
            flag = false;
        }

        try {
            if(preparedStatement != null && !preparedStatement.isClosed()) {
                preparedStatement.close();
                preparedStatement = null;
            }
        } catch (SQLException e) {
            e.printStackTrace();
            flag = false;
        }

        try {
            if(connection != null && !connection.isClosed()) {
                connection.close();
                connection = null;
            }
        } catch (SQLException e) {
            e.printStackTrace();
            flag = false;
        }
        return flag;
    }
}
底层代码一改,要改的地方就多了,一个个改。改完测试就OK。
从这次问题学到两点。
-
底层代码尽量少且简单易懂,less is more,simple is safe。
-
不要忽略IDEA的提示信息,它在帮你规范编程。敬畏之心。
后记
1、排查错误
遇到WEB项目出错不要怕,试着从这几个方面考虑它。
(1)
清除浏览器近期cookie
。现在浏览器太过智能,已经有了的js文件不会再重新下载,所以导致新修改的js不能及时应用在项目中。
(2)
IDEA清除(clean)项目,然后重新发布下
。有可能相关的文件没及时更新在target目录下。
(3)
差错请一定认真检查Project Structure去看项目结构
,去看explore导出的包标注是否都清楚了,然后再看target包是否符合自己的预期。
比如,我遇到这样的问题。所有设置都正确,但是项目在发布后,没有将resources目录下的配置到target,导致项目启动时没有读取到正确的配置参数而启动异常。
问题根源:问题出现在项目的pom.xml文件配置错误。写的是
<packaging>pom</packaging>
,改为
<packaging>war</packaging>
即可解决。之所以错误配置了pom是因为我之前为这个项目引入了多个测试的子模块(Module),也就是这个pom.xml是多个子模块的共同父模块的配置,所以参数值是pom。后面改项目结构取消了多子模块的形式,这个原本的父模块变成了实际的项目本体,所以最终需要输出war,即
<packaging>
的值需要时war。
<!--<packaging>pom</packaging>   以前引入多项目自动更改的-->
  <packaging>war</packaging><!--现在单个WEB项目肯定要改回来-->
从这学习到了配置文件pom.xml,以及项目的web.xml等对项目来说多么重要啊!IDEA有时候你操作一次,后台不知道有多少你没察觉的更改,是更智能了,但有时会带来错误。所以要更注重底层配置文件的格式。
2、写添加用户有感
如果不仅仅是跳转一个页面那么简单的事的话或者跳转页面前需要准备一些参数(需要进行准备工作),就走servlet(后面学习到可走ajax),走servlet就可以使用req-response进行前后端交互,就可以向req塞东西(ajax则是ajax参数)。
整体流程是:在servelt里面
			1.接受前端传递的参数
			2.对参数值正确性判断
			3.做一些操作
			4.准备回显数据放在req中
			5.转发/跳转页面。
当前页面的一些后台的小检查就交给ajax,adduser的用户名是否存在验证用ajax。
ajax传输的参数由
request.getParameter("userCode");
得到。
经过一些操作后,ajax需要的值通过json传递,因此需要。
Map<String, String> resultMap = new HashMap<>();    //放json结果的map

        //todo 进行逻辑判断等操作,往resultMap里面添加需要返回的数据

        try {
            resp.setContentType("application/json");        //设置响应类型为json
            PrintWriter writer = resp.getWriter();
            writer.write(JSONArray.toJSONString(resultMap));    //借助工具转换
            writer.flush();
            writer.close();
        } catch (IOException e) {
            e.printStackTrace();
        }
我们单抽出来一个ajax进行分析。
userCode.bind("blur",function(){	//当前控件失去焦点
		//ajax后台验证--userCode是否已存在

		$.ajax({
			type:"GET",//请求类型
			url:path+"/jsp/user.do",//请求的url
			data:{method:"ucexist",userCode:userCode.val()},//请求参数
			//形如user.do?method=ucexist&userCode=**
			dataType:"json",//ajax接口(请求url)返回的数据类型
			success:function(data){//data:返回数据(json对象)
				if(data.userCode == "exist"){//账号已存在,错误提示
					validateTip(userCode.next(),{"color":"red"},imgNo+ " 该用户账号已存在",false);
				}else{//账号可用,正确提示
					validateTip(userCode.next(),{"color":"green"},imgYes+" 该账号可以使用",true);
				}
			},
			error:function(data){//当访问时候,404,500 等非200的错误状态码
				validateTip(userCode.next(),{"color":"red"},imgNo+" 您访问的页面不存在",false);
			}
		});


	}).bind("focus",function(){
		//显示友情提示
		validateTip(userCode.next(),{"color":"#666666"},"* 用户编码是您登录系统的账号",false);
	}).focus();
邮箱的正则表达式验证
email.bind("focus",function () {		//获得焦点时后面输出要求信息
		validateTip(email.next(),{"color":"#666666"},"* 电子邮箱必须含有@",false);
	}).bind("blur", function () {			//输入完,当失去焦点时判断输入的信息
		if(email.val() != null
			&& /^[A-Za-z0-9\u4e00-\u9fa5]+@[a-zA-Z0-9_-]+(\.[a-zA-Z0-9_-]+)+$/.test(email.val())) {
			validateTip(email.next(),{"color":"green"},imgYes,true);
		} else {
			validateTip(email.next(),{"color":"red"},imgNo+"邮箱输入的不符合规范,请重新输入",false);
		}
	});
然后做到最后,对照狂神源码的做法,发现adduserPrepare(准备工作,往req塞值)没必要做,先加载出来页面,然后ajax再去更新就行了,没必要再多走一个方法,记住ajax是局部刷新。
终于理解ajax作用之一了,先加载一个页面,这个页面还有其他数据需要支持,可以用ajax处理,不需要像我刚才想的想法来一个做参数准备的servlet,往req里塞,然后转发。现在有了ajax,完全可以先加载出主要页面,其中主要页面的其他数据,可以由ajax代替获得。
原来的思想是必须有数据支撑整个页面才能显示出来(就需要先写个准备工作的servlet),而现在有了ajax,可以先把页面主框架搭建出来,然后其他的数据支撑可以去写js代码ajax传递,然后放在页面上。例子
<select>
useradd.jsp下的
<select name="userRole" id="userRole">
    <%--roleList从哪来?1.req塞 2.ajax塞--%>
    <c:if test="${roleList != null}">
        <option value="0">--请选择--</option>
        <c:forEach var="role" items="${roleList}">
            <option <c:if test="${role.id == userRole}">selected="selected"</c:if>
                    value="${role.id}">${role.roleName}</option>
        </c:forEach>
    </c:if>
</select>
3、写注册用户有感
先写页面相关信息,register.jsp。
<%@ page contentType="text/html;charset=UTF-8" language="java"
         pageEncoding="UTF-8" %>
<!DOCTYPE html>
<html lang="en">
<head>
    <meta charset="UTF-8">
    <title>注册页面</title>
    <link type="text/css" rel="stylesheet" href="${pageContext.request.contextPath }/css/style.css" />
    <link type="text/css" rel="stylesheet" href="${pageContext.request.contextPath }/css/public.css" />
</head>
<body>
<input type="hidden" id="path" name="path" value="${pageContext.request.contextPath }"/>
<%--因为发现它后面引入的js需要path这个变量,所以在这里定义--%>
<div class="right">
    <div class="location">
        <strong>你现在所在的位置是:</strong>
        <span>用户注册页面</span>
    </div>
    <div class="providerAdd">
        <form id="userForm" name="userForm" method="post" action="${pageContext.request.contextPath }/noneUser.do">
            <input type="hidden" name="method" value="addUser">
            <%--当表单点击提交时,会走${pageContext.request.contextPath }/noneUser.do,去web.xml找所映射的servlet,提交时的参数为method = addUser--%>
            <div>
                <label for="userCode">用户编码:</label>
                <input type="text" name="userCode" id="userCode" value="">
                <!-- 改变value的值可以放置提示信息 -->
                <font color="red"></font>
            </div>
            <%--用户编码这里因为要涉及不重复,所以要去数据库去进行查重,但这里只是搭建一个框架,只代表这个控件把这个坑占了,设置好id值,方便找到得到位置--%>
            <%--走个失去焦点的ajax异步请求,同时提示信息要随着变,所以去js添加代码--%>
            <div>
                <label for="userName">用户名称:</label>
                <input type="text" name="userName" id="userName" value="">
                <font color="red"></font>
            </div>
            <%--前端只是搭个框架,相关操作放在js进行,例如该控件获得焦点做什么,失去焦点做什么,要用什么正则表达式进行正确性判断--%>
            <div>
                <label for="userPassword">用户密码:</label>
                <input type="password" name="userPassword" id="userPassword" value="">
                <font color="red"></font>
            </div>
            <div>
                <label for="ruserPassword">确认密码:</label>
                <input type="password" name="ruserPassword" id="ruserPassword" value="">
                <font color="red"></font>
            </div>
            <div>
                <label >用户性别:</label>
                <select name="gender" id="gender">
                    <option value="1" selected="selected">男</option>
                    <option value="2">女</option>
                <%--前端显示为男女,而后台实际的数据为1,2,这就是数据库为什么1代表男,2代表女的原因了--%>
                </select>
            </div>
            <div>
                <label for="birthday">出生日期:</label>
                <input type="text" Class="Wdate" id="birthday" name="birthday"
                       readonly="readonly" οnclick="WdatePicker();">
                <%--走个日期工具包WdatePicker.js--%>
                <font color="red"></font>
            </div>
            <div>
                <label for="email">电子邮箱:</label>
                <input type="text" name="email" id="email" value="">
                <font color="red"></font>
            <%--写好id(方便js#获得并定位),name(方便后台getParameter获得真实值(value))--%>
            </div>

            <div>
                <label >用户角色:</label>
                <!-- 列出所有的角色分类,需要从数据库查有哪些用户-->
                <select name="userRole" id="userRole">
                    <%--roleList从哪来?1.req塞 2.ajax塞--%>
                    <%--TODOcomplete 只能填了,不能查当前,因为还没登录,没有权限--%>
<%--                        可以查,反正都是查数据库,ajax完成html代码嵌入--%>
<%--                    <c:if test="${roleList != null}">--%>
<%--                        <option value="0">--请选择--</option>--%>
<%--                        <c:forEach var="role" items="${roleList}">--%>
<%--                            <option <c:if test="${role.id == userRole}">selected="selected"</c:if>--%>
<%--                                    value="${role.id}">${role.roleName}</option>--%>
<%--                        </c:forEach>--%>
<%--                    </c:if>--%>
                </select>
                <font color="red"></font>
            <%--重点学习,前期方向搞错了,前期思想很乱,总结了三种解决方式。
            1.需要上面的c:if语句,就要明白roleList怎么来,从req(池子)来,那就需要先写个prepareWork,查询数据库往req塞roleList
            然后,再由这个prepareWork转发(include形式)给register.jsp页面,这样就可以显示了。
            2.需要上面的c:if语句,上述1解决方法太麻烦了,就是个局部刷新,所以roleList由ajax传过来。
            3.不需要上面的c:if语句,这样晦涩难懂的jstl谁记啊,jsp就是jsp,由ajax在相应的位置内嵌html代码即可!
            即jsp定好定好select主体框架,ajax内嵌option的html代码。

            总结:(1)jsp就是jsp是前端代码,jsp只需要描述好所有控件的定位信息即可,可以但不要含任何晦涩难懂jstl逻辑代码,
            其逻辑代码由jsp引入js文件去做。
            (2)已经到当前页面了,但发现还有些数据没有加载,异步请求ajax,在js中$(function(){ $.ajax({} } 直接进行自运行的ajax
            --%>
            </div>
            <div class="providerAddBtn">
                <input type="button" name="add" id="add" value="保存" >
                <input type="button" id="back" name="back" value="返回" >
            </div>
        </form>
    </div>
</div>

<%--忘记导jquery的包了,导入所有依赖的js文件。  从这发现jsp的弊端,就是在拼凑代码!!!--%>
<script type="text/javascript" src="${pageContext.request.contextPath }/js/jquery-1.8.3.min.js"></script>
<script type="text/javascript" src="${pageContext.request.contextPath }/js/userRegister.js"></script>
<script type="text/javascript" src="${pageContext.request.contextPath }/js/common.js"></script>
<script type="text/javascript" src="${pageContext.request.contextPath }/calendar/WdatePicker.js"></script>
</body>
</html>
userRegister.js。用户注册所需要的js文件。
var userCode = null;
var userName = null;
var userPassword = null;
var ruserPassword = null;
var phone = null;
var birthday = null;
var userRole = null;
var addBtn = null;
var backBtn = null;
var email = null;


$(function(){
    userCode = $("#userCode");
    userName = $("#userName");
    userPassword = $("#userPassword");
    ruserPassword = $("#ruserPassword");
    phone = $("#phone");
    birthday = $("#birthday");
    userRole = $("#userRole");
    addBtn = $("#add");
    backBtn = $("#back");
    email = $("#email");
    //初始化的时候,要把所有的提示信息变为:* 以提示必填项,更灵活,不要写在页面上
    userCode.next().html("*");
    userName.next().html("*");
    userPassword.next().html("*");
    ruserPassword.next().html("*");
    phone.next().html("*");
    birthday.next().html("*");
    userRole.next().html("*");

    $.ajax({    没有绑定任何控件的任何动作,所以是自运行,当js文件加载时,只运行一次
        type:"GET",//请求类型
        // url:path+"/jsp/user.do",//请求的url

        url:path+"/noneUser.do",//请求的url
        data:{method:"getrolelist"},//请求参数
        // 提交的位置 类似于 action="${pageContext.request.contextPath }/login.do?method="getrolelist""
        dataType:"json",//ajax接口(请求url)返回的数据类型
        success:function(data){//data:返回数据(json对象)
            if(data != null){
                userRole.html("");
                var options = "<option value=\"0\">请选择</option>";
                for(var i = 0; i < data.length; i++){
                    //alert(data[i].id);
                    //alert(data[i].roleName);
                    options += "<option value=\""+data[i].id+"\">"+data[i].roleName+"</option>";
                }
                userRole.html(options);
            }
        },
        error:function(data){//当访问时候,404,500 等非200的错误状态码
            validateTip(userRole.next(),{"color":"red"},imgNo+" 获取用户角色列表error",false);
        }
    });


    /*
     * 验证
     * 失焦\获焦
     * jquery的方法传递
     */
    userCode.bind("blur",function(){
        //ajax后台验证--userCode是否已存在
        //user.do?method=ucexist&userCode=xx
        $.ajax({
            type:"GET",//请求类型
            url:path+"/noneUser.do",//请求的url
            data:{method:"ucexist",userCode:userCode.val()},//请求参数
            dataType:"json",//ajax接口(请求url)返回的数据类型
            success:function(data){//data:返回数据(json对象)
                // console.log("success要删除的:" + this.url);
                if(data.userCode == "exist"){//账号已存在,错误提示
                    validateTip(userCode.next(),{"color":"red"},imgNo+ " 该用户账号已存在",false);
                }else{//账号可用,正确提示
                    validateTip(userCode.next(),{"color":"green"},imgYes+" 该账号可以使用",true);
                }
            },
            error:function(data){//当访问时候,404,500 等非200的错误状态码
                console.log("要删除的:" + this.url);
                validateTip(userCode.next(),{"color":"red"},imgNo+" 您访问的页面不存在",false);
            }
        });


    }).bind("focus",function(){
        //显示友情提示
        validateTip(userCode.next(),{"color":"#666666"},"* 用户编码是您登录系统的账号",false);
    }).focus();

    userName.bind("focus",function(){
        validateTip(userName.next(),{"color":"#666666"},"* 用户名长度必须是大于6小于12的字符",false);
    }).bind("blur",function(){
        if(userName.val() != null && userName.val().length > 6
            && userName.val().length < 12
            && /^[a-zA-Z][a-zA-Z0-9]*$/.test(userName.val())){
            validateTip(userName.next(),{"color":"green"},imgYes,true);
        }else{
            validateTip(userName.next(),{"color":"red"},imgNo+" 用户名输入的不符合规范,请重新输入",false);
        }

    });

    email.bind("focus",function () {		//获得焦点时后面输出要求信息
        validateTip(email.next(),{"color":"#666666"},"* 电子邮箱必须含有@",false);
    }).bind("blur", function () {			//输入完,当失去焦点时判断输入的信息
        if(email.val() != null
            && /^[A-Za-z0-9\u4e00-\u9fa5]+@[a-zA-Z0-9_-]+(\.[a-zA-Z0-9_-]+)+$/.test(email.val())) {
            validateTip(email.next(),{"color":"green"},imgYes,true);
        } else {
            validateTip(email.next(),{"color":"red"},imgNo+"邮箱输入的不符合规范,请重新输入",false);
        }
    });

    userPassword.bind("focus",function(){
        validateTip(userPassword.next(),{"color":"#666666"},"* 密码长度必须是大于6小于20",false);
    }).bind("blur",function(){
        if(userPassword.val() != null && userPassword.val().length > 6
            && userPassword.val().length < 20 ){
            validateTip(userPassword.next(),{"color":"green"},imgYes,true);
        }else{
            validateTip(userPassword.next(),{"color":"red"},imgNo + " 密码输入不符合规范,请重新输入",false);
        }
    });

    ruserPassword.bind("focus",function(){
        validateTip(ruserPassword.next(),{"color":"#666666"},"* 请输入与上面一只的密码",false);
    }).bind("blur",function(){
        if(ruserPassword.val() != null && ruserPassword.val().length > 6
            && ruserPassword.val().length < 20 && userPassword.val() == ruserPassword.val()){
            validateTip(ruserPassword.next(),{"color":"green"},imgYes,true);
        }else{
            validateTip(ruserPassword.next(),{"color":"red"},imgNo + " 两次密码输入不一致,请重新输入",false);
        }
    });


    birthday.bind("focus",function(){
        validateTip(birthday.next(),{"color":"#666666"},"* 点击输入框,选择日期",false);
    }).bind("blur",function(){
        if(birthday.val() != null && birthday.val() != ""){
            validateTip(birthday.next(),{"color":"green"},imgYes,true);
        }else{
            validateTip(birthday.next(),{"color":"red"},imgNo + " 选择的日期不正确,请重新输入",false);
        }
    });

    phone.bind("focus",function(){
        validateTip(phone.next(),{"color":"#666666"},"* 请输入手机号",false);
    }).bind("blur",function(){
        var patrn=/^(13[0-9]|15[0-9]|18[0-9])\d{8}$/;
        if(phone.val().match(patrn)){
            validateTip(phone.next(),{"color":"green"},imgYes,true);
        }else{
            validateTip(phone.next(),{"color":"red"},imgNo + " 您输入的手机号格式不正确",false);
        }
    });

    userRole.bind("focus",function(){
        validateTip(userRole.next(),{"color":"#666666"},"* 请选择用户角色",false);
    }).bind("blur",function(){
        if(userRole.val() != null && userRole.val() > 0){
            validateTip(userRole.next(),{"color":"green"},imgYes,true);
        }else{
            validateTip(userRole.next(),{"color":"red"},imgNo + " 请重新选择用户角色",false);
        }
    });

    addBtn.bind("click",function(){
        // console.log("点击了添加按钮+++++++++++++++++++++++++++++++++");
        if(userCode.attr("validateStatus") != "true"){
            console.log("1");
            userCode.blur();
        }else if(userName.attr("validateStatus") != "true"){
            console.log("2");
            userName.blur();
        }else if(userPassword.attr("validateStatus") != "true"){
            console.log("3");
            userPassword.blur();
        }else if(ruserPassword.attr("validateStatus") != "true"){
            console.log("4");
            ruserPassword.blur();
        }else if(birthday.attr("validateStatus") != "true"){
            console.log("5");
            birthday.blur();
        }else{
            // console.log("为什么不执行这里啊"); //找到了原因,copy的代码没有phone等数据,删除else if即可。
            if(confirm("是否确认提交数据")){
                $("#userForm").submit();
            //点击提交按钮。走jsp的action路径
            }
        }
    });

    backBtn.on("click",function(){
        if(referer != undefined
            && null != referer
            && "" != referer
            && "null" != referer
            && referer.length > 4){
            window.location.href = referer;
        }else{
            history.back(-1);
        }
    });
});
提交请求的位置对应的servlet后台代码。从这发现了和前面用户添加做了相同的事情,代码重复了,但没办法,现在没有登录不能访问到相关安全目录下的文件,所以只能重新写的这个NoneLoginUserDo的servlet了。说明前面需求分析的时候,或者说刚开始分析功能时有点考虑不周,如果现在让全部删了,重新改的话应该就知道怎么写了。
public class NoneLoginUserDo extends HttpServlet {

    @Override
    protected void doGet(HttpServletRequest req, HttpServletResponse resp) throws ServletException, IOException {
        String method = req.getParameter("method");
        if(StringUtils.isNullOrEmpty(method)) {
            return;
        }
        if(method.equals("addUser")) {
            addUser(req,resp);
        } else if(method.equals("ucexist")) {
            ucexist(req,resp);
        } else if(method.equals("getrolelist")) {
            getrolelist(req,resp);
        }
    }


    @Override
    protected void doPost(HttpServletRequest req, HttpServletResponse resp) throws ServletException, IOException {
        doGet(req, resp);
    }

    private void addUser(HttpServletRequest req, HttpServletResponse resp) {
        System.out.println("没有权限的开始addUser()================");
        String userCode = req.getParameter("userCode");
        String userName = req.getParameter("userName");
        String userPassword = req.getParameter("userPassword");
        String gender = req.getParameter("gender");
        String birthday = req.getParameter("birthday");
        String email = req.getParameter("email");
        String userRole = req.getParameter("userRole");

        UserModel user = new UserModel();
        user.setUserCode(userCode);
        user.setUserName(userName);
        user.setUserPassword(userPassword);
        user.setGender(Integer.parseInt(gender));
        user.setEmail(email);
        user.setUserRole(Integer.parseInt(userRole));
        try {
            user.setBirthday(new SimpleDateFormat("yyyy-MM-dd").parse(birthday));
        } catch (ParseException e) {
            e.printStackTrace();
        }

        IUserService userService = new UserServiceImpl();
        try {
            boolean flag = userService.addUser(user);
            if(flag) {
                resp.sendRedirect(req.getContextPath()+"/login.jsp");
            } else{
                req.getRequestDispatcher("/register.jsp").forward(req, resp);
            }
        } catch (Exception e) {
            e.printStackTrace();
        }
    }

    private void ucexist(HttpServletRequest req, HttpServletResponse resp) {
        String userCode = req.getParameter("userCode");

        Map<String, String> resultMap = new HashMap<>();    //放json结果的map

        if(StringUtils.isNullOrEmpty(userCode)) {   //空串是不允许的
            resultMap.put("userCode", "exist");
        } else {
            IUserService userService = new UserServiceImpl();
            try {
                UserModel user = userService.login(userCode, "");
                if (user != null) {
                    resultMap.put("userCode","exist");
                } else{
                    resultMap.put("userCode", "notexist");
                }
            } catch (Exception e) {
                e.printStackTrace();
            }
        }

        try {
            resp.setContentType("application/json");        //设置响应类型为json
            PrintWriter writer = resp.getWriter();
            writer.write(JSONArray.toJSONString(resultMap));    //借助工具转换
            writer.flush();
            writer.close();
        } catch (IOException e) {
            e.printStackTrace();
        }
    }


    private void getrolelist(HttpServletRequest req, HttpServletResponse resp) {

        List<RoleModel> roleList = null;
        IRoleService roleService = new RoleServiceImpl();
        try {
            roleList = roleService.getRoleList();
            resp.setContentType("application/json");
            PrintWriter outPrintWriter = resp.getWriter();
            outPrintWriter.write(JSONArray.toJSONString(roleList));
            outPrintWriter.flush();
            outPrintWriter.close();
        } catch (Exception e) {
            e.printStackTrace();
        }
    }
}
写完一个servlet,有时候是写完前端代码知道要给后端发请求,规定好相关路径,就可以填写web.xml里面的映射关系了,
web.xml就是连接后端和前端的映射,十分重要,其中url映射哪一项万分重要。
	<servlet>
        <servlet-name>noneUserDoServlet</servlet-name>
        <servlet-class>com.zmj.servlet.user.NoneLoginUserDo</servlet-class>
    </servlet>
    <servlet-mapping>
        <servlet-name>noneUserDoServlet</servlet-name>
        <url-pattern>/noneUser.do</url-pattern>
    </servlet-mapping>
至此,用户注册和添加就做完了。从中学习到很多点,总结如下。
-
JSP的弊端:所谓的JSP就是在拼凑代码!JSTL(JSP的语法)就是封装了一些Java操作。而我们心里要清楚,jsp就是jsp,是前端代码(可以看成和HTML功能一模一样),jsp只需要描述好所有控件的定位信息(搭好页面框架)即可,
可以但尽量不要
含任何晦涩难懂jstl逻辑代码,其逻辑代码由jsp引入js文件去做。 -
页面局部刷新就走Ajax,Ajax为相应位置内嵌HTML即可实现
。 -
前端控件属性写好id(方便js#获得并定位),name(方便后台getParameter获得真实值(value))
4、写删除用户有感
userList.jsp中找到
<span><a class="deleteUser" href="javascript:;" userid=${user.id } username=${user.userName }><img src="${pageContext.request.contextPath }/images/schu.png" alt="删除" title="删除"/></a></span>


<script type="text/javascript" src="${pageContext.request.contextPath }/js/userlist.js"></script>	//最下面引入了相关js
我很不解
href="javascript:;"
是什什么意思呢?和下面引入相关的js没有任何联系呀?乌龟的屁股吗?抱着好奇心,我去搜索了。得到答案。
首先,
<a>
标签中必须提供 href 属性。
但是这个就出现了一个问题,如果我不想让他跳转,那么这个时候href应该怎么赋值。有三种方法:
(1)
href=‘javascript:;’
代表的是发生动作时执行一段javascript代码,但是这个代码是空的,所以什么也不执行
(2)
href = ‘’:
代表的是什么也不执行,但是用这种,动作发生之后,会刷新页面。
(3)
href=‘#’:
代表的同样是什么也不执行,但是用这种,动作发生之后,会自动跳转到页面顶端。
然后又是servlet mvc操作(快写吐了,但也真正理解了)。
5、写显示用户有感
遇到的问题在构造sql语句时。
此时需要联表查询(不用外键),因为用户roleName在另一张表上,所以要查两张表。
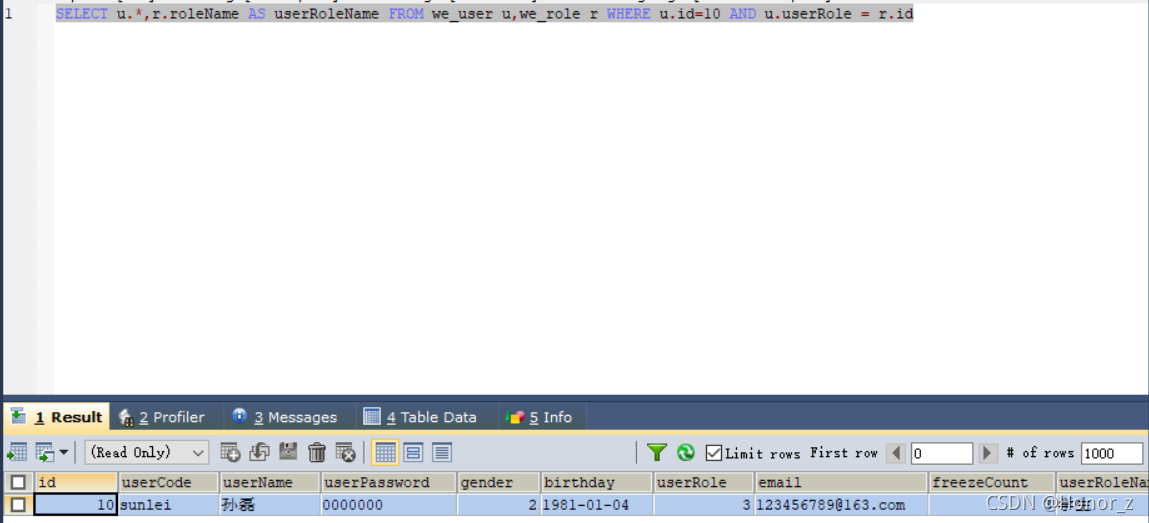
String sql = "select u.*,r.roleName as userRoleName from we_user u,we_role r where u.id=? and u.userRole = r.id";

//String sql = "select u.*,r.roleName as userRoleName from we_user u,we_role r where u.id=? "; 没有roleId会怎样
联表查询,没有相关条件(
笛卡尔积
)
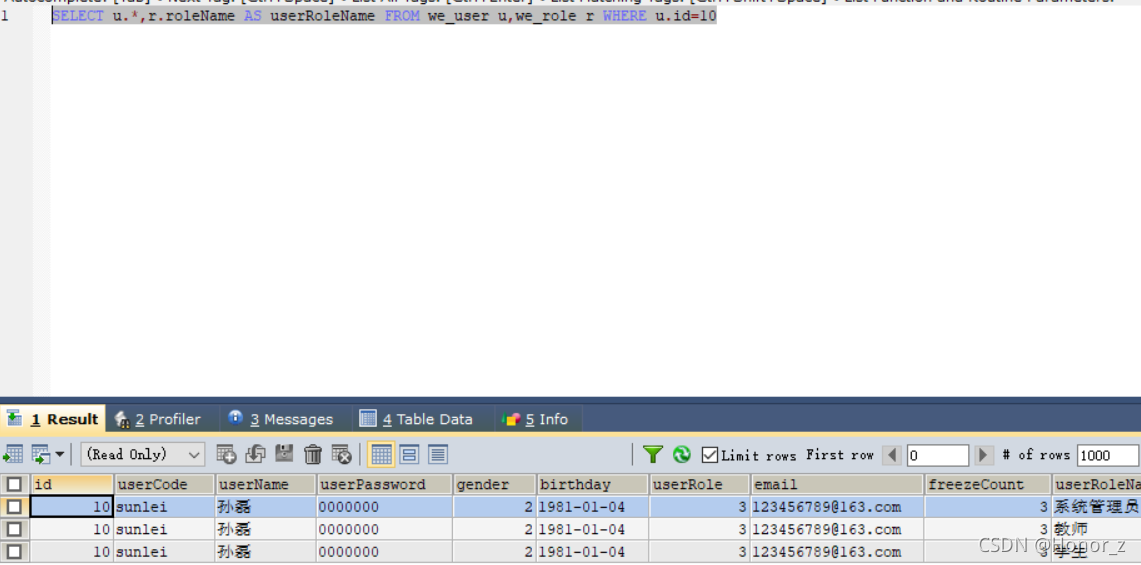
有相关条件,精准匹配到一个
之前说的数据库摈弃外键(
做到心中有外键,表上不设外键
),在pojo类中体现。
public class UserModel {

    private int id; //id
    private String userCode; //用户编码
    private String userName; //用户名称
    private String userPassword; //用户密码
    private int gender;  //性别
    private Date birthday;  //出生日期
    private int userRole;
    private String email;
    private int freezeCount;

    private String userRoleName;

    public String getUserRoleName() {
        return userRoleName;
    }

    public void setUserRoleName(String userRoleName) {  //这个就是设置逻辑上外键对应的真正值
        this.userRoleName = userRoleName;
    }
}
Javaweb映像图

希望这个图可以帮到大家认识javaweb的主体框架,还有很多细节没有画。
css背景色应该为五彩斑斓的(它最花哨),我不会画= =。