PaddleDetection在windows下C# 调用
文章目录
前言
本文记录paddledetection如何使用Paddlepaddle inference中C++预测库,并封装编译成成dl,使用C#调用。主要内容包含 C++预测的编译(生成.sln解决方案); 将C++预测代码封装成一个dll; 使用C#调用生成好的dll;
一、环境配置
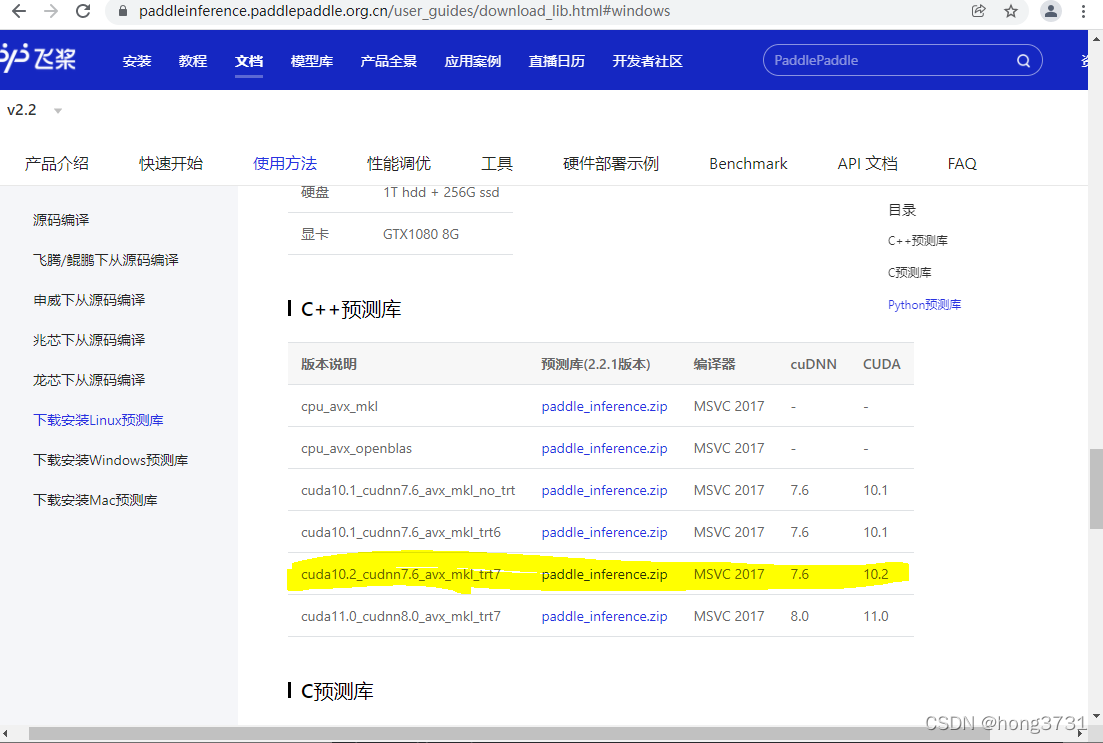
1.paddleinference库
paddleinference 库windows版本
记录下cuda,cudnn,trt版本

2.Opencv
3.Cuda 10.2
4.CUDNN 7.6
5.TensorRT 7.0
二、C++编译Paddledetection成exe文件
参考Paddledetection的官方指南,生成exe
Paddledetection c++ deploy

三、编译成dll文件
1.修改代码
修改main.cc的代码
#include <iostream>
#include <string>
#include <vector>
#include <numeric>
#include <sys/types.h>
#include <sys/stat.h>
#include <math.h>
#include <algorithm>


#ifdef _WIN32
#include <direct.h>
#include <io.h>
#elif LINUX
#include <stdarg.h>
#include <sys/stat.h>
#endif

#include "include/object_detector.h"
#include <gflags/gflags.h>

using namespace cv;
using namespace PaddleDetection;
using namespace std;


std::string FLAGS_model_dir = "ppyolo_mbv3_large_coco";
std::string FLAGS_device = "GPU";
bool FLAGS_use_mkldnn = false;
int FLAGS_cpu_threads = 1;
int FLAGS_batch_size = 1;
std::string FLAGS_run_mode = "fluid";
int FLAGS_gpu_id = 0;
int FLAGS_trt_min_shape = 1;
int FLAGS_trt_max_shape = 1280;
int FLAGS_trt_opt_shape = 640;
bool FLAGS_trt_calib_mode = false;
std::string FLAGS_image_file = "";
std::string FLAGS_output_dir = "";
double FLAGS_threshold = 0.8;
bool FLAGS_run_benchmark = false;

ObjectDetector* det;


extern "C" __declspec(dllexport) int LoadModel(char* model_dir);
__declspec(dllexport) int LoadModel(char* model_dir)
{
    // Load model and create a object detector
    det = new PaddleDetection::ObjectDetector(std::string(model_dir), FLAGS_device, FLAGS_use_mkldnn,
        FLAGS_cpu_threads, FLAGS_run_mode, FLAGS_batch_size, FLAGS_gpu_id,
        FLAGS_trt_min_shape, FLAGS_trt_max_shape, FLAGS_trt_opt_shape,
        FLAGS_trt_calib_mode);
    return 0;

}


extern "C" __declspec(dllexport) Mat * Predict_mat(char* input, int width, int height, double threshold, char* ret_string);
__declspec(dllexport) Mat * Predict_mat(char* input, int width, int height, double threshold, char* ret_string)
{
    Mat im(height, width, CV_8UC3, input);

    vector<cv::Mat> batch_imgs;
   vector<PaddleDetection::ObjectResult> result;
    vector<int> bbox_num;
    std::vector<double> det_times;
    bool is_rbox = false;

    batch_imgs.insert(batch_imgs.end(), im);
    det->Predict(batch_imgs, threshold, 0, 1, &result, &bbox_num, &det_times);
    auto labels = det->GetLabelList();
    auto colormap = vector<int>{ 255,255,0, 0,255,0, 0,255,255, 0,0,255 };
    std::string rest;
    std::vector<PaddleDetection::ObjectResult> im_result;
    for (int j = 0; j < bbox_num[0]; j++) {
        PaddleDetection::ObjectResult item = result[0 + j];
        if (item.confidence < threshold || item.class_id == -1) {
            continue;
        }
        im_result.push_back(item);
        char s[300];
        sprintf(s, "class=%d||confidence=%.4f||rect=[%d %d %d %d]\n",
            item.class_id,
            item.confidence,
            item.rect[0],
            item.rect[1],
            item.rect[2],
            item.rect[3]);
        strcat(ret_string, s);

    }

    printf(ret_string);
    return new cv::Mat(PaddleDetection::VisualizeResult(
        im, im_result, labels, colormap, is_rbox));

}
2.修改项目属性


3.生成的文件

四、C#中调用dll
1.C# NUGet 安装opencvsharp4

2.C# 调用dll
[DllImport("main.dll", EntryPoint = "LoadModel", SetLastError = true, CharSet = CharSet.Ansi)]
static extern int LoadModel(String modesdir);
[DllImport("main.dll", EntryPoint = "Predict_mat", SetLastError = true, CharSet = CharSet.Ansi)]
static extern IntPtr Predict_mat(IntPtr input, int height, int width, Double threshold, [MarshalAs(UnmanagedType.LPStr)] StringBuilder ppcResult);
3.加载模型
private void Form1_Load(object sender, EventArgs e)
{
      int ss = LoadModel("ppyolov2_r50vd_dcn_365e_coco");
}
4.推测并返回结果
private void button1_Click(object sender, EventArgs e)
        {
            OpenFileDialog ofd = new OpenFileDialog();
            ofd.Title = "请选择图片";
            ofd.Filter = "(*.jpg)|*.jpg|(*.*)|*.*";
            if (ofd.ShowDialog() == DialogResult.OK)
            {
                string[] strNames = ofd.FileNames;
                for (int i = 0; i < strNames.Length; i++)
                {
                    string image_path = strNames[i];
                    unsafe
                    {
                        Mat input_img = Cv2.ImRead(image_path);
                        StringBuilder rec = new StringBuilder(1024);
                        DateTime T_start = DateTime.Now;
                        IntPtr seg_img = Predict_mat(input_img.Data, input_img.Cols, input_img.Rows, 0.5d, rec);
                        string ss = rec.ToString();
                        this.label2.Text = ss;
                        Mat img = new Mat(seg_img);
                        Bitmap seg_show = OpenCvSharp.Extensions.BitmapConverter.ToBitmap(img);
                        this.pictureBox1.Image = seg_show;
                        DateTime T_end = DateTime.Now;
                        TimeSpan T_esp = T_end - T_start;
                        this.label1.Text = T_esp.TotalMilliseconds.ToString();
                    }
                }
             }
            GC.Collect();
        }
五、最终效果图

六、总结
本文只是记录生成的过程,及相关需要调用的库。
版权声明:本文为hong3731原创文章,遵循 CC 4.0 BY-SA 版权协议,转载请附上原文出处链接和本声明。