目录
一、pytorch能做什么?
这里本来要比较在Cpu和cuda上跑代码的区别,但是我们没钱没显卡,带不动cuda
import torch
import time

import torchvision
print(torchvision.__version__)
print(torch.__version__)
#1.8.1+cpu

a = torch.randn(10000, 1000)
#1万行,1千列的矩阵
b = torch.randn(1000, 2000)
#1千行2千列的矩阵
#print(torch.cuda.is_available())
t0 = time.time()

c = torch.matmul(a, b)
#矩阵 a 和 b进行运算

t1 = time.time()
print(t1 - t0)
#0.18988704681396484
2、自动求导
#自动求导功能
import torch
from torch import autograd

x = torch.tensor(1.)
a = torch.tensor(1., requires_grad=True)
b = torch.tensor(2., requires_grad=True)
c = torch.tensor(3., requires_grad=True)

y = a**2 * x + b * x + c
#函数为y
print("before:", a.grad, b.grad, c.grad)
#运行之前 y对a,b,c的偏导
grads = autograd.grad(y, [a, b, c])
#求y对a,b,c的偏导
print("after:", grads[0], grads[1], grads[2])
'''
before: None None None
求导之前是没有值得
after: tensor(2.) tensor(1.) tensor(1.)
y对a,b,c求偏导之后的值分别为2,1,1
'''
3、常用网络层
二、线性回归、逻辑回归和分类的区别
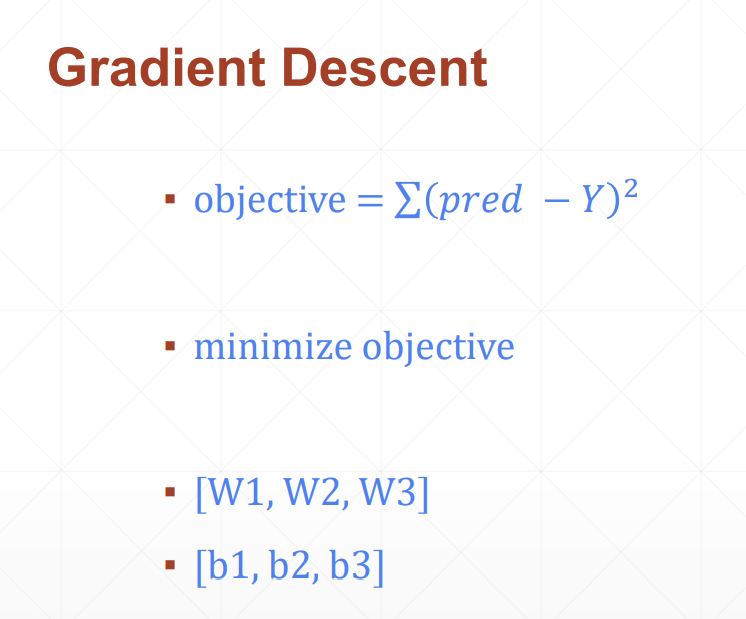
梯度下降法在深度学习部分已经学习过了,不多做介绍了,嘿嘿
linear Regression——我们要估计连续函数的值;
logistic Regression——在上述linear regression的基础上增加了一个激活函数,把y的空间压缩到0-1的范围,0-1可以表示一个概率
classification——所有的可能性概率之和为1
三、回归问题实战
1、定义损失函数compute_error

2、定义梯度下降法step_gradient


3、迭代优化gradient_descent
输入初始w和初始b
4、输入数据
代码段
import numpy as np
def compute_error(b, w, points):
    totalError = 0
    for i in range(0, len(points)):
        x = points[i, 0]
        y = points[i, 1]
        totalError += (y - (w * x + b)) ** 2
    return totalError / float(len(points))

def step_gradient(b_current, w_current, points, learningRate):
    b_gradient = 0
    w_gradient = 0
    N = float(len(points))
    for i in range(0, len(points)):
        x = points[i, 0]
        y = points[i, 1]
        b_gradient += -(2/N) * (y - (w_current * x) +b_current)
        #损失值对b进行求偏导之后,在对b_current进行更新,倒数的累加跟除以n抵消
        w_gradient += -(2/N) * x * (y - (w_current * x) +b_current)
    new_b = b_current - (learningRate * b_gradient)
    new_w = w_current - (learningRate * w_gradient)
    return [new_b, new_w]

def gradient_descent(points, starting_b, starting_w, learning_rate, num_iteration):
    b = starting_b
    w = starting_w
    for i in range(num_iteration):
        b, w = step_gradient(b, w, np.array(points), learning_rate)
    return [b, w]

def run():
    points = np.genfromtxt("data.csv", delimiter=",")
    learning_rate = 0.0001
    initial_b = 0
    initial_w = 0
    num_iteration = 1000
    print("gradient_desent at b = {0}, w= {1}, error={2}".format(initial_b, initial_w, compute_error(initial_b, initial_w, points)))
    print("Running···")
    [b, w] = gradient_descent(points, initial_b, initial_w, learning_rate, num_iteration)
    print("After{0}iterations b={1}, w={2}, error={3}".format(num_iteration, b, w, compute_error(b, w, points) ))

if __name__ == '__main__':
    run()

'''
gradient_desent at b = 0, w= 0, error=5565.107834483211
Running···
After1000iterations b=0.08989889221785105, w=1.4812542263671995, error=112.64530033200117
'''
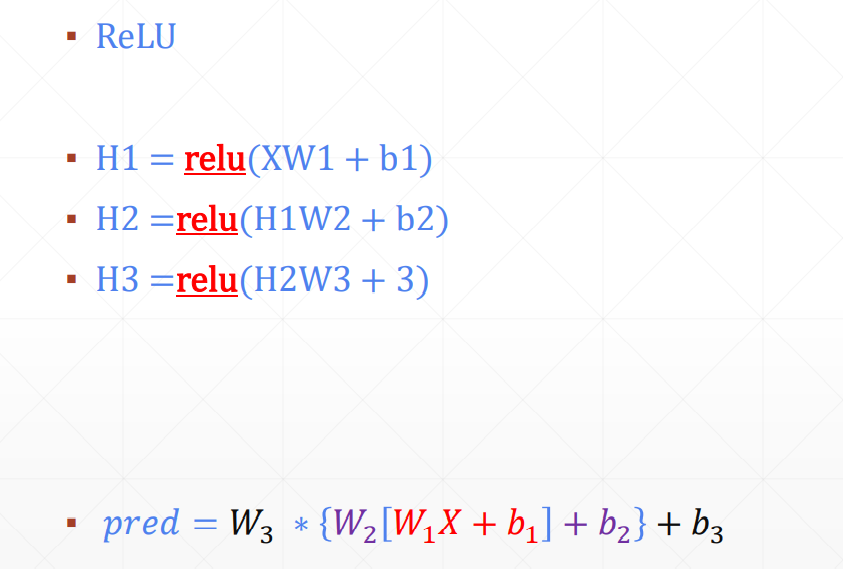
四、激活函数,非线性转换
![]()
考虑Non-linear Factor

加入激活函数之后pred既有线性表达能力,还有非线性的表达能力


五、手写数字识别案例
需要四步:
(1)load data
(2)build model
(3)train
(4)test
import torch
from torch import nn
from torch.nn import functional as F
from torch import optim

import torchvision
from matplotlib import pyplot as plt


from utils import plot_image, plot_curve, one_hot


batch_size = 512

# step1. load dataset
train_loader = torch.utils.data.DataLoader(
    torchvision.datasets.MNIST('mnist_data', train=True, download=True,        #如果我们没有这个文件,自动从网络上下载
                               transform=torchvision.transforms.Compose([
                                   torchvision.transforms.ToTensor(),      #将数据转换为tensor格式
                                   torchvision.transforms.Normalize(       #正则化,是像素在0-1之间均匀分布
                                       (0.1307,), (0.3081,))
                               ])),
    batch_size=batch_size, shuffle=True)

test_loader = torch.utils.data.DataLoader(
    torchvision.datasets.MNIST('mnist_data/', train=False, download=True,
                               transform=torchvision.transforms.Compose([
                                   torchvision.transforms.ToTensor(),
                                   torchvision.transforms.Normalize(
                                       (0.1307,), (0.3081,))
                               ])),
    batch_size=batch_size, shuffle=False)
#    一次加载多少次图片

x, y = next(iter(train_loader))
print(x.shape, y.shape, x.min(), x.max())
#torch.Size([512, 1, 28, 28]) torch.Size([512]) tensor(-0.4242) tensor(2.8215)
#一共拿到了512张图片,1个通道,28行,28列,label一共有512个
plot_image(x, y, "image sample")

#创建网络
class Net(nn.Module):

    def __init__(self):
        super(Net, self).__init__()

        #要建三层*
        self.fc1 = nn.Linear(28*28, 256)
        self.fc2 = nn.Linear(256, 64)
        self.fc3 = nn.Linear(64, 10)

    def forward(self, x):
        #x:[b,1,28,28]
        x = F.relu(self.fc1(x))
        x = F.relu(self.fc2(x))
        x = self.fc3(x)

        return x


net = Net()
optimzer = optim.SGD(net.parameters(), lr=0.01, momentum=0.9)


train_loss = []
for epoch in range(3):

    for batch_idx, (x, y) in enumerate(train_loader):

        #x:[b,1,28,28], y:[512]
        #[b, feature]
        x = x.view(x.size(0), 28*28)
        # => [b, 10]
        out = net(x)
        y_onehot = one_hot(y)
        #loss = mse(out, y_onehot)
        loss = F.mse_loss(out, y_onehot)

        optimzer.zero_grad()
        loss.backward()
        optimzer.step()

        train_loss.append(loss.item())

        if batch_idx % 10 == 0:
            print(epoch, batch_idx, loss.item())

plot_curve(train_loss)
#we got optimal [w1, b1, w2, b2, w3, b3]


total_correct = 0
for x, y in test_loader:
    x = x.view(x.size(0), 28*28)
    out = net(x)
    # out: [b, 10] => pred: [b]
    pred = out.argmax(dim=1)
    correct = pred.eq(y).sum().float().item()
    total_correct += correct

total_num = len(test_loader.dataset)
acc = total_correct / total_num
print('test acc:', acc)

x, y = next(iter(test_loader))
out = net(x.view(x.size(0), 28*28))
pred = out.argmax(dim=1)
plot_image(x, pred, 'test')
#test acc: 0.888
版权声明:本文为weixin_51589123原创文章,遵循 CC 4.0 BY-SA 版权协议,转载请附上原文出处链接和本声明。
