一、常用服务器:
-
apache
:
功能完善,历史悠久,模块支持非常丰富,属于重量级产品,比较耗费内存。缺点:处理每一个php比较费资源,导致如果高并发时会耗费服务器资源无法处理更多请求。 -
lighttpd
:内存开销低,cpu 占用率低,效能好,模块丰富等特点,轻量级web服务器。 -
nginx
:省资源,省cpu,在高并发时能够处理更多的请求,高端能达到3万到5万的并发量,还有负载均衡可使用。
二、安装
Nginx
-
安装
Nginx
可以通过
HomeBrew
进行安装,也可以通过
Nginx Download
下载安装包进行安装,这里我们就选择
HomeBrew
的方式进行安装了。 -
搜索
Nginx
包,查询要安装的软件是否存在$ brew search nginx -
(可选使用) 查看
Nginx
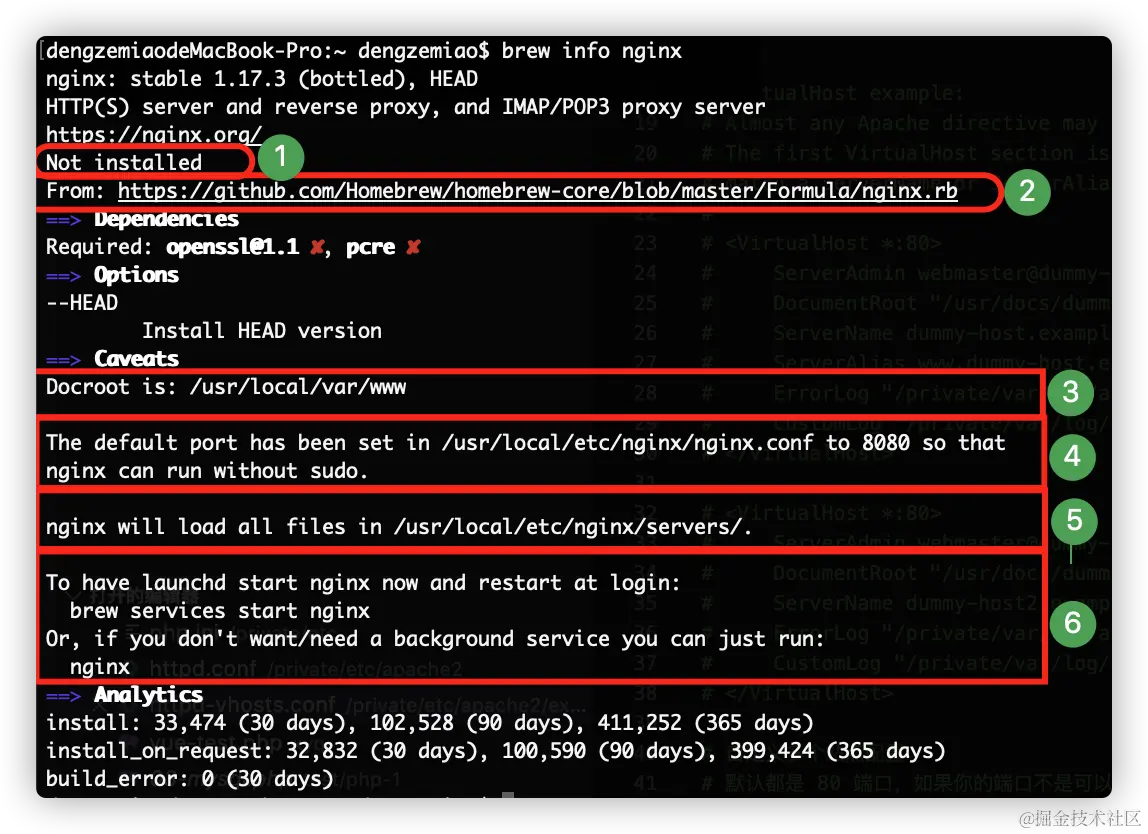
包、安装、启动、存放、等信息$ brew info nginxdengzemiaodeMacBook-Pro:~ dengzemiao$ brew info nginx nginx: stable 1.17.3 (bottled), HEAD HTTP(S) server and reverse proxy, and IMAP/POP3 proxy server https://nginx.org/ Not installed From: https://github.com/Homebrew/homebrew-core/blob/master/Formula/nginx.rb ==> Dependencies Required: openssl@1.1 ✘, pcre ✘ ==> Options --HEAD Install HEAD version ==> Caveats Docroot is: /usr/local/var/www The default port has been set in /usr/local/etc/nginx/nginx.conf to 8080 so that nginx can run without sudo. nginx will load all files in /usr/local/etc/nginx/servers/. To have launchd start nginx now and restart at login: brew services start nginx Or, if you don't want/need a background service you can just run: nginx ==> Analytics install: 33,474 (30 days), 102,528 (90 days), 411,252 (365 days) install_on_request: 32,832 (30 days), 100,590 (90 days), 399,424 (365 days) build_error: 0 (30 days)
通过这些信息可以看出:
1、nginx 在本地还未安装(Not installed) 2、nginx 的来源(From) 3、Docroot 也就是文件根目录,代码存放的文件夹,默认为 /usr/local/var/www 4、在 /usr/local/etc/nginx/nginx.conf 配置文件中默认端口被配置为 8080 从而使 nginx 运行时不需要加 sudo 5、nginx 将在 /usr/local/etc/nginx/servers/ 目录中加载所有文件 6、我们可以通过命令 '$ nginx' 来启动 nginx -
开始安装
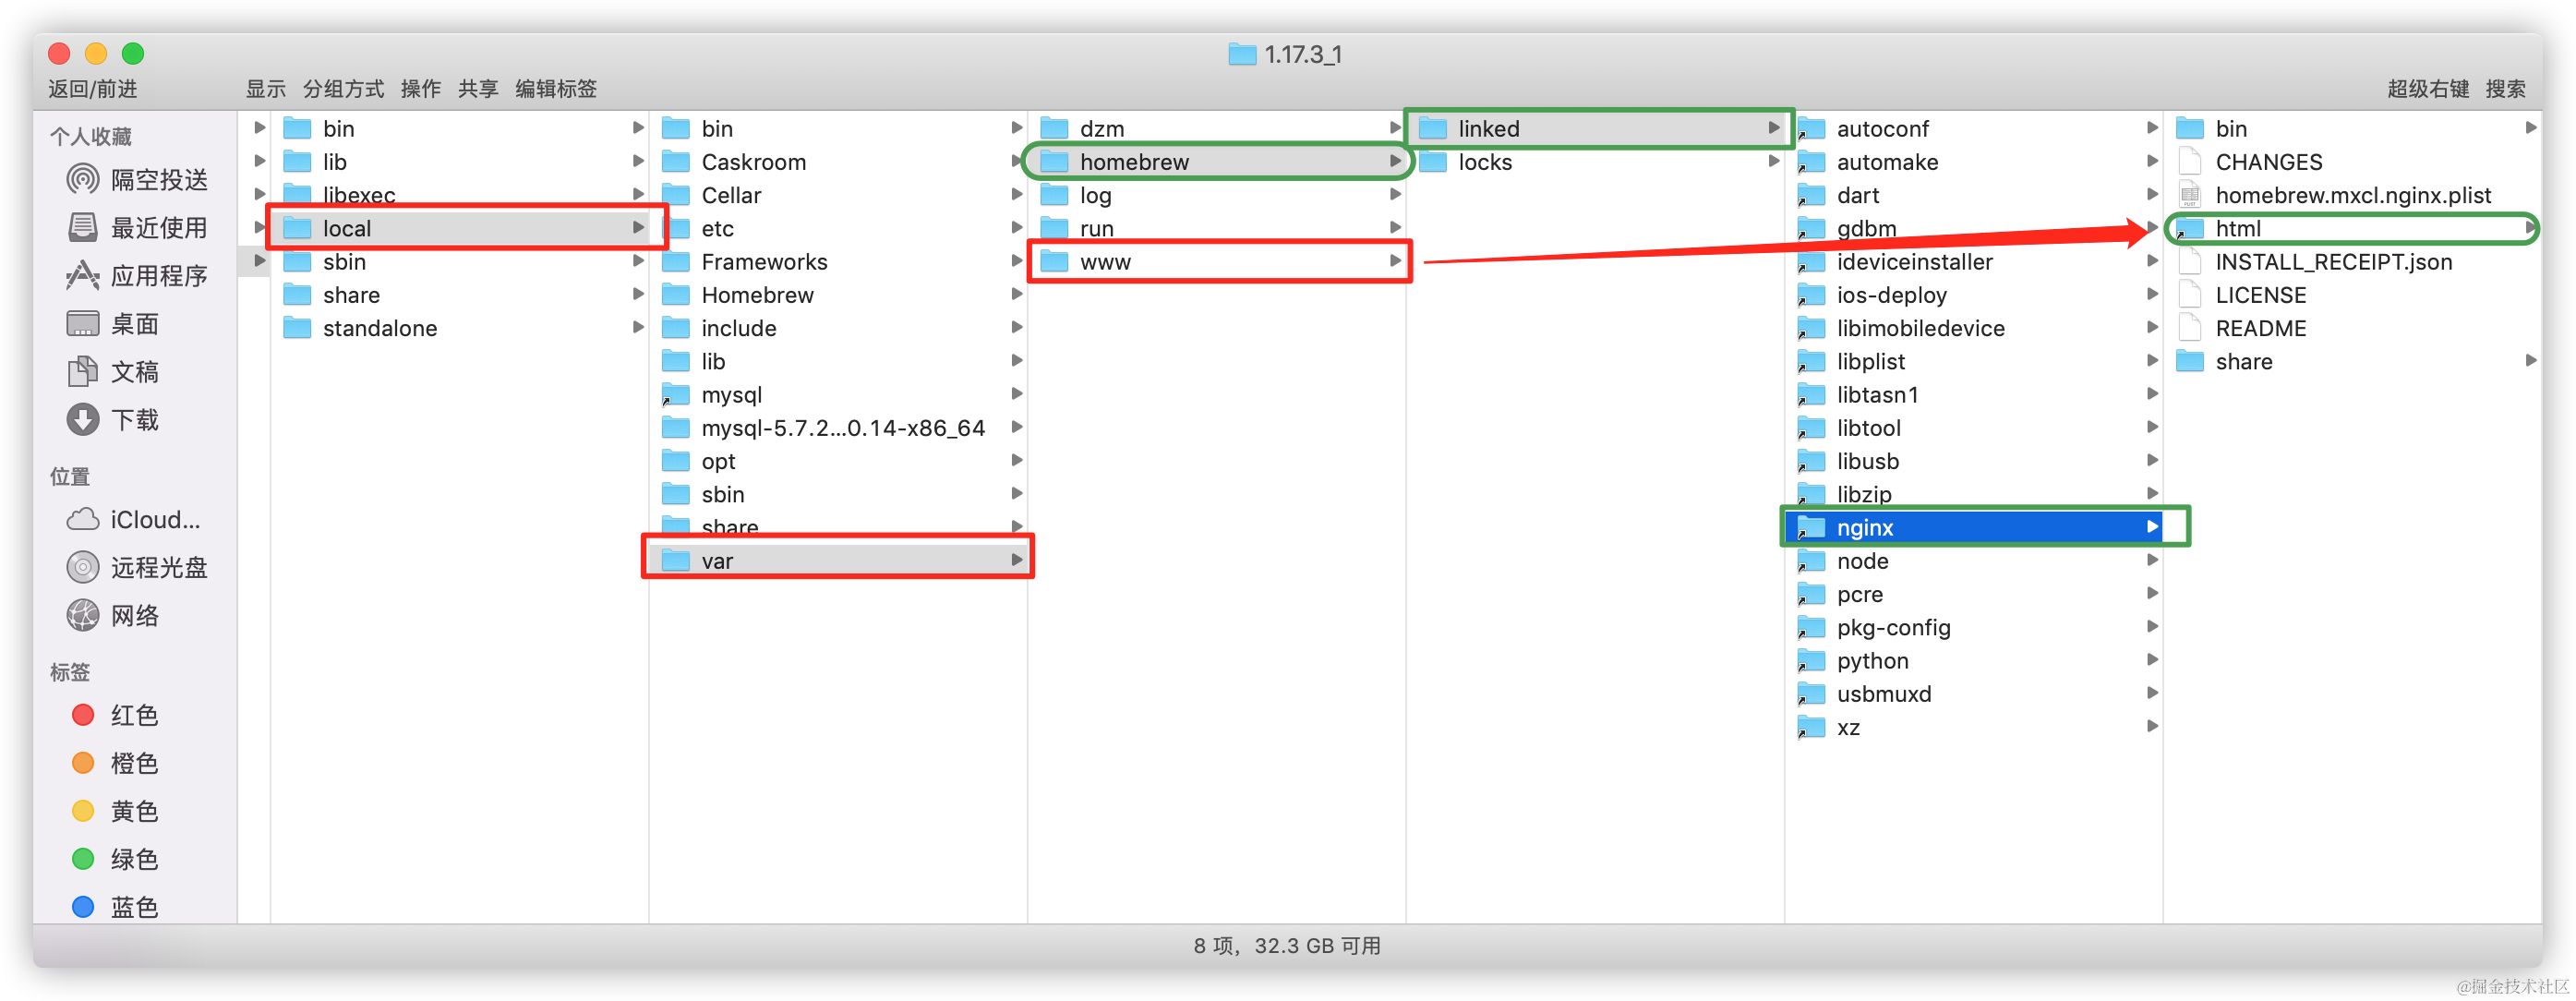
$ brew install nginx...... Docroot is: /usr/local/var/www The default port has been set in /usr/local/etc/nginx/nginx.conf to 8080 so that nginx can run without sudo. nginx will load all files in /usr/local/etc/nginx/servers/. To have launchd start nginx now and restart at login: brew services start nginx Or, if you don't want/need a background service you can just run: nginx- 安装成功之后,nginx 的本地路径为:
/usr/local/var/homebrew/linked/nginx- nginx 本地配置文件路径:
/usr/local/etc/nginx/nginx.conf # M1 系统路径 /opt/homebrew/etc/nginx/nginx.conf- nginx 文件存放路径为,在 Mac 上其实这个存放路径是软链出来的:
/usr/local/var/www

# M1 系统路径
/opt/homebrew/var/www
这个
/usr/local/var/www
指向的是
/usr/local/Cellar/nginx
里面的
html
文件夹,
项目的代码或文件可以放置这个文件夹中就能被访问到,如果路径不满意也可以
Nginx 配置文件
中去调整。
- nginx logs 文件存放路径为:
/usr/local/var/log 可以通过命令查看各个日志文件的信息以及大小: $ cd /usr/local/var/log $ ls -alF 示例: dengzemiaodeMacBook-Pro:nginx dengzemiao$ ls -alF total 16 drwxr-xr-x 4 dengzemiao admin 128 10 13 15:29 ./ drwxr-xr-x 3 dengzemiao admin 96 10 13 15:11 ../ // 每次刷新网页,日志文件信息跟大小都会不一样 -rw-r--r-- 1 dengzemiao admin 195 10 13 15:30 access.log -rw-r--r-- 1 dengzemiao admin 60 10 13 15:29 error.log -
启动 Nginx,启动之后打开
http://localhost:8080/
链接,就会出现
Welcome to nginx!
。$ nginx
-
到这里安装 Nginx 也就完成了!!