目录
目录
前言
接口测试,本篇文章主要介绍通过python语言中的requests模块来进行接口请求;requests模块是常用的接口自动化框架,学习相对容易;单纯的接口测试,也可以postman、jmeter等测试工具;
一、介绍GET请求
HTTP默认的请求方法就是GET
1.没有请求体
2.数据必须在1K之内
3.GET请求数据会暴露在浏览器的地址栏中
具体参数是:
格式:r=requests.get(url,params,**kwargs)
- url: 需要爬取的网站地址。
- params: 翻译过来就是参数, url中的额外参数,字典或者字节流格式,可选。
-
**kwargs : 12个控制访问的参数(与post通用)
-
params
:字典或字节序列, 作为参数增加到url中,使用这个参数可以把一些键值对以 【
?key1=value1&key2=value2
】的模式增加到 url 中,例如:kv = {‘key1′:’ values’, ‘key2’: ‘values’} -
例
import requests

url='http://mobile.atguat.com.cn/xx/xxx/xxx.jsp'

params={"sn":"=19c77bf96505f7de4d2a3fe4d22a320608e0b614"}

r = requests.get(url,params)
print(r.url)
print(r.text)


"""

请求地址包含入参 print(r.url)实例:

http://mobile.atguat.com.cn/xx/xxx/xxx.jsp?sn=%3D19c77bf96505f7de4d2a3fe4d22a320608e0b614


返回参数 print(r.text)实例:

{"status":"200","isSuccess":"N","isSessionExpired":"N","isActivated":"Y","serverTime":"2022-03-21 16:43:48","pendingShipmentOrderNum":0,"waitPayOrderNum":0,"waitConfirmOrderNum":0,"waitEvaluateGoodsNum":0,

"waitReadMessageNum":0,"expiringCouponNum":0,"couponNum":0,"isNeedCaptcha":"N","traceID":"EA93B8FA7DE64CF5852B4D49E31796E4"}

"""
二、介绍POST请求
1.数据不会出现在地址栏中
2.数据的大小没有上限
3.有请求体{请求的字典}
4.请求体中如果存在中文,会使用URL编码!
1. post格式
- url: 需要爬取的网站地址。
- data: 翻译过来就是参数, url中的额外参数,字典或者字节流格式,可选。
- **kwargs : 12个控制访问的参数
import requests
response = requests.post( url = 'http://mobile.xxxuat.com.cn/mobile/p/xxSearch.jsp' ,data = {"body": "{\"keyWord\": \"iphone\"}" )
print(response.text) # 打印接口反,字符串格式
2. 传入data
对于 POST 请求来说,我们一般需要为它增加一些参数。那么最基本的传参方法可以利用
data
{请求的字典}这个参数。
import requests

url='http://mobile.atguat.com.cn/mobile/p/wapSearch.jsp' #入参地址

headers={"Content-Type":"application/x-www-form-urlencoded;charset=utf-8","Cookie":"gcid=11010000;gdid=11010200;addr_lat=39.96482"} #请求头信息

data ={'body':'{"keyWord": "iphone"}'} #标准入参参数

response = requests.post( url= url ,data =data ,headers=headers,timeout=0.1) #post请求

print(response.text) #打印接口返回
三、get、post通用方法
-
headers
字典是
headers
的相关语,对应了向某个url访问时所发起的http的头i字段, 可以用这个字段来定义http的访问的http头,可以用来模拟任何我们想模拟的浏览器来对url发起访问。同时存放:Content-Type,Cookie,User-Agent等;
-
import requests url='http://mobile.xxuat.com.cn/mobile/p/xxxSearch.jsp' #接口地址 #接口请求头,python中通常是字典的模式; headers={"Content-Type":"application/x-www-form-urlencoded;charset=utf-8", "Cookie":"gcid=11010000;gdid=11010200;addr_lat=39.96482"} data = {'body':'{"keyWord": "iphone"}'}#接口入参 response = requests.post(url = url,data = data,headers = headers)# post请求 print(response.text) #打印接口返回信息 """接口返回,print(response.text): {"traceID":"C713A65B72D743DA84CF86F4EED6618F","filterCatList":[],"goodsList":[],"isActivated":"Y","pageBar":{"pageNumber":1,"totalPage":0,"pageSize":15,"totalCount":0},"filterConList":[],"isSuccess":"Y"} """ -
timeout
形式:数字 单位是s(秒)用于设置超时时间,防止爬取时间过长,无效爬取
import requests
url='http://mobile.xxuat.com.cn/mobile/p/xxxSearch.jsp' #接口地址
response = requests.post(url = url,data = data,timeout=0.1 )# post请求,timeout = 0.1设置超时时间
print(response.text) #打印接口返回信息
"""接口返回,print(response.text):
{"traceID":"C713A65B72D743DA84CF86F4EED6618F","filterCatList":[],"goodsList":[],"isActivated":"Y","pageBar":{"pageNumber":1,"totalPage":0,"pageSize":15,"totalCount":0},"filterConList":[],"isSuccess":"Y"}
"""
-
代理(proxies参数)
如果需要使用代理,你可以通过为任意请求方法提供
proxies
参数来配置单个请求get,post代理设置方法一样:proxies = { "http": "http://10.2.190.40:8888", "https": "http://10.2.190.40:8888", } #设置代理 response = requests.get("http://www.baidu.com", proxies = proxies) #接口请求代理模式 print(response.text) -
verify
开关, 用于认证SSL证书, 默认为True,如果接口返回SSLError错误,需要请求时,verify=false;
##接口设置了代理直接访问github网站是不通的,增加verify=False参数


import requests
proxies = {
"http": "http://10.2.190.40:8888",
"https": "http://10.2.190.40:8888",
}
url='https://github.com'
r=requests.get(url=url,proxies=proxies,verify=False) ##接口设置了代理直接访问github网站是不通的,增加verify=False参数

print(r.text)-
files:字典
是用来向服务器传输文件时使用的字段
import requests
url='http://mobile.atguat.com.cn/mobile/p/wapSearch.jsp' #接口地址
data ={'body':'{"keyWord": "iphone"}'} #入参
fs = {'files': open('data.txt', 'rb')} #参数中上传的文件
response = requests.post( url= url ,data =data ,flies=fs) #接口请求中,files参数是上传文件用
print(response.text)
四、获取响应参数的值
1.查看响应内容
import requests
url='http://mobile.atguat.com.cn/mobile/p/wapSearch.jsp'

kw = {'wd':'长城'}

headers = {"User-Agent": "Mozilla/5.0 (Windows NT 10.0; Win64; x64) AppleWebKit/537.36 (KHTML, like Gecko) Chrome/93.0.4577.63 Safari/537.36"}

 response=requests.post(url=url,data=kw,headers=headers)

# 查看响应内容,response.text 返回的是Unicode格式的数据
print (response.text)

# 查看响应内容,response.content返回的字节流数据
print (response.json())

# 查看响应内容,response.content返回的字节流数据

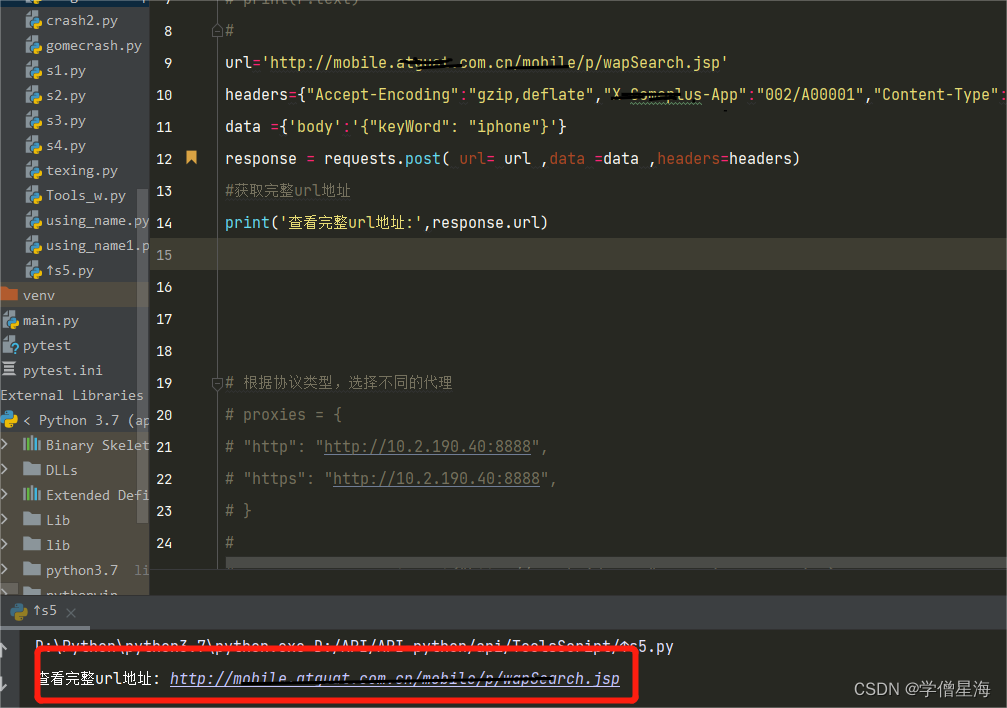
2.查看完整url地址
import requests
url='http://mobile.xxuat.com.cn/mobile/p/xxSearch.jsp'

kw = {'wd':'长城'}

headers = {"User-Agent": "Mozilla/5.0 (Windows NT 10.0; Win64; x64) AppleWebKit/537.36 (KHTML, like Gecko) Chrome/93.0.4577.63 Safari/537.36"} #请求头部

response=requests.post(url=url,data=kw,headers=headers) #接口返回信息


# 查看完整url地址
print (response.url)

"""
接口返回print (response.url):url='http://mobile.xxuat.com.cn/mobile/p/xxSearch.jsp'

"""

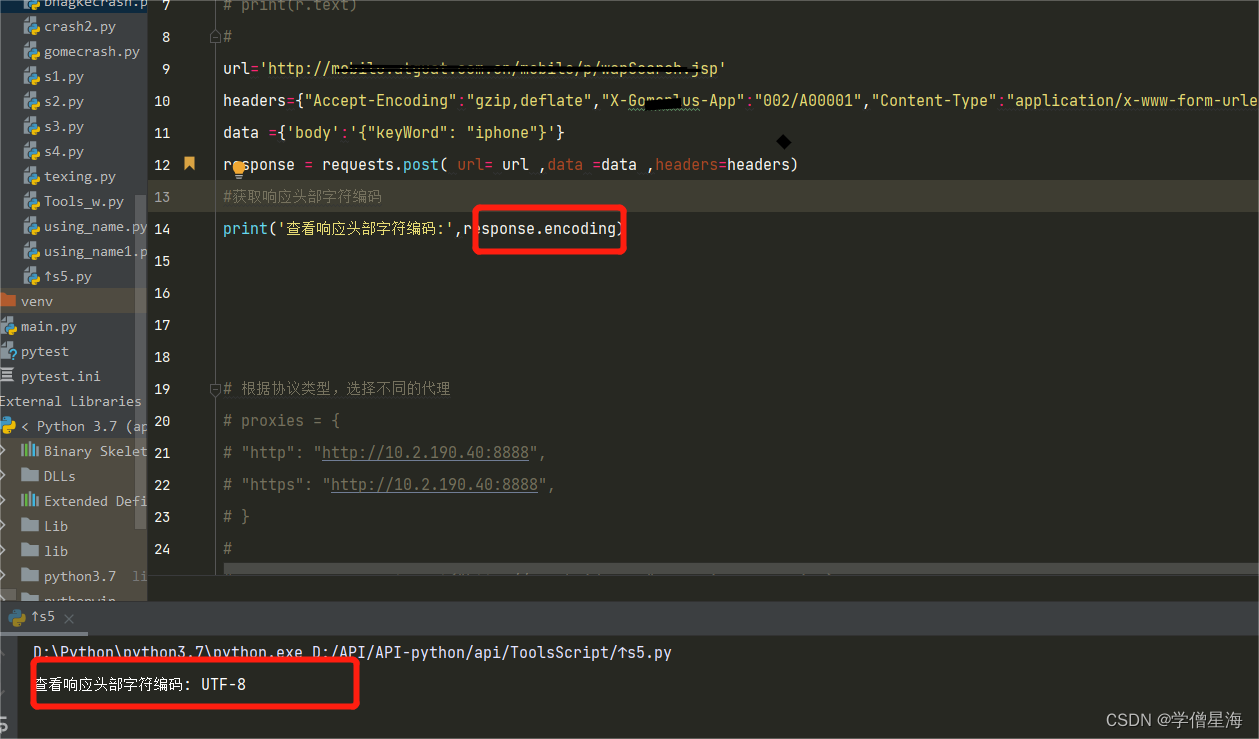
3.查看响应头部字符编码
import requests
url='http://mobile.xxuat.com.cn/mobile/p/xxSearch.jsp'

kw = {'wd':'长城'}

headers = {"User-Agent": "Mozilla/5.0 (Windows NT 10.0; Win64; x64) AppleWebKit/537.36 (KHTML, like Gecko) Chrome/93.0.4577.63 Safari/537.36"} #请求头部

response=requests.post(url=url,data=kw,headers=headers) #接口返回信息


# 查看响应头部字符编码
print (response.encoding)

4.查看响应码status_code
import requests
url='http://mobile.xxuat.com.cn/mobile/p/xxSearch.jsp'

kw = {'wd':'长城'}

headers = {"User-Agent": "Mozilla/5.0 (Windows NT 10.0; Win64; x64) AppleWebKit/537.36 (KHTML, like Gecko) Chrome/93.0.4577.63 Safari/537.36"} #请求头部

response=requests.post(url=url,data=kw,headers=headers) #接口返回信息


# 查看响应码
print (response.status_code)
5.获取响应的headers
import requests
url='http://mobile.xxuat.com.cn/mobile/p/xxSearch.jsp'

kw = {'wd':'长城'}

headers = {"User-Agent": "Mozilla/5.0 (Windows NT 10.0; Win64; x64) AppleWebKit/537.36 (KHTML, like Gecko) Chrome/93.0.4577.63 Safari/537.36"} #请求头部

response=requests.post(url=url,data=kw,headers=headers) #接口返回信息

#获取响应的headers
print (response.headers)
6.获取响应的cookies
import requests
url='http://mobile.xxuat.com.cn/mobile/p/xxSearch.jsp'

kw = {'wd':'长城'}

headers = {"User-Agent": "Mozilla/5.0 (Windows NT 10.0; Win64; x64) AppleWebKit/537.36 (KHTML, like Gecko) Chrome/93.0.4577.63 Safari/537.36"} #请求头部

response=requests.post(url=url,data=kw,headers=headers) #接口返回信息

#获取响应的cookies
print (response.cookies)
五、会话保持Sission
在 requests 里,session对象是一个非常常用的对象,这个对象代表一次用户会话:从客户端浏览器连接服务器开始,到客户端浏览器与服务器断开。
import requests
#1. 创建session对象,可以保存Cookie值
ssion = requests.session()

# 2. 处理 headers
headers={"Accept-Encoding":"gzip,deflate","X-Gomeplus-App":"002/A00001","Content-Type":"application/x-www-form-urlencoded;charset=utf-8","Referer":"http://office.gome.inc/","User-Agent":"Mozilla/5.0 (Windows NT 10.0; Win64; x64) AppleWebKit/537.36 (KHTML, like Gecko) Chrome/99.0.4844.51 Safari/537.36"}

url='http://office.gome.inc/newWeb/auth/xxsLogin.do'
# 3. 需要登录的用户名和密码
data={"userName": "d2FuZ2ppd2VpMQ==","passWord":"V2p3MTIzNDU2IQ==","domainCode":"GOMEDQ","rememberMe":"false"}

# 4. 发送附带用户名和密码的请求,并获取登录后的Cookie值,保存在ssion里
re=ssion.post(url=url,data=data)
ssion.post(url=url,data=data)
re=re.json()

#解析值更新header
authToken=jsonpath.jsonpath(re,"$.data.authToken")
print(authToken)
ssion.headers.update({"Authorization":authToken[0]})

# 5. ssion包含用户登录后的Cookie值,可以直接访问那些登录后才可以访问的页面
re1=ssion.post(url='http://office.xxx.inc/newWeb/myBill/list.do',data={"type":"0"})
六、requests控制访问参数
1.params:形式:字典或字节序列,做为参数增加到url中
2.data:形式:字典或字节序列 或文件对象,做为Requests的内容,可反馈给服务器
3.json:形式:JSON格式的数据 做为Requests的内容,可反馈给服务器
(ps:科普
JSON
(
JavaScript
Object Notation, JS 对象简谱) 是一种轻量级的数据交换格式。
4.headers:形式:字典 HTTP定制头
5.cookies:形式:字典或cookie Jar(从HTTP协议中解析得来)是Requests中的cookie
(ps:管理HTTP cookie值、存储HTTP请求生成的cookie、向传出的HTTP请求添加cookie的对象。整个cookie都存储在内存中,
对CookieJar实例进行垃圾回收后cookie也将丢失。)
6.auth:形式:元组 支持HTTP的认证功能
7.files: 形式:字典类型用于向服务器传输文件
8.timeout:形式:数字 单位是s(秒)用于设置超时时间,防止爬取时间过长,无效爬取
9.prixies:形式:字典类型 设定访问代理服务器,可以增加登录认证。(防止爬虫逆追踪)
10.allow_redirects:形式:布尔类型(True or False)默认为True 重定向开关
11.stream:布尔类型(True or False)默认为Ture 获取内容立即下载 开关
12.verify:布尔类型(True or False)默认为Ture 认证SSL证书开关
13.cert: 保存本地证书路径