一.Python中如何利用Opencv打开摄像头或图像并用PyQt控件显示
①python中opencv打开图像
import cv2
filename='1.jpg'
img=cv2.imread(filename)
cv2.imshow('Main Window',img)
cv2.waitKey() #任意键退出
cv2.destroyAllWindows()
②python中用opencv打开摄像头
import cv2
cap=cv2.VideoCapture(0)
success, frame=cap.read()
while success and cv2.waitKey(1)==-1:
    cv2.imshow("Main Window", frame)
    success, frame=cap.read()
cap.release()
cv2.destroyAllWindows()
③利用PyQt 的QLabel显示摄像头
#借助QTimer,不断产生事件,显示图片
第一步:首先在Qt designer中创建MainWindow,拖进去一个Label控件,放大到任意的大小,保存。
第二步:将.ui文件转化为.py文件
第三步:输入以下代码
# -*- coding: utf-8 -*-
from PyQt5.QtCore import *
from PyQt5.QtWidgets import *
from PyQt5.QtGui import *
import cv2
from UIMain import Ui_MainWindow

class MainWindow(QMainWindow, Ui_MainWindow):
    def __init__(self, parent=None):
        super(MainWindow, self).__init__(parent)
        self.setupUi(self)
        self.timer_camera = QTimer(self)
        self.cap = cv2.VideoCapture(0)
        self.timer_camera.timeout.connect(self.show_pic)
        self.timer_camera.start(10)

    def show_pic(self):
        success, frame=self.cap.read()
        if success:
            show = cv2.cvtColor(frame, cv2.COLOR_BGR2RGB)
            showImage = QImage(show.data, show.shape[1], show.shape[0], QImage.Format_RGB888)
            self.label.setPixmap(QPixmap.fromImage(showImage))# 将摄像头显示在之前创建的Label控件中
            self.timer_camera.start(10)

if __name__=='__main__':
    import sys
    app=QApplication(sys.argv)
    window=MainWindow()
    window.show()
    sys.exit(app.exec_())
二.点击一个按钮,在QT中通过Label显示出来
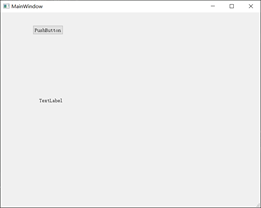
第一步:在Qt designer中创建MainWindow,拖进去一个Label控件(命名为image_label),同时创建一个按钮(命名为one_pushButton),保存。

第二步:对刚刚保存的UI文件将其转为.py文件
第三步:创建新的程序调用这个py程序
# -*- coding: utf-8 -*-
from PyQt5.QtCore import *
from PyQt5.QtWidgets import QMainWindow,QApplication
from PyQt5.QtGui import *
import cv2
from UIMain import Ui_MainWindow

class mywindow(QMainWindow, Ui_MainWindow):
    def __init__(self):
        super(mywindow, self).__init__()
        self.setupUi(self)
        self.one_pushButton.clicked.connect(self.pushbutton_fuction)

    def pushbutton_fuction(self):
        Im = cv2.imread('1.jpg')  # 通过Opencv读入一张图片
        image_height, image_width, image_depth = Im.shape  # 获取图像的高,宽以及深度。
        QIm = cv2.cvtColor(Im, cv2.COLOR_BGR2RGB)  # opencv读图片是BGR,qt显示要RGB,所以需要转换一下
        QIm = QImage(QIm.data, image_width, image_height,  # 创建QImage格式的图像,并读入图像信息
                     image_width * image_depth,
                     QImage.Format_RGB888)
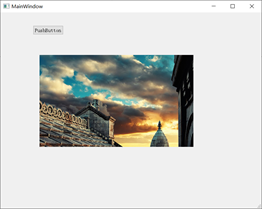
        self.image_label.setPixmap(QPixmap.fromImage(QIm))  # 将QImage显示在之前创建的QLabel控件中
        '''如果想让图片适应QLabel的大小,加下面这行代码'''
        #self.image_label.setScaledContents(True)
        '''如果想自定义QLabel的大小以及位置,加下面这行代码'''
        #self.image_label.setGeometry(x, y, width, height)

if __name__=='__main__':
    import sys
    app=QApplication(sys.argv)
    window=mywindow()
    window.show()
    sys.exit(app.exec_())
效果:


版权声明:本文为qq_45445740原创文章,遵循 CC 4.0 BY-SA 版权协议,转载请附上原文出处链接和本声明。