http://www.jamesphoughton.com/2013/08/making-gif-animations-with-matplotlib.html
previous
posts
, I showed animated plots of data as it changed over time. Here’s simple code to show how they can be constructed using the python libraries
Matplotlib
and
Pandas
, and written using the external program
ImageMagick
. First, the libraries that I’m using:
import pandas as pd
import pymc as mc
import matplotlib.pyplot as plt
from matplotlib import animation
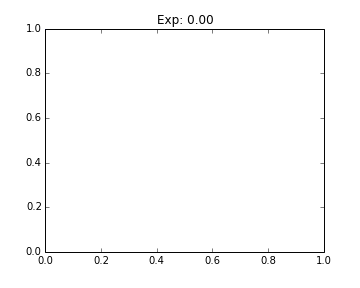
Now, lets say we want to show how the function y=x^n changes as we vary n from 0 to 3. We can generate coordinate sets for a variety of different n and save them in a pandas dataframe:
data = pd.DataFrame(data=0., index=np.arange(0, 30, 1), columns=np.arange(0,1, 0.01))
for exp in data.index.values:
data.ix[exp] = np.arange(0,1, 0.01)**(.1*exp)
We define a function that draws each graph. ‘nframe’ is the frame number which will be passed in by the animation control function, and is how we access the row in the dataframe that we want to plot.
def animate(nframe):
plt.cla()
plt.plot(data.columns.values, data.ix[nframe])
plt.ylim(0,1)
plt.title(‘Exp: %.2f’%(1.*nframe/10.))
We define a figure that we would like to draw our plot within:
fig = plt.figure(figsize=(5,4))
Matplotlib provides a control function to iterate over the frames and construct an animation object. That object has a method that allows us to save the animation as a gif, using the external program ImageMagick.
anim = animation.FuncAnimation(fig, animate, frames=30)
anim.save(‘demoanimation.gif’, writer=’imagemagick’, fps=4);
Happy Plotting!
2
View comments
Antonio Rohit De Lima Fernandes
January 18, 2014 at 10:26 AM
In order to be able to do anim.save, I had to:
1. Install ImageMagick from here
2. Modify matplotlib’s rcsetup.py
• This is found in your site-packages folder in Python’s install directory. For me, the directory is: ‘C:\Anaconda\Lib\site-packages\matplotlib\rcsetup.py’
• The ‘animation settings’ should have ‘animation.convert_path’ point to the convert.exe file of ImageMagick:
# Animation settings
‘animation.writer’ : [‘ffmpeg’, validate_movie_writer],
‘animation.codec’ : [‘mpeg4’, str],
‘animation.bitrate’ : [-1, validate_int],
‘animation.frame_format’ : [‘png’, validate_movie_frame_fmt],
‘animation.ffmpeg_path’ : [‘C:\\Program Files\\ImageMagick-6.8.8-Q8\\ffmpeg.exe’, str],
‘animation.ffmpeg_args’ : [‘’, validate_stringlist],
‘animation.mencoder_path’ : [‘mencoder’, str],
‘animation.mencoder_args’ : [‘’, validate_stringlist],
‘animation.convert_path’ : [‘C:\\Program Files\\ImageMagick-6.8.8-Q8\\convert.exe’, str],
‘animation.convert_args’ : [‘’, validate_stringlist],
• You can also have the ffmpeg path point to the ffmpeg.exe file in the ImageMagick folder (this may be handy for the future)
3. Change matplotlib’s animations.py file to include ImageMagick code:
• For me, the directory is: ‘C:\Anaconda\Lib\site-packages\matplotlib\animation.py’
• Paste the following code after the class definition for MencoderFileWriter and before the Animation class definition. Beware of indentation-related errors if copy pasting this code into your animation.py file. Use soft tabs.
# Base class for animated GIFs with convert utility
class ImageMagickBase:
exec_key = ‘animation.convert_path’
args_key = ‘animation.convert_args’
@property
def delay(self):
return 100. / self.fps
@property
def output_args(self):
return [self.outfile]
@writers.register(‘imagemagick’)
class ImageMagickWriter(MovieWriter, ImageMagickBase):
def _args(self):
return ([self.bin_path(),
‘-size’, ‘%ix%i’ % self.frame_size, ‘-depth’, ‘8’,
‘-delay’, str(self.delay), ‘-loop’, ‘0’,
‘%s:-‘ % self.frame_format]
+ self.output_args)
@writers.register(‘imagemagick_file’)
class ImageMagickFileWriter(FileMovieWriter, ImageMagickBase):
supported_formats = [‘png’, ‘jpeg’, ‘ppm’, ‘tiff’, ‘sgi’, ‘bmp’,
‘pbm’, ‘raw’, ‘rgba’]
def _args(self):
return ([self.bin_path(), ‘-delay’, str(self.delay), ‘-loop’, ‘0’,
‘%s*.%s’ % (self.temp_prefix, self.frame_format)]
+ self.output_args)
Reply
Replies
James Houghton
February 13, 2014 at 8:03 AM
Thanks Antonio, It’s great to get some context for doing this on a Windows machine.
I’m running on a Mac, and used homebrew to install imagemagick, without needing to make any changes.