一、集成Redis
1、修改pom文件,增加依赖
<!– redis –>
<
dependency
>
<
groupId
>
org.springframework.boot
</
groupId
>
<
artifactId
>
spring-boot-starter-data-redis
</
artifactId
>
</
dependency
>
2、在properties增加redis配置
# REDIS (RedisProperties)
# Redis数据库索引(默认为0)
spring.redis.database
=
0
# Redis服务器地址
spring.redis.host
=
192.168.30.156
# Redis服务器连接端口
spring.redis.port
=
6379
# Redis服务器连接密码(默认为空)
spring.redis.password
=
12345678
# 连接超时时间(毫秒)
spring.redis.timeout
=
5000
3、新建单元测试
/**
* 测试连接redis(连接地址为虚拟机redis服务,需要手动开启)
*/
@SpringBootTest
(classes = {App.
class
})
@RunWith
(SpringRunner.
class
)
public class
SpringRedisTest {
@Resource
private
RedisTemplate<String,String>
redisTemplate
;
@Test
public void
testRedis()
throws
Exception {
ValueOperations<String, String> ops =
redisTemplate
.opsForValue();
ops.set(
“name”
,
“hankin1117”
);
String value = ops.get(
“name”
);
System.
out
.println(value);
}
}
二、集成RabbitMQ
RabbitMQ在后面SpringCloud的章节还会用到,在这会简单的安装使用下RabbitMq,至于RabbitMQ的详细使用请参考分布式消息队列课题。
1、Windows安装RabbitMQ
先安装Erlang,下载地址:
http://erlang.org/download/otp_win64_20.3.exe
RabbitMQ Server 3.7.4下载地址:
安装好后,启动服务:
开启web插件,进入rabbitmq安装目录的sbin目录,在命令行界面开启web插件:
./rabbitmq-plugins enable rabbitmq_management
重新启动reabbitmq服务,在地址栏输入
http://localhost:15672/
使用默认用户 guest/guest登陆界面
2、新增用户,并设置权限
用新创建的admin用户登陆,发现新用户已经新增成功,设置权限:
点击这用户,设置虚拟主机的权限(全部可读,可写,可配置)

这个时候一个admin新用户设置完毕
3、SpringBoot中使用RabbitMQ
1)修改pom文件,增加rabbitmq依赖:
<!– 增加rabbitmq依赖 –>
<
dependency
>
<
groupId
>
org.springframework.boot
</
groupId
>
<
artifactId
>
spring-boot-starter-amqp
</
artifactId
>
</
dependency
>
2)修改配置properties文件,增加rabbitmq的连接信息
## rabbitmq config
spring.rabbitmq.host
=
localhost
spring.rabbitmq.port
=
5672
spring.rabbitmq.username
=
admin
spring.rabbitmq.password
=
admin
3)创建Rabbit配置类,用来配置队列,交换器,路由等高级信息
@Configuration
public class
RabbitConfig {
@Bean
public
Queue firstQueue() {
// 创建一个队列,名称为:hankin
return new
Queue(
“hankin”
);
}
}
4)创建消息的生产者:
@Component
public class
Sender {
@Resource
private
AmqpTemplate
rabbitTemplate
;
public void
send() {
rabbitTemplate
.convertAndSend(
“hankin”
,
“this is a message!”
);
}
}
5)创建消息的消费者
@Component
@RabbitListener
(queues =
“hankin”
)
//
TODO 定义该类需要监听的队列
public class
Receiver {
// 指定对消息的处理
@RabbitHandler
public void
process(String msg) {
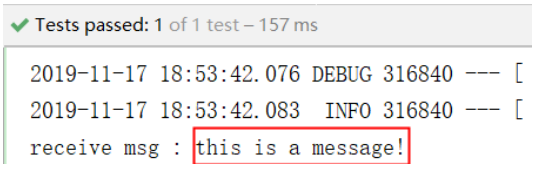
System.
out
.println(
“receive msg : ”
+ msg);
}
}
6)新增单元测试
@RunWith
(SpringRunner.
class
)
@SpringBootTest
(classes = App.
class
)
public class
RabbitmqTest {
@Resource
private
Sender
sender
;
@Test
public void
testRabbitmq()
throws
Exception {
sender
.send();
}
}
三、Actuator监控管理
Actuator是spring boot的一个附加功能,可帮助你在应用程序生产环境时监视和管理应用程序;可以使用HTTP的各种请求来监管、审计、收集应用的运行情况,特别对于微服务管理十分有意义。
缺点:
没有可视化界面(Spring cloud还会用到这功能,就可以看到界面了)
1、修改pom文件,添加依赖:
<!– Actuator监控管理 –>
<
dependency
>
<
groupId
>
org.springframework.boot
</
groupId
>
<
artifactId
>
spring-boot-starter-actuator
</
artifactId
>
</
dependency
>
2、修改application.properties文件,启动监控端点
# 加载所有的端点/默认只加载了 info / health
management.endpoints.web.exposure.include
=
*
# 描述信息
info.blog-url
=
https://blog.csdn.net/m0_37661458
info.author
=
hankin
info.version
=
@project.version@
重新启动,在地址栏输入:
http://localhost:8080/actuator/info
,在界面看到这说明监控成功
A
ctuator访问路径
:
通过actuator/+端点名就可以获取相应的信息。
|
路径 |
作用 |
|
/actuator/beans |
显示应用程序中所有Spring bean的完整列表。 |
|
/actuator/configprops |
显示所有配置信息。 |
|
/actuator/env |
陈列所有的环境变量。 |
|
/actuator/mappings |
显示所有@RequestMapping的url整理列表。 |
|
/actuator/health |
显示应用程序运行状况信息 up表示成功 down失败 |
|
/actuator |