前言
Android 7.0,提供了非常多的变化,不过必须要适配的就是去除项目中传递 file:// 类似格式的 Uri 了
对于面向 Android 7.0 的应用,Android 框架执行的 StrictMode API 政策禁止在应用外部公开 file:// URI , 如果一项包含文件 URI 的 intent 离开应用,则应用出现故障,并出现 FileUriExposedException 异常
要应用间共享文件,您应发送一项 content:// URI,并授予 URI 临时访问权限。进行此授权的最简单方式是使用 FileProvider 类
使用
1、AndroidManifest 中进行注册
<manifest>
    ...
    <application>
        ...
        <provider
            android:name="android.support.v4.content.FileProvider"
            android:authorities="当前app包名.fileprovider"
            android:exported="false"
            android:grantUriPermissions="true">
            <meta-data
                android:name="android.support.FILE_PROVIDER_PATHS"
                android:resource="@xml/filepaths"
                />
        </provider>
        ...
    </application>
</manifest>
FileProvider 是 ContentProvider 的子类,所以要申明
2、指定可分享的文件路径
FileProvider 只能为指定的目录中的文件生成内容 URI。要指定目录,就必须使用 元素的子元素在 XML 中指定其存储区域和路径
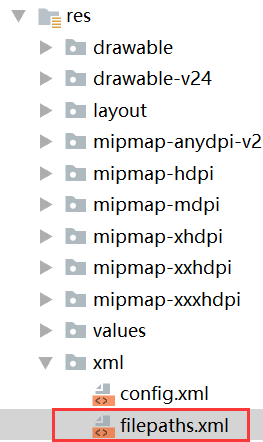
创建一个名为 res/xml/filepaths.xml 的新文件
必须包含以下元素中一个或者多个子元素
<paths xmlns:android="http://schemas.android.com/apk/res/android">
    <root-path name="root" path="" />
    <files-path name="files" path="" />
    <cache-path name="cache" path="" />
    <external-path name="external" path="" />
    <external-files-path name="name" path="path" />
    <external-cache-path name="name" path="path" />
</paths>
子节点含义如下:
| 子节点 | 含义 |
|---|---|
| <root-path> | 代表设备的根目录 new File(“/”) |
| <files-path> | 代表 context.getFileDir() |
| <cache-path> | 代表 context.getCacheDir() |
| <external-path> | 代表 Environment.getExternalStorageDirectory() |
| <external-files-path> | 代表 context.getExternalFilesDirs() |
| <external-cache-path> | 代表 getExternalCacheDirs() |
每个节点都使用两个属性:
name
path
path
即为代表目录下的子目录,例如:
<external-path name="external" path="pics"/>
代表的目录即为:
Environment.getExternalStorageDirectory()/pics
SDCard就可以这么写:
<paths xmlns:android="http://schemas.android.com/apk/res/android">
    <external-path name="external" path="" />
</paths>
声明以后,代码可以使用你所声明的当前文件夹以及其子文件夹
3、使用 FileProvider 生成内容 URI
要将之前传递的
file://
替换成
FileProvoider
需要用到的
content://
,这就需要用到
FileProvider.getUriForFile()
方法了
 public static Uri getUriForFile(Context context, String authority, File file) {
        final PathStrategy strategy = getPathStrategy(context, authority);
        return strategy.getUriForFile(file);
}
可以看到
getUriForFile()
,需要传入 一个
authority
的参数,这正是我们前面在
AndroidManifest.xml
文件中配置的
android:authorities
参数
调用这个方法会自动得到一个
file://
转换成
content://
的一个 Uri 对象,可以供我们直接使用
4、给 Uri 授予临时权限
当我们生成一个
content://
的 Uri 对象之后,其实还无法对其直接使用,还需要对这个 Uri 接收的 App 赋予对应的权限才可以
这个授权的动作,提供了两种方式来授权:
① 通过 Context 的 grantUriPermission() 方法授权
Context 提供了两个方法
- grantUriPermission(String toPackage, Uri uri, int modeFlags)
- revokeUriPermission(Uri uri, int modeFlags);
可以看到 grantUriPermission() 方法需要传递一个包名,就是你给哪个应用授权,但是很多时候,比如分享,我们并不知道最终用户会选择哪个 app,所以我们可以这样:
List<ResolveInfo> resInfoList = context.getPackageManager()
                .queryIntentActivities(intent, PackageManager.MATCH_DEFAULT_ONLY);
        for (ResolveInfo resolveInfo : resInfoList) {
            String packageName = resolveInfo.activityInfo.packageName;
            context.grantUriPermission(packageName, uri, flag);
        }
根据 Intent 查询出所有符合的应用,都给他们授权,然后在不需要的时候通过 revokeUriPermission 移除权限
② 配合 Intent.addFlags() 授权
既然这是一个 Intent 的 Flag,Intent 也提供了另外一种比较方便的授权方式,那就是使用
Intent.setFlags()
或者
Intent.addFlag
的方式
使用这种形式的授权,权限截止于该 App 所处的堆栈被销毁。也就是说,一旦授权,知道该 App 被完全退出,这段时间内,该 App 享有对此 Uri 指向的文件的对应权限,我们无法主动收回该权限了