目录
一.下载地址
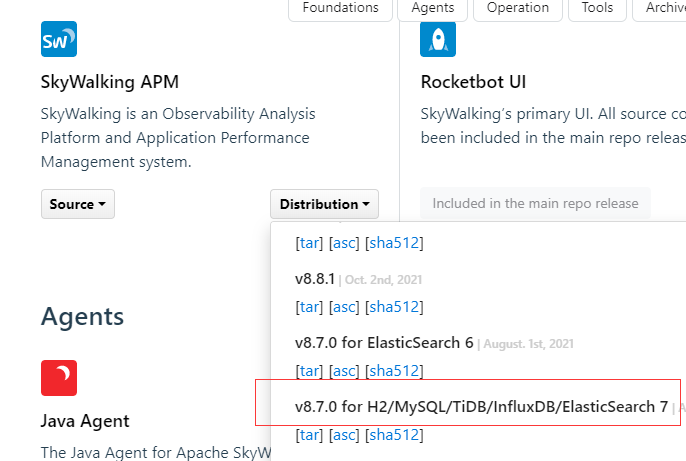
1.
Downloads | Apache SkyWalking
2.下载位置:
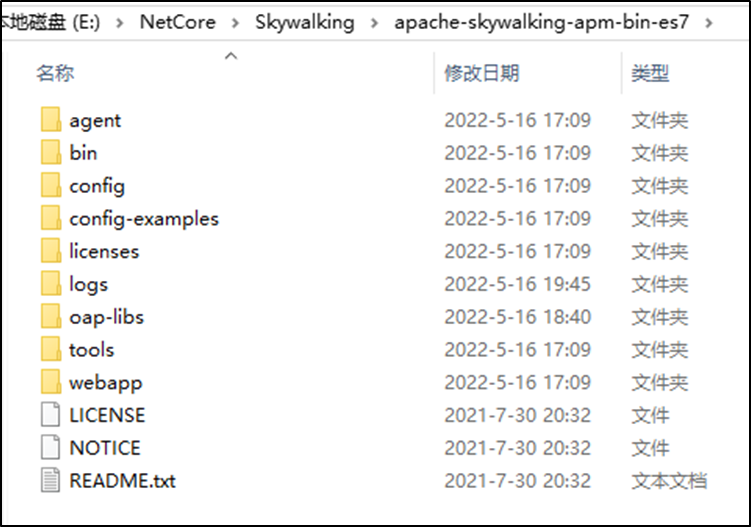
3.下载后如图:
二.修改启动端口号:
1.文件: E:\NetCore\Skywalking\apache-skywalking-apm-bin-es7\webapp\webapp.yml
2.内容:
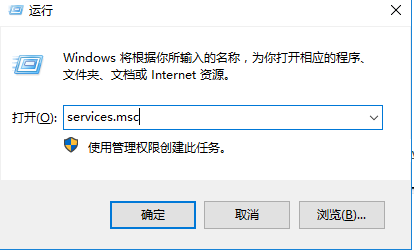
server:
port: 18080
三.更改数据库为mysql
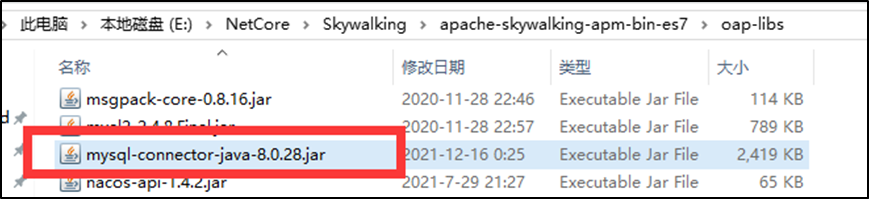
1.下载:
mysql-connector-java-8.0.28.jar
到oap-libs下 版本的不同,直接影响数据表是否创建成功
3.打开 E:\NetCore\Skywalking\apache-skywalking-apm-bin-es7\config\application.yml
4.注释H2,开启mysql
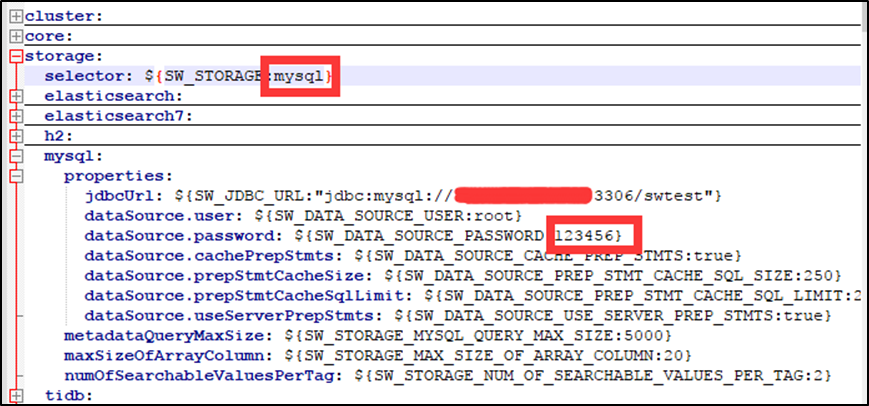
5.接着,到Mysql中创建一个 swtest数据库
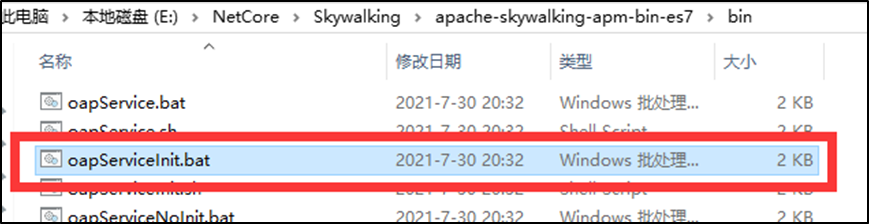
6.执行 E:\NetCore\Skywalking\apache-skywalking-apm-bin-es7\bin\oapServiceInit.bat
7.最后数据库表

三.启动 腳本: \bin\startup.bat
四.做成windows服务
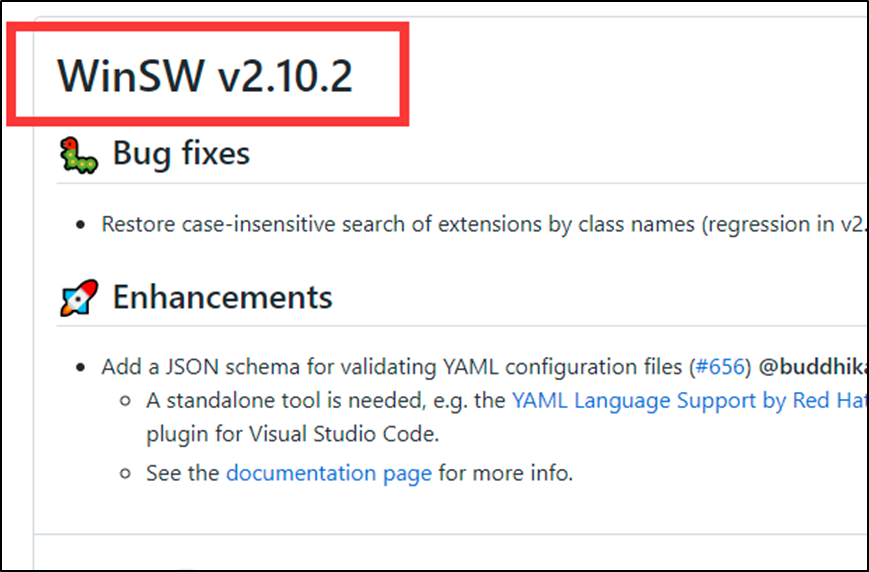
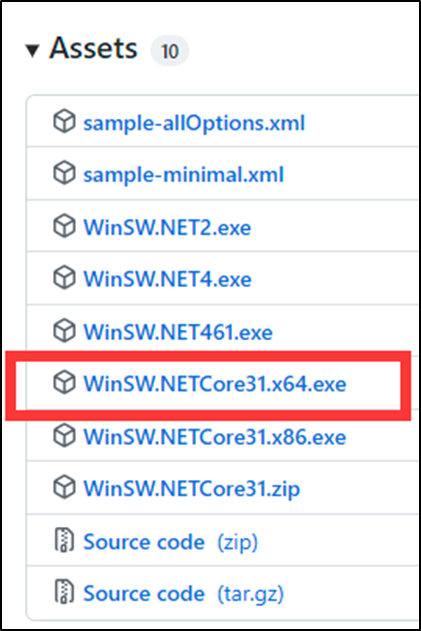
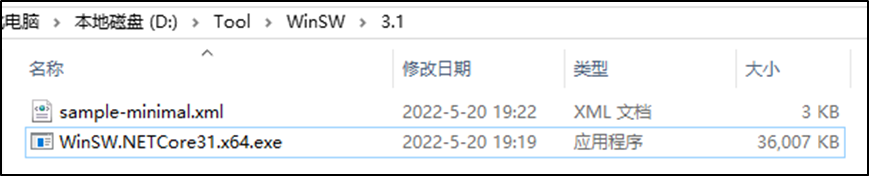
1.下载
winsw 2.10.2
, 即.net core 3.1 :如图:
2.把前两个文件也下载,用于配置:下载后结果:
3. 创建两个运行文件夹,我定义的是run_oap和run_webapp如图:
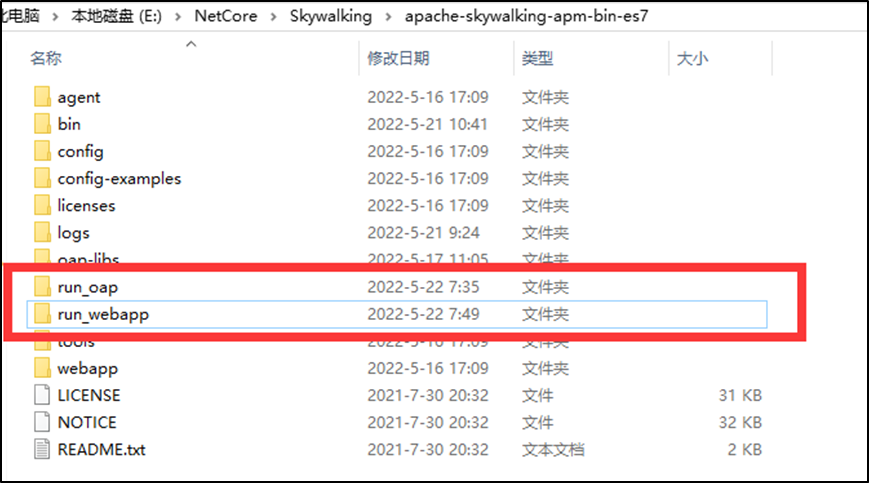
4.把下载后的文件分别放在子目录下run_oap和run_webapp下,并重命名如图:


5.oapService.xml内容如下:
<service>
  <!-- 这是最小配置-->
  <id>SkyWalking OapService</id>
  <!-- Display name of the service -->
  <name>SkyWalking OapService</name>
  <!-- Service description -->
  <description>SkyWalking 后端服务</description>
  <env name="OAP_HOME" value="%BASE%\.."/>
  <env name="CLASSPATH" value="%OAP_HOME%\config;.;%OAP_HOME%\oap-libs\*;"/>
  <!-- Path to the executable, which should be started -->
  <executable>java</executable>
  <arguments>-Xms128M -Xmx128M -Doap.logDir="%OAP_HOME%\logs" -cp "%CLASSPATH%" org.apache.skywalking.oap.server.starter.OAPServerStartUp</arguments>
</service>
6.做bat启动文件,放在oapService.exe同目录下:
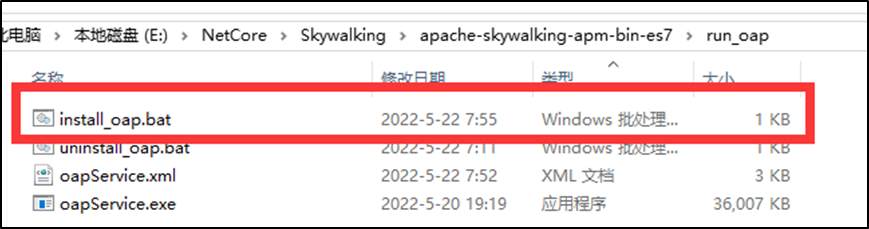
7.内容如下:
oapService.exe install
oapService.exe start
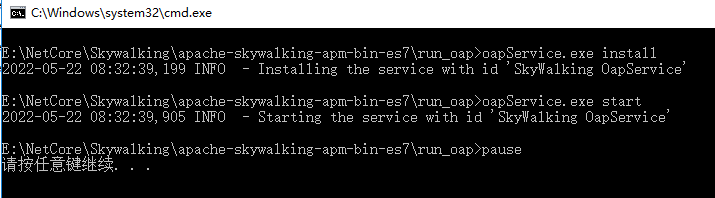
pause8.双击执行install_oap.bat即可,成功后控制台如图:
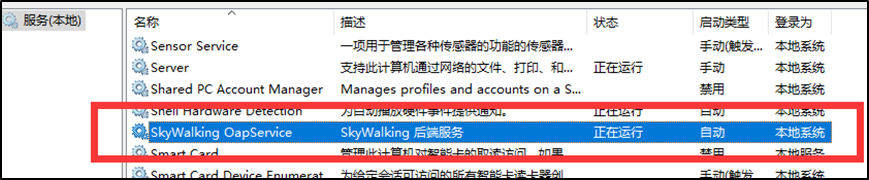
9.查看服务:
10.服务列表:
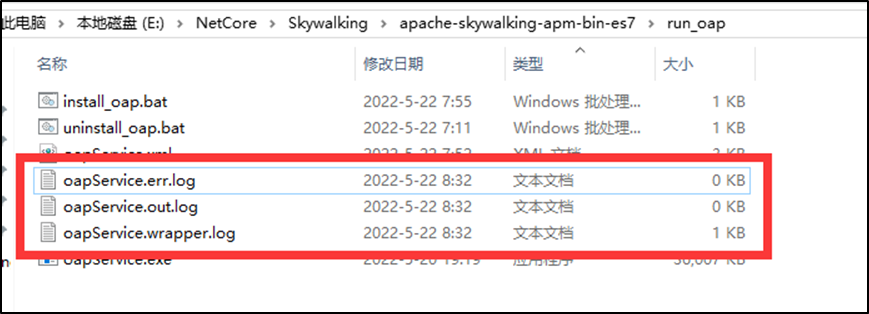
11.运行后文件夹下会多出一些日志文件,这日志没研究明白,应该是winsw行成的文件:
11.uninstall_oap.bat 删除服务,文件如下。停止服务没有做bat,本人习惯在serivces.msc停止
set serviceName="SkyWalking OapService"

sc stop %serviceName%
sc delete %serviceName%

pause
12.webappService服务操作一样,这里只发一下相关文件内容,webappService.xml文件内容如下:
<service>

  <!-- ID of the service. It should be unique across the Windows system-->
  <id>SkyWalking WebAppService</id>
  <!-- Display name of the service -->
  <name>SkyWalking WebAppService</name>
  <!-- Service description -->
  <description>SkyWalking UI 服务</description>
  <env name="WEBAPP_HOME" value="%BASE%\.." />
  <env name="JARPATH" value="%WEBAPP_HOME%\webapp" />
  <env name="LOG_FILE_LOCATION" value="%WEBAPP_HOME%\logs\webapp.log" />

  <!-- Path to the executable, which should be started -->
  <executable>java</executable>
  <arguments>-jar %JARPATH%/skywalking-webapp.jar --spring.config.location=%JARPATH%/webapp.yml --logging.file=%LOG_FILE_LOCATION%</arguments>
</service>
13.install_webApp.bat内容:
webappService.exe install
webappService.exe start
pause
14.
五.UI服务18080:
http://localhost:18080
六.Net Core集成
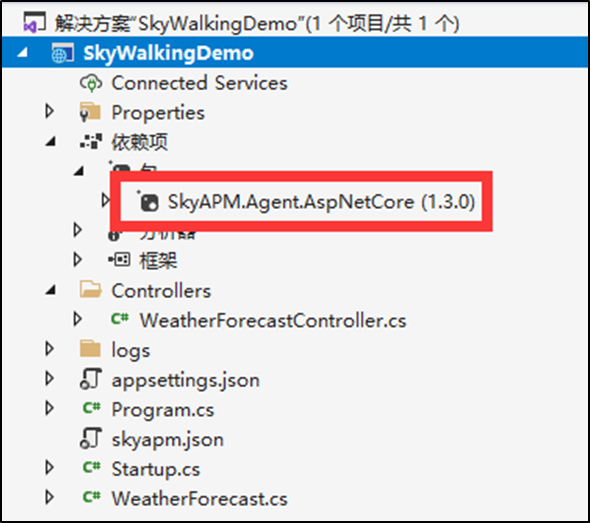
1.添加.net webapid项目 SkyAPM.Agent.AspNetCore 1.3
2.Startup类中注册
public void ConfigureServices(IServiceCollection services)
{
services.AddControllers();
services.AddSkyAPM(ext => ext.AddAspNetCoreHosting());
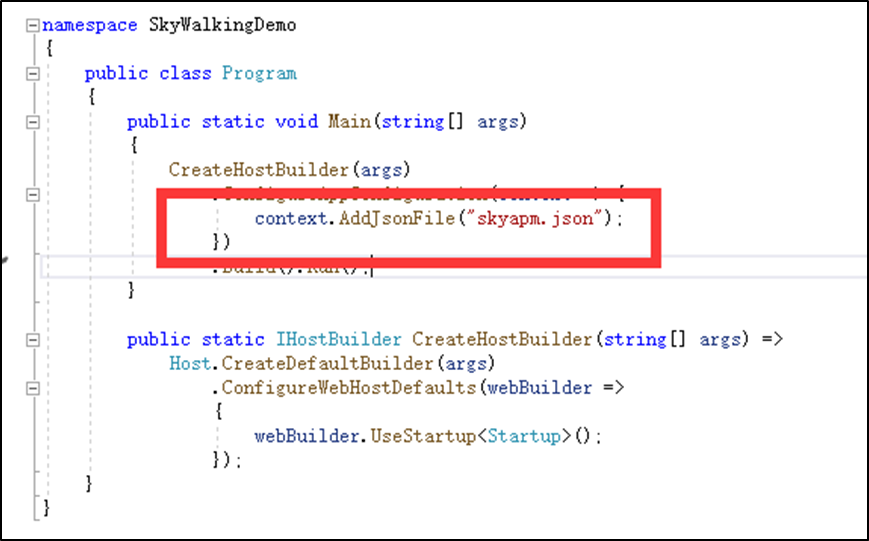
}3.添加配置文件:skyapm.json
4.skyapm.json内容,ServiceName默认是项目名称
{
“SkyWalking”: {
“ServiceName”: “SkyWalkingDemo”,
“Namespace”: “”,
“HeaderVersions”: [
“sw8”
],
“Sampling”: {
“SamplePer3Secs”: -1,
“Percentage”: -1.0
},
“Logging”: {
“Level”: “Information”,
“FilePath”: “logs\\skyapm-{Date}.log”
},
“Transport”: {
“Interval”: 3000,
“ProtocolVersion”: “v8”,
“QueueSize”: 30000,
“BatchSize”: 3000,
“gRPC”: {
“Servers”: “127.0.0.1:11800”,
“Timeout”: 10000,
“ConnectTimeout”: 10000,
“ReportTimeout”: 600000,
“Authentication”: “”
}
}
}
}
5.launchSettings.json 文件中添加服务名
“IIS Express”: {
“commandName”: “IISExpress”,
“launchBrowser”: true,
“launchUrl”: “weatherforecast”,
“environmentVariables”: {
“ASPNETCORE_ENVIRONMENT”: “Development”,
“ASPNETCORE_HOSTINGSTARTUPASSEMBLIES”: “SkyAPM.Agent.AspNetCore”, // 必须配置
“SKYWALKING__SERVICENAME”: “SkyWalkingDemo” // 必须配置,在skywalking做标识
}
},
6.在webapi中添加IEntrySegmentContextAccessor
private readonly IEntrySegmentContextAccessor segContext;
private readonly ILogger<WeatherForecastController> _logger;public WeatherForecastController(IEntrySegmentContextAccessor segContext,
ILogger<WeatherForecastController> logger)
{
this.segContext = segContext;
_logger = logger;
}[HttpGet(“Get1”)]
public IActionResult Get1()
{
//获取全局的skywalking的TracId
var TraceId = segContext.Context.TraceId;
segContext.Context.Span.AddLog(LogEvent.Message($”SkywalkingTest1—Worker running at: {DateTime.Now}”));
segContext.Context.Span.AddLog(LogEvent.Message($”SkywalkingTest1—Worker running at–end: {DateTime.Now}”));return Ok($”TraceId={TraceId} “);
}
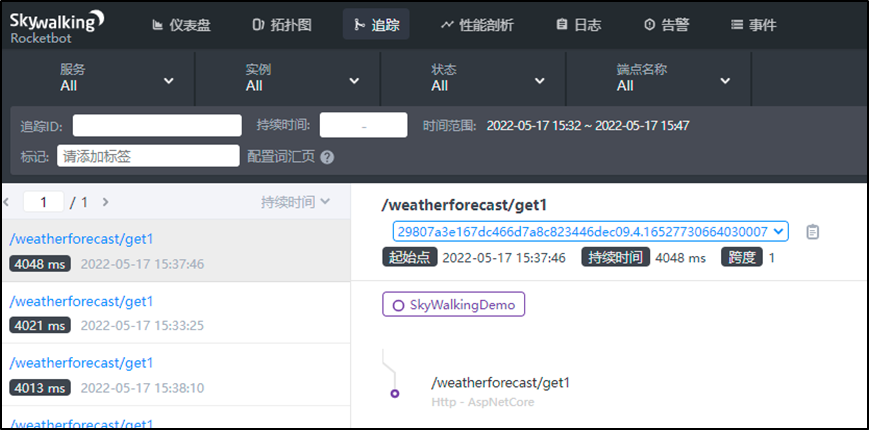
7.运行项目,访问 http://localhost:46696/weatherforecast/get1
8..最后访问 localhost:18080 进入追踪