1. 方法简介:
使用systemd 来进行 oracle数据库的启动和关闭操作. 使用的脚本为 lsnrctl和dbstart
2. 修改事项.
需要先修改一下 oracle 的启动脚本配置:
vim /etc/oratab

将里面 最后一句话设置从N 修改为Y 允许启动

ORA19C:/opt/oracle/product/19c/dbhome_1:Y
注意这个文档说明:
# This file is used by ORACLE utilities.  It is created by root.sh
# and updated by either Database Configuration Assistant while creating
# a database or ASM Configuration Assistant while creating ASM instance.

# A colon, ':', is used as the field terminator.  A new line terminates
# the entry.  Lines beginning with a pound sign, '#', are comments.
#
# Entries are of the form:
#   $ORACLE_SID:$ORACLE_HOME:<N|Y>:
#
# The first and second fields are the system identifier and home
# directory of the database respectively.  The third field indicates
# to the dbstart utility that the database should , "Y", or should not,
# "N", be brought up at system boot time.
#
# Multiple entries with the same $ORACLE_SID are not allowed.
3. 然后设置一下 数据库的启动命令
vim /usr/bin/oracle.sh

增加的内容为:
#! /bin/bash
#  script  For oracle19c.service
/opt/oracle/product/19c/dbhome_1/bin/lsnrctl start
/opt/oracle/product/19c/dbhome_1/bin/dbstart /opt/oracle/product/19c/dbhome_1
然后设置这个文件的读写权限
chmod 777 /usr/bin/oracle.sh
4. 设置一个 oracle19c.service
vim /etc/systemd/system/oracle19c.service

编辑添加内容为:
[Unit]
Description=Oracle19c
After=syslog.target network.target
[Service]
LimitMEMLOCK=infinity
LimitNOFILE=65535
Type=oneshot
RemainAfterExit=yes
User=oracle
Environment=”ORACLE_HOME=/opt/oracle/product/19c/dbhome_1″
ExecStart=/usr/bin/oracle.sh
[Install]
WantedBy=multi-user.target
5. 设置开机自动启动
systemctl enable oracle19c
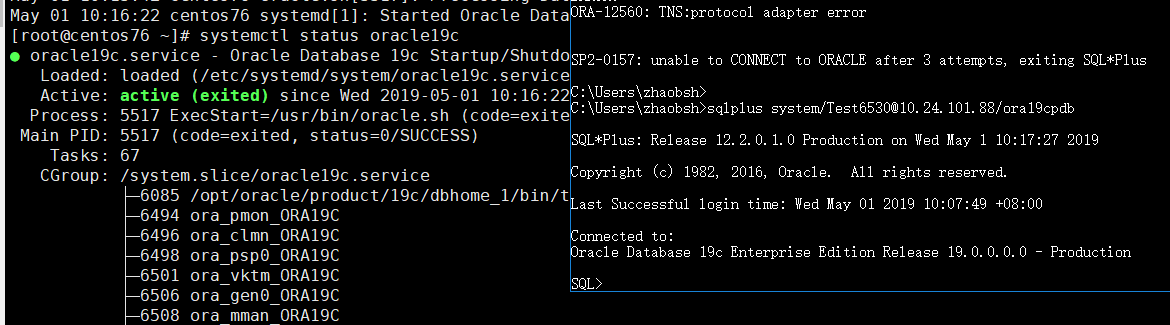
6. 重启测试.
成功.
转载于:https://www.cnblogs.com/jinanxiaolaohu/p/10799269.html