1. 先打开IDEA setting->Version Control->GitHub->勾选Clone git repository using ssh

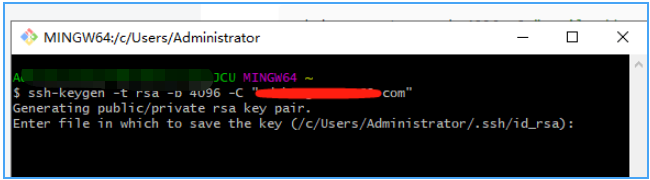
2. 打开Git Bash,输入下边命令
ssh-keygen -t rsa -b 4096 -C "email_address@example.com"
3. 弹出下边命令,直接’
回车
‘就行, rsa文件会保存在C:\Users\Administrator\.ssh\id_rsa
Enter file in which to save the key (/c/Users/you/.ssh/id_rsa):
4. 接下来会让你设置一个私钥密码(建议设置),设置完成按回车。成功会显示下图 The key fingerprint is: xxxxxxxxxxxxxxxxxxxxxxxxxx

5. 接着要添加密钥到ssh-agent(先启动ssh-agent) – 在Git Bash接着输入下边的命令启动ssh-agent
ssh-agent -s

6.将刚才生成的密钥添加到ssh-agent,输入以下命令
ssh-add ~/.ssh/id_rsaNote: 如果出现以下错误, 还要多输入一条命令
Could not open a connection to your authentication agent
![]()
eval `ssh-agent -s`
![]()
接着再重新执行以下命令, 然后出现Enter passphrase就是让你输入刚才设置的私钥密码,回车后出现Identity added证明添加成功了。
ssh-add ~/.ssh/id_rsa

7. 添加密钥到GitHub仓库 – 用记事本打开生成的公钥文件C:\Users\Administrator\.ssh\
id_rsa.pub, ctrl+a复制全部内容。
8. 登录GitHub,去到Setting->SSH and GPG keys -> New SSH key

9. 将刚才复制的公钥(C:\Users\Administrator\.ssh\
id_rsa.pub
)内容粘贴到Key中,随便输入个Title, 再Add SSH key就完成了
10.最后回到IDEA重新 New Project from Version Control – 选择GitHub就可以了,Clone 项目的时候如果让你输入passphrase,就是刚才上边设置的那个私钥密码