YOLOv6 是美团视觉智能部研发的一款目标检测框架,致力于工业应用。本框架同时专注于检测的精度和推理效率,在工业界常用的尺寸模型中:YOLOv6-nano 在 COCO 上精度可达 35.0% AP,在 T4 上推理速度可达 1242 FPS;YOLOv6-s 在 COCO 上精度可达 43.1% AP,在 T4 上推理速度可达 520 FPS。在部署方面,YOLOv6 支持 GPU(TensorRT)、CPU(OPENVINO)、ARM(MNN、TNN、NCNN)等不同平台的部署,极大地简化工程部署时的适配工作。
目前,项目已开源至Github,
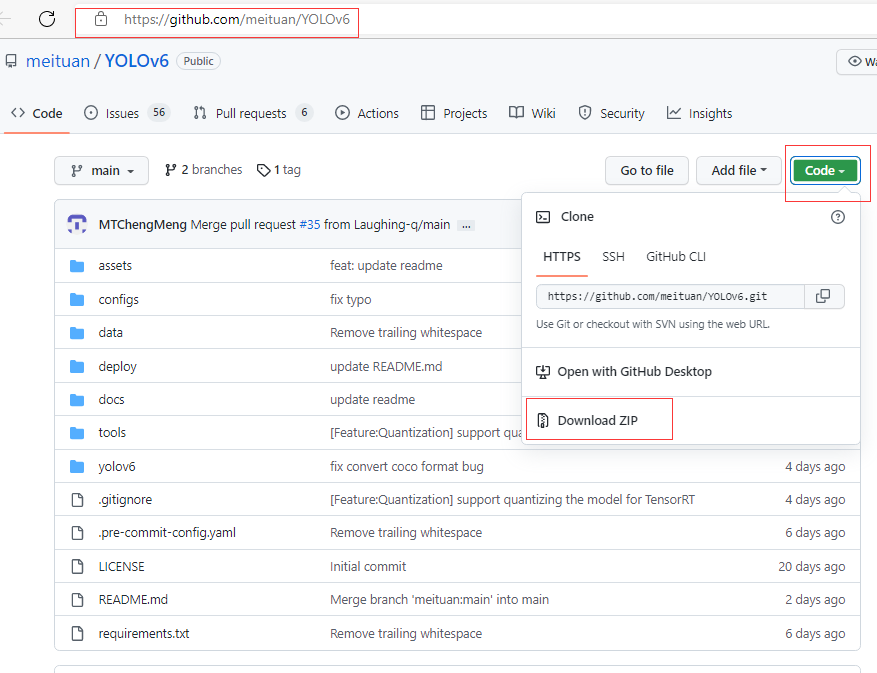
YOLOv6传送门:https://github.com/meituan/YOLOv6 。
欢迎有需要的小伙伴们Star收藏,随时取用。
项目下载:
YOLOv6简介:
https://tech.meituan.com/2022/06/23/yolov6-a-fast-and-accurate-target-detection-framework-is-opening-source.html
COCO数据集预训练权重下载:

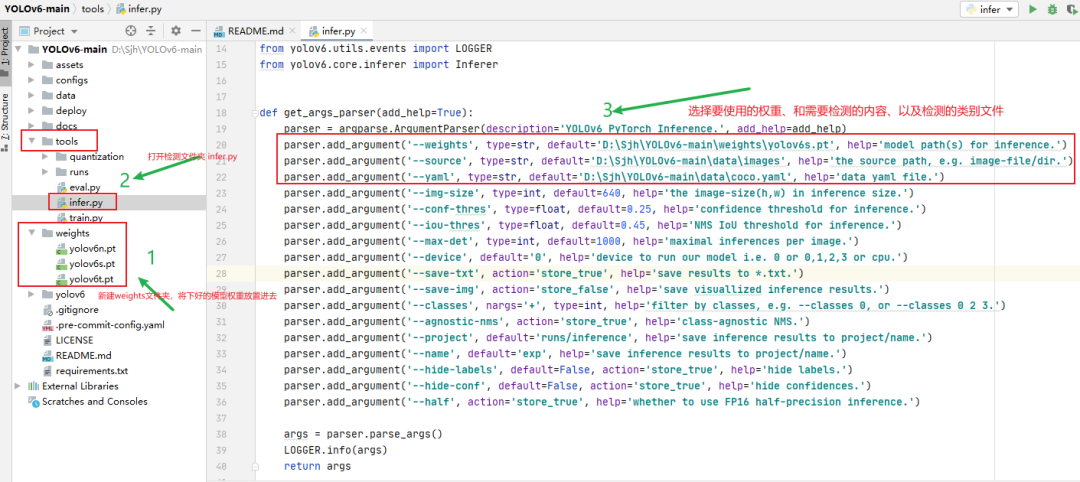
下载好YOLOv6项目后,在主目录下新建一个weights文件夹,将下载好的权重放置在里面,然后修改放置在yolov6\core目录下的检测infer.py文件,进行图片/视频检测。
要检测推理的图片放置在data文件夹下,检测推理完之后
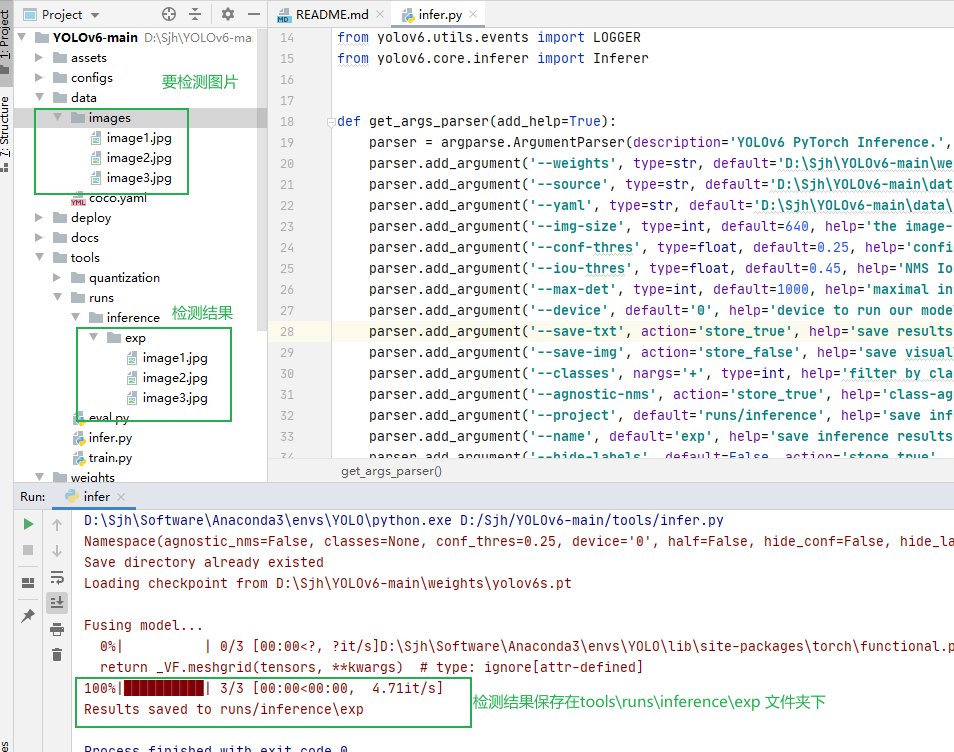
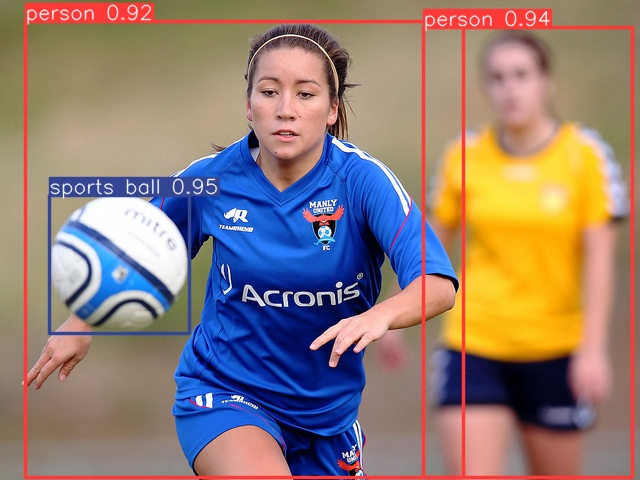
检测结果如下所示:
使用YOLOv6检测视频代码官方没给出,可自己添加代码,就可以检测视频了。
https://blog.csdn.net/m0_58772523/article/details/125465063
训练YOLOv6
训练YOLOv6步骤和训练YOLOv5步骤差不多一样,只要数据集格式是YOLOv5格式一样就可以了。
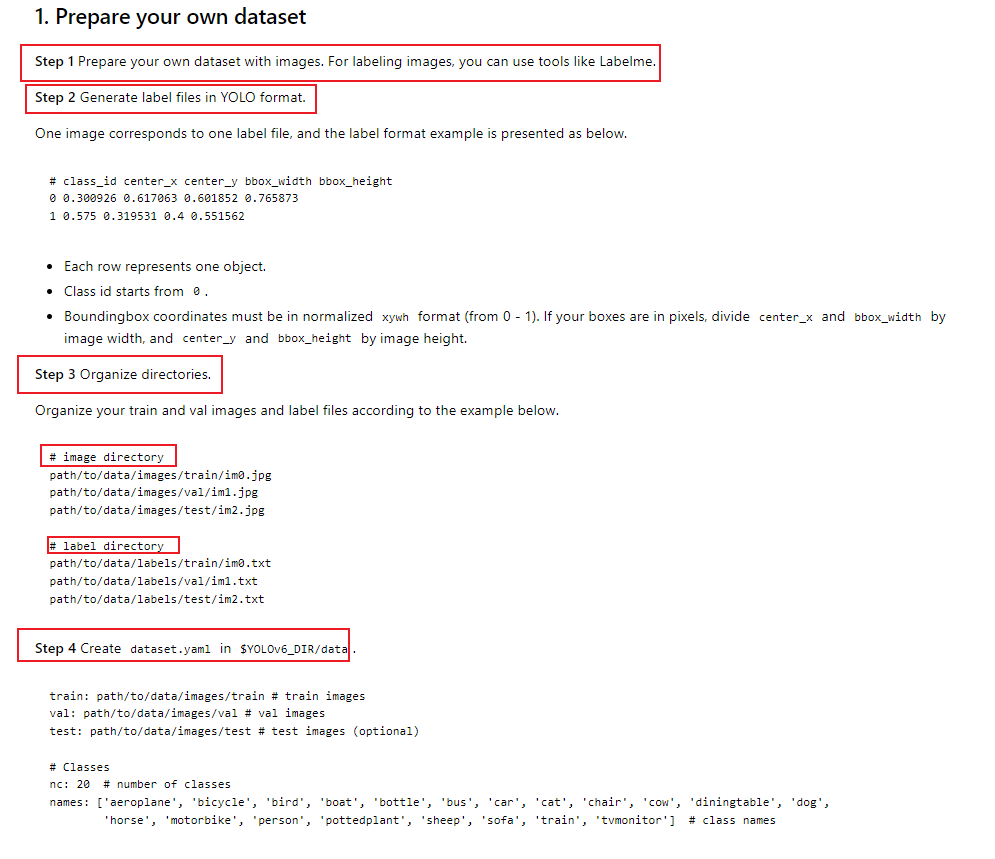
1.数据集制作
第一步:
使用
labelme
或者
Makesense.ai
标签标注工具,对自己的数据集进行标注,之前发过这两个标签工具的使用方式:
制作自己的训练数据集之图像标注工具labelimg和labelme
借助AI模型目标检测打标签工具 :Makesense.ai , 解放双手 ! ! !
注意:
-
使用LabelmeToYolov6.py文件将使用labelme文件标注的标签json格式转换为YOLO格式,并分为train、val、test数据集。
-
使用Makesense.ai标签工具不需要转换可以直接生成YOLO格式的标签数据,无需进行标签格式转换,但是需要再次读取数据,重新划分train、val、test,否则只有一个包含全部图片和标签的的数据集。
使用LabelmeToYolov6.py文件可以将使用labelme文件标注的标签.json格式转换为YOLO格式的标签。
import os
import numpy as np
import json
from glob import glob
import cv2
from sklearn.model_selection import train_test_split
from os import getcwd

classes = ["aircraft", "oiltank"]
# 1.标签路径
labelme_path = "LabelmeData/"
isUseTest = True  # 是否创建test集
# 3.获取待处理文件
files = glob(labelme_path + "*.json")
files = [i.replace("\\", "/").split("/")[-1].split(".json")[0] for i in files]
print(files)
if isUseTest:
    trainval_files, test_files = train_test_split(files, test_size=0.1, random_state=55)
else:
    trainval_files = files
# split
train_files, val_files = train_test_split(trainval_files, test_size=0.1, random_state=55)


def convert(size, box):
    dw = 1. / (size[0])
    dh = 1. / (size[1])
    x = (box[0] + box[1]) / 2.0 - 1
    y = (box[2] + box[3]) / 2.0 - 1
    w = box[1] - box[0]
    h = box[3] - box[2]
    x = x * dw
    w = w * dw
    y = y * dh
    h = h * dh
    return (x, y, w, h)


wd = getcwd()
print(wd)


def ChangeToYolo6(files, txt_Name):
    if not os.path.exists('tmp/'):
        os.makedirs('tmp/')
    list_file = open('tmp/%s.txt' % (txt_Name), 'w')
    for json_file_ in files:
        json_filename = labelme_path + json_file_ + ".json"
        imagePath = labelme_path + json_file_ + ".jpg"
        list_file.write('%s/%s\n' % (wd, imagePath))
        out_file = open('%s/%s.txt' % (labelme_path, json_file_), 'w')
        json_file = json.load(open(json_filename, "r", encoding="utf-8"))
        height, width, channels = cv2.imread(labelme_path + json_file_ + ".jpg").shape
        for multi in json_file["shapes"]:
            points = np.array(multi["points"])
            xmin = min(points[:, 0]) if min(points[:, 0]) > 0 else 0
            xmax = max(points[:, 0]) if max(points[:, 0]) > 0 else 0
            ymin = min(points[:, 1]) if min(points[:, 1]) > 0 else 0
            ymax = max(points[:, 1]) if max(points[:, 1]) > 0 else 0
            label = multi["label"]
            if xmax <= xmin:
                pass
            elif ymax <= ymin:
                pass
            else:
                cls_id = classes.index(label)
                b = (float(xmin), float(xmax), float(ymin), float(ymax))
                bb = convert((width, height), b)
                out_file.write(str(cls_id) + " " + " ".join([str(a) for a in bb]) + '\n')
                print(json_filename, xmin, ymin, xmax, ymax, cls_id)


ChangeToYolo6(train_files, "train")
ChangeToYolo6(val_files, "val")
ChangeToYolo6(test_files, "test")
'''
file1 = open("tmp/train.txt", "r")
file2 = open("tmp/val.txt", "r")
file_list1 = file1.readlines()  # 将所有变量读入列表file_list1
file_list2 = file2.readlines()  # 将所有变量读入列表file_list2
file3 = open("tmp/trainval.txt", "w")
for line in file_list1:
    print(line)
    file3.write(line)
for line in file_list2:
    print(line)
    file3.write(line)
'''
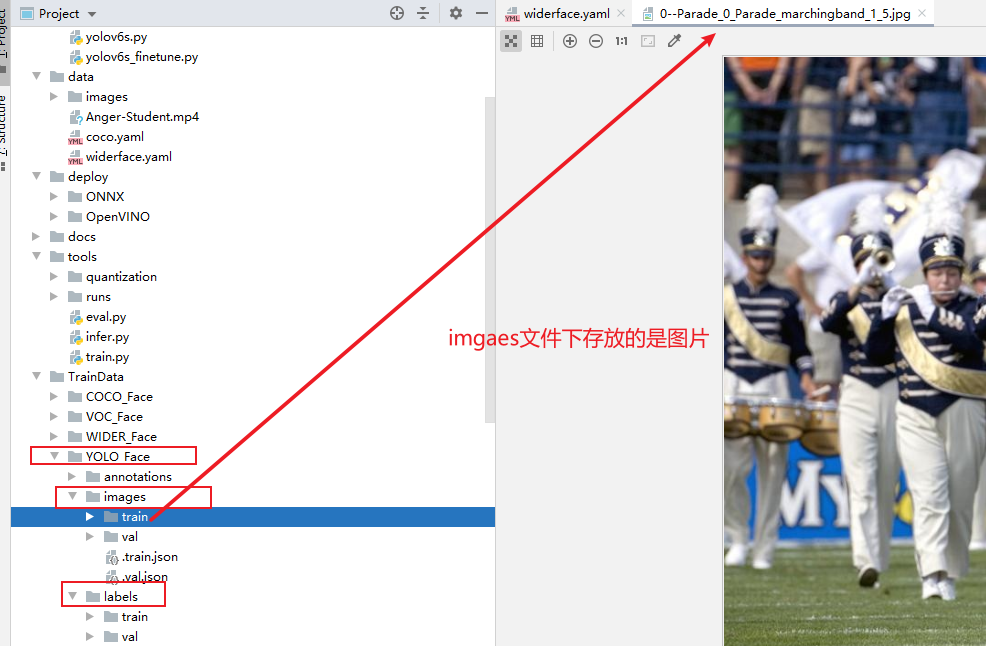
第二步:
创建
images,labels文件分别
用于存放
图像
和.
txt格式的
的标签标注文件,再分别在images和labels文件夹下创建train和val两个子文件夹分别存放训练集和验证集的图片和标签。
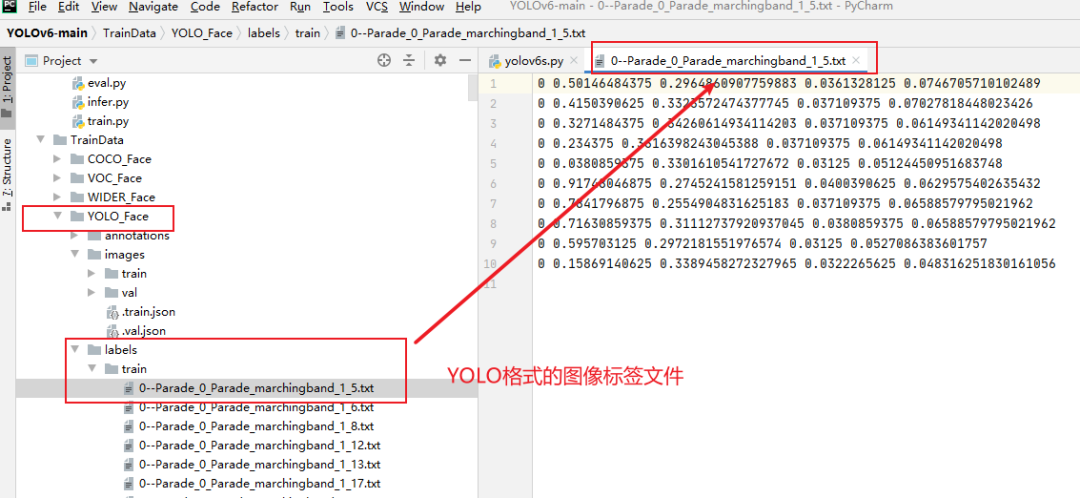
labels文件夹下存放的是train和val的图像标签文件。
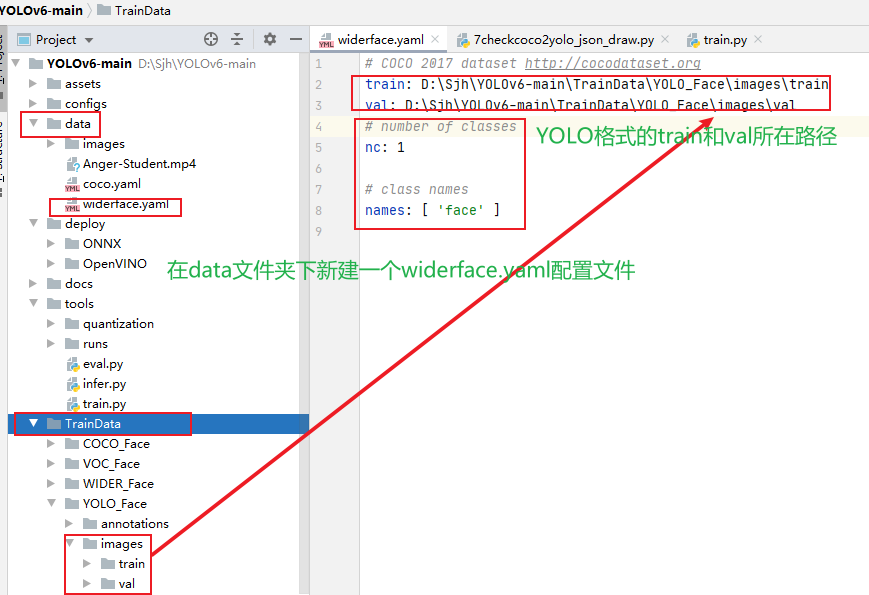
2.模型训练
第三步:
在data/中添加一个和
coco.yaml
格式类似的
widerface.yaml
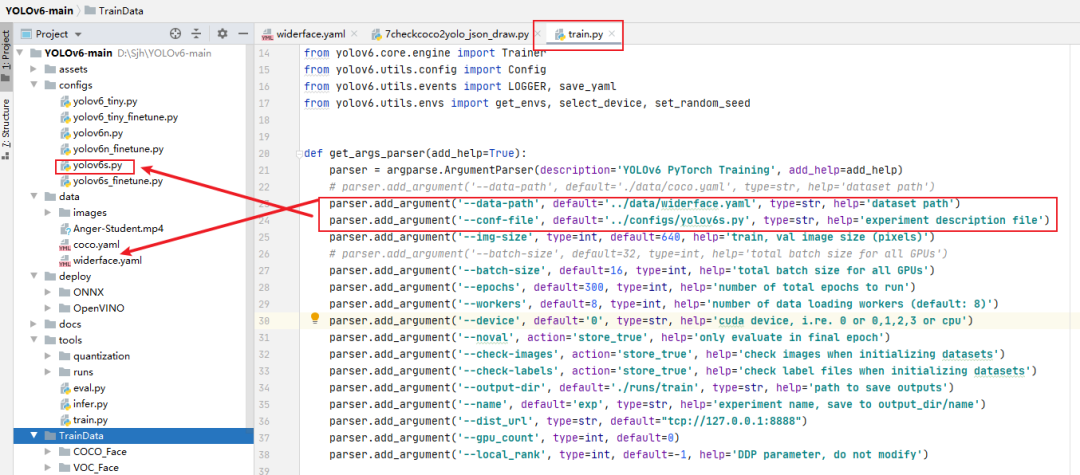
的配置文件,如下图所示,
nc改为1,name改为”face”
,train和val为yolo格式的数据集的路径地址。
第四步:
打开tools\train.py文件,配置一下训练参数,选择一下自己想要基于YOLOv6的那个版本(yolov6s、yolov6….)上开始训练。
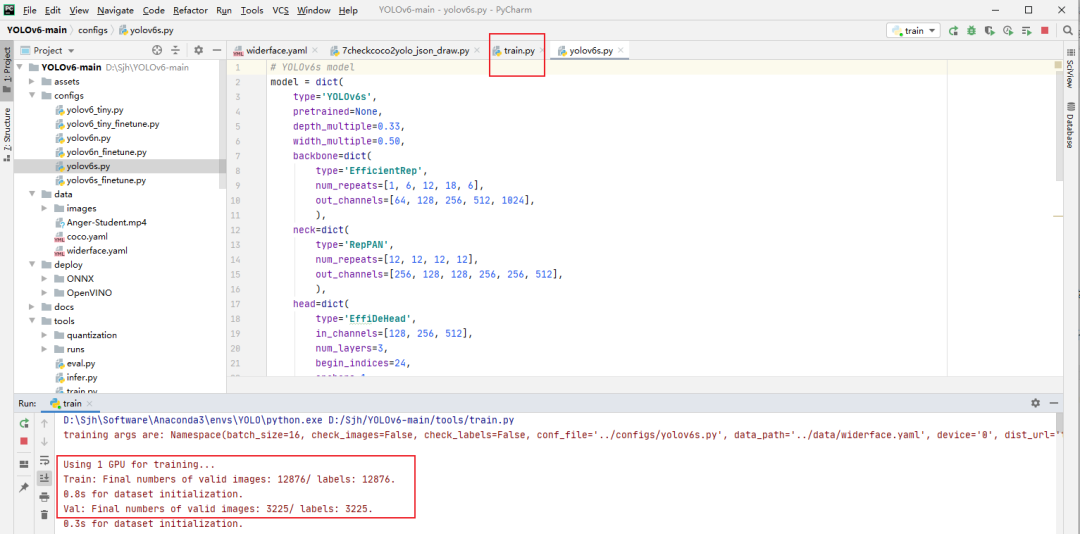
第五步:
配置成功之后,就可以点击右键yolov6\core\train.py文件运行,开始训练模型。
代码下载
,后台回复关键字:
项目实战
,代码即可获取下载使用。
精彩推荐:
Yolov3算法实现社交距离安全检测项目讲解和实战(Social Distance Detector)
万字长文,用代码的思想讲解Yolo3算法实现原理,Visdrone数据集和自己制作数据集两种方式在Pytorch训练Yolo模型
